There is an old saying that goes something like this…
“In this world nothing can be said to be certain, except death and taxes.”
I believe that saying is attributed to Benjamin Franklin.
No offense to Mr. Franklin, but I think something must be added to that list.
It is certain that no one wants a portrait of themselves with a double chin hanging down in all of its glory.
Today, I’m going to show you how to eliminate a double chin. But before I do that, I want to clarify one thing.
If someone is extremely overweight, and they have a large double or triple chin, you can’t fix it with this technique, nor should you want to. With a subject such as this, if you remove those layered chins it will no longer look like them. A subject that is severely overweight must be dealt with in the lighting and in the pose when creating the picture. After applying those techniques, some retouching may improve the photograph; but don’t go overboard.
A subject that is severely overweight must be dealt with in the lighting and in the pose when creating the picture.
This technique is for those folks who really don’t have a double chin and one just showed up due to the pose or lighting. It will also work on folks who are getting a double chin but they’ve just started down that path.
The subject in the photographs that I’m going to share with you today is a young man just seventeen years old. He’s not fat by any means, but he’s heavy. I would call him stocky. In normal conversation you wouldn’t look at him and say he has a double chin.
I recently took his high school senior portraits and he had a double chin in just about every shot. Needless to say, I got good at removing the double chin. This technique that I’m going to share with you might seem a little daunting at first, but after you’ve done it a few times it can be accomplished fairly quickly.
My high school senior was a perfect example of where this technique could be applied. He certainly would have been most unhappy if I had delivered all of his portraits with a double chin!
Take a look at a before and after photograph:
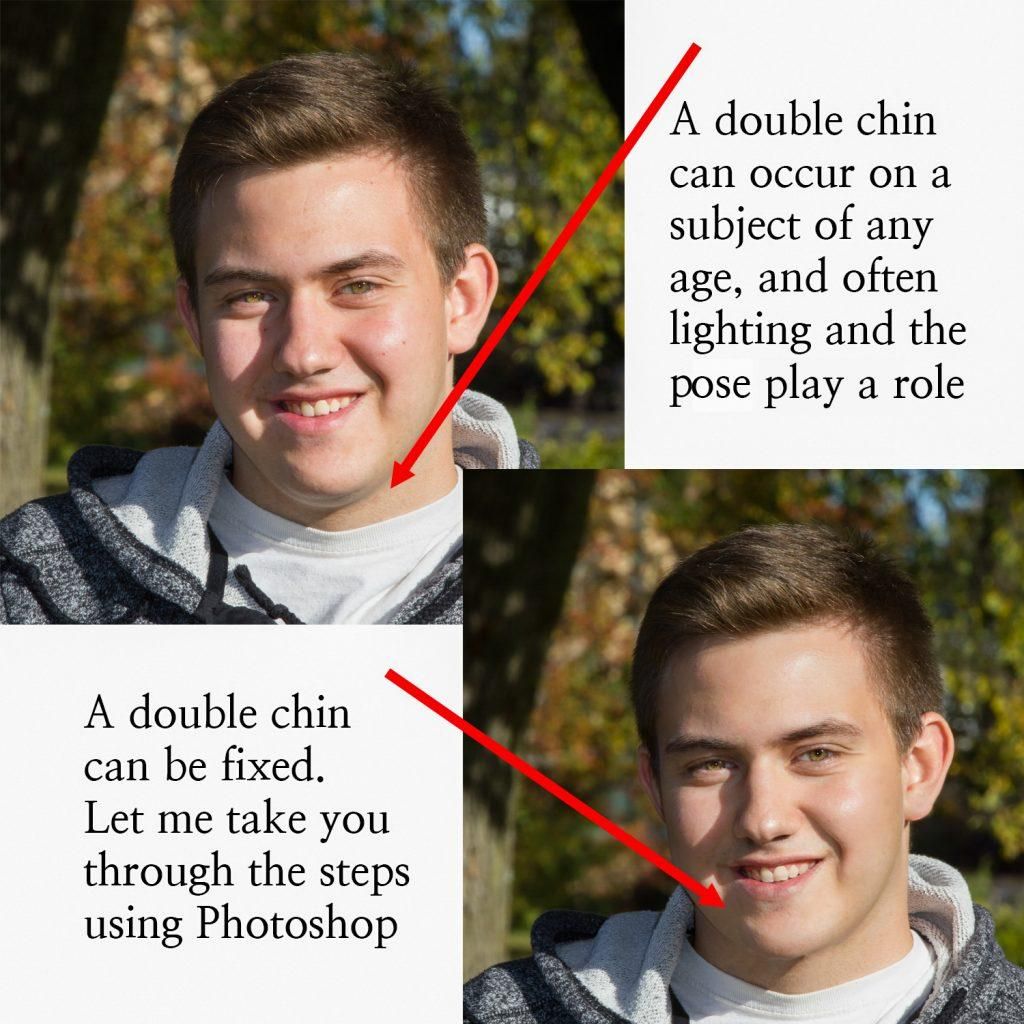
Figure 1: Photo Illustration by Kent DuFault
Step 1
With the image opened up in our “Workspace” in Photoshop, we go to the “Filter Menu” and select the “Liquify” filter.
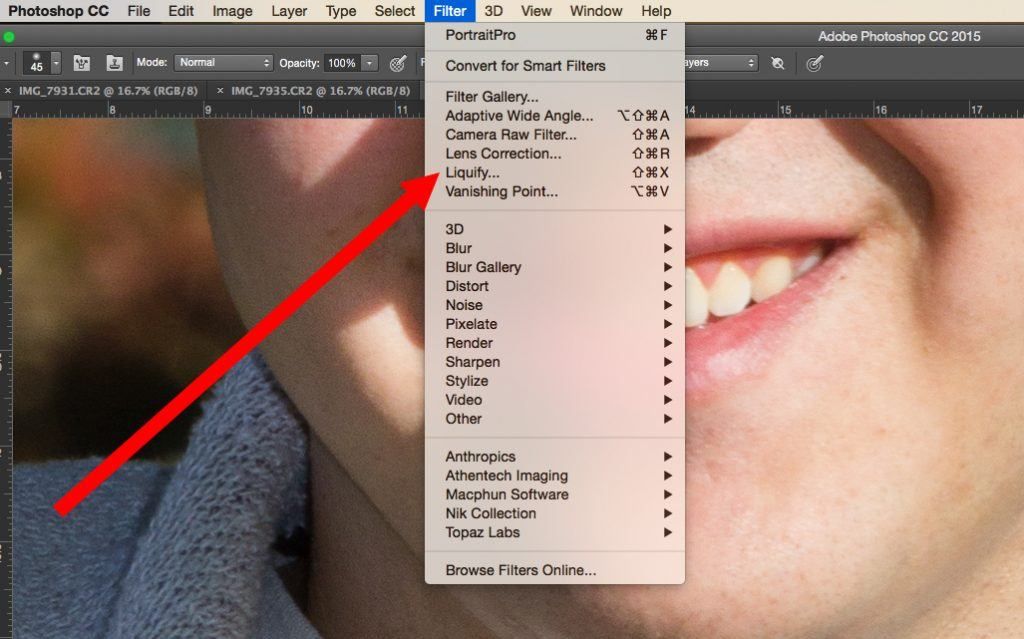
Figure 2: Photo Illustration by Kent DuFault
We are now inside the “Liquify Workspace Window”
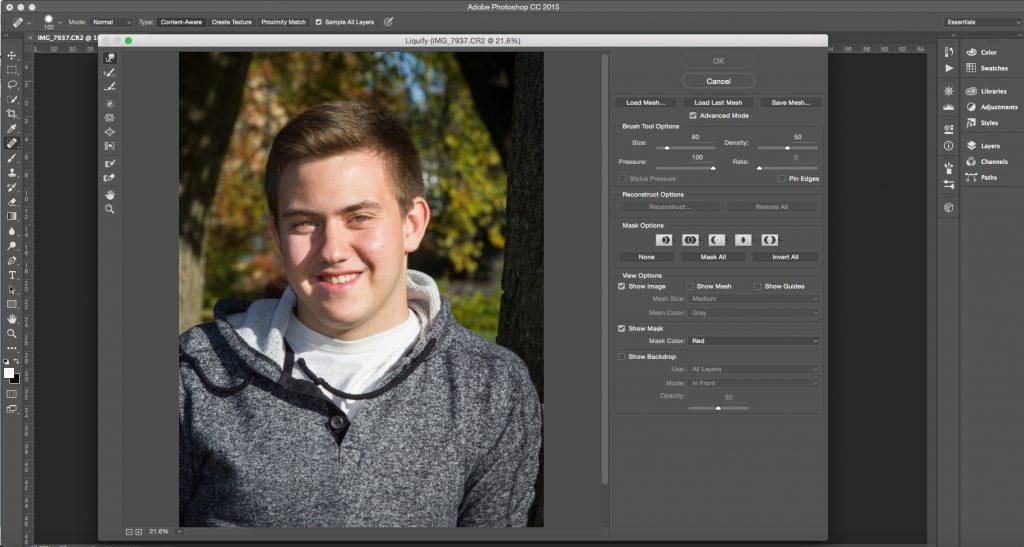
Figure 3: Photo Illustration by Kent DuFault
Step 2
We will set our image view (within the “Liquify Workspace”) to 100% (if your monitor size will not accommodate that, use the largest image magnification that your computer setup will allow). We want to see the entire chin and neck area at the largest magnification possible (up to 100%; don’t go over that).
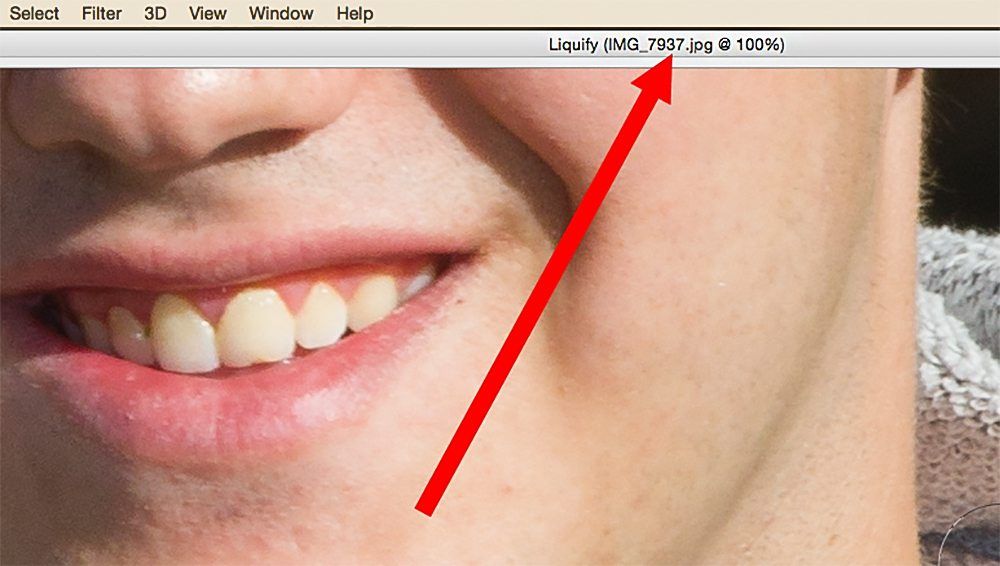
Figure 4: Photo Illustration by Kent DuFault
Identify the “natural chin line” and the “double chin line”.
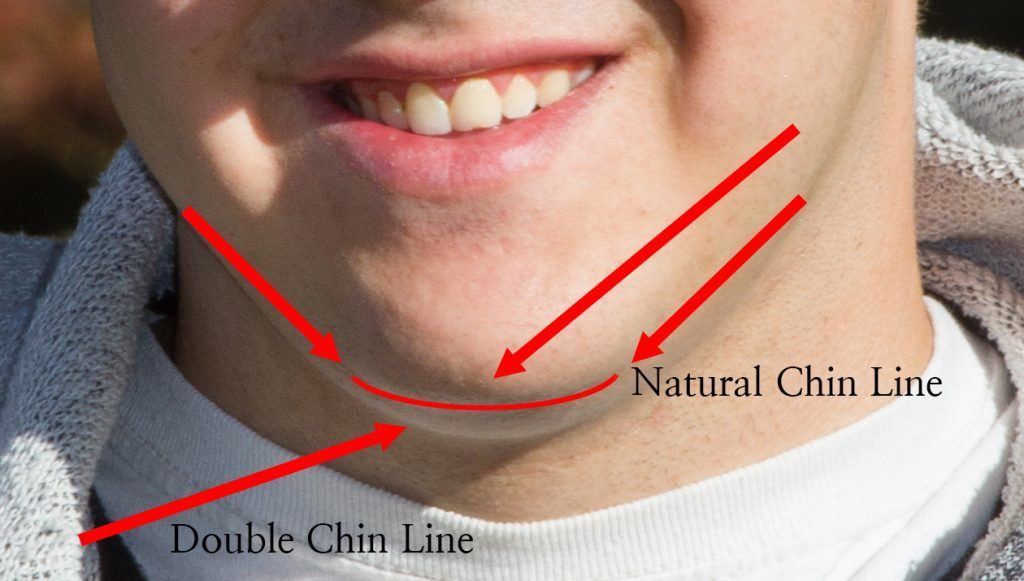
Figure 5: Photo Illustration by Kent DuFault
Step 3
Now we’re going to begin the process of “Creating a Mask”. This part is very important because it tells Photoshop what areas we don’t want to be affected, and which ones we do. The areas in red will not be affected. We can change the color of the mask if we want to. For me, the red usually works best.
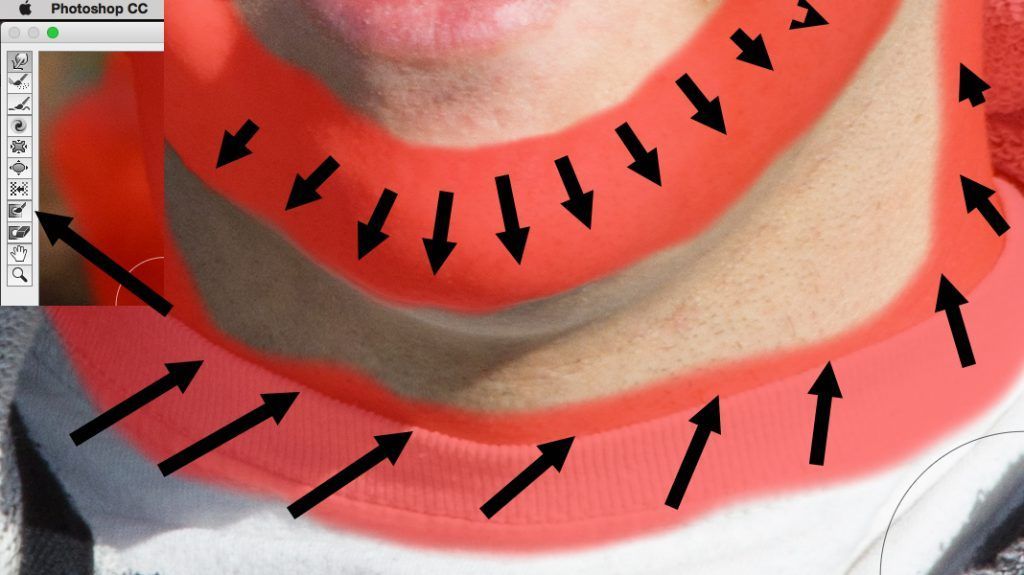
Figure 6: Photo Illustration by Kent DuFault
First we’ll select the “Masking Tool”. Depending on which version of Photoshop you are working with, it will simply be labeled “Masking Tool”, and the tool below that will be labeled “Eraser Tool”. Photoshop CC 2015 changed the names of these tools. See my next illustration for some help with that. We are going to paint a mask that follows the natural chin line and the collar of the subject’s clothing.
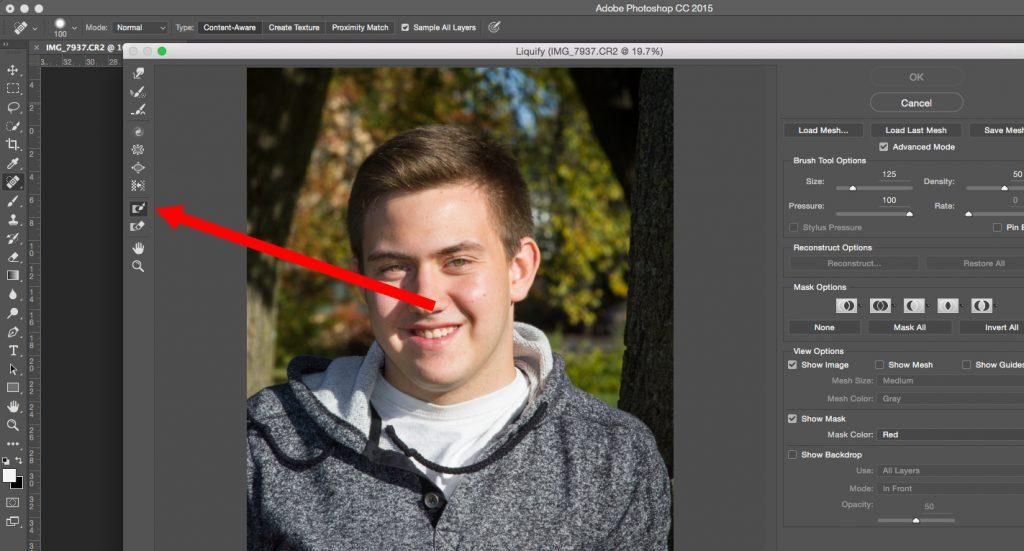
Figure 7: Photo Illustration by Kent DuFault
In Photoshop CC 2015, the masking tool is now called the “Freeze Mask Tool”. The tool right below it used to be called the “Eraser Tool”. In Photoshop CC 2015 it’s called the “Thaw Mask Tool”. Why they changed the name? Who knows! It works exactly the same.
When we create the mask, we want to be able to see it. Therefore we must make sure that “Show Mask” is checked. We also want to leave as much skin as possible exposed between the natural chin line and the collar on the clothing. I’ll explain why in a moment. It is not necessary to mask the rest of the picture. Notice how the mask we have created has formed a “corral” around the double chin and neck areas. All the work is going to be done in the “corral” so the surrounding areas are protected.
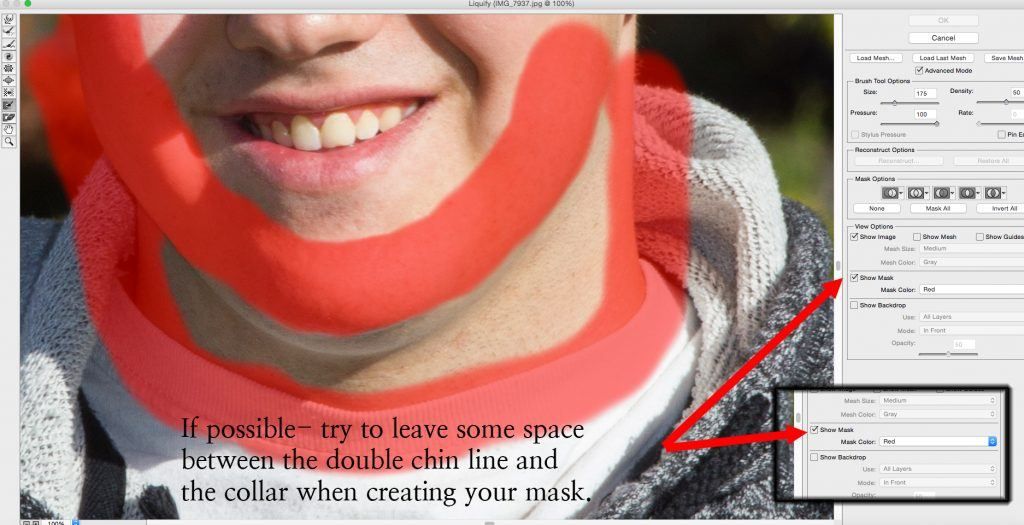
Figure 8: Photo Illustration by Kent DuFault
You can clean up the edges of your mask using the “Eraser Tool” or (as previously indicated in Photoshop CC 2015) the “Thaw Mask Tool”.
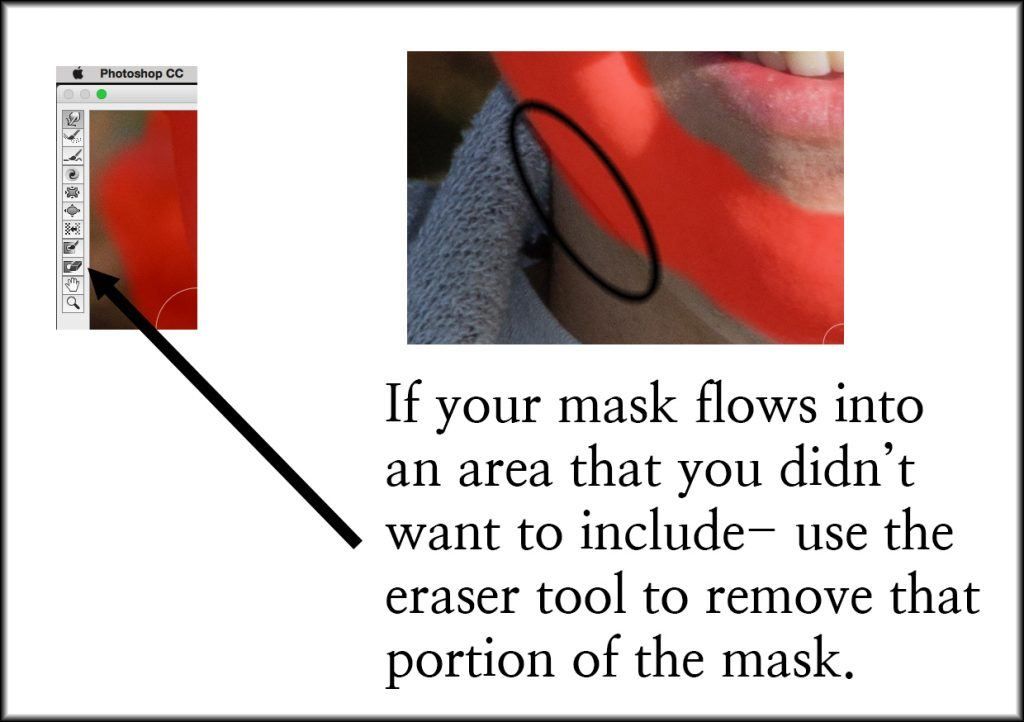
Figure 9: Photo Illustration by Kent DuFault
When we create the mask, we want to be able to see it.
Now comes the fun part. We’re going to select the tool with the little extended finger. Again, Adobe changed the name. It used to be called the “Warp Tool”. Now it’s called the “Forward Warp Tool”. We want to turn the mask off by unchecking “Show Mask”. Doing this will give us an unobstructed view of our edits. We don’t have to worry about messing up other parts of the photograph because we know the mask is still there. We simply can’t see it. We now select a brush size that extends from the natural chin line to the top of the collar. The “Pressure” and “Density” setting are right there next to the “Brush Size”. I always leave the density at the default setting of 50. We will begin our work with the pressure set at the default setting of 40. When we’re almost done, we’ll reduce it to 20 for the final touches. Essentially, the pressure setting determines how fast and how much movement is going to occur when you push it with the “Forward Warp Tool”. We are going to place our brush in the areas below the natural chin line and above the collar and we are going to push up. We are essentially pushing the double chin up under the natural chin. I want you to study the area in the red circle on the boy’s neck. If you push too hard or too far in one concentrated area, you’ll get strange, unnatural looking marks on the skin. Work gently and slowly. After we finish pushing up, the double chin has been reduced to a thin line beneath the natural chin. (Look at the two arrows above the natural chin line and pointing downward.) When we’re happy that we’ve successfully pushed up the chin without marring the neck area, our work in “Liquify” is done. We accept the changes and return to the “Photoshop Workspace”. We are now going to get rid of the line that was left by our squished up double chin.
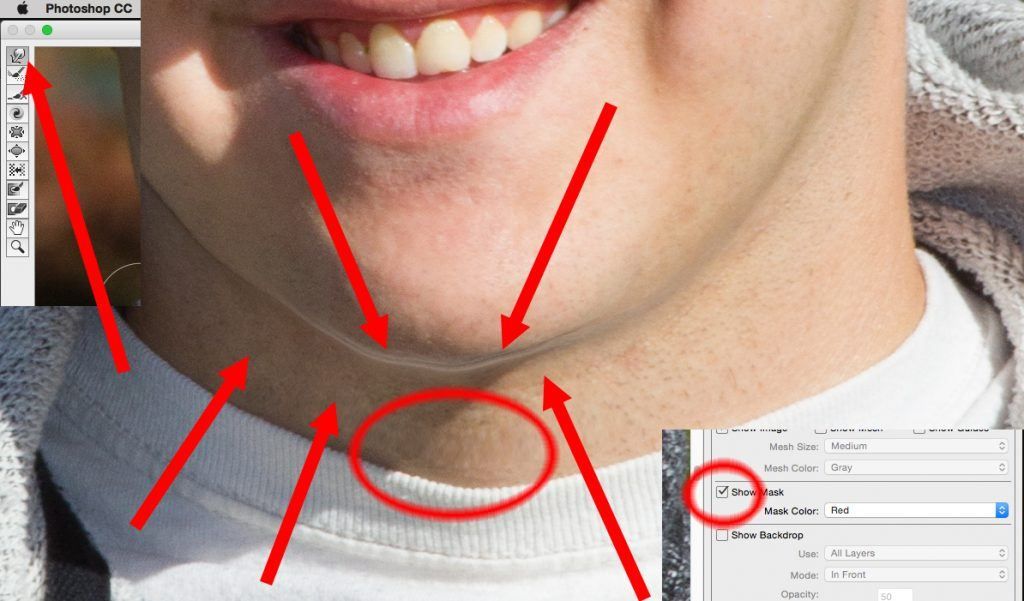
Figure 10: Photo Illustration by Kent DuFault
Now we are going to eliminate that ‘white line’ that was left behind when we pushed up the chin (see the red circle). Select the “Clone Tool”. Set the hardness of the brush to 25%. We must make sure that we are viewing our image at 100%. We want to use a brush that is fairly small. I put a blue dot on this image so that you could get a feel for the size of the brush that I was using. If you look at the red arrow to the left of the red circle, you’ll see that I have already cloned out some the white line already. I wanted you to see what it looked like before and after. I made my selection from the skin area on the neck and just below the white line. The opacity was set at 100%.
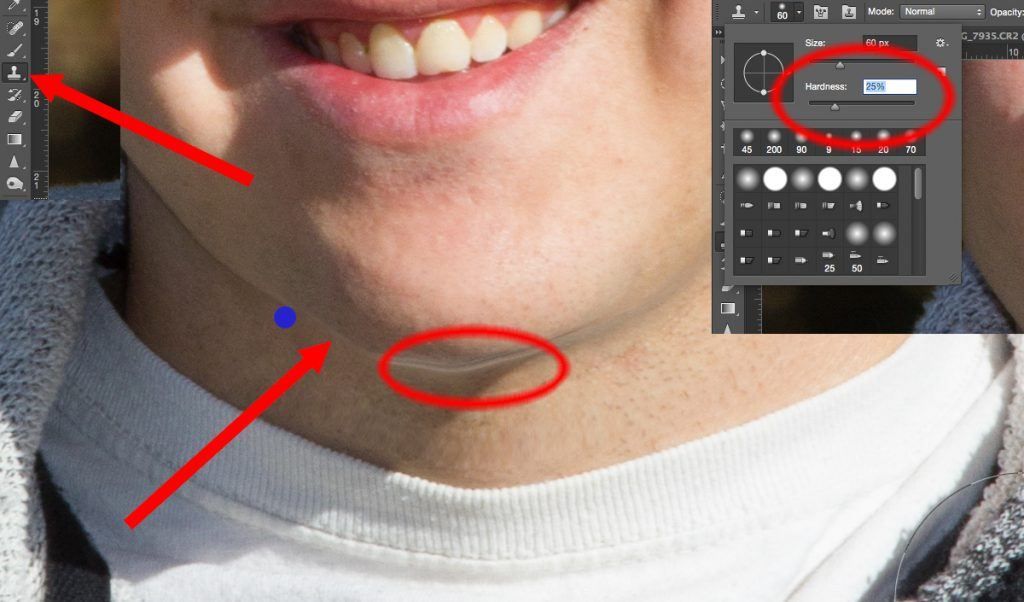
Figure 11: Photo Illustration by Kent DuFault
You can see in Figure 12 how I have continued to clone out the white area below the natural chin line. I want you to notice the angled shadow falling below his chin line and onto his neck. This is a natural stopping spot. Whenever you’re editing—a face especially—never do more than you have to! Look for natural starting and stopping points, and have a plan ready.
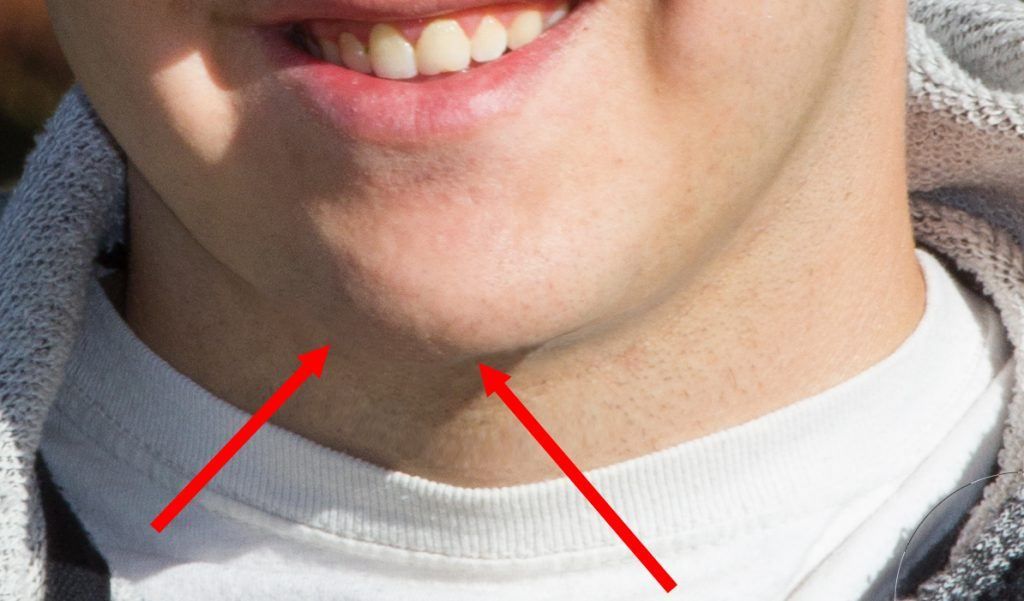
Figure 12: Photo Illustration by Kent DuFault
Step 4
As a last step, you want to create an almost invisible “hard edge” along the shadow side of the chin. Reduce the size of your brush to about 1/2 to 1/4 of the size that it was for the previous cloning, set the opacity to 70% and the hardness to 0. This time we will sample from above the chin line. Drag your brush along the chin line (see the red arrows). You’re just trying to give a little “edge” to that side of the chin. Finally, if you feel like you have visible stretched skin marks on the neck area (from the pushing in Liquify), use the “Clone Tool”, set the opacity to 45, and set the brush size to about 70% of the neck area. Set the “Feather” of the “Brush” to 20. The blue dot in Figure 13 indicates the size of the brush that I used for this image. Click on an area of the neck that has good texture and similar tone. Then click lightly in several spots over the area that you’re trying to fix. For this image, I repaired the neck area below the three red arrows.
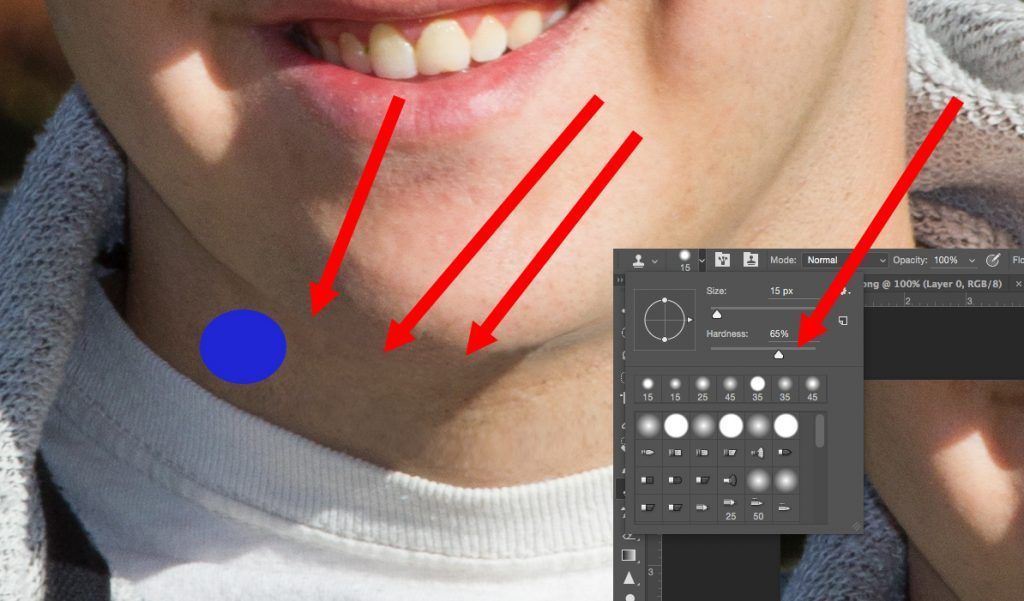
Figure 13: Photo Illustration by Kent DuFault
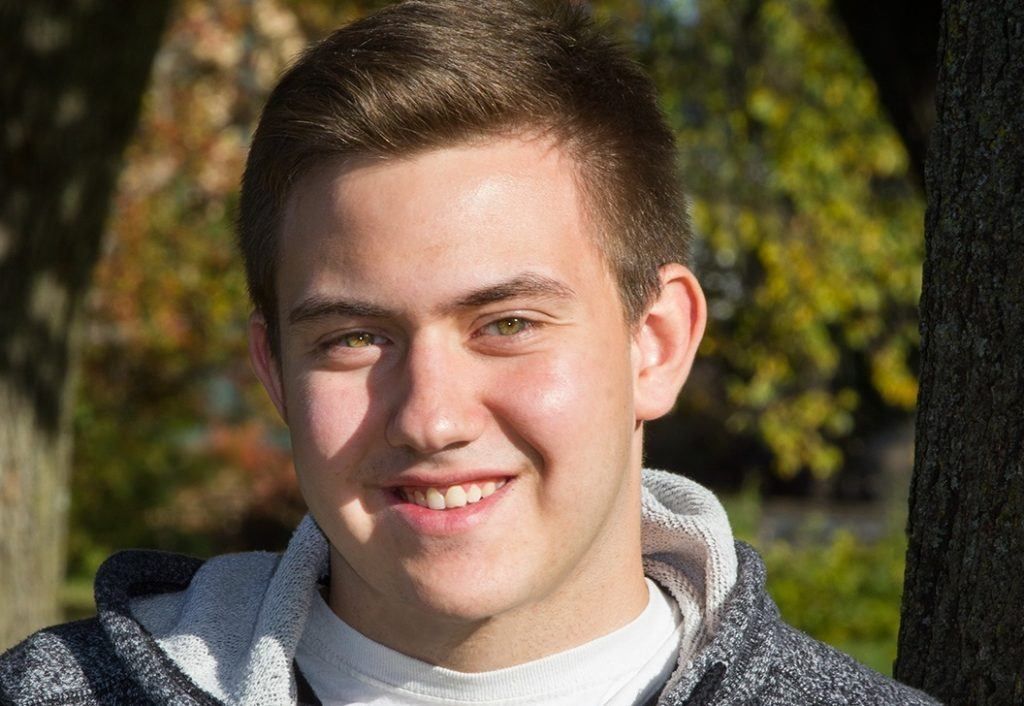
Here is the final portrait with the double chin removed, and we have a happy customer.
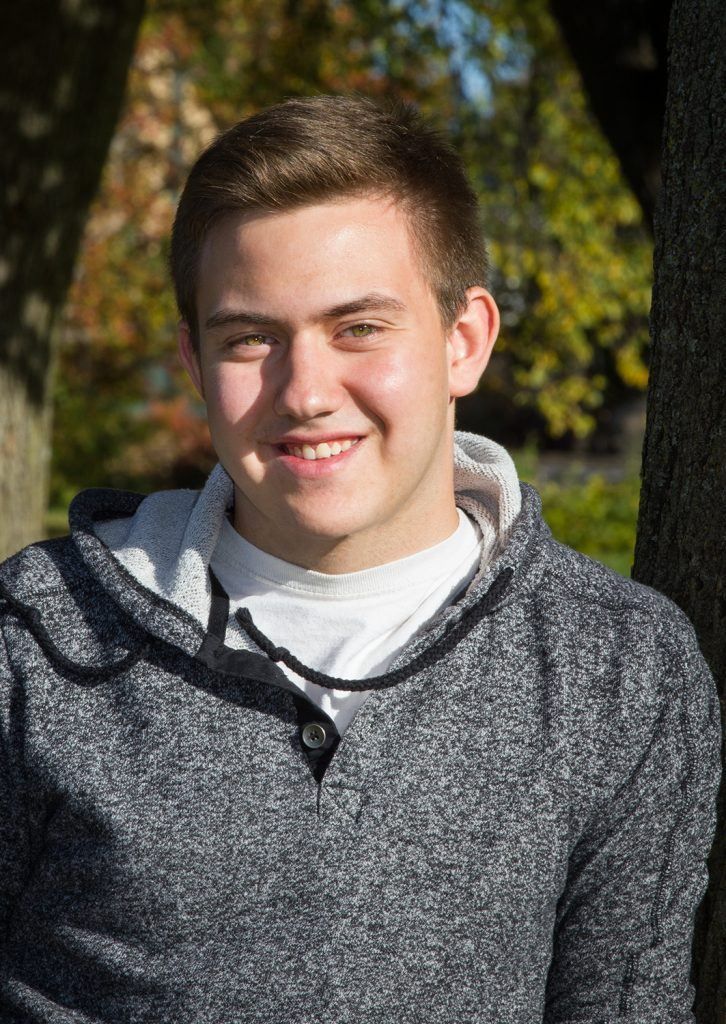
Photo by Kent DuFault


