

There are probably thousands of articles that could be devoted to the individual topics of planning, producing, and post-processing alone. With that in mind, this article can only hope to scratch the surface of what’s possible with location portrait photography. My intention is to provide a loose structure for you to use as a general guide.
Let’s first address the question: What exactly is a “simple outdoor location portrait”?
For me, it’s simply taking portraits using available light only. No Speedlights or studio strobes, no modifiers, not even a reflector; just you, the model, and your camera.
Let’s assume those conditions for the remainder of the article.
Here is what you will learn:
- Why knowing the “type” of portrait that you want to produce is important
- How to locate a willing model
- A simple “pro trick” – how to create and use a “mood board”
- The what and why of wardrobe selection
- A few thoughts on working with makeup artists and hair stylists
- Choosing a time of day and the pros and cons of each choice
- Choosing a location – what to look for
- How to warm up (yourself and your model)
- Finding the “best light” in your chosen location
- Why it’s important to keep an eye on the background
- How a simple change of camera position can add real drama to your shot
- Why encouragement and discussion with your subject is important
- How to post-process a location portrait
Planning
The first step to planning an outdoor portrait is deciding what genre you want to shoot. Knowing what images you want to create helps everything else fall into place. The rest of this article will reference shooting fashion portraits, but you can apply these tips to any portrait genre, whether you shoot fine art, swimwear, lifestyle, or anything else.
- Key Lesson: You need to determine what genre of photography your portrait will fall into, as this affects just about everything else involved with your shoot.
Finding A Model
If you’re just starting out with portrait photography, the best way to find models is to ask friends or family. This is a great way to practice your skills without any pressure. Plus, you’ll find that your friends and family will usually be happy to model for you, especially since they get free photos out of it!
- Key Lesson: Friends and family make great models while you’re learning. Offer them free photographs in exchange for their time.
Creating A Mood Board
Okay, you’ve decided on the style of portraits you want to shoot and you have your model. The next step is creating a “mood board.” A mood board is simply a collection of images to help convey the emotion and mood you’re going for, and they’re super easy to make!
If you have a Pinterest account, you can search for key terms and save images for easy access later. Here I searched for “outdoors fashion portraits” and found some amazing examples of images with the style I like.

Due to copyright restriction the photographs have been blurred out. However, you get the idea. Locate images that match your “vision” for your portrait session and gather them together into a sharable document. Screenshot by Kevin Kleitches
You can also invite others who have a Pinterest account to view the saved images so it’s easy to collaborate with a team.
If you don’t have Pinterest, don’t sweat it. You can just find images that you like on Instagram, screenshot them, and share them with your model prior to your shoot
- Key Lesson: The creation of a “mood board” not only helps you to stay focused on what you’re trying to create, but it is also extremely beneficial to convey your intentions to members of your team including the model(s) and possibly hair and makeup.
Choosing Wardrobe
Let’s talk wardrobe. The truth is, wardrobe is such an easy thing to overlook, but getting it right makes a huge difference in how your portraits will look. If the thought of styling your model makes your eyes glaze over, don’t worry; it doesn’t have to be too complicated.
I like to ask models to bring simple pieces that we can mix and match if we need to, such as some solid-colored tops (short or long-sleeve t-shirts, blouses, button-downs), a couple pairs of jeans (black denim looks killer for fashion portraits!), a skirt or dress, and a few different options for shoes, typically sneakers and boots. I try to avoid pieces with any crazy colors, distracting patterns, or any large logos that might detract from the portrait itself.
- Note: While we’re on the topic of wardrobe, you may want to consider partnering up with someone to do makeup and hair for your model. While it’s certainly not required to have someone do the model’s hair and makeup, it can make a big difference to the end result. If you know someone who might be willing to collaborate with you, ask him or her if they’d be interested! If not, no worries, you can just skip this step.
- Key Lesson: Keep your wardrobe simple. It’s best to avoid crazy patterns and colors, as well as company logos.
When To Shoot
After taking a look at some inspirational images, it’s time to decide what time of day you want to shoot. With natural light, the most forgiving times to shoot are early in the morning and in the late evening, otherwise known as “The Golden Hour.”
These times are when you’re less likely to deal with harsh shadows cast across the model’s face due to the sun’s position in the sky. If you have to shoot in broad daylight, just have your model rotate so that they’re facing the sun.

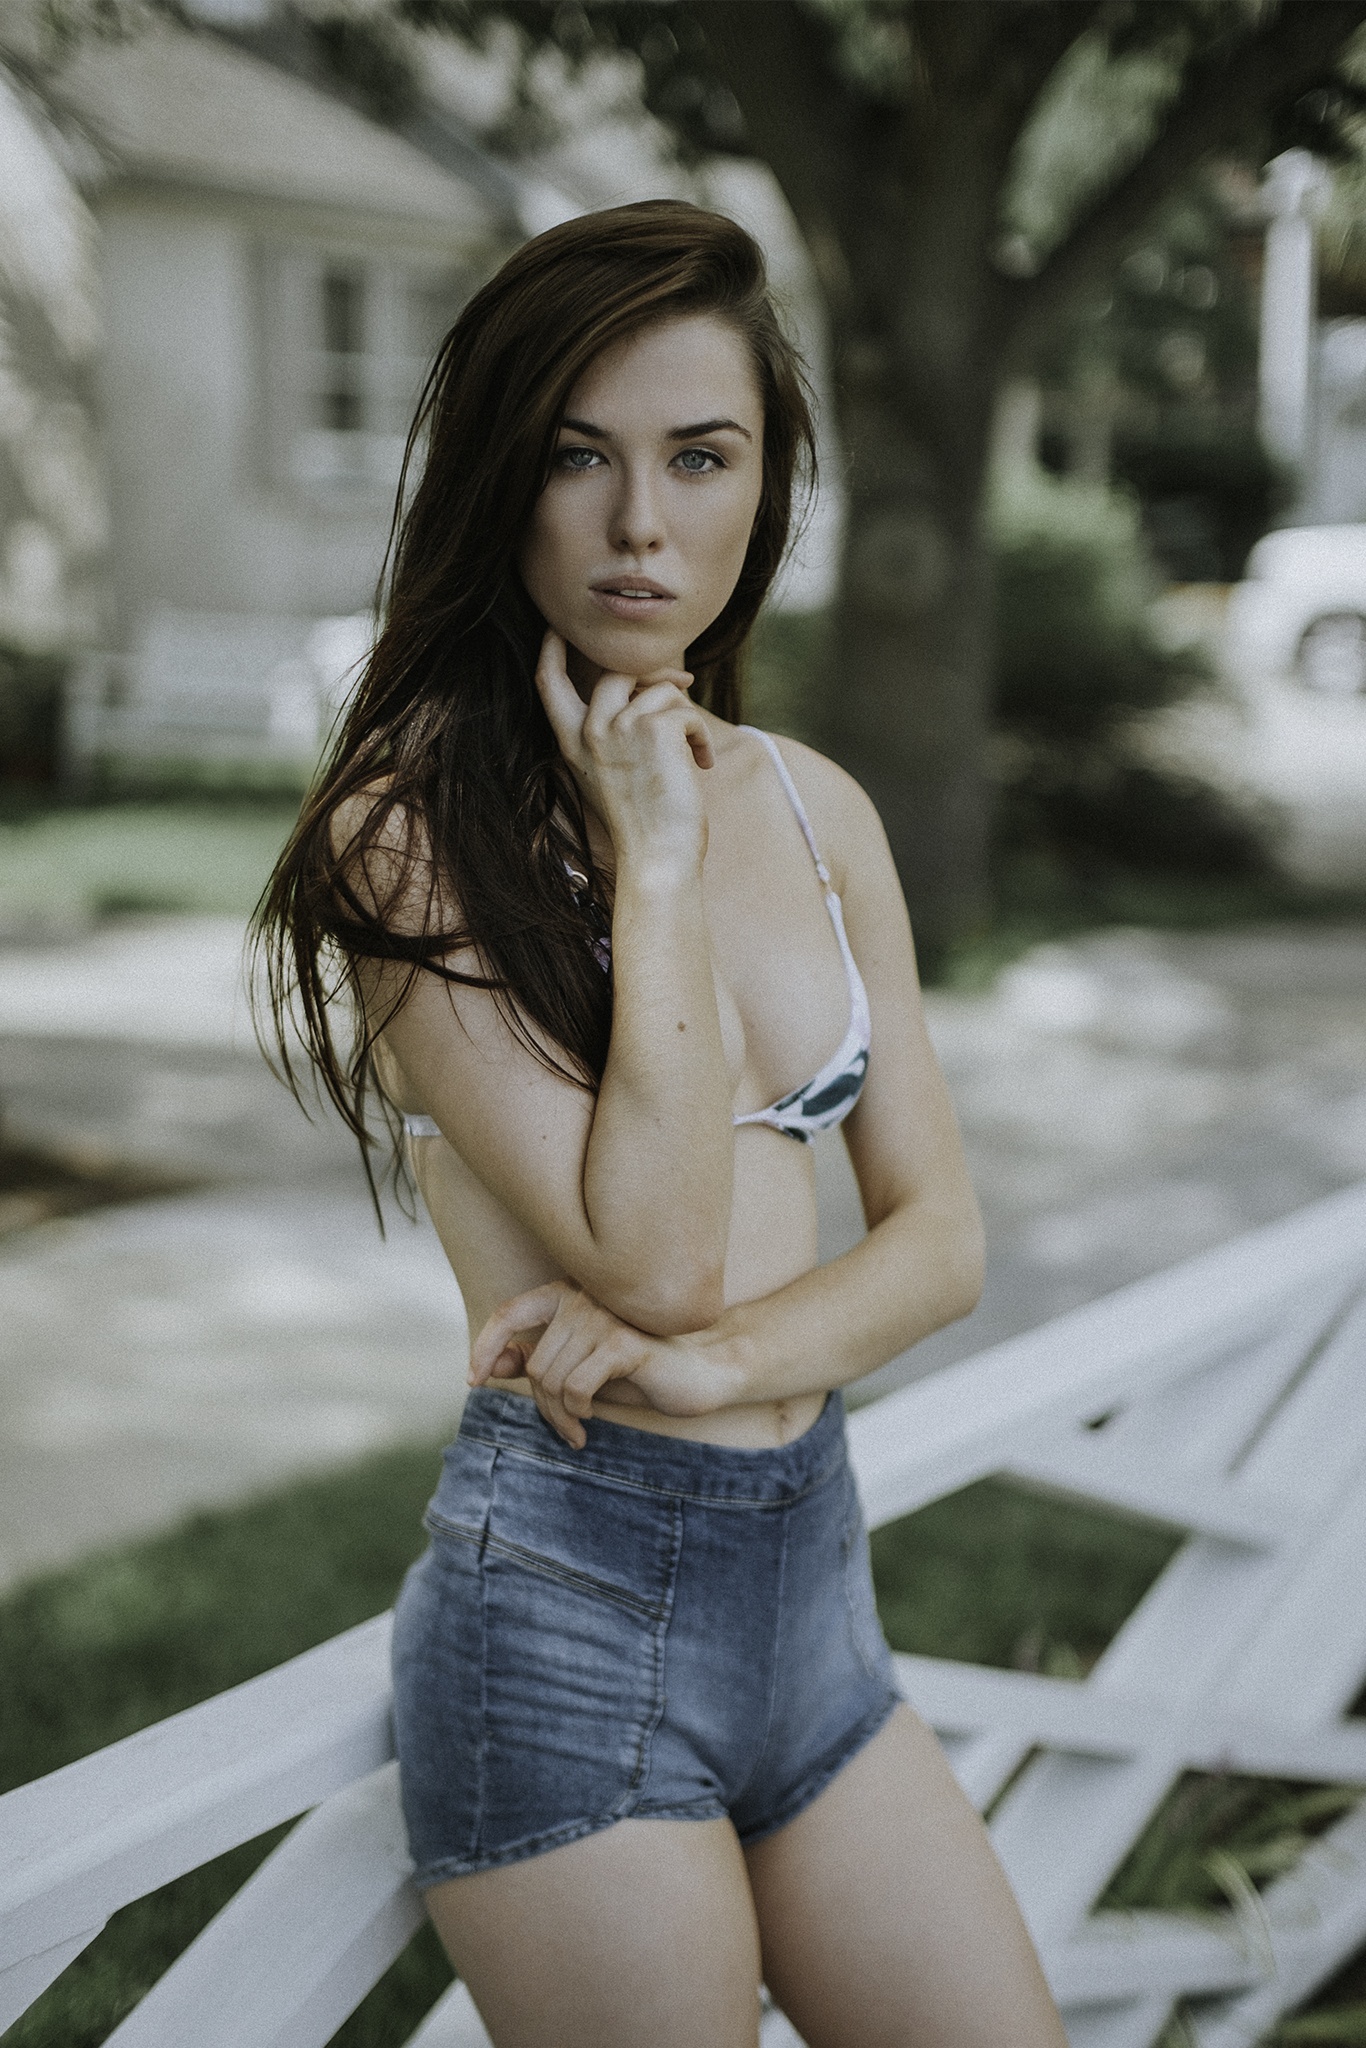
Here’s an example of when I used this technique recently (turning the model toward the sun) while shooting in harsh sunlight. Photograph by Kevin Kleitches
- Key Lesson: Set up your shoot time for early in the day or late in the day. If you have no other option than midday lighting, turn the subject toward the sun, but explore the possibility of turning their face away from the sun. (Study the example photo above)

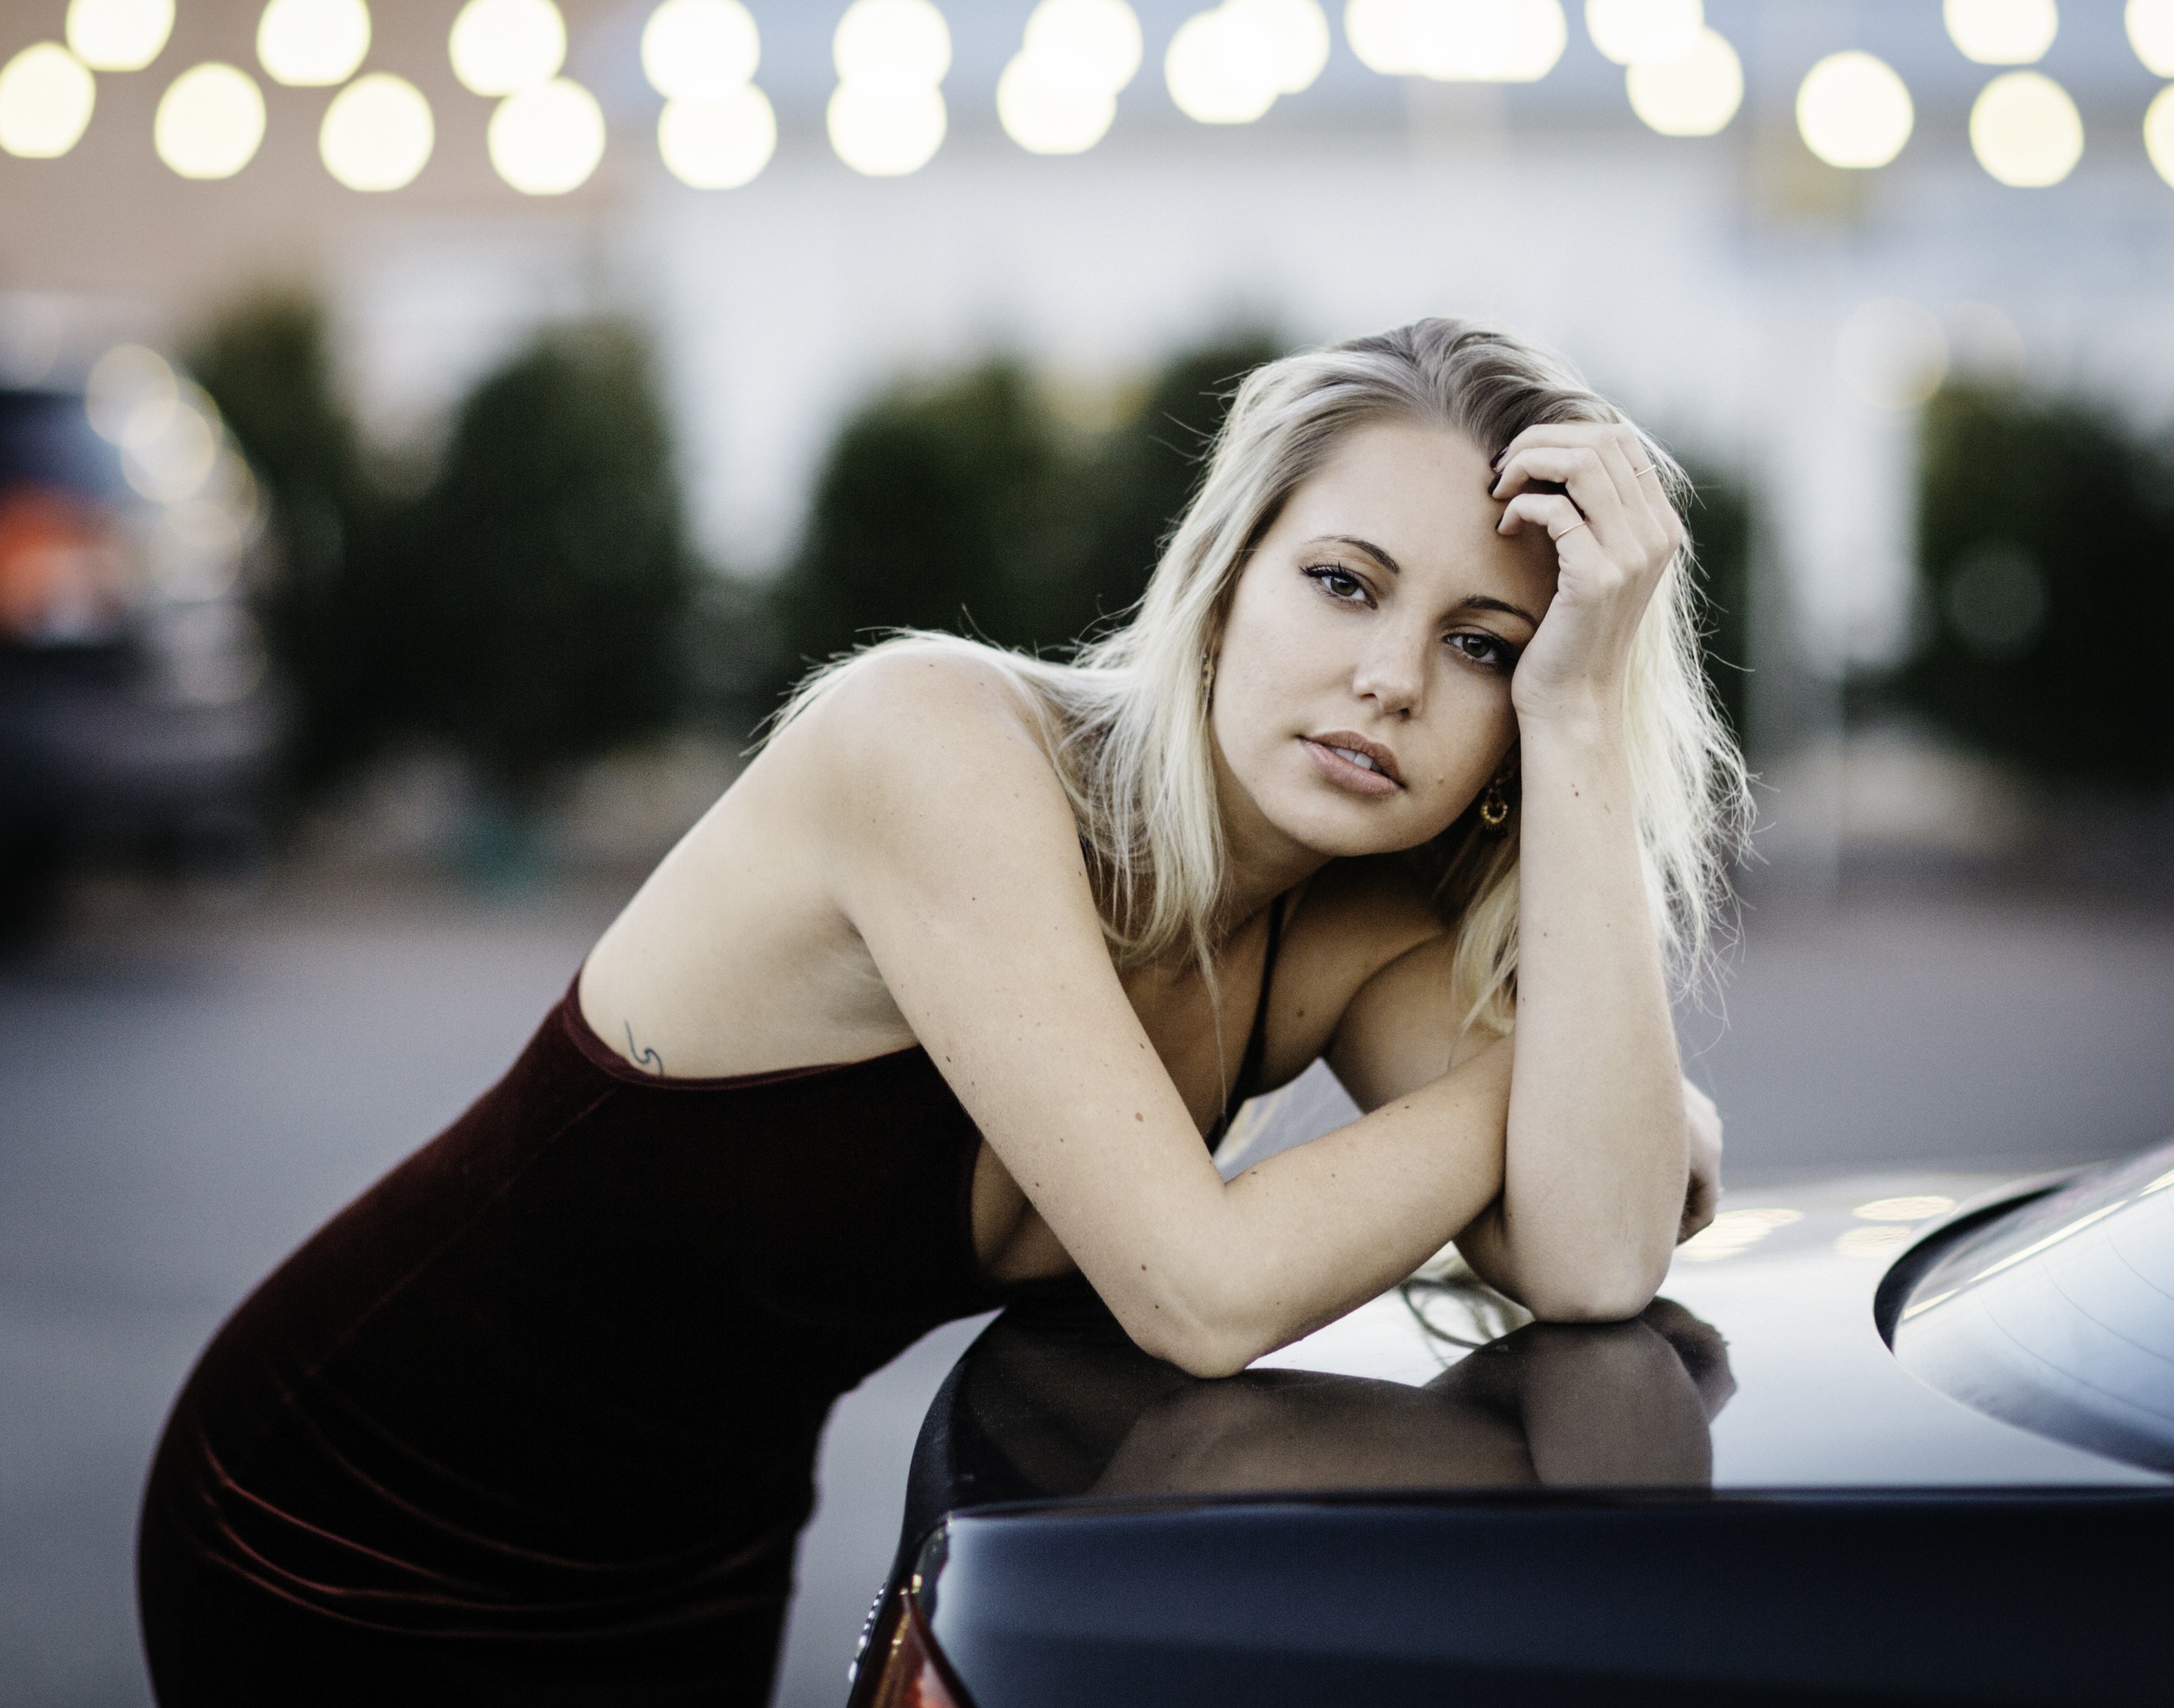
In this shot, the model’s red top and the green brick of the hotel building are complementary colors that made for a nice color scheme. Photograph by Kevin Kleitches
Where To Shoot
Choosing where to shoot will depend on what kind of style or mood you’re going for. Generally, places like parks, fields, alleyways, courtyards, and even downtown streets are all great locations to shoot.
And remember: don’t underestimate places simply because they don’t immediately stick out to you. Sometimes an otherwise ordinary setting can become unique if presented in the right way. When I drove by Krispy Kreme on my way to a shoot recently, I immediately saw its potential and envisioned using it as a vintage backdrop. I also realized that the colors of the sign would work nicely with the planned wardrobe, so I called the model and had her meet me there so we could take some shots.

Photograph by Kevin Kleitches
Choosing a location with colors that match the wardrobe you’ve picked out will do wonders for your portraits. I’ve found it helpful to reference the color wheel and play with different color harmonies.
Producing
Alright, you’ve found the inspirational images, chosen wardrobe, and decided on when and where to shoot. Now it’s time to shoot.
Warming Up
Right before I start taking the first few shots of the session, I’ll tell the model, “Don’t worry about posing for these, I just want to take a shot and assess the light,” which is true. But doing this also lets me start the session with no pressure. It creates the illusion that the “real” shooting really hasn’t started yet, allowing them to relax. As I’m taking these shots, I just have a normal conversation with them. Since they’re feeling pretty comfortable, they generally will do something like run their hands through their hair or gaze in a particular direction in a way that looks natural and good for portraits. That’s when I’ll say, “Can you do what you just did again?” and start taking photos. Boom! Now you know how to start each session in a completely non-awkward way.
Finding the Light
When you’re shooting outdoor portraits, you should find the most flattering light on your subject. I like to shoot in shaded spots where light is soft and evenly distributed across the face. If the sun is hidden behind clouds, you’re in luck — that’s when you can escape the shade and shoot anywhere you want. Clouds diffuse light super well, so take advantage of them!
Whether you’re shooting in midday sun or the shade, pay attention to how the shadows fall on your subject’s face. Are their eyelashes casting shadows beneath the eyes? That’s a sign that they’re angling their face too low. Does their nose cast a shadow across their cheek? Have them rotate their face more toward the sun.
- Key Lesson: By shooting some preliminary photos, where the subject is unaware that you’ve started, you can occasionally catch a “real look or pose” that will not be revealed later.
Training yourself to be able to identify these issues while you’re shooting not only makes for better portraits, but they also make your life a lot easier when it comes to editing the photos later.
- Key Lesson: Be mindful of hot spots and poorly placed shadows from your lighting.
In this photo, I had the model pose underneath a large oak tree. This spot yielded nice, soft light that was perfect for taking portraits. Notice how the background doesn’t have any overexposed “hot spots” due to the shade. Photograph by Kevin Kleitches
Stay Mindful of the Background
I’m a huge fan of background blur when it comes to portraits. This is because I don’t want the background to be distracting in my photos. With this in mind, I enjoy shooting closer to “wide-open” or as fast as my lens allows. For any given portrait, I’m shooting anywhere between f/1.4 to f/2.2 to achieve the narrow depth of field that I’m looking for.
Remember that depth of field doesn’t just involve aperture. If you need more background separation, sometimes you just need to have your model stand farther away from the background.
- Key Lesson: Depth of field is controlled by aperture AND subject-to-background distance!
- Recommended Reading: If you’d like to create stunning portraits with gorgeous blurry backgrounds, check out Photzy’s Beautiful Background Blur premium guide.

In this shot, I crouched down on the ground and angled my camera upwards toward the model to give him a larger-than-life look. Photograph by Kevin Kleitches
Get Low
Sometimes all it takes to get a whole new perspective is, well, changing your perspective. Try shooting up at your model from the ground to make them look taller.
- Caveat: When doing this technique, keep an eye on the model’s chin and jawline. Have them slightly bring their chin forward and down to avoid the jaw blending in with the neck, which would create an unflattering look.
- Key Lesson: Avoid the tendency to simply stand and point your camera at the subject. Try different perspectives to make your portraits unique.
Be Encouraging
One of the worst things you can do as a photographer is stay quiet while you’re shooting. It helps so much to encourage your model after every few shots and tell them they’re doing a great job. You don’t have to be insincere either. If your model appears stiff or has an unnatural pose, you can still find something positive to say before addressing the issue you want to fix. Something like, “I love that pose! Let’s try relaxing your fingers a little more,” instills confidence in your model while still acknowledging what they can improve.
Post-Processing
I do most of my basic editing in Lightroom and export to Photoshop for retouching. Even if you don’t have Lightroom, most editing programs allow the basic functions that I’m going to discuss (that Lightroom offers). Here’s a glimpse of some of the things that I adjust in Lightroom:

Screenshot by Kevin Kleitches
White Balance: I set my camera to Auto White Balance, and for the most part it does a good job of giving me the proper color temperature. Occasionally though, I’ll need to adjust the slider in Lightroom to make slight corrections. When deciding how much to adjust the white balance, pay attention to how the skin tones of your model are affected. If the skin is overly saturated with orange, your white balance is probably too warm. If the skin appears to have a sickly blue hue, your white balance is too cold. For the most part, you shouldn’t have to change this setting too drastically.
Tint: I’ll adjust this slider whenever the hue of the skin looks a little off. Sometimes the location where you’re shooting will affect the hue of the skin – shooting in a grassy field, for example, may cause a green colorcast. Let the skin tones be your guide when making adjustments to the slider. You want to aim for the perfect balance; not too green and not too magenta.
Exposure: I’m not often adjusting exposure much since I try to get it as perfectly as possible in-camera, but sometimes I’ll need to brighten the image a little.
Contrast: Contrast is another slider that I try not to touch unless I absolutely have to. Again, this is personal preference, but I find that it’s easy to go overboard with this setting, so I use it sparingly.
Highlights: If any part of my image is blown out or overexposed, I’ll usually try to address the issue by decreasing the highlights first. I find that this has a more subtle effect than decreasing exposure.
Shadows: Sometimes certain parts of an image are so dark that they lose detail. This is especially common with the color black. In the earlier photo (man in a suit holding a backpack), I raised the shadows slightly to bring detail back into his blazer.
- Recommended Reading: If you want to learn how to enhance your photos and create better images, grab a copy of Photzy’s Ultimate Guide to Fundamental Editing premium guide.

Photograph by Kevin Kleitches
Final Thoughts
Preparing for an outdoor location portrait session goes a long way. It doesn’t have to be a large-scale production, but taking the time to plan details like wardrobe and setting will only make your portraits that much better. Keep shooting; the more you practice, the more comfortable and confident you’ll become.


