I remember something that Bill Murray said which went something like this, “The more relaxed you are, the better you are at everything…” The Great Murray couldn’t have been more correct.
The more comfortable we become the more apt we are to produce our best work. This is especially true when it comes to photography and more specifically, when it comes time to edit our photos. But how can we be more relaxed while trudging through our post processing duties?
It all comes down to feeling more at home in our digital darkrooms. If you’re like me and use Adobe Lightroom for the bulk of your editing then you might be surprised at just how homey we can make the software appear.
Most of us are used to Lightroom Looking something like this… sleek yet unadorned.
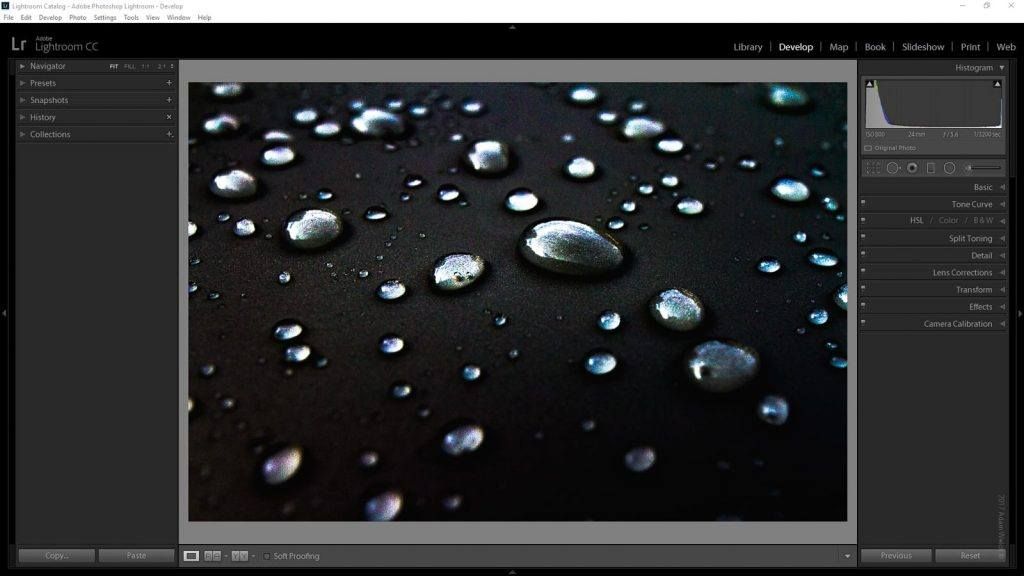
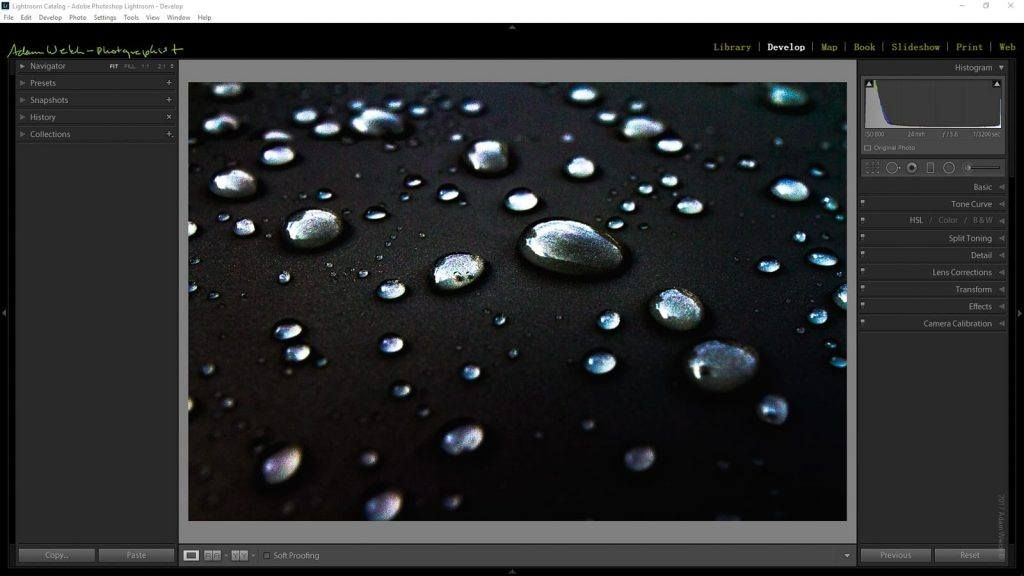
But did you know that you can personalize the way Lightroom looks. Here’s my Lightroom setup as it appears right this second…
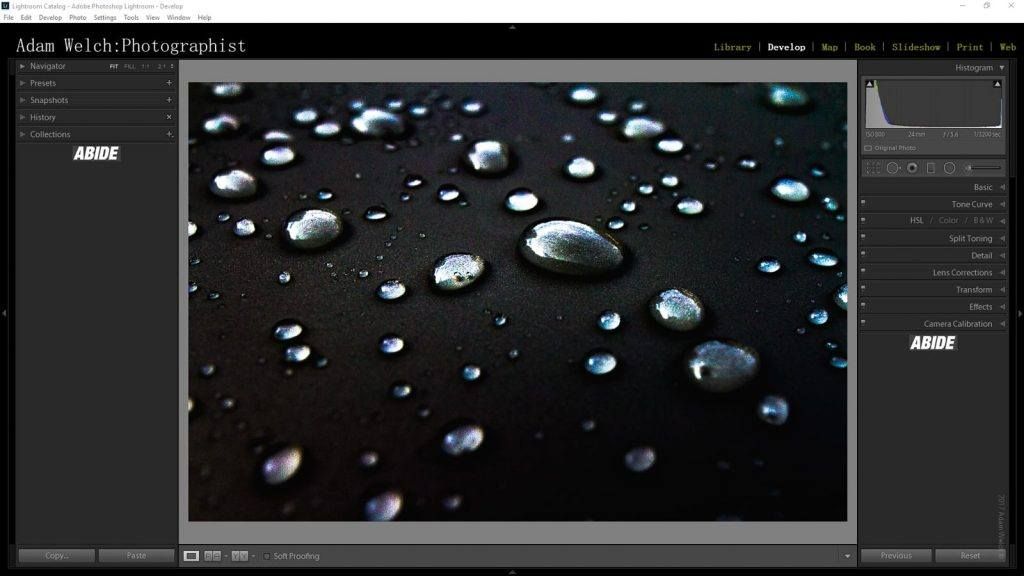
Quite the change, eh? Ok, maybe not a huge change but I’ve made Lightroom more “me”. We can choose the type of fonts, their colors and sizes, and even add our own custom logos to the identity plate or end marks (the areas below the panels) so that our editing software looks the way we want it to look. After all, what we do as photographers is a very personal enterprise.
Why should we not make our editing software just as personal so that we feel more relaxed when using it? In this article we’re going to look at just how easy it is to personalize the Lightroom interface so that it reflects our own style and dare I say, our own personalities. Let’s get started!
How to Add a Personal Identity Plate
The identity plate is that portion at the upper left corner of the Lightroom window.
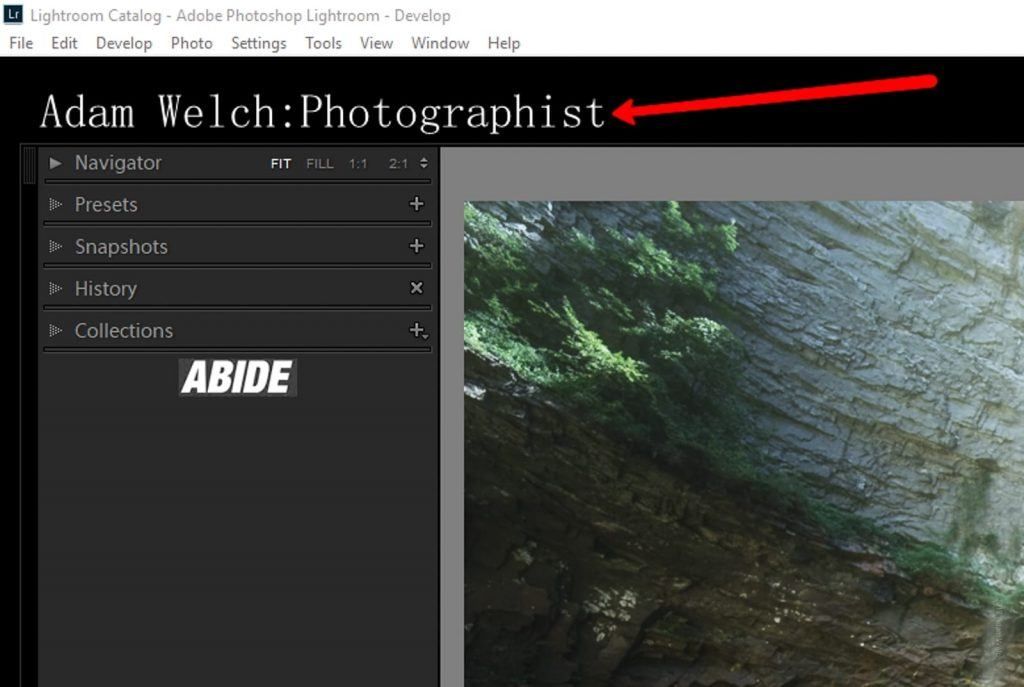
By default, Lightroom CC shows it as, well, “Adobe Lightroom CC.” This can be changed extremely easily and it just takes a few clicks. To begin the customization of the identity plate, click on the “Edit” menu and then select the aptly named “Identity Plate Setup“…
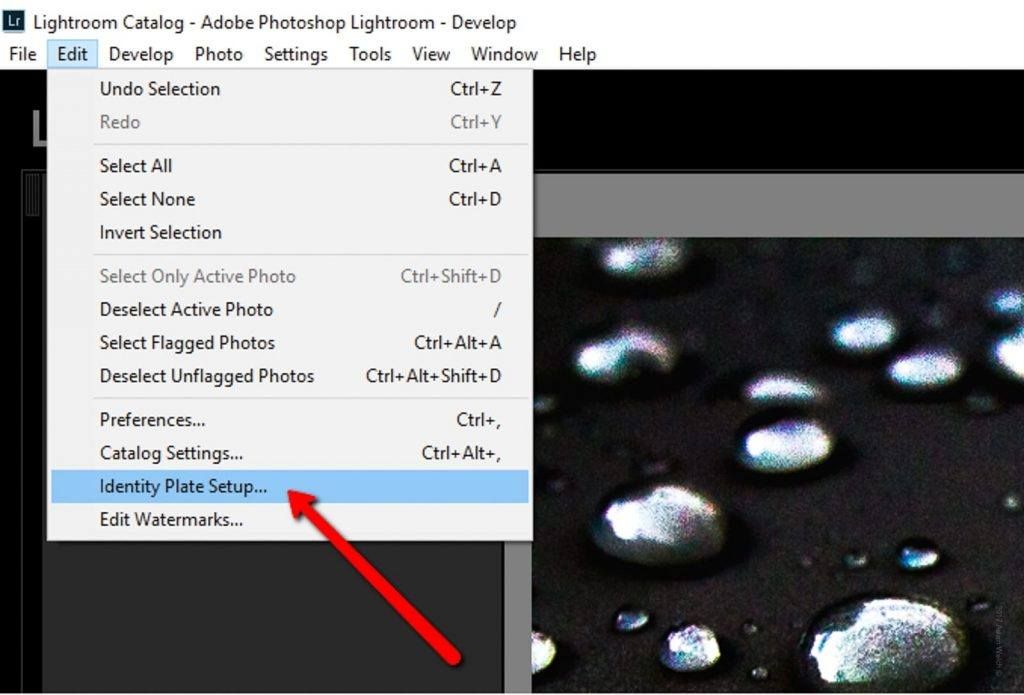
This will bring up the identity plate setup dialog.
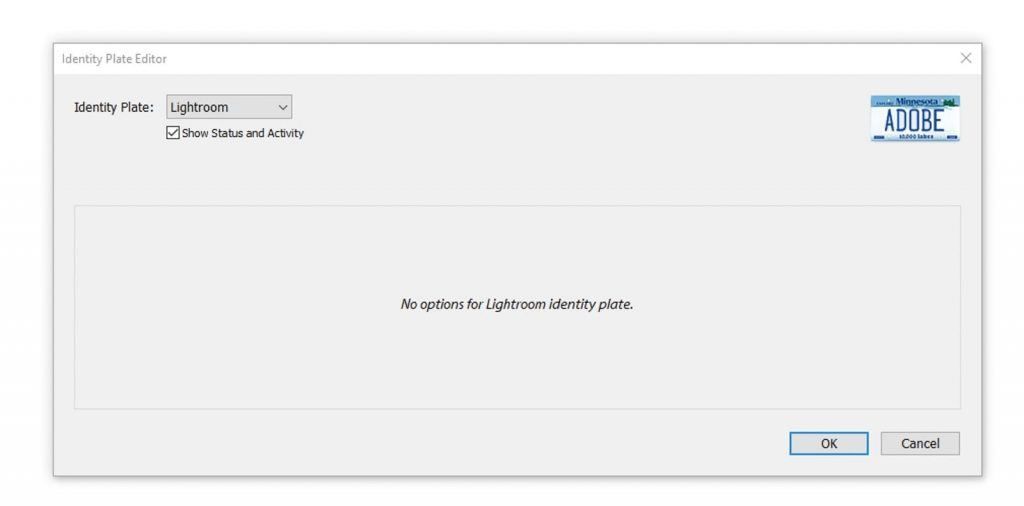
It’s here where we can manipulate not only the identity plate but also the module tabs at the right upper side of the screen. Click on the identity plate dropdown at the top left of the dialog.
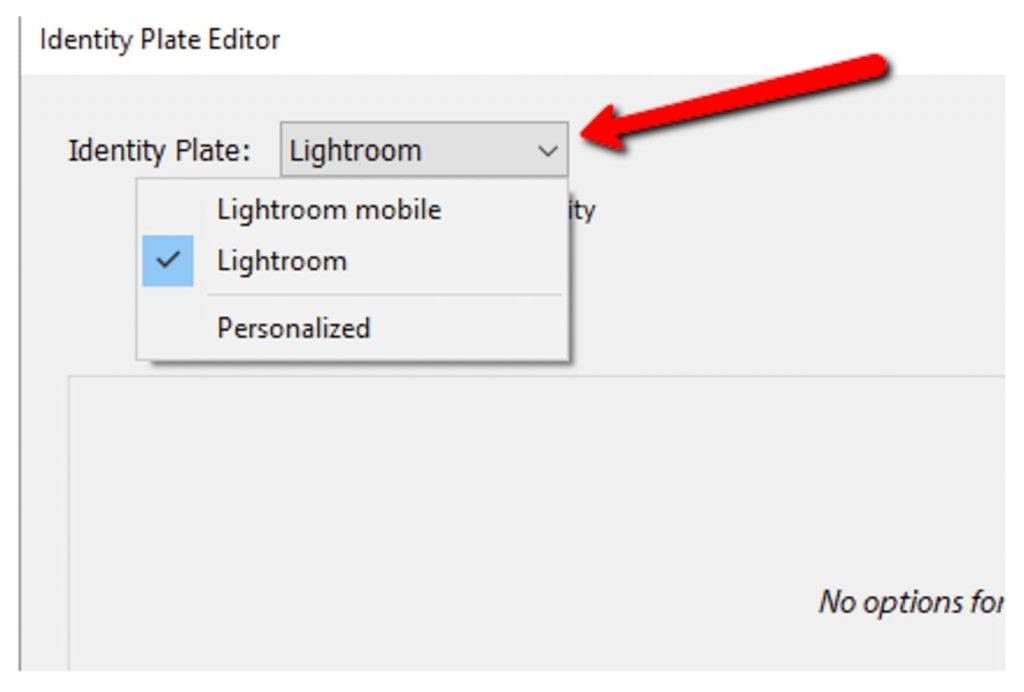
Lightroom is currently in its default appearance mode so that is what is checked in the dropdown menu. If you select the “Lightroom Mobile” option the information in your Adobe CC account will be used as the nameplate. For now though, we want to go fully custom with our identity plate, so select “Personalized” from the list.
Now we have on our hands the full monty of the identity plate with a whole host of options available to us.
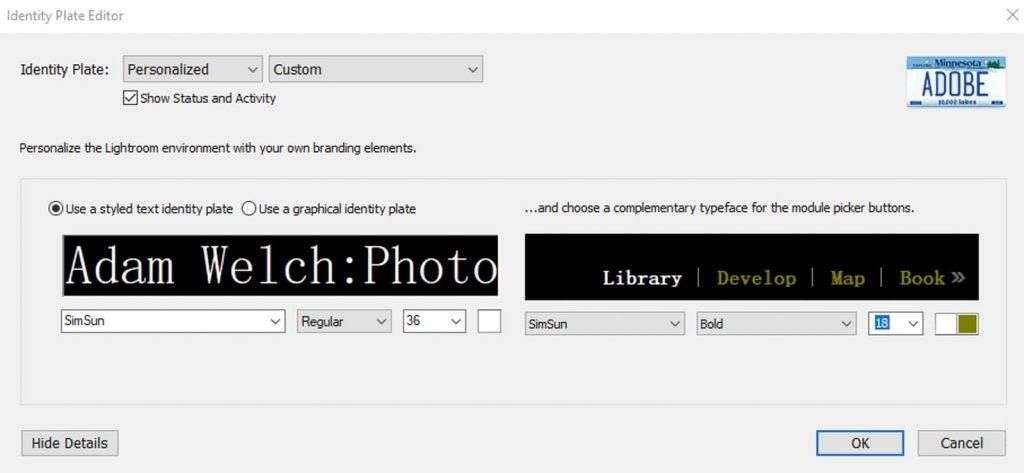
You’ll notice that I already have the “Use a styled text identity plate” selected and that the personalized plate from my current Lightroom setup is included. If you’re choosing to use a plain text identity plate then the steps are very straightforward. Simply type in whatever text you want displayed into the black box. Then choose the font style and size you like as well as the color and options (bold, italic, etc.).
You can also change the way the module tabs look in order to better match your new identity plate. The same options are available for font, size, and color as they were in the identity plate section. Don’t want to change the module tabs? That’s completely fine. Just leave them set to their default values. When you’re all done, click OK to apply your changes.
And if you run across a combination of fonts and colors that you really, really, really like then save it as a preset! Here’s how to do it. After you’ve made all your changes click the “Custom” dropdown menu to the right of the identity plate menu and select “Save As”.
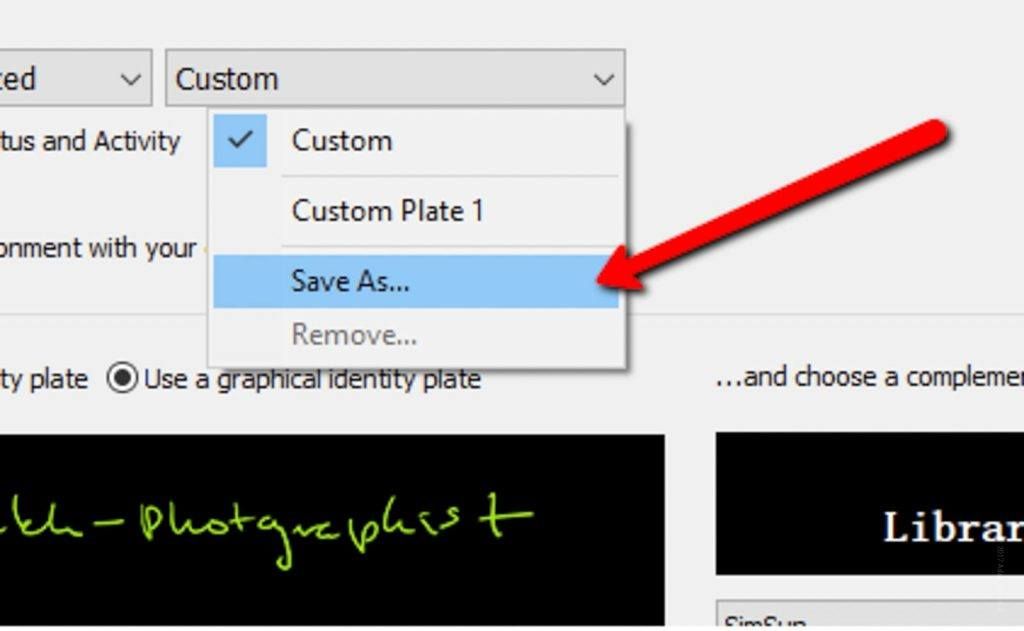
Name your identity plate preset (I’ve named a preset “Custom 1” earlier) and it will appear from now own in the custom dropdown menu. This makes it much easier to switch the appearance of Lightroom back and forth with needing to make all those individual changes all over again.
How to Add a Custom Graphic Identity Plate
Having a personalized text identity plate is great. But if you really want to kick things up a notch, try adding your very own logo or other custom graphic as your identity plate. Truthfully, adding the graphical identity plate is even easier than the text version. First, you need a logo or graphic to add as the identity plate. I did a super quick (can’t you tell?) handwritten logo using my tablet which automatically saves the writing as transparency. Then I saved it someplace I could find it before the next step.
In the same identity plate setup dialog we used before, but this time we will select the “Use graphical identity plate” option. Which gives us something like this….
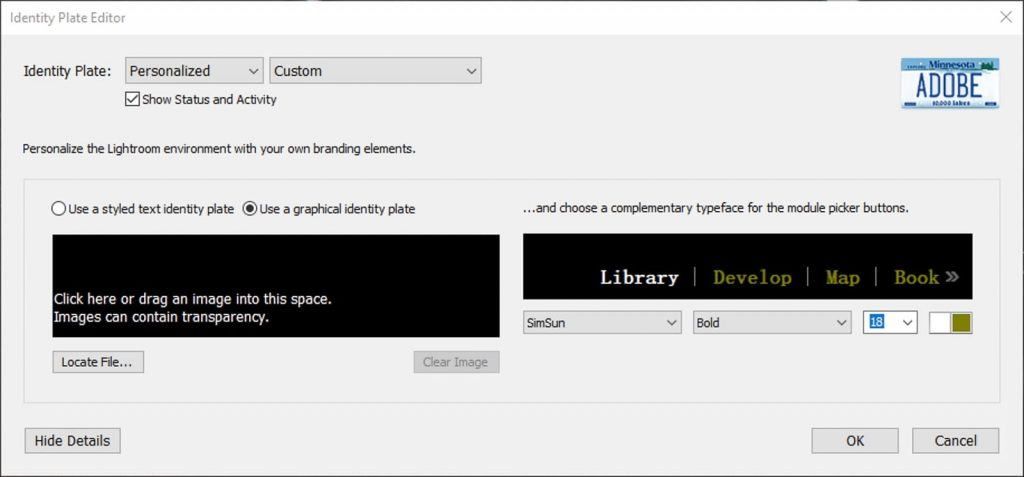
Either click the “Locate File” button to find your image/logo or drag and drop it into the black box. Size matters here! The sweet spot for most images is around 350-500px wide and about 70-80px in height. The final sizing, of course, depends on your own tastes and the particular nature of the image being used. For reference, my imaged used here was 350x71px.
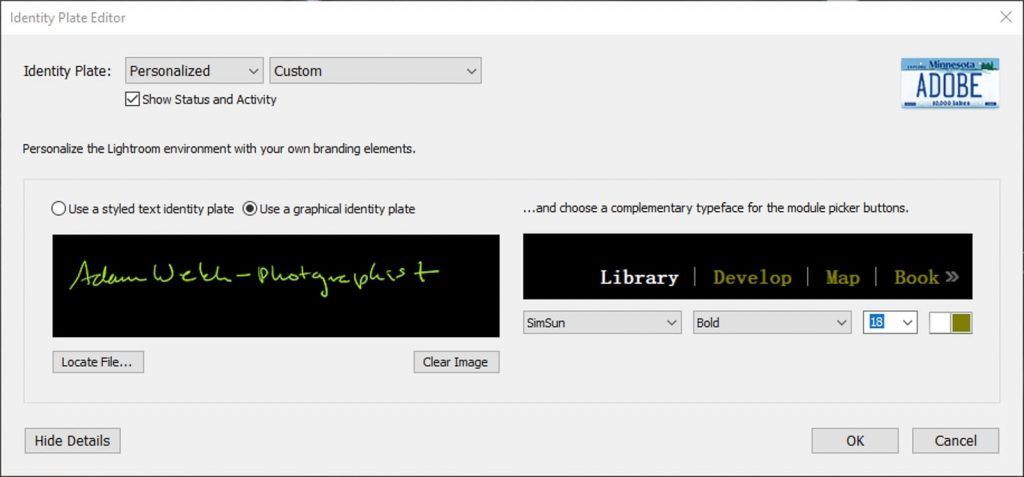
Again, if you want to change those module tabs to better match your own particular logo by all means do it but it isn’t something that you have to do. After you’re done, click OK to solidify your choices as your very own custom identity graphic.
Adding Personalized End Marks
You may be thinking, “Hey, didn’t he mention something about end marks?” Yes, indeed! Those little areas just below the panels at the left and right sides of the Lightroom window are customizable, too. You can either use Lightroom’s own “flourish” graphic or add your own… which is what you’re about to learn to do right now!
To start, click on the “Edit” menu tab and then select “Preferences”. This opens up the heart of Lightroom where any number of changes can be made. We’re interested in the “Interface” tab. Click it! It’s here where we find the “End Marks” dropdown where we can select our customized end marks.
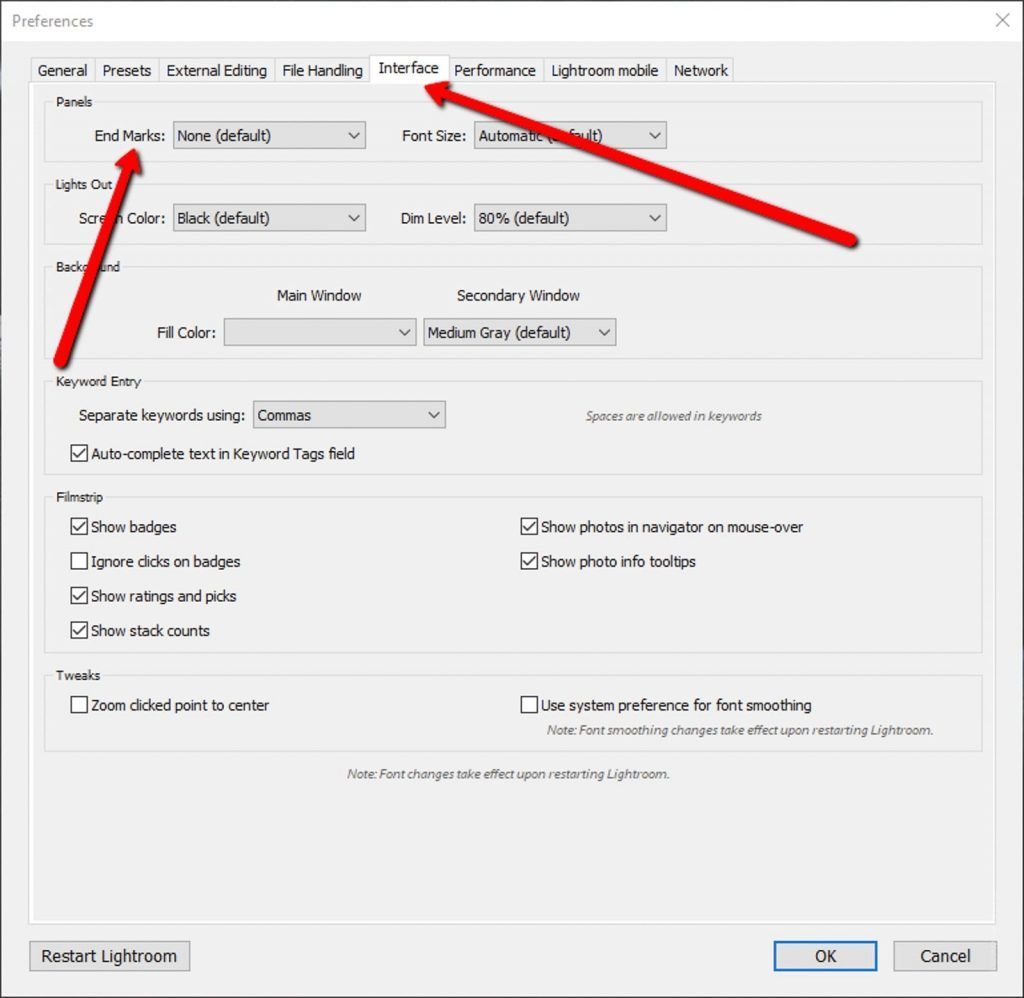
Clicking on the end marks dropdown gives us the option to use Lightroom’s default flourish or to go to the “Panel End Marks Folder” to load our own images. I have already saved my image for use as an end mark in that folder. Whichever image you choose, simply be sure to save it in the folder Lightroom shows to be the end marks folder. The size of the image is important here, too. Again, the final choice of image size is up to you but as a reference, my end mark image is 90x30px.
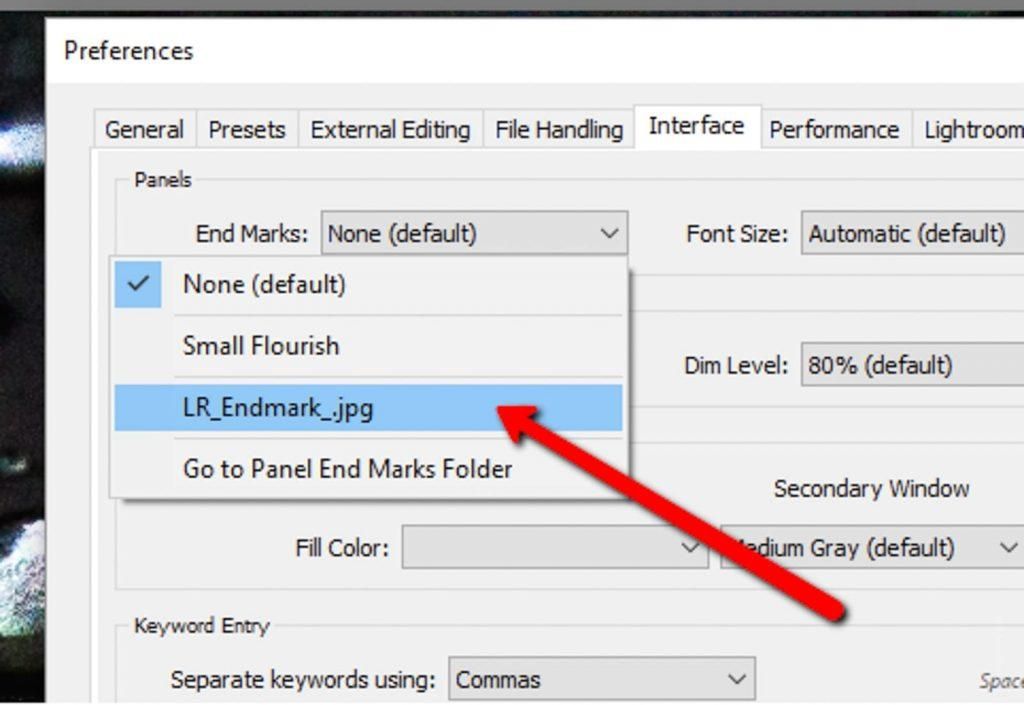
After your end mark image is loaded, it will appear in the dropdown. Select it and click “OK” to save your changes.
And here we have our fully customized version of Lightroom featuring all the changes we’ve just made!
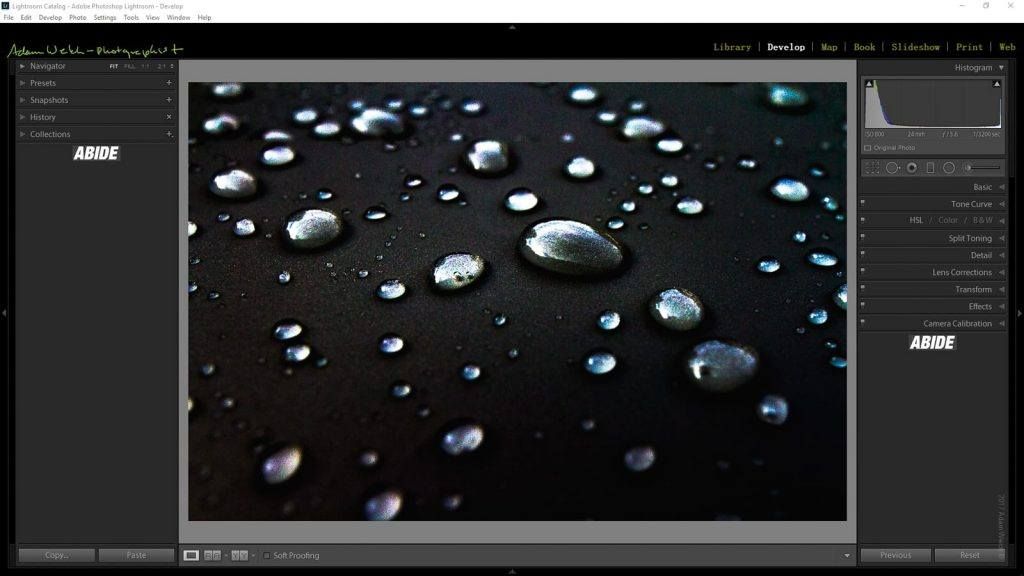
We’ve changed the identity plate to a custom logo, the module tabs now match, and we choose to include our own personalized end marks to the bottom of both panel sections. While these changes show the versatility of personalization available in Lightroom, the true scope of personalization possibilities truly are limitless.
Final Thoughts…
Do you have to personalize Lightroom? Of course not. Still, having the option available to do so makes me feel warm and fuzzy inside and it should make you feel the same. You’re not locked into some drab and uninteresting software… you’re using Lightroom, and Lightroom is one of the most beautifully engineered pieces of editing software out there. Why not make your own version of the program as unique as you are?
Just by adding a few custom options you can literally make your editing software your own.
Have a screenshot of your Lightroom setup you want to show off? Please share it with us on Facebook or Twitter!
This article was written by award-winning photographer and Lightroom expert, Adam Welch from Contrastly. Contrastly is a producer of premium Lightroom presets & other resources for enthusiast photographers, as well as thought-provoking articles about the techniques that make great photographers.
Want More?
If you’d like to learn each of the fundamental editing steps from a professional photographer, our Ultimate Guide to Fundamental Editing eBook is the perfect next step.
This eBook will give you a complete step by step guide to photographic post-processing that will change your photography forever. Go here now to find out more – The Ultimate Guide to Fundamental Editing

