


Would you believe that it took a “photo a day” challenge and some really cold weather to make me a better photographer? Let me explain…
A few years ago, I found that I wasn’t pushing myself to learn more about photography and decided to fix that. I committed, publicly, to a 365-day challenge where I took photos every day. The public part meant that I would post them every day so that I was accountable to myself and others. (There is good evidence that this is a most excellent way to ensure you stick to your goals, so tell a friend. Better yet, tell 357 friends on Facebook or some other social networking site.)
Some days, when the weather was poor (translation, below -15 Celsius AND snowy) I would find myself digging through the kitchen drawers to find something, anything, to take a photo of. Some of those kitchen drawer forays were sad, but some were quite productive and taught me to “see” differently in order to help me make a measuring tape photo worthy!
I started to develop lists of things I might want to photograph just for those days. The lists ranged from family heirlooms, like my Grandad’s mandolin, to tools and nuts and bolts. These lists helped keep me from panicking when 9 p.m. rolled around and I realized I hadn’t taken a photograph for that day. They also helped me realize that we had a multitude of subjects in the house for me to photograph.
This practice of photographing ordinary household objects not only saved me tons of money (I didn’t have to travel to exotic locales to get great photos), but it helped me develop my skills to become a better photographer.
It wasn’t until I began applying compositional elements to my photos that I really started to understand how they could contribute to a more visually appealing photograph.
So, let’s take a look at how photographing normal, everyday objects can help you develop your skills and create some amazing photos.
In this article, you will learn:
- How to find photo-worthy objects in your home,
- Ways to help you develop your “photographer’s eye” by building good habits,
- Suggestions for how you can improve your photography using everyday objects,
- That you don’t have to travel far or spend loads of money to get great shots, and
- Ways to make the “ordinary” seem “extraordinary” through photography.
How to “see” differently
When I began my photographic journey, I spoke to fellow photographers and read a whole lot about photography. I read about the golden ratio, the rule of thirds, leading lines, symmetry, contrast, and many other elements that make a photo interesting.
- Recommended Reading: Author and photographer Kent DuFault talks about the process of how we develop our own unique way to “see” as photographers in his free guide, The Art of Seeing. I highly recommend reading it. Keep in mind that this is a process that happens over time so practice, practice, practice!
It wasn’t until I began applying compositional elements to my photos that I really started to understand how they could contribute to a more visually appealing photograph. Like anything, you need to build a habit of seeing these elements, and this can only happen through practice.
You don’t have to travel outside the doors of your house to see things in this way. Sit in any room in your house (yes, even the bathroom…you must go anyway!) and look around. You don’t have to have your camera at this point. Take some mental pictures of objects in the room. Consider compositional elements (even just one or two) and apply them to some subjects that interest you.
- Recommended Reading: While considering which subjects to photograph, you may want to look at this free guide by Karlo de Leon: How to Choose the Right Photography Subjects for Better Images.
This retraining of your brain – to see ordinary everyday objects with your photographer’s eye – takes a little practice, but soon that ugly soap dish that you’ve kept for years or that odd-looking potato masher will be calling to you to photograph it.
Still not feeling it? Go on a photo walk around your house. Create a mental, or literal, list of items that might be appealing for a photo. Save it for a rainy day and then try one of the following approaches.
Get close...Now closer
Some of my favorite photographs are ones that present a pleasing shape, image, or color combination when suddenly, pop! I see the subject of the photo for what it really is – almost like a photographic mystery. A great way to create this sense of surprise is to get in much closer to a subject than you typically would view it. You can use a macro lens, or zoom in on a subject from a distance with a zoom lens.
- Key Lesson: Stabilizing your lens is important, especially if you are shooting close-ups of objects. Be sure to use a tripod or a sturdy surface to avoid unnecessary blur.
You have heard photographers advise beginners to “fill the frame.” Take it a step further and fill it to bursting. It is a great way to present an ordinary everyday object in a new and interesting way.
Get close…

Get closer…
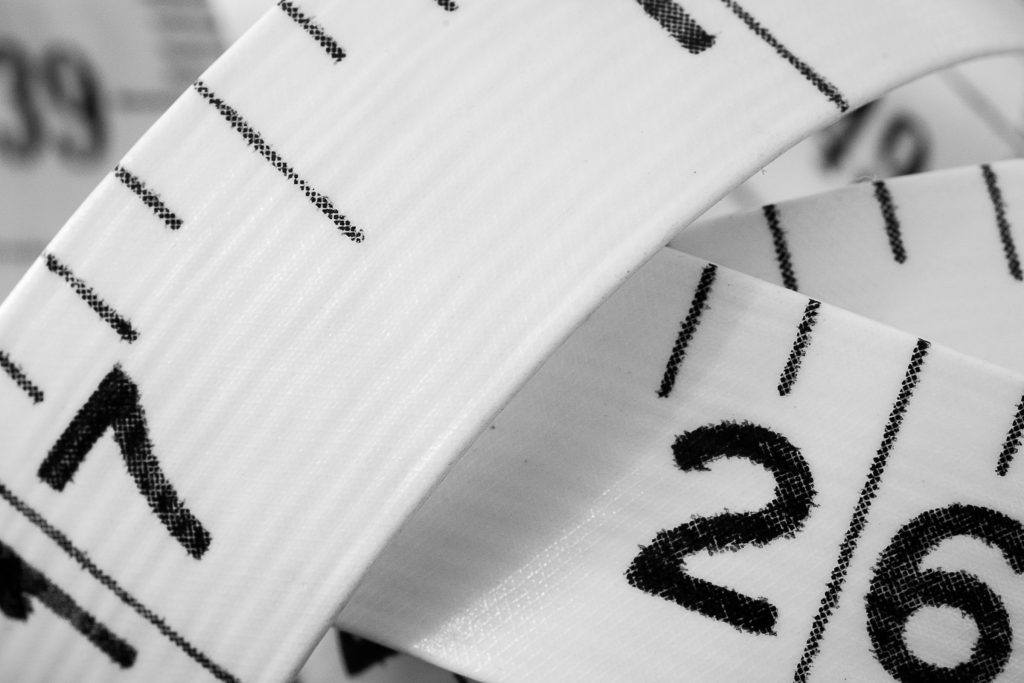
Close-up photos may show only some of the subject – a small piece of it. Sometimes getting close to your subject is one of the best ways to create an interesting, appealing composition. You may even delve into “abstract” when doing so.
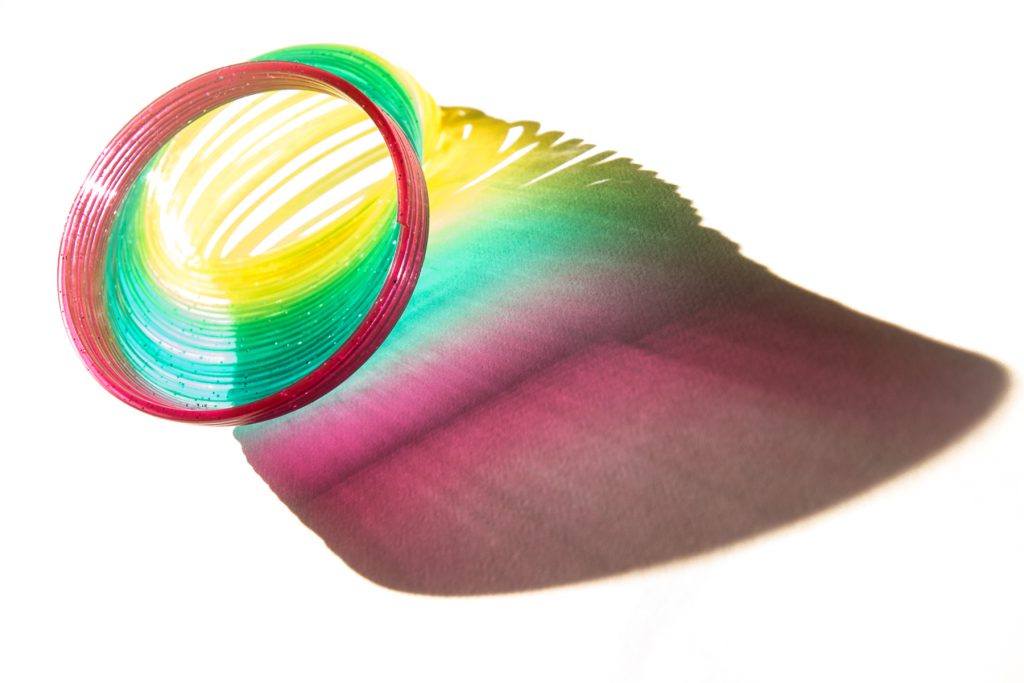
The form, colors, and shadows of the slinky in the photo above made for an interesting image that tends toward the abstract. Try losing yourself in a subject’s attributes and you may find that you see it in a whole new light.
- Key Lesson: If you are struggling with what to photograph, try what I did: ask someone else. The slinky in this photo was my six-year-old daughter’s idea. Alternatively, you can hit the internet and find numerous lists of ideas for things to photograph.
Move it
The great thing about photographing everyday objects around your house is that they are yours and you can move them around.
If the light isn’t working for your photo of that pepper grinder, move it to a better location.
If the background is too busy, provide your own by slipping a piece of fabric in behind it.
If there are distracting elements in your photo, move them somewhere else.
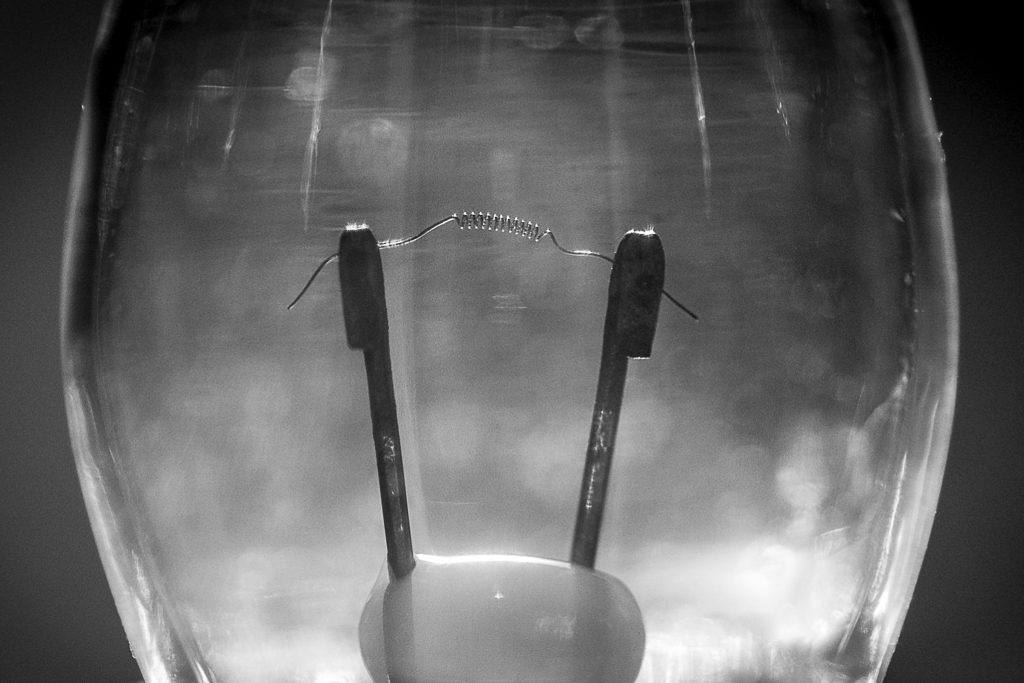
I was able to move this small light bulb (image above) to a spot where the sunlight from a window played on the filament and shone through the non-conductive material at the base. I might have been able to emulate something similar to this using an external flash, but being able to move the lightbulb made this photograph much easier and, I think, better.
Being able to move your subject around is a huge advantage, and you will find yourself taking many photos of the same subject in very different ways. Again, from a learning standpoint, this kind of practice is invaluable, as you are building your understanding of what works and what doesn’t work compositionally.
Change your perspective

Everyone has seen a battery, knows what it looks like, and what it is used for. Many of us use them daily. How many of us really look at a battery?
Photographing everyday objects can be extremely satisfying, as you force yourself and others to pause and look at objects that you may take for granted. Flipping a battery on its side and placing it on a reflective surface created an interesting symmetrical image of an object I would barely glance at ordinarily.

This image I call Hooked was an attempt to change my perspective of a commonly used object. Hit a crafting site and you will find numerous shots of a crochet hook and yarn.
By shooting several hooks with a macro lens against a red background, I achieved a very different point of view from the traditional photo of this subject. The crochet hooks become something else, reminiscent of statues or a monument.
So take some time to turn that tea steeper over in your hands. Look at the bottom. View it from the side. You might see something that you never noticed before. Approach shooting an object from an unconventional way and you may find yourself creating a wonderful surprise for yourself and your viewers.
Another way to change perspective and guide your viewer’s eye in photographs is to use depth of field. Being in control of the depth of field allows you to showcase just a tiny sliver of a subject or the whole thing, depending on the effect you are going for.

This image, a close-up of a marble, has a shallow depth of field. You can see that the edge of the marble and the part that is closest to the camera has a soft focus. I did this to try and make the marble look “huge” and have the viewer zoom in on the patterns and colors of the part that is sharper.
- Key Lesson: Changing your point of view, either by moving an object, moving yourself, or affecting the depth of field, can allow for a greater level of creativity when photographing everyday objects.
- Recommended Reading: If you’d like to learn how to use depth of field to create stunning images, grab a copy of Photzy’s Beautiful Background Blur premium guide.
Feel it (But with your eyes)
Looking for interesting textures in the objects around you is another way to get some great photographs, and your house is full of them!
Once you find a textured object and you have a plan for how you would like to photograph it, consider your position (relative to the object you are photographing) and your light.
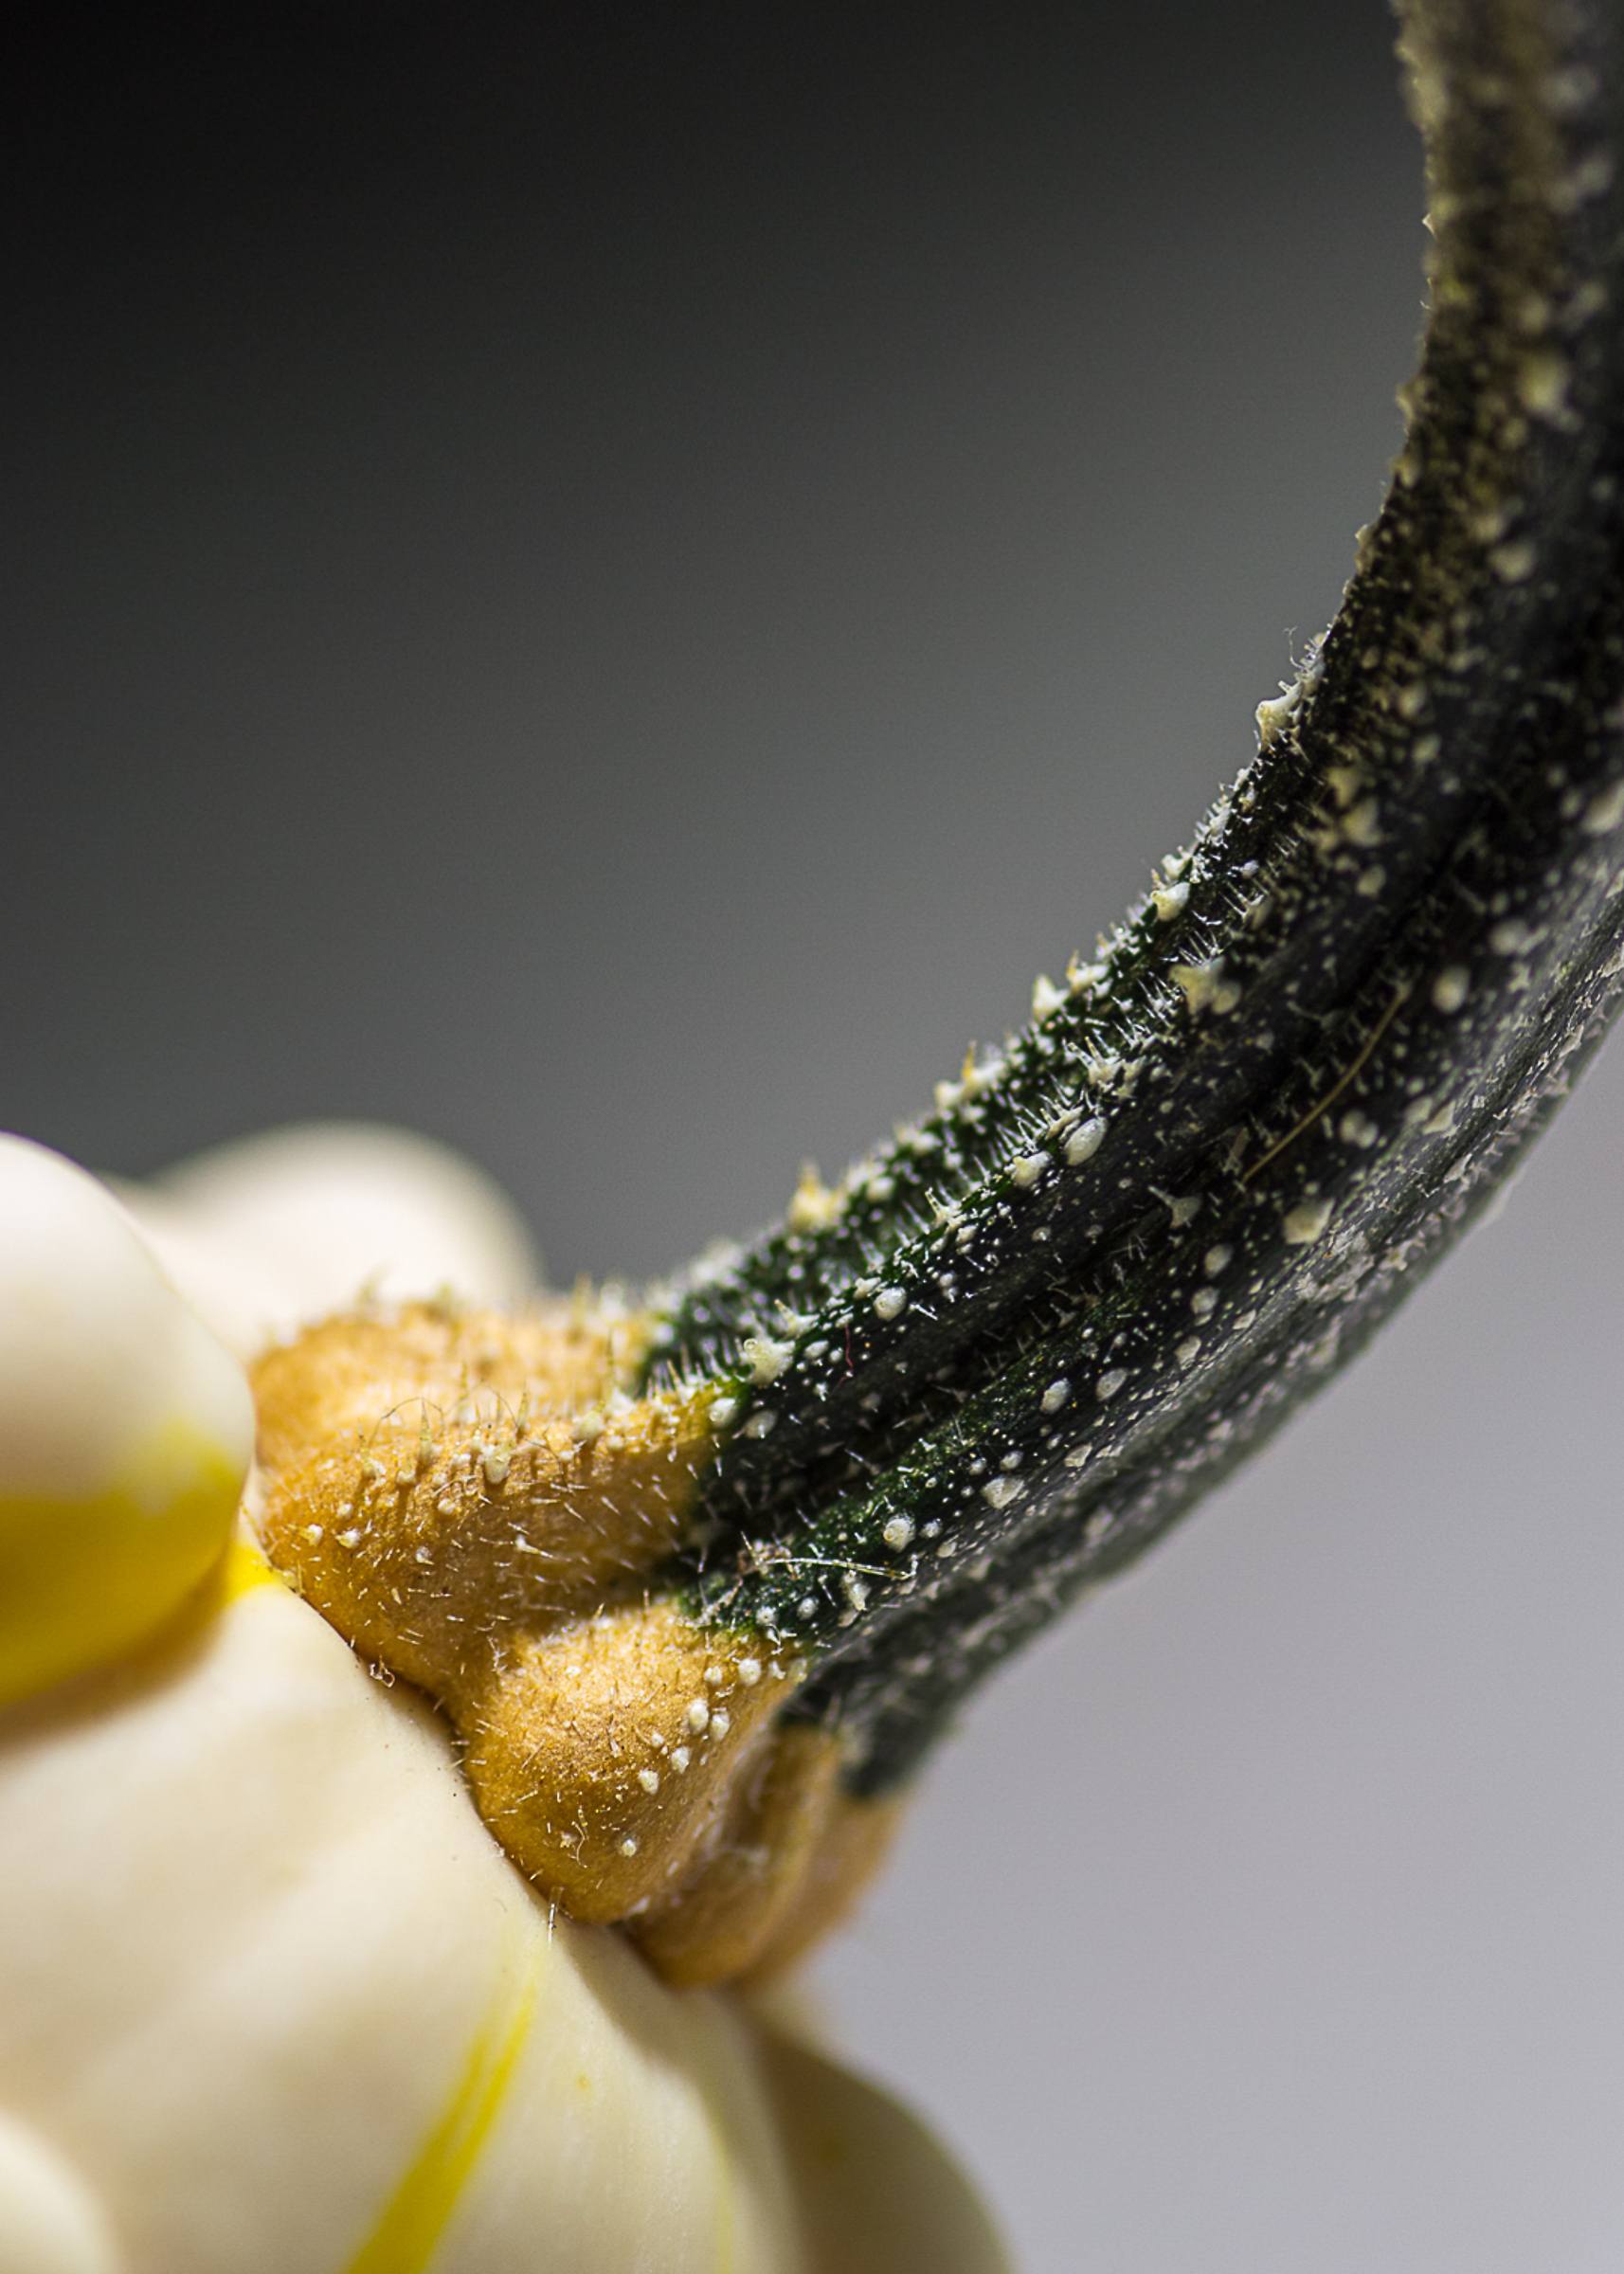
Looking straight at a textured object may be good for capturing interesting patterns or forms, but if you want the viewer to “feel” the texture, you will want to view your subject from a different angle.
Looking for interesting textures in the objects around you is another way to get some great photographs..
Placement and type of light can greatly influence the impact of textured subjects. If your light source is hitting your subject straight on, from somewhere over your shoulder, you can expect the image to look a little flat.
Move the light source (or your subject, if you are using natural light) so that it hits your subject at an angle, and you will see shadows and contrasting light spots that really make your subject pop in a three- dimensional way.
- Key Lesson: To make the texture of an object stand out, position your light (or alternatively move your subject) so that it hits the object from the side or from behind. Taking several photographs, moving the light a little each time, is a great way to learn how to get the light working for you.
- Recommended Reading: If you’re interested in learning more about light and how you can use it to improve your photography, grab a copy of Photzy’s bestselling tutorial series, Understanding Light Book One and Understanding Light Book Two.
Every picture tells a story
Everyone has objects that would be considered heirlooms or keepsakes. We all have little treasures that exist sometimes to be functional, but often to elicit memories.
With these types of objects, I would suggest that you carefully consider the purpose for keeping it and the feelings it brings. Think about that object’s history and the story it tells.
When photographing it, you want to try and convey that feeling. If you have a dainty teacup that belonged to your great- grandmother, you may want to zoom in on the details on the side of the cup. Or if you have a pocket watch that your grandfather used every day, pop it open to show the gears that turned the hands.

Photographing keepsakes can be very satisfying, and a great way to try and convey that object’s story, visually. This approach, of considering a subject’s story, works for all objects, not just ones of sentimental value.
Play away!
Those of you who have read any of my guides know that one thing I value in photography is the opportunity to play. Play, to me, is about experimenting and trying different approaches in your shots. Photographing objects in and around your house provides opportunities to really have fun and learn.
I find that getting creative with lighting, using shadows and reflections, and experimenting with high and low key can be very rewarding to me as a photographer. It can pull you out of a photography slump and recharge your batteries.
I tend to shoot in themes. For example, I might spend a week focused on tools. Then I will photograph soap bubbles. Then I might use reflective surfaces to create some interesting images. Do what works for you, but don’t be afraid to let those creative juices flow.
I often use daily or weekly themes from online photography groups to guide my creativity.

One week, while photographing glass objects around the house, I discovered what an amazing affect colored LED lights had on the subjects I was photographing. It made a clear glass insulator into something “otherworldly” (image above) and prompted me to try using colored LEDs in other photos.
- Key Lesson: Use point of view, lighting, reflections, shadows, or anything else to showcase your subject in a new and interesting way. If you “accidentally” learn something about composition or your camera’s settings while doing so, then you are improving your skills, building a mental tool kit for future photos.
- Recommended Reading: If you want to improve the way you see things and create better images, grab a copy of Photzy’s bestselling premium guide, Powerful Imagery, by award-winning photographer Mitchell Kanashkevich.
-
Shooting Exercise
1. Create a themed list of items around your house that you can photograph.
For example:- Tools – nuts, bolts, wrench, hammer, screw driver, pins, nail clippers
- Electronics – plugs, keyboard, stereo dials, CDs, remote control
- Cosmetics – Q-tips, brushes, cotton balls, nail clippers, tweezers
- Self-Check Quiz
- When starting in photography, you should read a lot, ask questions, and most importantly, ____________________.
- Light can have a huge effect on the appearance of texture in photographs. How should you position your light to make textures pop?
- When photographing everyday objects, try to get __________________, change your ______________________, or ________________ the objects to get a more creative and interesting shot.
- List three advantages to photographing everyday objects from your home.
- When shooting close-up shots of an object, it is important to stabilize your camera by using a ________________.
- Kids and photographers learn through _________________, so be sure to have fun while you learn and grow as a photographer.
- True or false: Developing your “photographer’s eye” is a process that can require practice and time.
**Editor’s Update: If you want more, you can Get 5 Extended Case-Studies on ‘Making the Ordinary Extraordinary’ With these extra case-studies (35 pages) you’ll dive much deeper into specific situational examples. Not only will you learn from these, you can ethically ‘steal’ from them, to form your own unique ideas. A perfect addition if you want to get straight to the key points faster. If you missed out on your set last time, they’re available again on sale for only $7 right now (80% off limited time deal) Plus it includes free shooting challenges, and self evaluation questions, designed to push you outside your photo comfort zone. Grab your case-studies for $7 here →
📸 Thank you very much for your support, hope you have an awesome week! Visit the Marketplace Deals for more in-depth photography training.


