

We’ve all seen some wonderful winter landscapes – the clouds and snow are just right and the subtle blueish tones send a chill down your spine. Or maybe there’s a cabin at the end of a row of pine trees with bows covered by an impossible amount of fluffy snow.
Whatever your favorite winter scene, this guide is going to walk through the basics of creating and editing a winter landscape.
Specifically, we’re going to cover the following:
- What makes a good winter landscape?
- The challenges of shooting in the winter
- Compositional considerations when framing your photo
- Exposing to snow and working with cool tones
- Editing your photo
- Saving your settings as a preset
Let’s get started!
Recommended Reading: If you’d like to learn more and improve your landscape photography, grab a copy of Photzy’s bestselling premium guide: Complete Landscape Photography.
What Makes a Good Winter Landscape?
Good winter photograph is highly subjective, but there are some common themes:
- The image tonality evokes the feeling of being cold
- They utilize snow to simplify complex landscapes
- They add texture and shapes where none normally exist
Your best bet, as with any photography outing, is to shoot during the golden and blue hours of the day. During these times, the sky will provide some necessary color in a mostly white landscape. Depending on the situation, you can sometimes create some wonderful images in the middle of the day. If the skies are clear, you may experience some harsh light that comes with hard shadows, but a partly cloudy sky could add some nice drama.

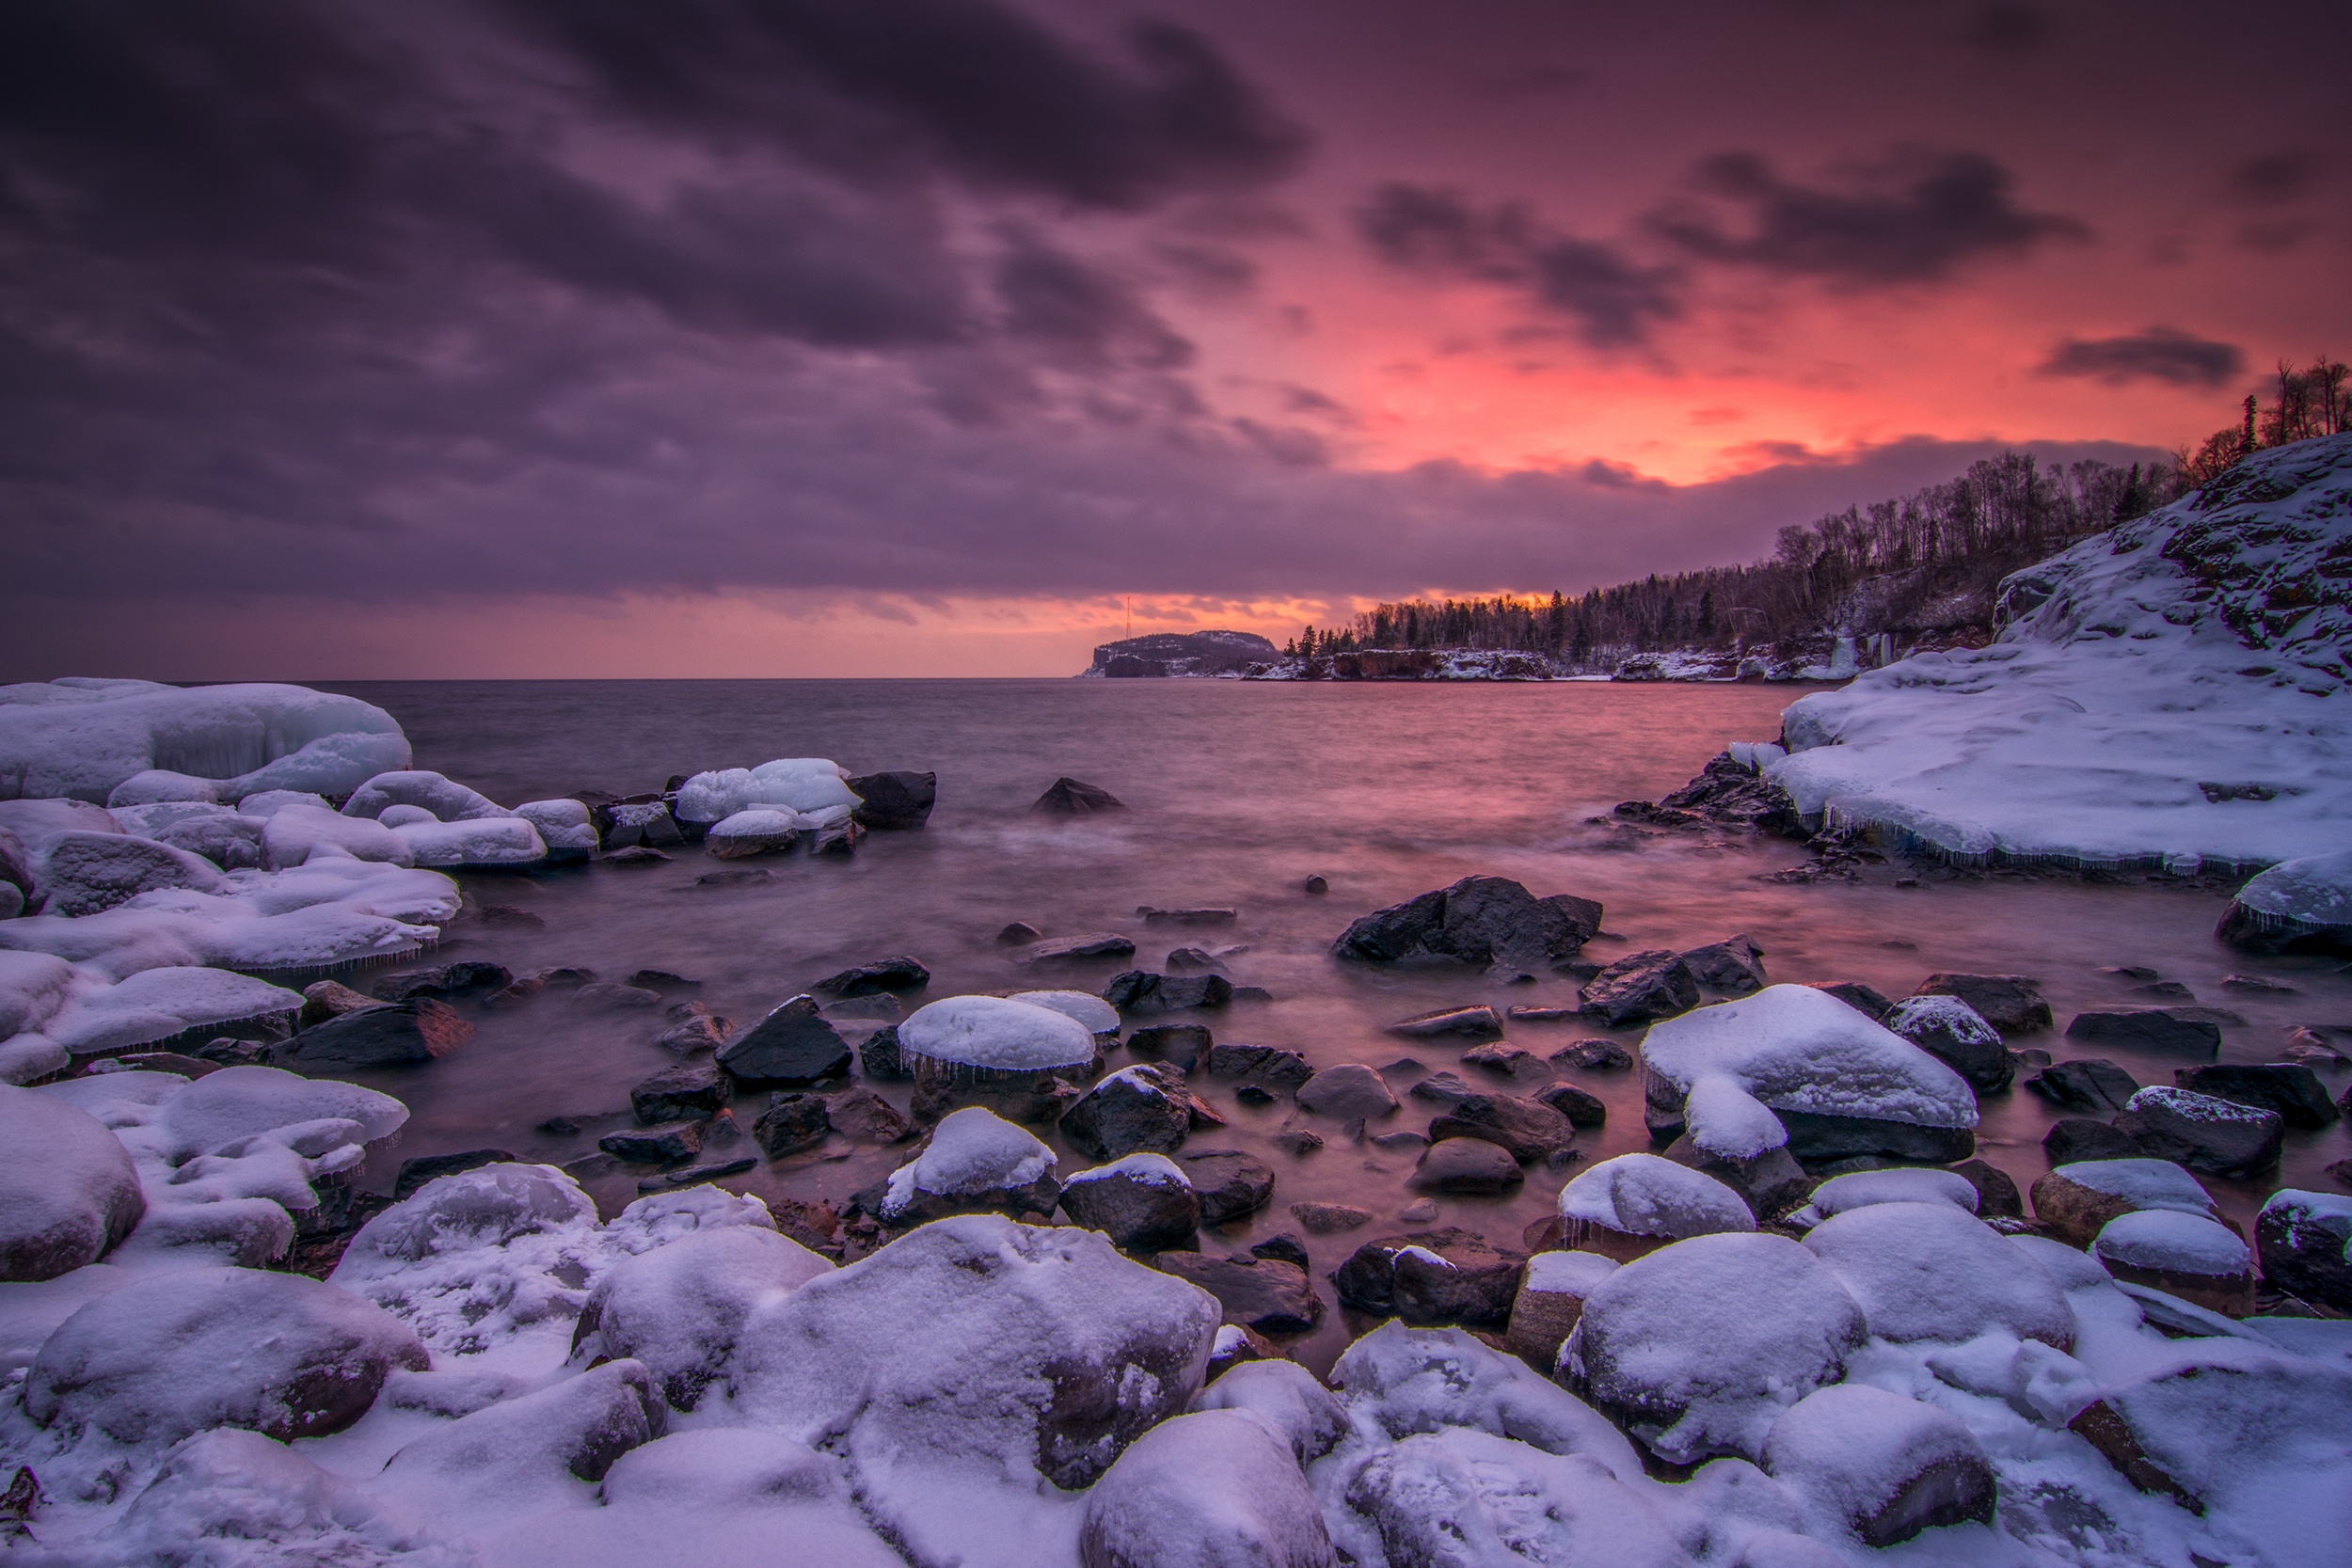
Cool dawn tones, calm Lake Superior water, and small icebergs create a feeling of cold serenity. Photograph by Tomas Alvarez
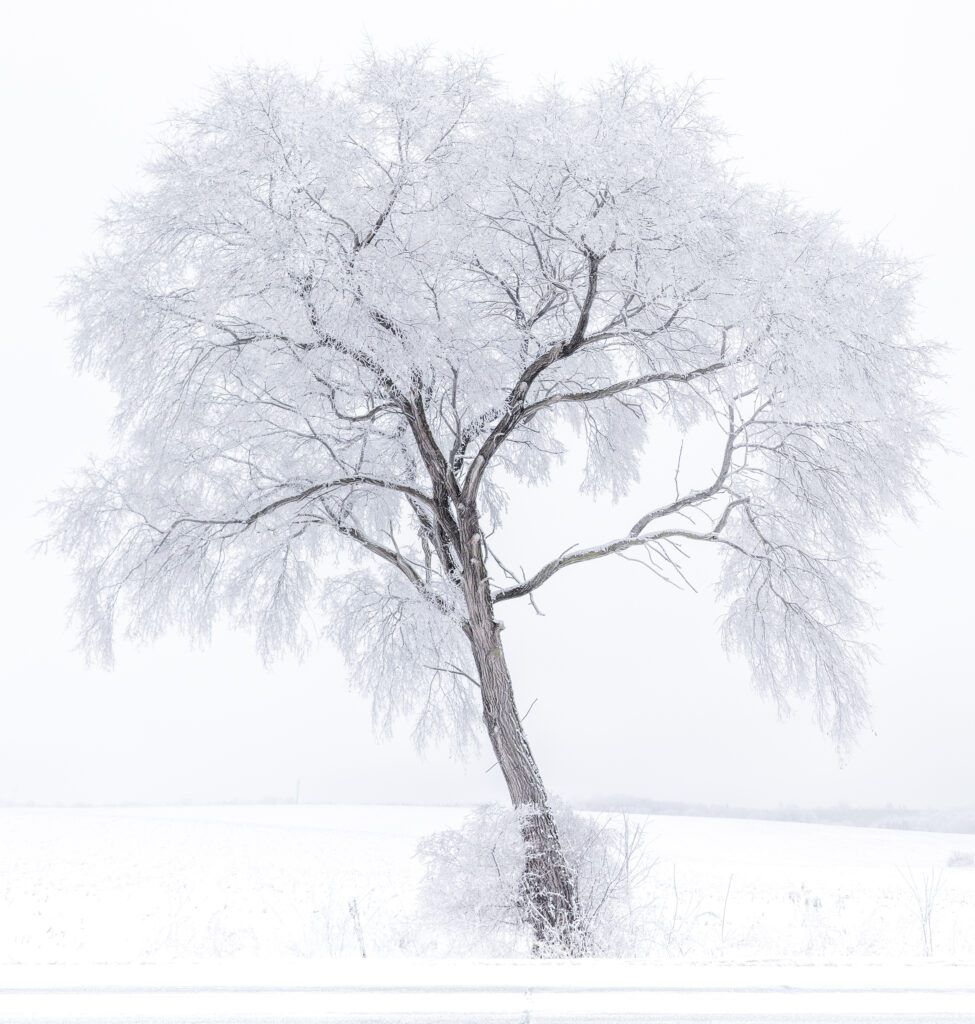
Rime-ice-covered limbs provide a nice contrast against the trunk and main branches of this tree. Photograph by Tomas Alvarez
Challenges of Shooting in the Winter
Photographing winter landscapes is equal parts opportunity and know-how. Winter also provides its own set of challenges: extreme cold is difficult to work in, and landscape features are constantly changing.
A few weeks ago, I saw a video on social media of a waterfall that had not completely frozen and thought it would make a wonderful photograph. I knew I had to act quickly as the temperatures in that region were steadily dropping, and eventually, the falls would freeze solid. This particular waterfall is located in a park that is two hours from my home, which meant I had to commit five hours for the excursion. Because of the potential for freezing, I went out to create the image the following morning.
The story above is just an illustration of how sometimes you have to act quickly to create the image that matches the vision in your head.
Key Lesson: Winter landscapes can change literally overnight. Be prepared for the weather and the need to act quickly to take advantage of conditions.
Compositional Considerations
When you have arrived at your location, look for compositional elements to keep in the frame and elements to exclude.
Your best bet, as with any photography outing, is to shoot during the golden and blue hours of the day.
The complexity of your subject will determine the aperture you use. For instance, if you are photographing a tree with frost or snow-covered limbs, I would suggest an aperture of f2.8, or wider, to keep the main subject sharp and soften the rest of the image. Because you’re shooting close to wide open, other objects in your composition will be out of focus, or seem out of place, and may distract from your subject.
If your subject is more like pancake ice on a partially frozen lake, using a more closed aperture is suggested to add more depth to the image. Some items will be out of focus, but because of the bigger focal plane, you’ll want to be aware of all the objects in your composition that could be distracting.

Photograph by Tomas Alvarez
Key Lesson: Scan all the objects in your image frame and make sure they don’t distract from the subject.
Exposing for Snow
To reduce the editing process, it’s imperative to get our image exposed properly in-camera. Because we need to control all the parameters of the exposure, we’re going to start by switching the camera to Manual mode. The rest of the changes are below.
White Balance
Setting white balance can get tricky if you are shooting at sunrise or sunset because of the additional color in the sky. If that is the case, I’d suggest using a white balance you normally use for that time, or Auto. If you are shooting in normal daylight, I suggest setting a custom white balance of 6000K-6200K. This temperature range will ensure cool tones in the image.
Aperture
I suggest keeping the aperture on the wider end. Anything wider than f/5 should provide the desired outcome. A wider aperture will keep the image on the softer side while keeping your subject sharp.
Shutter Speed
We will be using your camera’s built-in light meter to determine our shutter speed. Frame up your shot and dial in a shutter speed so that your camera meters to zero, which is the center of the light meter. Now that we have a properly exposed image, we’re going to adjust the shutter speed again to slightly overexpose the image. I like to overexpose a stop to a stop-and-a-half. Using the shutter speed dial, turn it until the meter indicates a 1 to the right of the zero. Review your histogram to make sure you are not clipping highlights.
And Shoot!
Now that we have the proper settings dialed into the camera, it’s a good idea to create a few images, change your composition, and try a few more. After each shot, review your image and make sure your subject is sharp and your images appear close to the look you are intending to create. Adjust the above settings as necessary.
Key Lesson: Manually setting up your camera will give you better image results and require less post-processing.
Recommended Reading: If you’d like to learn more and improve your landscape photography, grab a copy of Photzy’s bestselling premium guide: Complete Landscape Photography.
Editing Your Image
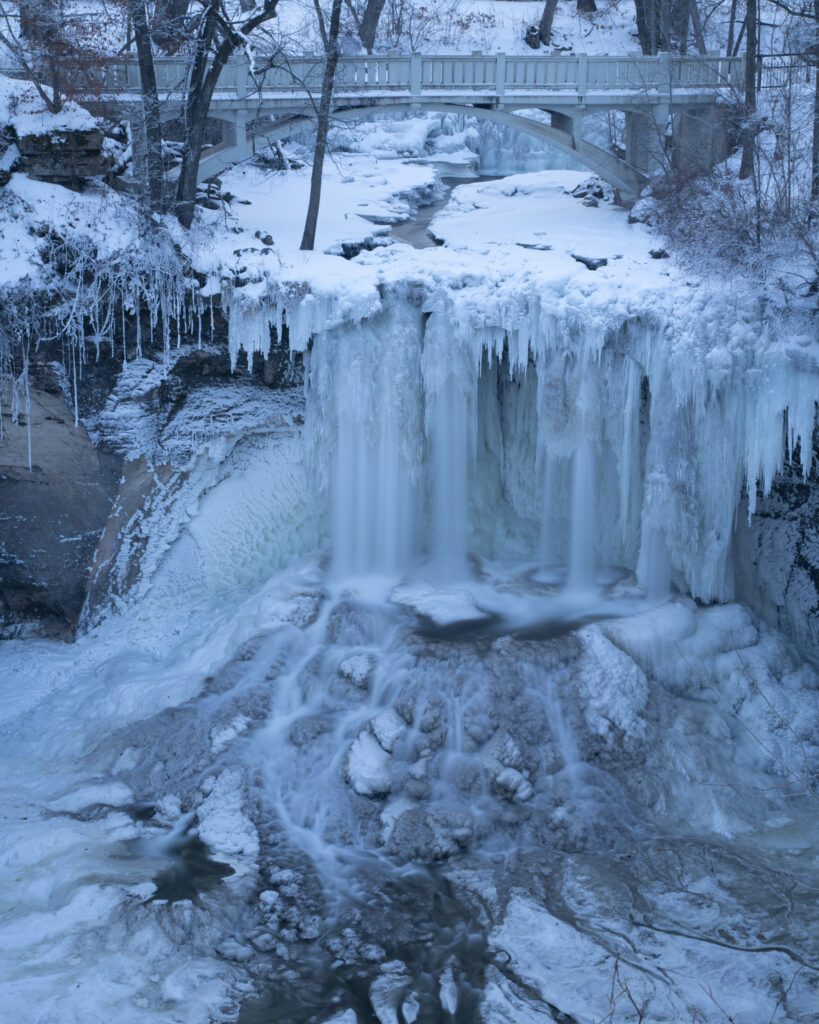
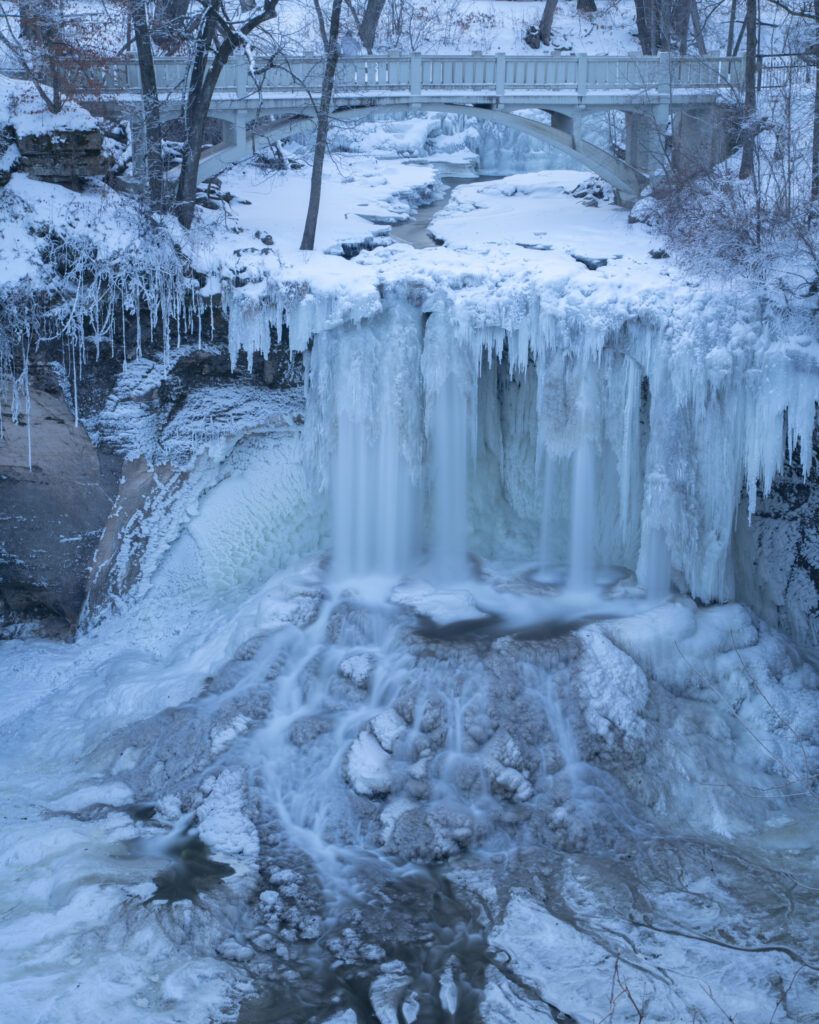
Now that we have a good base to start from, let’s look at editing your image. As we walk through the editing process, I’m going to use the waterfall image I mentioned above.
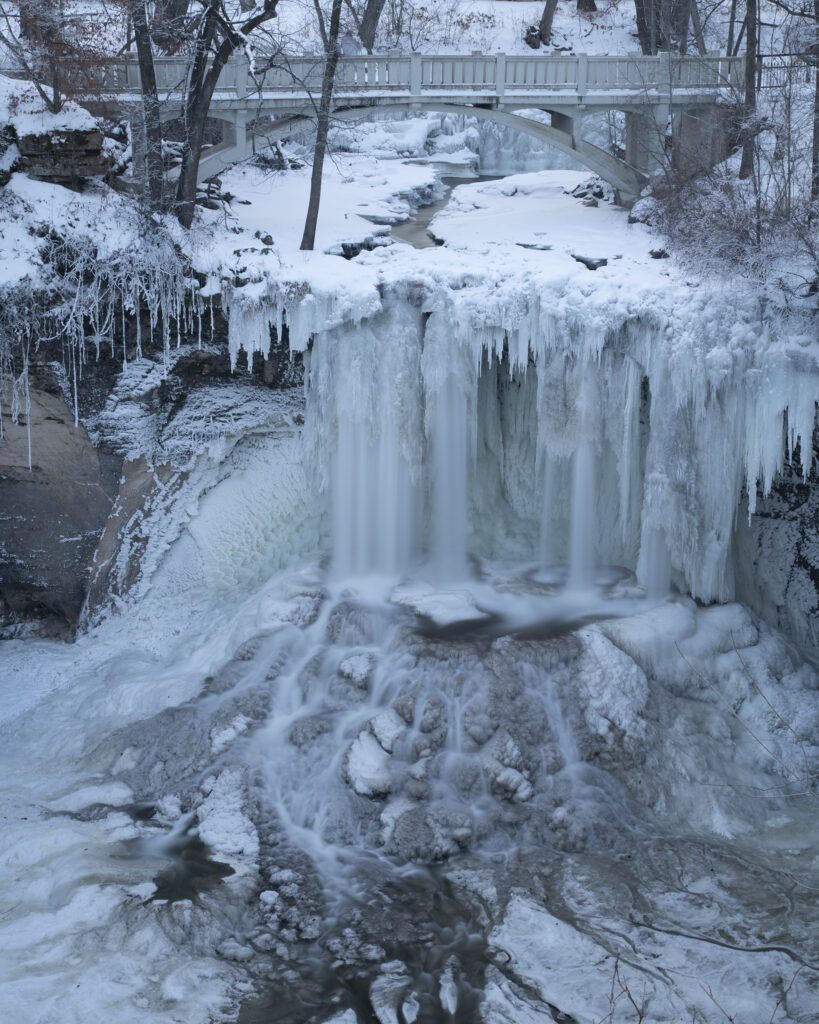
Minneopa Falls. Photographed using an ND1000 filter, with a 20-second shutter speed. Photograph by Tomas Alvarez
White Balance
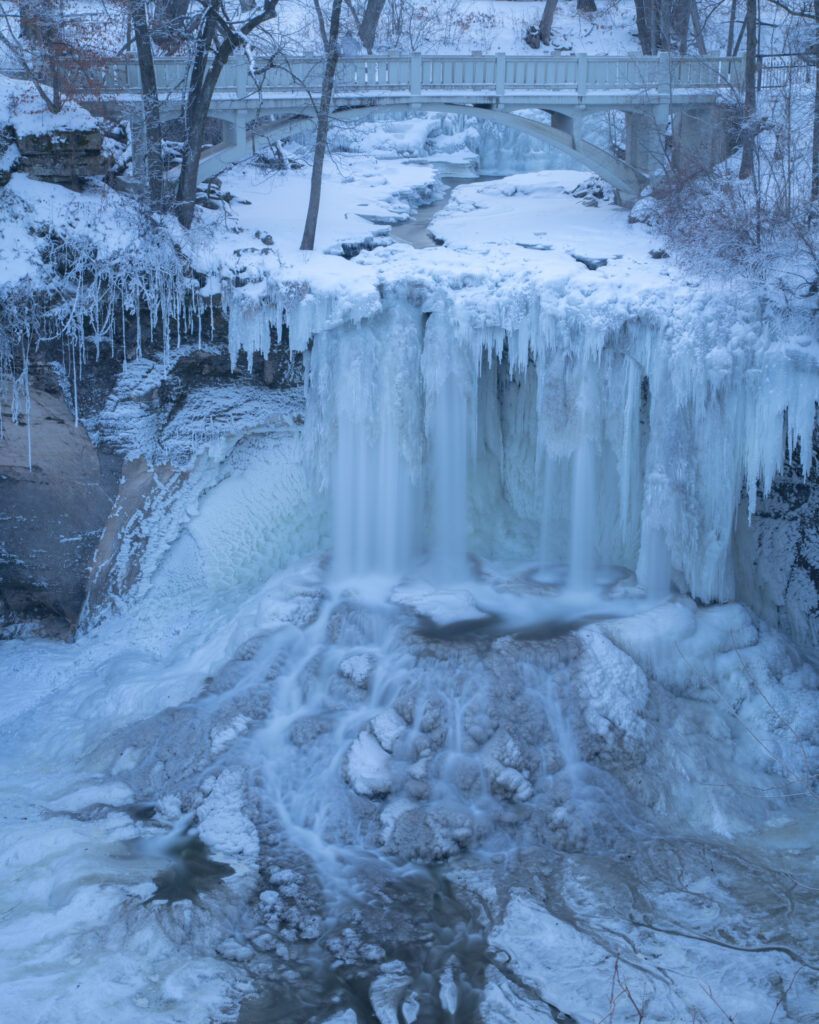
This is typically the hardest setting to get right. If you were able to set your white balance to the recommended setting of 5500K to 6500K, then you should be in the ballpark. Slide the White Balance setting to the left (the cooler side) until the image starts to turn blue.
Cooler tones were added after the white balance adjustment. Photograph by Tomas Alvarez
Slide it back to the right to dial in the cool tone you like. You should have also seen the white areas of the image become “whiter” as if viewed in daylight.
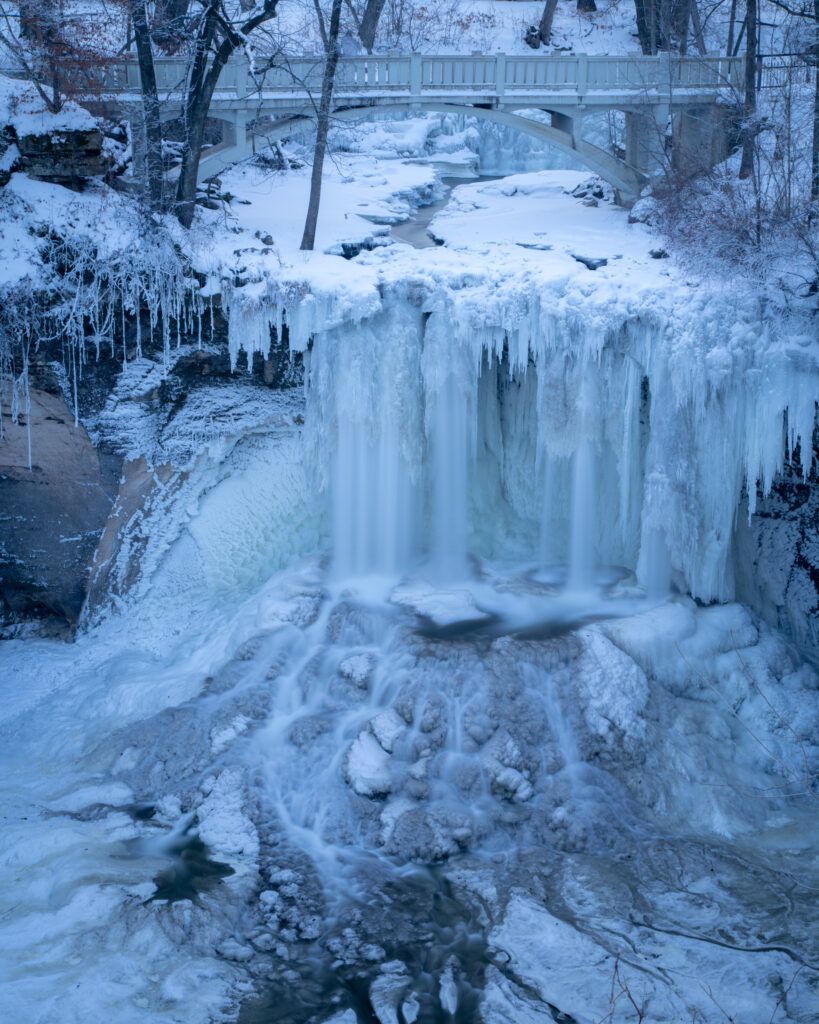
Exposure, Highlights, and Whites
It’s easy to go too far with the exposure of snow, blowing it out to the point of no detail. As you process your image, it is imperative, especially if you intend to print your image, to check if you have any pure white areas that need adjustment. The quickest way to do this is to check for clipping on the right side of the histogram.
After Exposure, highlights, and whites adjustments. Photograph by Tomas Alvarez
Set your desired exposure and highlight adjustments. I suggest you check the Whites adjustment by holding down the [OPTION] Mac/[ALT] Windows key as you move the Whites slider. In this mode, you will be shown any areas of the image that are, or are approaching, pure white. Adjust the exposure as high as you can without any pure white areas.
It’s easy to go too far with the exposure of snow, blowing it out to the point of no detail.
The [OPTION]/[ALT] key mode also exists for the Exposure and Highlights sliders. You can visualize your adjustments there, too.
Softening the Image
Because we’re trying to keep things ethereal, we want to soften them. To do that, we’re going to do the opposite of what we’d normally do, and that is to add in some negative global adjustments. There are multiple elements you can change to soften your image. For this process, we are going to adjust the three main ones: Contrast, Clarity, and Dehaze.
Contrast
My starting point for softening images is setting the contrast adjustment to -20. This adjustment reduces the color and tonal contrast in the overall image. This is the lowest I recommend you go for negative contrast. Adjustments are lower than this muddy the image. Adjust the contrast slider up as needed.
Clarity
Set the clarity slider to -10. This adjustment softens hard edges from objects in your photograph. Adjust sparingly. For subjects with hard edges, like sheets of ice or icicles, I suggest you slide clarity down only to -5. This will still give you some softness without a total loss of clarity.
Dehaze
We’re going to add some haze by setting the Dehaze adjustment to -10. This has the same impact as having a Pro-Mist filter on your lens. Combined with the above two settings, the small amount of added haze works to blend the image.
After softening with negative Contrast, Clarity, and Dehaze. Photograph by Tomas Alvarez
Key Lesson: Use negative values for clarity, contrast, and dehaze to soften your image. A little can go a long way, so use negative values sparingly.
Fine-Tuning
As you process your image, you’ll find that you need to increase and decrease some adjustments to fine-tune your final product.
My final image. Photograph by Tomas Alvarez
]We’ve covered the basics here, and there are plenty of other adjustments, like split-toning, that you can experiment with to get the look you are after. For my image, I fine-tuned the image softness to -8 Clarity, -8 Dehaze, and -5 Contrast. I added a little Vibrance (+8) and Saturation (+6). I also adjusted the Blacks to -30 and added a light vignette.
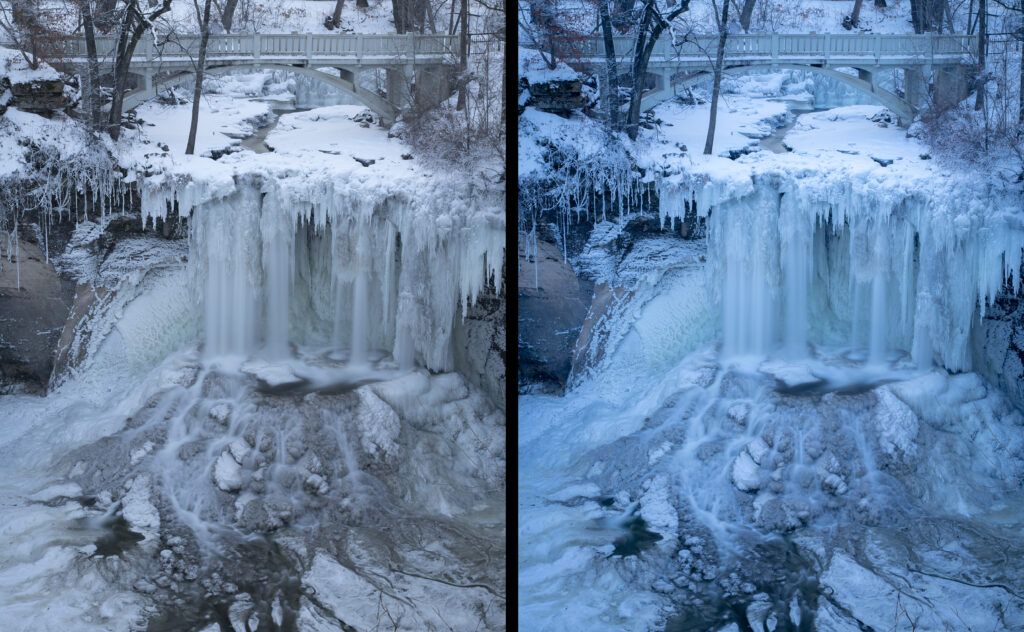
Here is a ‘before’ and ‘after’ view. Photograph by Tomas Alvarez
Now that you’ve done all that work, let’s save those settings to a preset so you can make all of the same changes with the click of a mouse.
Creating a Snowy Landscape Preset
Presets save time and energy, giving you more of both to be out making new photographs. Creating a new preset is very easy, but I have a few recommendations of settings to avoid to keep your presets as generic as possible.
- Create your preset by clicking the plus button at the top right of the Presets panel on the left side of Lightroom.
Screenshot by Tomas Alvarez
- Click Create Preset.
- Give your preset a name like “Winter Landscape” and select a group. You can also create a new group by selecting that drop-down option and providing a group name.
- Click the Check None button at the bottom of the screen. All the items should now be unchecked.
- Now, we’re going to check only the changes we made. Because image exposures can generally vary, I don’t suggest checking the exposure option. If you made additional changes, check those boxes along with the adjustments below:
- White Balance
- Contrast
- Clarity
- Dehaze
- Process Version – necessary for newer versions of Lightroom
- Click the Create button.
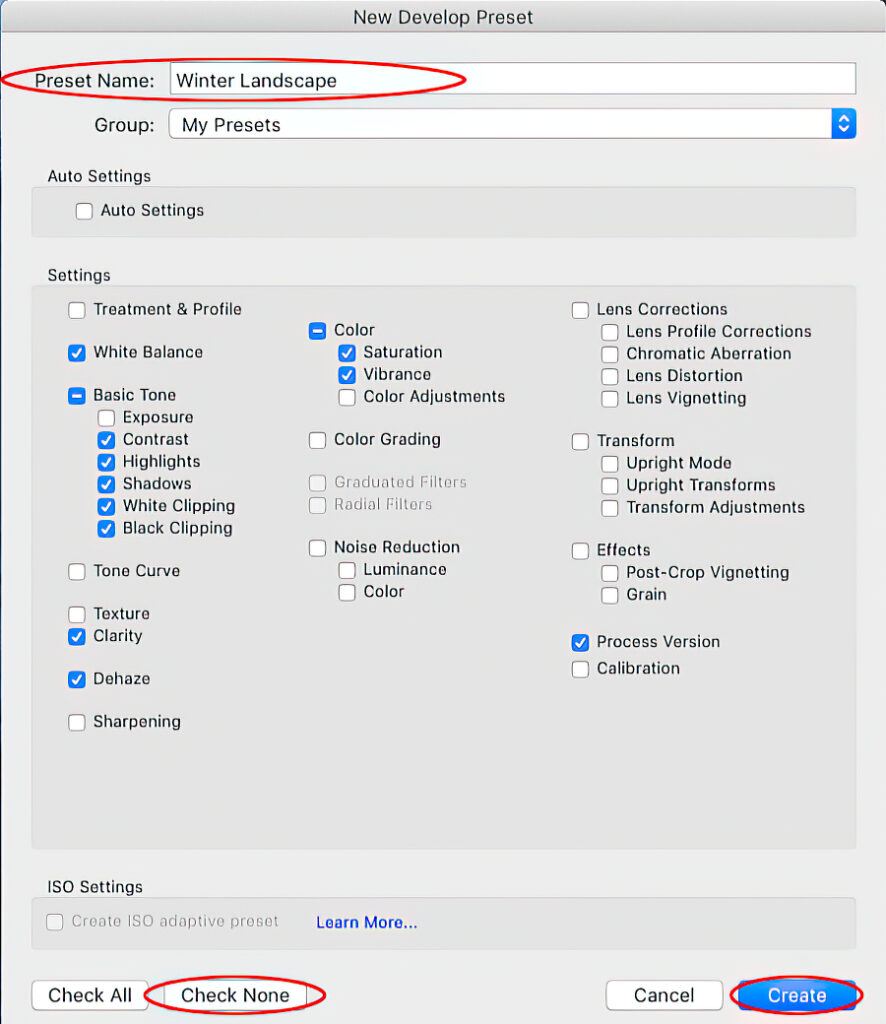
Screenshot by Tomas Alvarez
That’s it! Using your new preset, you can now make all of your changes quickly to a single image or multiple images at a time. I find that using presets speeds up my processing time considerably.
Recommended Reading: If you’d like to learn more and improve your landscape photography, grab a copy of Photzy’s bestselling premium guide: Complete Landscape Photography.
Final Thoughts

Photograph by Tomas Alvarez
Winter landscapes can be challenging, but they are worth experiencing and photographing. Working with your camera to obtain proper exposure will take some practice, but once you’re dialed in, it becomes a very simple process. Through editing, you can correct most of the issues you may experience and push your images into the magical realm. Having a preset at your disposal will give you more time to be out in nature, rather than in front of the computer – unless it’s freezing outside and you’re sipping hot chocolate at your desk! Then, by all means, stay inside and enjoy yourself. Happy shooting.
Self-Check Quiz:
- Which is the best camera mode to use for winter photography?
- Name some of the settings you’ll need to change for a proper winter exposure.
- What are some of the challenges of winter photography?
- What adjustments can be made to images to soften their look?
- How can you validate that you didn’t blow out the highlights in your image?
- How can you increase your post-processing efficiency to get similar results?


