


Wherever you live in the world, you’ll probably find that there’s woodland or forest near to your house (or even just a small patch of trees!). Forests offer a multitude of photographic opportunities, but they’re not usually the first place people associate with landscape photography. Most people think that you need to go to an iconic location or find a landscape with wide-open spaces, but woodlands can offer opportunities for creative and unique images.
In this guide, I’m going to discuss the knowledge you’ll need to create magical forest pictures. Here’s what we’ll cover:
- What gear will you need?
- When to shoot
- Creative techniques for forest photography
- A note on verticals
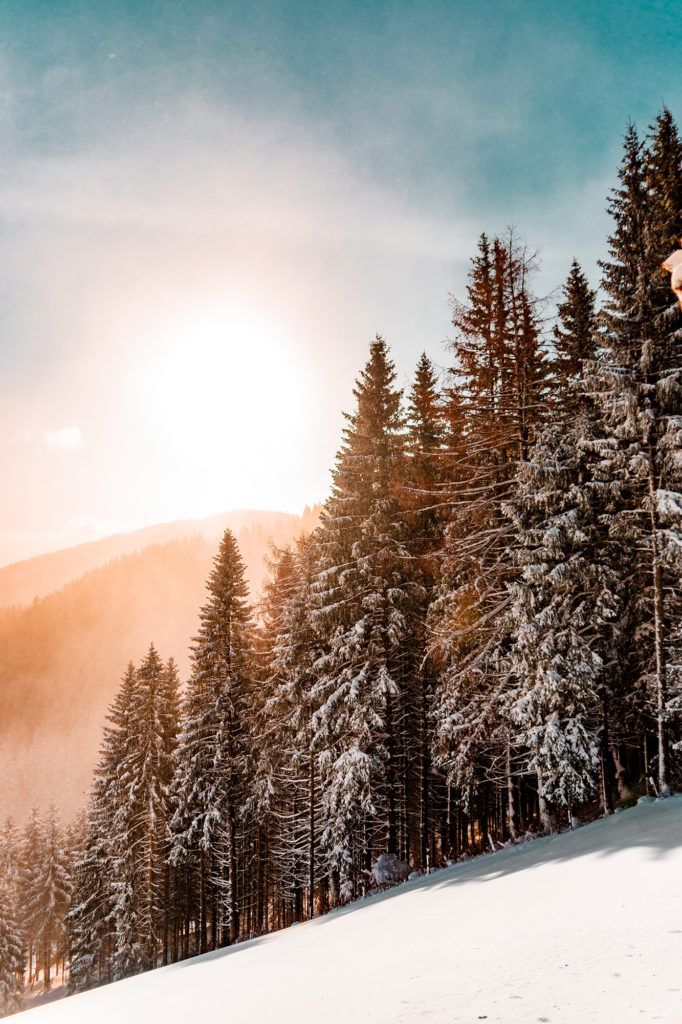
No matter the weather or the time of year, forests always provide exciting shooting opportunities. Photograph by Daniel J. Schwarz
Recommended Reading: If you’d like to learn more and improve your landscape photography, grab a copy of Photzy’s bestselling premium guide: Complete Landscape Photography.
What Gear Will You Need?
As with many photographic projects and genres, you can always make a start with the kit you have available. But these are the things that will make the job a lot easier!
Firstly, you’ll get the best results with a camera that allows you to use interchangeable lenses. I’m a firm believer in investing your money into lenses rather than camera bodies. Good glass outweighs a newer camera for me every time! If you shoot any landscape photography, you’ll probably already have a wide-angle lens, and this is undoubtedly an essential item in your kit for forest photography. You might, however, be surprised to learn that a telephoto lens can also be extremely useful in woodlands. A 70-200mm lens will give you some really creative options.
I’m a firm believer in investing your money into lenses rather than camera bodies.
You will be looking at long exposures for forest photography, as the canopy of the trees and thick foliage will block a fair amount of light, so a tripod is essential. In conjunction with this, you’d be best off releasing the shutter with a remote trigger (you can use the camera’s self-timer, but you run the risk of slight camera shake).
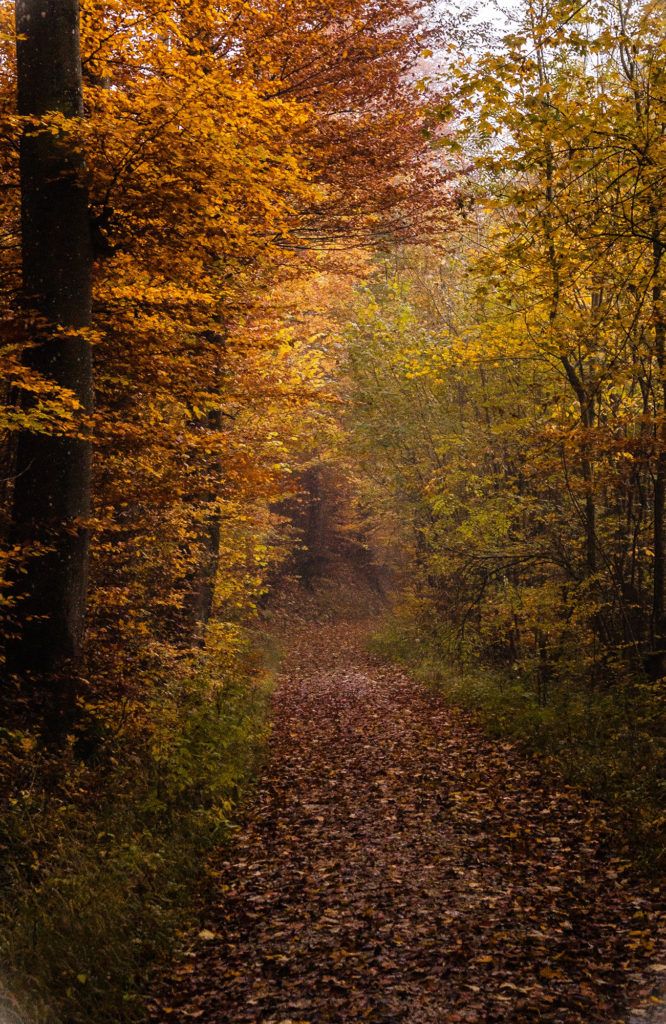
Leading lines and autumn colors are always a perfect combination. Photograph by Kajetan Sumila
Key Lesson: Anyone who photographs landscapes regularly will have these filters in their bag, and they’ll certainly come in very handy in forest photography. A circular polarizer will reduce glare from any damp foliage, make colors more vivid and help to add color contrast. Neutral Density filters (both solid and graduated are extremely useful) allow you to get longer exposures without overexposing either a part of the whole of a shot. They also give you numerous creative possibilities with water and sunlight, allowing you to soften it for an ethereal look.
When to Shoot
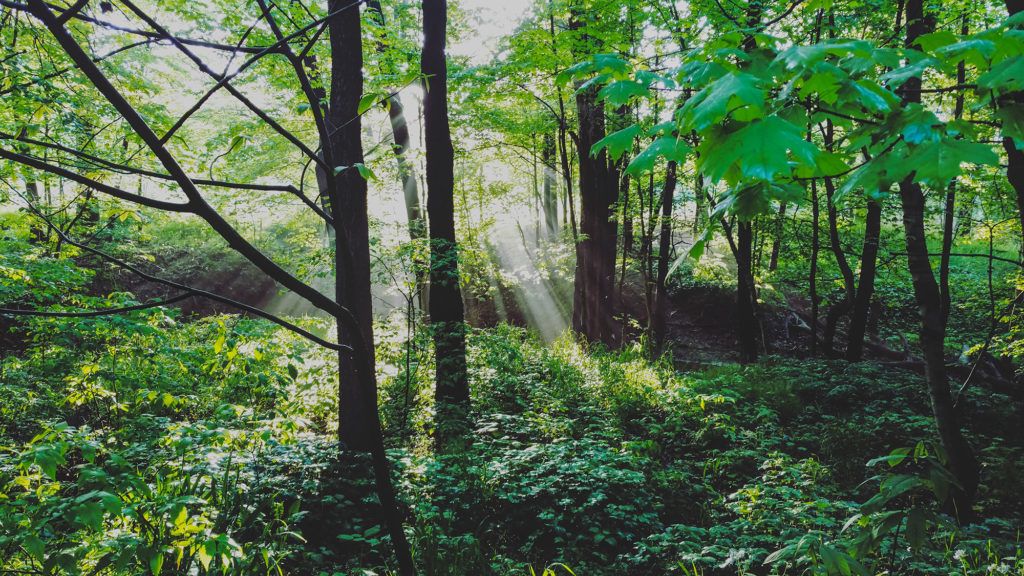
Look for shafts of sunlight coming through the trees to create depth and interest in your shots. Photograph by Srikanth Peetha
Forests are surprisingly forgiving when it comes to shooting conditions. Dull skies, bright midday sun, and overcast weather can still work when you’re in amongst a canopy of trees.
Whilst people often associate landscape photography with spring and summer (and you can, of course, get stunning woodland photos in those seasons), I actually think that autumn and winter lend themselves particularly well to forest images. Autumn is a season that’s intrinsically linked with trees. The golden and red colors of the changing leaves provide a natural palette for the camera and, combined with shafts of sunlight filtering through the trees, offer multiple chances for beautiful photos.
However, I think that winter is often an underrated season when it comes to forest photography, particularly if you live somewhere where you’re lucky enough to get snow! The mix of pine trees and fresh snowfall offers a clean juxtaposition between the two prevailing colors, leading to eye-catching images. Winter also offers plenty of opportunities without snow. Frost and early morning mist can work well with the bare deciduous trees for atmospheric results. Winter also offers the chance of clear night skies so that you can capture the combination of trees and a clear starry sky.
Creative Techniques for Forest Photography
There are endless ways to photograph in forests and, as you become more confident, I’m sure you’ll think of plenty to add to this list. But here are some ideas to get started with.
Understanding the Available Light
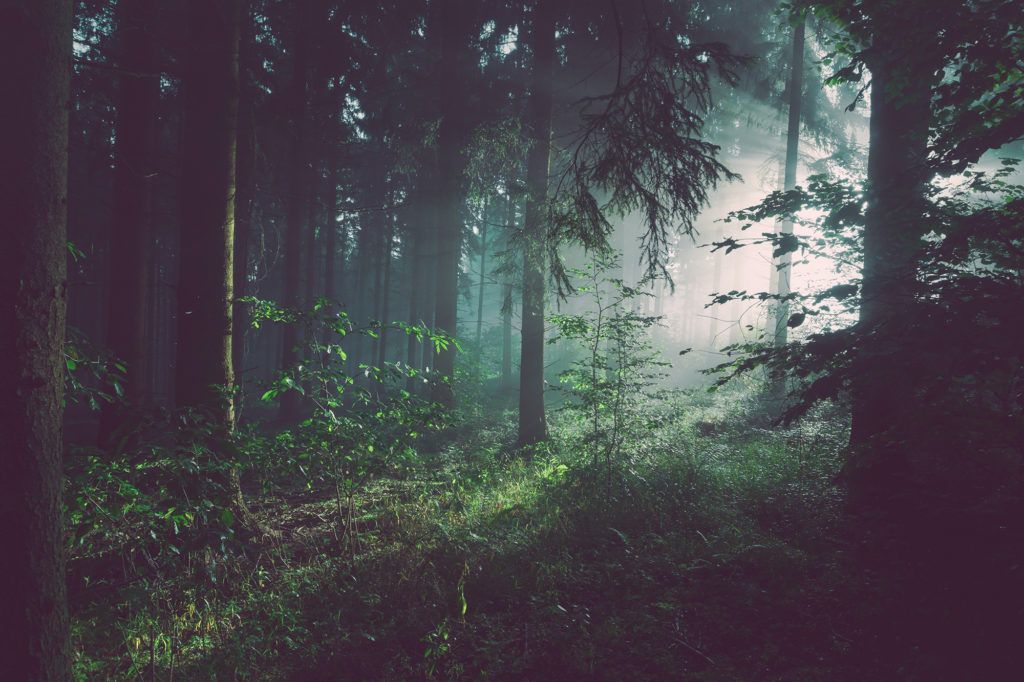
Take care to allow a long enough exposure to cope with the reduced light coming through the dense foliage of the forest. Photograph by Sebastian Unrau
Photographing in the depths of trees means using light in a slightly different fashion to the way you’d shoot out in the open. In some ways, forest photography is more forgiving of unattractive lighting conditions. Take, for example, the harsh midday sun. With the hard shadows that it creates, this is usually a time that photographers stay indoors for! But in the forest, you can use the strong rays of light filtering through the trees in the cooler areas of shade to create beautiful pictures. Gray skies are also not the natural choice for landscape photographers, but under a forest canopy, the clouds start to act as softboxes, softening harsh light, reducing shadows, and leaving the foliage with a soft glow. It goes without saying that the golden hour provides, as always, great opportunities for gorgeous images!
Shooting With Winter Moonlight
A full moon can cast a surprising amount of light, making it an ideal tool to use for dramatic forest imagery. You do need to find fairly open woodland, as a densely packed area of trees will struggle to allow any light through it. You can choose to shoot the trees with the moonlight and stars behind them or shoot upwards into the night sky with just the tops of the trees showing. (N.B. If you’re going to attempt this sort of photography, make sure to wrap up warm as you’re going to need long exposures to get enough light into your shot.) But what if the night light is dim or slightly overcast? In this case, you could think about shooting a silhouette of trees against a backdrop of the sky.
Use a Shallow Depth of Field

Dull, gray, and misty skies can lead to interesting photographs in woodland, where the light can actually play to your advantage. Photograph by Artur Rutkowski
I bang on and on about using a large depth of field to shoot landscapes, so it seems counter-intuitive to suddenly start suggesting using a smaller depth of field! But you can use the combination of a telephoto lens and a small depth of field to highlight specific areas of the forest, with the soft trees in the background providing a pleasing background. Additionally, a small depth of field can work well if you’re shooting a section of woodland with mist or sun coming through the trees. The blurred background will help to ensure subject separation and ensure that your viewer’s eye is drawn to the front of the shot.
Black and White
Black and white can produce stunning forest images, and the best thing about digital photography is that you can shoot in color and then experiment with black and white in post-production. However, if you are thinking about converting your shots to black and white, you do need to learn to ‘think’ in black and white. The best black and white imagery have plenty of strong contrasts of light and dark so that these will translate into a combination of black, gray, and white tones. It’s worth noting as well that black and white can be very forgiving of hard shadows, with the solid black creating a stark effect that eliminates distractions.
Try Different Viewpoints

Sometimes you don’t need to try and fit a whole forest scene into your shot. Picking out small, vibrant details and using a small depth of field can lead to unusual takes on a woodland. Photograph by Aaron Burden
As with most landscape photography, the obvious shot will always be to try and capture an entire vista in one shot. And this can work extremely well in forests where you can capture the sheer grandeur of the trees in your photo. But you don’t just need to photograph forests at eye level! You could think about shooting upwards from a low angle to emphasize the size of the trees or even experiment with drone photography to get a feel for the sheer size of forests from an aerial view.
As with most landscape photography, the obvious shot will always be to try and capture an entire vista in one shot
Of course, you don’t need to try and capture everything in one shot. Sometimes there can simply be too much to try and cram into one image and it’s best to look for small and interesting details to focus on. Picking details out of a forest can also really help to tell a story and create a shot that will get viewers thinking about it.
A Note on Verticals

When you’re shooting trees, you need to be aware of your verticals and perspective. You will find that your trees start to ‘lean’ in a little the higher up they go. So, how do you get around this? Well, you could invest in a tilt-shift lens with bellows that will allow you to correct the perspective on-site. But these lenses have a pretty hefty price tag! For a cheaper alternative, use a telephoto lens and crop into part of the trees to help keep things straight. Alternatively, if you’re shooting with a wide-angle lens, make sure to shoot your scene with extra space around it. This means you’ll have room to correct your perspective and straighten your verticals in post-production.
Recommended Reading: If you’d like to learn more and improve your landscape photography, grab a copy of Photzy’s bestselling premium guide: Complete Landscape Photography.
Conclusion
I think forests are really underutilized when it comes to shooting locations for photographers. A lot of us are more focused on the traditional landscape views: big skies, big mountains, and big seas. But forests can produce truly stunning imagery. And the best thing is that most of us won’t have to travel that far to find a patch of woodland to experiment in. You don’t need to go trekking into national parks to start experimenting with trees. Any small patch of woodland will give ample opportunities to start shooting in.
Self-Check Quiz:
- What filters should every landscape photographer keep in their bag?
- List two reasons why winter is such a good season for shooting in forests.
- How can you use gray clouds to your advantage in forest photography?
- Name one reason why using a small depth of field can work well in forest photography.
- How do you think’ in black and white?
- Name the three ways to deal with verticals in forest photography.


