

As the landscape gets swallowed by darkness and the lights come on, there’s something magical that happens. Trees and buildings fade into the shadows, and the lights in the street and sky make their presence known in the canvas that surrounds us. The beauty of the night is something to behold, but capturing that beauty on camera with little to no help from the sun is a tremendous undertaking. There are several things we can do to compensate for the lack of light, but choosing the right lens for the job is one of the most important, and more intimidating, tasks out there.
The beauty of the night is something to behold, but capturing that beauty on camera with little to no help from the sun is a tremendous undertaking.
To not get your hopes up, I’m going to say this right off the bat: I will not be recommending any specific lenses in this article. Every one of us has our own set of requirements, priorities, and preferences. The intention of this article is to help you decide what lens will work best as you shoot outside of daylight hours.
In this article, we’ll discuss the following:
- Things you need to consider before researching lenses
- Qualities to look for in a lens used for shooting in the dark
- How to choose a lens that will work for you
Where to Begin
There is a myriad of lens choices out there, and it can be overwhelming to wade through the list in search of your holy grail. Before turning to your search engine of choice, it’s important to consider a few things that will help you narrow down your options.
What Camera(s) Do You Own?
This is a simple question, but it eliminates a number of options right off the bat. It sounds obvious, but limiting your search to options for your camera system keeps you from wasting time researching lenses that won’t work. For example, if you shoot a full-frame Nikon DSLR, not only can you ignore lenses made for the other manufacturers’ bodies, but you can also ignore Nikon’s 1 NIKKOR and DX lines. (Yes, I know that DX lenses work on FX bodies, but why would you want to lose the benefit of the larger sensor when every photon is critical at night?)
What Do You Plan to Shoot With This Lens?
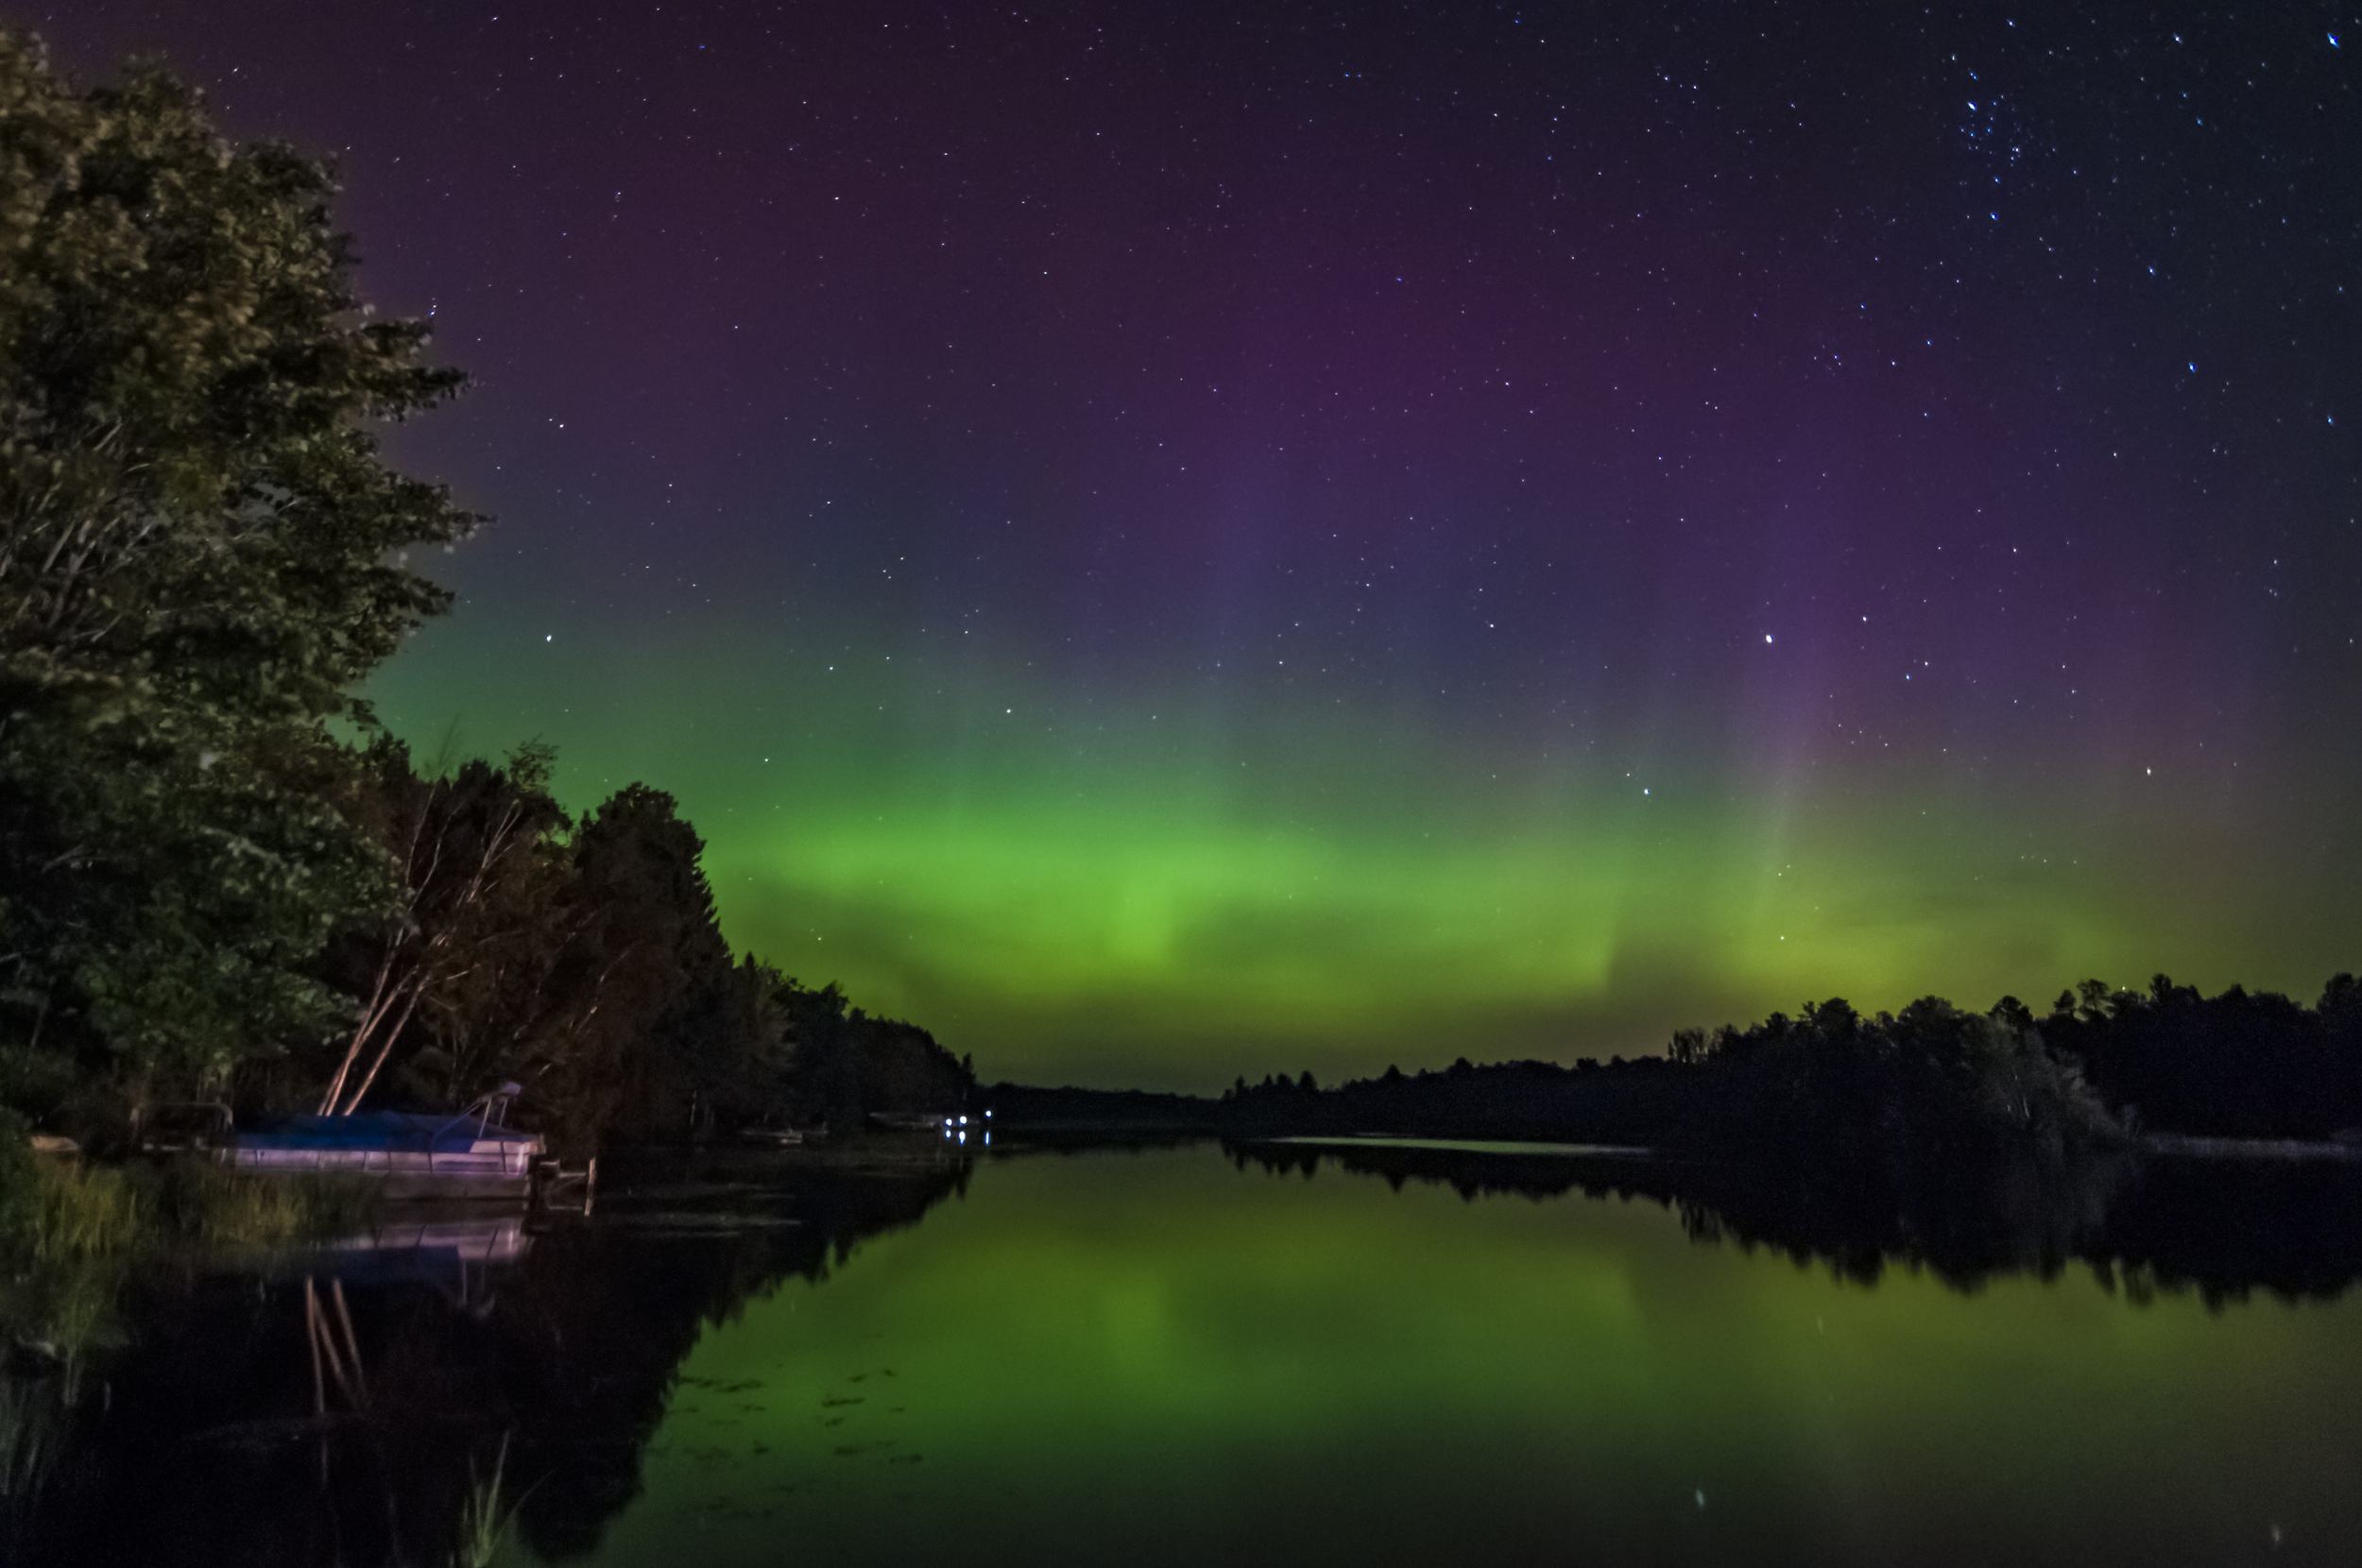
Night photography is a vast subject, so think about what you’re trying to photograph. If you want to capture a moonlit landscape, the Aurora Borealis or Aurora Australis, or the Milky Way, you’ll probably want a wide to ultra-wide lens. Individual constellations can often be captured with a wide to standard focal length. Close-ups of the moon require a telephoto lens, or even a small telescope! Whatever you wish to photograph, make sure you have a focal length that adequately frames your subject.
Also consider whether you might use this lens to shoot things in daylight or with artificial lighting. Some lenses that are great for night shots are manual focus only. Focusing manually in the dark can be easier than trying to use auto focus, so that’s fine. However, if you want to use the same lens in the daylight, auto focus can be a huge time saver.
Recommended Reading: If you want to learn more about how to capture amazing landscape photographs, take at look at Photzy’s best-selling guide, Complete Landscape Photography
What Is Your Budget?
This is another question that can narrow down your choices. If you’re like me and can’t afford the flagship line of lenses from your camera’s manufacturer, there are less expensive options out there. Many kit lenses are great for shooting night cityscapes, moonlit landscapes with star trails, or anything that doesn’t require stopping motion. There are also some more affordable prime and short-range zoom lenses with fast apertures from the major manufacturers. Don’t rule out third-party and/or used lenses. You must be a little more diligent to find a good copy when pursuing third-party or used options, but they can save a lot of money and still produce excellent results.

What Should You Look for in a Lens?
Name Brand or Third Party?
In the past, third-party manufacturers like Sigma, Tamron, Tokina, and Rokinon had reputations for having cheap lenses that didn’t perform very well compared to their Nikon and Canon counterparts. Well, the times have changed. The third-party players have upped their game and have produced some excellent lenses now. Sigma’s Art line and Tamron’s G2 lenses are highly regarded in the field. Tokina has been a steady performer with good alternatives to the camera manufacturers. In the last few years, Rokinon has put out some impressive fast lenses. The biggest knock on the third-party lenses has been quality control. If you can find a good copy of their lenses, you’ll have something that performs almost as well as a lens from Nikon or Canon. If you get a bad copy, well, hopefully you can exchange it for another one. It’s harder to go wrong with the camera manufacturer lenses, but even the big names have some bad lenses, so you still have to be careful.
Aperture
Photography is the recording of light to your camera’s sensor or film. When there isn’t much of the precious commodity around, you need to make every photon count. The best way to collect as much light as quickly as possible is to use a lens with a fast aperture and shoot it wide open. A wide aperture coupled with the highest usable ISO on your camera will result in the shortest shutter speed needed for a proper exposure. The smaller the f number the better; f/2.8 is often regarded as the benchmark for a fast lens, but there are many lenses that boast f/1.8 or faster.
The best way to collect as much light as quickly as possible is to use a lens with a fast aperture and shoot it wide open.
Of course, like all things in photography, there are tradeoffs. Depth of field is reduced as the aperture opens up. This isn’t too much of a concern with ultra-wide to wide focal lengths because infinity is only a few feet away from the camera’s sensor, and your subject is usually beyond that. It may become more of an issue when shooting with a standard to telephoto lens. Reduced sharpness is a bigger concern. All lenses exhibit some degradation when shot wide open. The center of the frame usually isn’t affected too much, but the effects are more pronounced in the corners. Pay attention to this and look for a lens that produces an image that looks good to you.
If you plan to shoot stars or the Milky Way, a fast aperture is crucial. You want the stars to appear as dots, not streaks in the image. Stars are always in motion and begin to streak after 10-30 seconds, depending on your focal length and sensor size. This is one area where you have to balance a fast-enough aperture with acceptable image quality. Remember, acceptable image quality is subjective.

If you shoot skylines, fireworks, or anything that doesn’t require stopping motion, you can get away with a slower lens. The photo above is an example of this. It was shot at f/11 to keep as much of the scene as in focus as possible, and a longer shutter speed was desirable to capture multiple firework bursts in one frame. I didn’t care that some of the boats were drifting since they weren’t my subject.
Recommended Reading: Want to have a better understanding of Depth of Field and how you can use it to improve your photography? Grab a copy of Photzy’s premium guide, Beautiful Background Blur
Flare Control

I know what you’re thinking: “The sun’s down, so why do I have to worry about flare?” The sun may be down, but lens flare can appear if you have a bright light source in or just outside of your image. Did you notice the weird blob above the lift bridge in the image above? That’s lens flare (and a poor attempt to smooth it out) from a street light that was just to the right of the frame.
Another type of flare that rears its head at night is coma flare. Coma flare is the phenomenon where point sources of light that should appear as a dot or circle, such as stars, get distorted into weird-looking blobs. This happens in the corners of the frame, but not the center.

This image is a crop from the corner of one of my images. The red arrows point to some of the worst instances of coma flare.

Almost all lenses suffer from coma flare, but there are a couple of ways to combat the issue. Stopping the aperture down about one stop is usually enough to make the issue go away. I know I said that you want the widest aperture you can get, but I also mentioned that everything has a trade off. This is no exception to that rule. If you have a lens that opens to f/1.8, you can stop down to f/2.5 or even f/2.8 to reduce the flare, but still be working with a fast-enough aperture for most applications.
Another approach to reducing coma flare is to use a lens that covers full-frame sensors on an APS-C sensor camera. The affected areas of a full-frame lens fall mostly outside of the smaller APS-C sensor’s view, so the worst flare isn’t recorded in the image.
Choosing a Lens
Now that we’ve discussed what to think about and look for, it’s time to choose a lens. For some applications, you may already have something in your bag that will work. If you need to purchase a new (to you, anyways) lens, the internet can be your best friend and worst enemy. If you do a quick search for “best lens for night photography,” you’ll end up with hundreds of results, with hundreds of different opinions.
Search through the lists and look for lenses that meet your criteria (camera make and model, aperture values, focal length, price, etc.) and that several sites seem to agree on. Make note of the ones that may work for you and then search for each of those models.

Photo by Aaron Seefeld
There are plenty of reviews for just about every lens ever made. Some lenses will get rave reviews from one site and trashed on another. Don’t let the mixed reactions discourage you. I like to read the technical reviews, but they put a lot of emphasis on lab tests and nit-pick every “flaw” a lens has. I tend to put more weight on the reviews from verified buyers on the camera store websites. I’m not a professional, so if a lens is good enough for 90% of those who own it, I’m sure it’ll be good enough for me. I still have to discern whether the lens meets my needs and wants, but I feel confident that the lens will perform well.
Some lenses will get rave reviews from one site and trashed on another. Don’t let the mixed reactions discourage you.
Once you’ve identified a couple of good options, read the reviews again and look for sample images taken with those lenses. If it’s feasible, visit a camera store and ask to see those lenses. Most places will let you try them out in the store if they have one in stock. Take a few test shots and check for the things that are important to you in regard to image quality. Be sure to take some test shots with the aperture wide open so you can get a better idea of what to expect if you were to use the lens in the field. It may be tempting to walk out of a store with a new lens in hand, but try to resist the urge, especially if you’re not 100% sure whether it’s the one for you.
Key Lesson: After doing so much research, it’s easy to feel a bit overwhelmed and not be sure what to do. Sit on it for a couple of days. Come back with a refreshed mind and re-visit your options. Start doing some price shopping from reputable sellers. Your head and heart may be telling you different things (mine sure did when I was going through this process a few months ago). Follow your heart, but don’t ignore your head. If your heart really wants a lens that your head says you can’t afford, be prudent and start saving up. If you really can’t wait, choose a more affordable option. Debt is not worth racking up over a hobby. If photography is how you make your living, you’ll have to consider the purchase from a business perspective.
Once you’ve decided on the lens you want, wait another day or two and make sure you still feel the same way. If you don’t, repeat the steps above. Once you’re set, make your purchase and enjoy the benefits of having the right tool for the job!
Recommended Reading: If you want to learn more about how to capture amazing landscape photographs, take at look at Photzy’s best-selling guide, Complete Landscape Photography

Self Check Quiz
- Why is it important to think about what gear you already have and what you intend to photograph before researching lenses for night photography?
- What should you look for in a lens used for photographing in the dark?
- True or false: A fast aperture is important, but can lead to problems with image quality.
- True or false: Third-party lenses should not be ignored when considering a new lens.
- Why is it important to wait and make sure you really want a particular lens before making the purchase?


