

Introduction
I remember a (quite long) spell in the beginning stages of my photography venture, during which the term ‘luminosity masks’ sounded like something very ‘upper class’ – something only ‘advanced’ photographers played with. Something I’d try out ‘one day.’
The reason perhaps for not trying it out right away was that I was still new to photography, new to Lightroom, and new to Photoshop. Way too many new things to master at the same time. The last thing I needed was another strange technique to learn and apply, and after all, I managed quite well without it.
Well, long story short: one day I realized that sometimes Lightroom’s shadow, highlight, and brightness adjustments simply lacked something extra to solve some of my problems, especially when I was testing my camera’s dynamic range borders. Then I vaguely remembered something about luminosity masks and decided to investigate it further. My life was never the same again.
We have only scratched the surface of luminosity masks in this guide. There’s much more to it, but my intention is not to overwhelm you with too much detail. I just want to give you enough to get started and to last you a while before delving deeper into luminosity masks on your own.
What will you learn in this guide?
In this guide, we’re going to look at the reasons for using luminosity masks. We’re going to work through one of many ways of using them. I hate complexity, so I can assure you my way is probably the simplest of them all. All you need is Photoshop (because it relies on Photoshop’s excellent layering features) and one of the simplest luminosity mask applications available.
After working through this guide, you should be able to easily recognize which of your images need luminosity masks and you will be able to do so with ease.
Recommended Reading: If you’re interested in improving your post-processing workflow, check out Photzy’s Understanding Masking premium guide. It has sections in Lightroom and Photoshop, as well as Snapseed for mobile users, too.
Luminosity Masks? You Say What?
So, what are these things called ‘luminosity masks’?
The most obvious clue is embedded in the ‘lumi’ part of the term. Closely related to ‘illuminate,’ it must have something to do with light.
That is correct. If you look at any photograph, you will see bright areas, then brighter areas. Then others are even brighter than the previous level of brightness. You can keep on finding brighter-than-previous bright areas until you reach the brightest areas.
The same with the darker areas, ranging from just ‘shadowy’ to pitch black.
These ranges of darkness and brightness are generally referred to as ‘tonal ranges’ because they reflect various ranges of ‘tones’ in terms of brightness or darkness.
But why are they called ‘masks’? Because luminosity masks identify these ‘levels’ or ‘layers’ or ‘tones’ of brightness or darkness and allow you to select only those layers for further processing – with a bit of a twist. If you select a specific level of brightness for adjusting with Bright Luminosity Masks, it will also select that level as well as all tones brighter than that level. If you select a specific level of darkness for adjusting with Dark Luminosity Masks, it will also select all levels darker than the selected one.
Don’t worry if that does not make any sense at this stage. It will become as clear as daylight once we start working through our example below.

Photograph by Tobie Schalkwyk
But Why Do I Need Luminosity Masks?
Have you ever raised the exposure in an image, just to see how the brighter areas in your image start losing detail, and you can see how the brights in your histogram get blown to oblivion? Or vice versa as you lower the exposure in the darker areas of an image? You try to raise the shadows and/or lower the highlights but to no avail. No adjustment removes all too-bright areas as well as too-dark areas in your image.
No adjustment removes all too-bright areas as well as too-dark areas in your image.
In the absence of luminosity masks, you will then grab the adjustment brush and try to fix the problem, just to be frustrated by accidental overlaps into the neighboring areas, unless you work very carefully and slowly. But is that what you want to do, knowing that you have another 1,500 images awaiting post-processing?
That is when luminosity masks come to the rescue. It allows you to select all areas within a specific tonal range with the click of a button. Thereafter you can make tonal (or other) adjustments to all of those areas simultaneously, in a ‘blended’ fashion – without touching the neighboring areas.
Key Lesson: Luminosity masks are all about the selection of tonal ranges. It is impossible to do this by eye because the human eye simply cannot distinguish these layers – well, not in such fine detail. Once selected, you can do tonal (or other) adjustments on that area only or with very little effect on the non-selected areas.
Easy Panel: Photoshop’s Luminosity Mask Partner
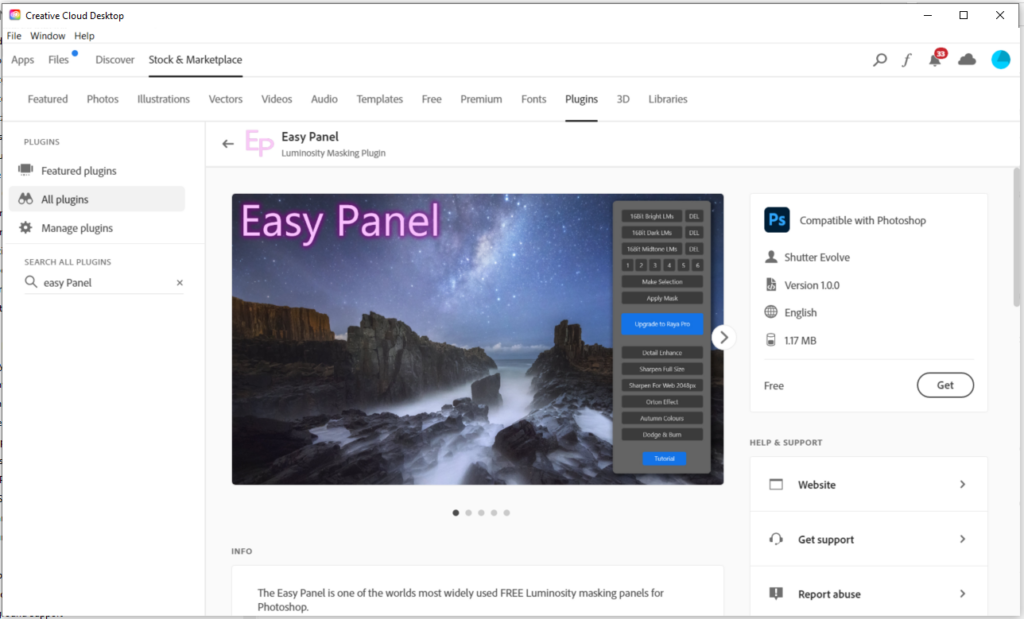
Maybe you’re curious enough by now to have opened Photoshop and you’ve looked for luminosity masks but for the life of you, you could not find them! Well, not to worry – Photoshop does not actually come with built-in luminosity mask functionality. We need to team it up with one of the packages that were specifically built for using luminosity masks. Enter Jimmy McIntyre’s FREE Easy Panel!
This package is actually so good that you may be looking for a catch – it seems too good to be free! But not so. I guess secretly Jimmy wishes that your next step would be to buy his more advanced luminosity mask package: Raya Pro. Maybe that is something to consider once you want to take your luminosity mask skills and abilities to a next level. Easy Panel is more than good enough for our purpose, though, and much easier to use than Raya Pro. And it’s free (have I said that already? Wink wink…).
So, Easy Panel it will be. All we have to do is to integrate it into Photoshop.

Screenshot by Tobie Schalkwyk
Integrating Easy Panel Into Photoshop
To integrate Easy Panel into Photoshop, do the following:

Photograph by Tobie Schalkwyk
- Download Easy Panel
- Enter your email address and click the Download The Easy Panel
- Click on the Click Here To Confirm link in your confirmation email.
- Click the Click Here To Download the EASY PANEL button on the resulting browser screen.
- Click DOWNLOAD on the next (MediaFire) screen.
- Copy the .zip file from your Downloads directory to its own directory.
- Extract all of the files.
- Navigate through the unzipped directories: Easy-Panel-2021-release/Easy-Panel-2/Easy Panel/Select Photoshop Version.
- Double-click the relevant sub-directory, depending on which version of Photoshop you have:
- CC-2021 if you have the latest CC version OR.
- CS6 if applicable OR.
- CC – Older Versions.
Each of these versions has its own installation method.
- CS6 has manual installation instructions on the video.
- CC – Older versions have manual installation instructions in a .pdf file.
- CC 2021 comes with an installer program. Just double-click the file to start the installation process. It will jump straight into Creative Cloud Desktop and inform you that it has found a plugin for Easy Panel.
Screenshot by Tobie Schalkwyk
- Click the Get button on the right and install the plugin. If successful, you will get a green popup stating that Easy Panel is now installed. It has an Open Photoshop link which you can use to open Photoshop straight away, should you want to. In my case, I always open an image to I want to apply a luminosity mask from inside Lightroom. That ensures that the luminosity-masked image appears next to my vanilla image, and I can make further changes to it inside Lightroom if I want to.
If you have issues with installation, have a look at the accompanying .pdf file. If all else fails, Google is usually a good option because you will not be the first one to have a particular problem. In my case, the installation was smooth and perfect
- Open Photoshop
Easy Panel’s panel should pop up automatically inside or outside of Photoshop. If not, then find it via the Plugins/Easy Panel menu item.
If all else fails, Google is usually a good option because you will not be the first one to have a particular problem
Previously the panel was embedded inside Photoshop, but now it opens up independently. Drag it to a place of your choice.
Screenshot by Tobie Schalkwyk
Note the double left arrow (displaying ‘Collapse to Icons’ when you hover over them with your mouse) in the panel’s top-right corner. When you click on this, the panel will collapse to a mini version of itself (labeled ‘Easy Panel’) to not obscure the view of your image once you’re done with the panel.
You can of course close it by clicking on its close (x) icon in the top-right corner. I usually just drag it into the unused Menu space on the right.
Recommended Reading: If you’re interested in improving your post-processing workflow, check out Photzy’s Understanding Masking premium guide. It has sections in Lightroom and Photoshop, as well as Snapseed for mobile users, too.
Let’s Do It!
Now we can get our hands dirty, at last!
Remember that editing is always most effective on a RAW file. My typical routine is to open a RAW file in Photoshop from inside Lightroom (using right-click/Edit In in Lightroom). That allows me to edit the file before and after making adjustments in Photoshop, and even opening it in another editor like PortraitPro.
You may of course choose to open a file directly in Photoshop and then import the resultant (saved/exported) file into Lightroom or another editor, for further enhancements.
Let’s start with an image that would demonstrate why luminosity masks are so popular (even a must-have) with landscape photographers.
You will see that I have already dragged the Highlights slider way down to the left to remove as much of the brightness as possible, without losing detail anywhere else.

Screenshot by Tobie Schalkwyk
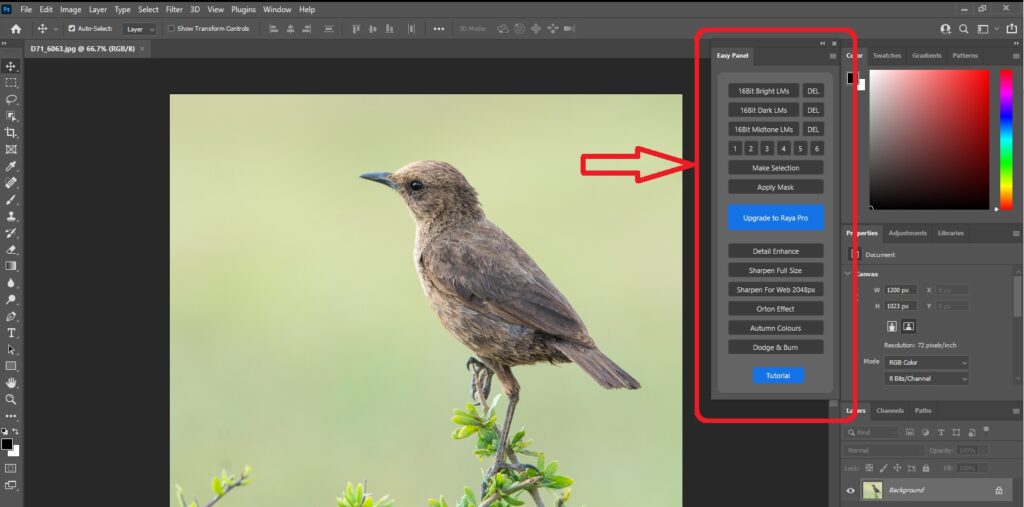
Let’s open up the image in Photoshop (Right-click/Edit In/<your Photoshop version>) and open up Easy Panel.
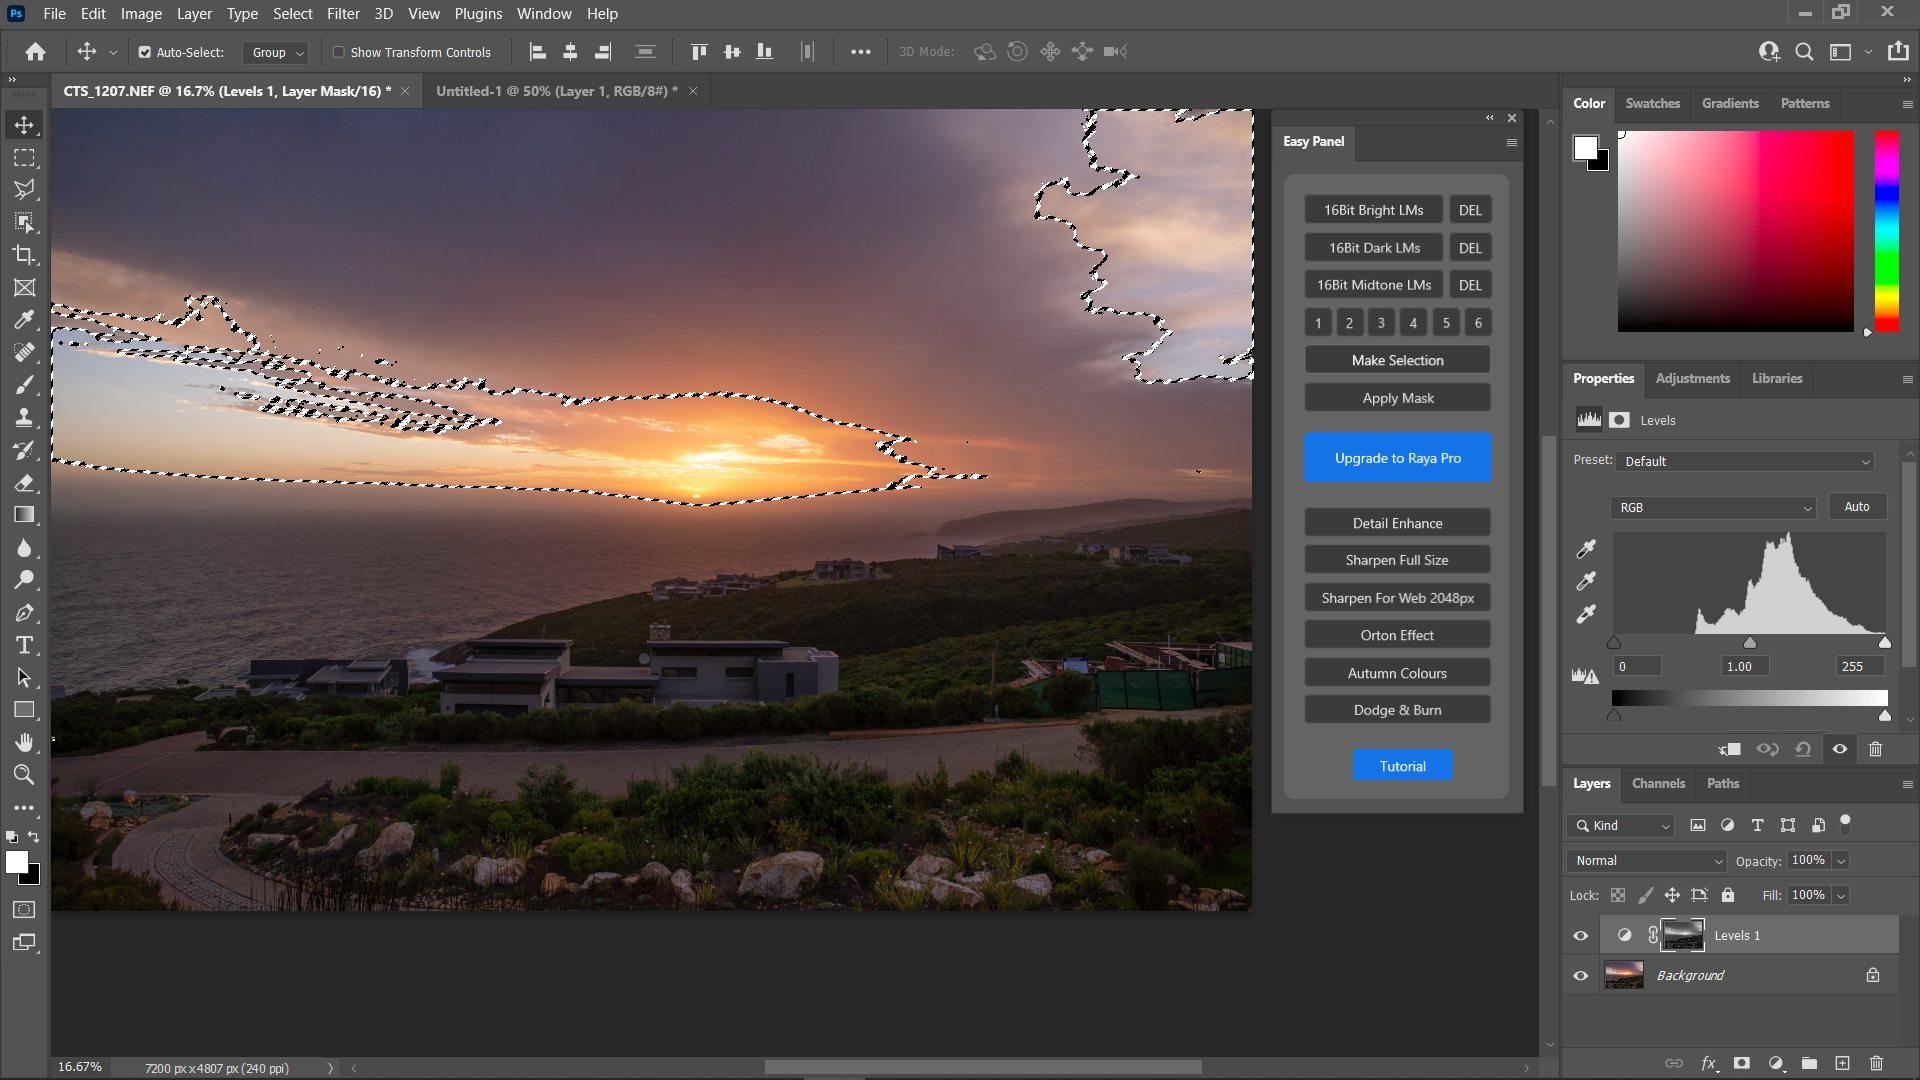
We’d like to adjust the brights, so click on Easy Panel’s 16Bit Brights LMs button (see the red arrow above). You will see Easy Panel generating a set of masks. A Masks folder will appear in the Layers panel. If it is collapsed, click on its little right arrow (just left of the Masks folder icon) to expose the various layers (only for sake of interest). Its little icons will give you an indication of what area(s) it is relevant to. These six layers correspond to the numbers 1–6 in Easy Panel (below the red arrow in the image below).

Screenshot by Tobie Schalkwyk
Click on each of these numbers and see which tonal area is selected by each mask. You will see the image turning black and white. The whites are the areas affected by that particular tonal layer.
Once you have decided on your desired tonal layer (and clicked on its relevant number), click on the Make Selection button just below the numbers. You will see the image return to its color version and the borders of your selected area will be indicated by slanted black and white lines.
Tip: If you’re not sure what level to start with, start with level 3. That’s right in the ‘tonal middle’ range of the areas covered by the layers. In the border below I started with level 1.
The selected areas are indicated by the slanted black and white lined borders. Easy Panel has even selected small patches of bright water reflections in the pool. Now just imagine how difficult and time-consuming that would be to do with an adjustment brush!
Now it’s time to decide what you’d like to do with your selected area. Easiest is to click on one of the icons in the Adjustments panel (middle-right in the image above). I usually use the Levels adjustment for adjusting brightness and darks (thus for masks generated with 16Bit Bright LMs and 16Bit Dark LMs) and the Curves adjustment for layers generated with 16Bit Midtone LMs).
So, let’s click on the Levels Adjustments icon. You will see a histogram appearing in the Properties tab. This histogram has three adjustment triangles in its bottom corner:

Screenshot by Tobie Schalkwyk
- Left triangle slider: for adjusting shadows
- Middle triangle slider: for adjusting mid-tones
- Right triangle slider: for adjusting highlights
There is also an ‘Output Level’ slider. That affects the full image, so we’re not interested in that right now. Our focus is to fix the overexposed sky area.
Play around a bit with the triangle sliders. You will soon realize that the shadow and highlight sliders are of very little use in this context. The mid-tone slider is the one we need. Slide it to the right to lower the brights, but keep a close look at the remainder of the image. When you see detail starting to disappear, then you know that you have gone too far. You are then starting to move into the areas that our other tonal masks can fix more effectively.
When you see detail starting to disappear, then you know that you have gone too far.

Screenshot by Tobie Schalkwyk
In the image above, I lowered the brights down to just before the image started losing detail. The mid-tone triangle’s applicable level indicator showed ‘0.80.’ The Highlights triangle on the right was not touching the histogram detail, indicating blown highlights. I brought it back to the left until it touched the histogram content.
Once you have created a luminosity mask, you may give it a more meaningful name by double-clicking on its current name in the Layers panel and then overwriting it with your (more descriptive) name. Now, let’s generate another set of 16Bit Bright LMs and repeat the above process for a different level. You may do all six levels if you really want to, but I’m lazy (wink!) so I usually skip a level or two.

Mask Level 2 selected above; mid-tones adjusted to ‘0.66.’ Can you see the brights coming down yet? Mask Level 3, mid-tones adjusted to ‘0.33.’ Screenshot by Tobie Schalkwyk

Screenshot by Tobie Schalkwyk
Here is the image on Mask level 2. See how the selected area differs from the selected area above (for mask level 1).
When playing with the mask tonal levels slider higher than 3, I’ve found that I cannot make any further adjustments without losing detail in the rest of the image.
At this stage, I usually generate a set of 16Bit Midtone LMs and then do a Curves adjustment on mask level 3 just to set the final brights and darks to my liking.

Screenshot by Tobie Schalkwyk

Screenshot by Tobie Schalkwyk
The final finishing touch is usually a feather adjustment on my top layer (the mask highest on your layer stack). Just drag the feather’s adjustment triangle left and right and see where you extract most/the sharpest detail in your image.

Photograph by Tobie Schalkwyk
Here’s the final image above.
Granted, we may still have a patch or two with blown highlights, but it’s a lot better than the original. The details and colors in the brightest areas are much more acceptable! (see below for the comparison)!

Before and after. Photograph by Tobie Schalkwyk
Key Lesson: Easy Panel offers you the selection of one to six tonal ranges in your image. You may want to make adjustments on any number of them, from one to six. Easy Panel selects all of the spots in particular tonal ranges. You most probably would have missed a lot of them if you tried to make these selections manually (using one of Photoshop’s selection tools).
Keep an eye on the selected areas as you make adjustments. They will start losing detail when you go too far. Leave the adjustment of those areas to luminosity masks in other tonal ranges.

Photograph by Tobie Schalkwyk
Let’s take a look at some other examples. Here we see that adding a luminosity mask leaves us with not too bad a change in the bright background, despite a slightly warmer touch to the model’s face.

Photograph by Tobie Schalkwyk
Perhaps a little too far, but see how much detail is available for extraction.
Viva Luminosity masks!
Recommended Reading: If you’re interested in improving your post-processing workflow, check out Photzy’s Understanding Masking premium guide. It has sections in Lightroom and Photoshop, as well as Snapseed for mobile users, too.

Photograph by Tobie Schalkwyk
Conclusion
You may be able to get away with never using luminosity masks in your life, but if you do so then you are guaranteed to produce some photos that have not been optimally edited. If you only take images in the studio, then maybe you’ll never need them because you are in a controlled environment. If you’re a nature or wedding photographer (where the sun or other bright lights are not always your best friend), then it’s a different story.
In nature, you can perhaps wait for the right conditions, but they may never come – or conditions may become worse. Animals do not always pose (or perch) at optimum spots and then you need to make the most of what you have. Fortunately, we have luminosity masks at our disposal for those rare events where you can move your ‘special’ keepers from good to great.
Further reading and tutorials:
Self-Check Quiz:
- What is a luminosity mask and what are they mostly used for?
- Why is Easy Panel better at selecting tonal ranges in an image?
- What do you have to look out for as you make tonal adjustments using luminosity masks?
- What is the feather adjustment good for?
- What tonal ranges are usually best for curve adjustments?


