

I’ve been doing photography for 15 years now. I have been able to use my skills in countless ways. I have shot weddings; I’ve assisted on shoots for well known photographers and brands. I have shot events, portraits, fashion, nature, and animals. You name it, I have probably been lucky enough to shoot it.
It’s no secret that if you have read other guides by me, my favorite subject matter is women and fashion/commercial photography.
It’s well within my comfort zone to shoot products on models, but over the past two years I have been working primarily on product photography as well and growing my skills in this area. I’d say it’s a little more challenging than it may appear.
In this article, I’d like to cover how I market a product both on a model and in still-life form. I’ll be sharing some tips to help you feel more comfortable with helping your client market their brand. The jewelry in this guide is all from my brand, Retro Luxe Resin.
Photograph by Lauren Gherardi
In this article, I will be covering the following:
- Getting to know the product brand
- Shooting on a model
- Poses and angles
- Product photography
- Materials and props for product photography
- Common mistakes and how to avoid them
- Wrapping it up
Recommended Reading: After learning about camera settings, improve your
photographs by understanding how light works! Grab a copy of Photzy’s premium guide: Understanding Light Book One.
Getting to Know the Product Brand
The most important thing to do when a client approaches you with an inquiry to
market their products is truly know the brand. Ask questions about the maker of the product or the owner of the company.
In this guide, we are using jewelry.
Here are a couple of examples of what to ask the maker:
- What inspires their designs?
- What makes their line unique among other similar brands?
- Who is their target audience?
Questions like these begin to paint the picture of how your final product photos
will look.
This knowledge will help with choosing models that reflect the proper age group of their customers.
Photograph by Lauren Gherardi
Anyone can take products and put them on a white background and create clean images, but getting to know the client helps you create imagery that really sells the product to their consumers and highlights features in the product that maybe weren’t so obvious.
The most important thing to do when a client approaches you with an inquiry to market their products is truly know the brand.
Since I’m using my brand as the client for this guide, I will go ahead and answer the above questions.
- This brand is inspired by nostalgia from decades past, bright colors, and retro styles with a modern twist. In these images you’ll see brightcolored backgrounds and retro-styled images with modern clothing.
- What I believe makes this line unique is the fact that I use hoops and designs that are inspired by retro jewelry and I put a modern spin on them with the use of color and inserts.
- My target audience is women in their late 20s to mid-30s. Women of all races and professions.
In the images created for my brand, I chose appropriate models that fit this profile.
Key Lesson: The answers to the appropriate brand questions are essential to your creative process. The conversation can also help your client feel confident that you will provide them with a final product focused on selling their brand.
Shooting Products on a Model
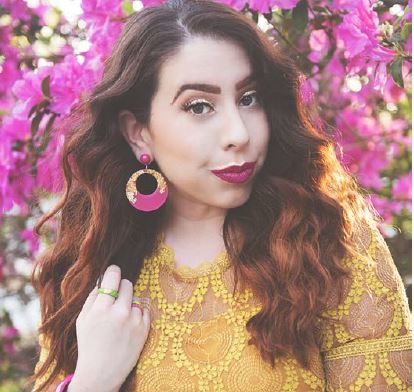
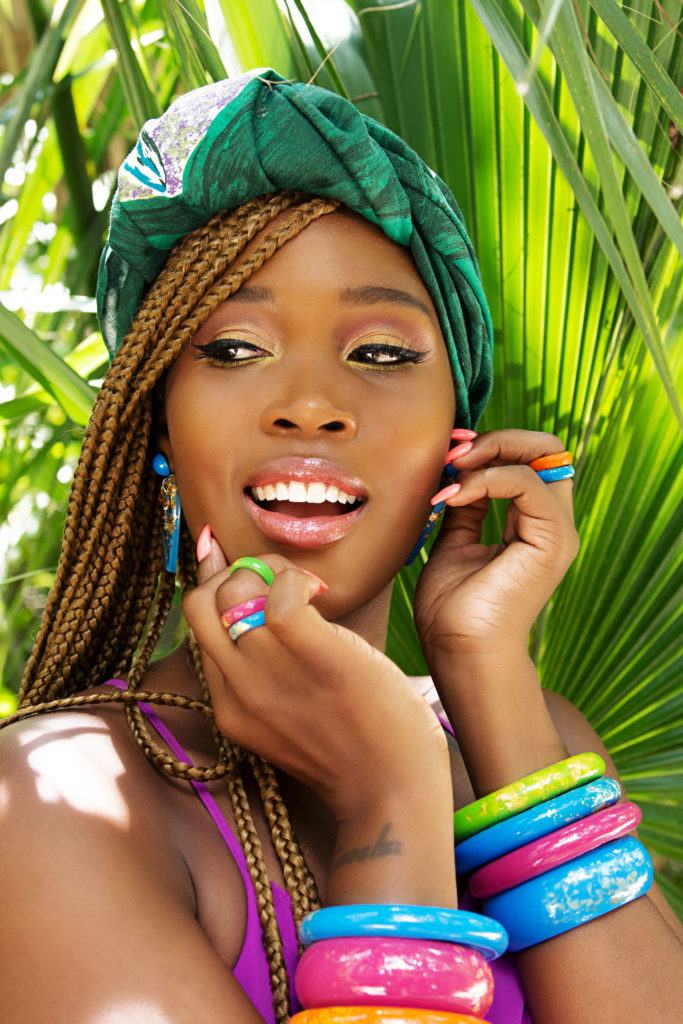
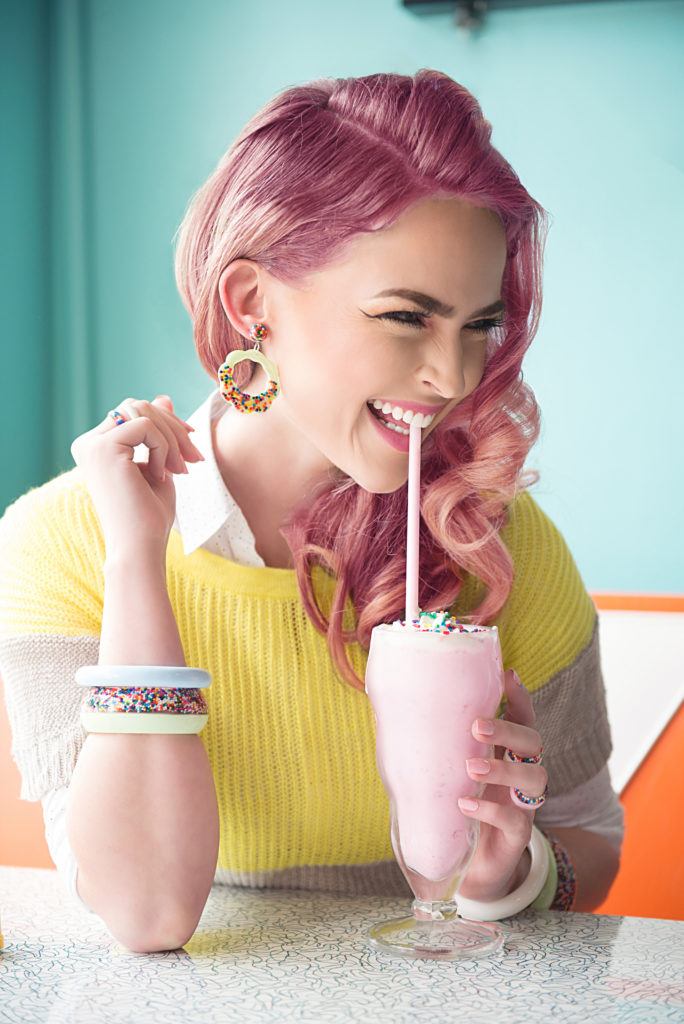
Using the correct models to represent the brand is essential to being able to market the products. With my target audience being women in their late 20s to mid-30s, that sets the age range of the models.
Using a teenager, for example, would not speak to the client’s consumer.
The client also wants to market to women of all races, so it’s important to be aware of that type of representation for these images.
Editorial images for the brand help consumers see several things. They can see the scale of the products and, depending on the images, they can see how to pair them with outfits. Styling the products on the models gives the consumer an idea of items that look good together and different outfits the items can be styled with.
Key Lesson: Every shoot is different, so choose your location and lighting accordingly. I’ve had clients specifically ask for studio shots on a model and others give me creative freedom to find a location.
Recommended Reading: After learning about camera settings, improve your
photographs by understanding how light works! Grab a copy of Photzy’s premium guide: Understanding Light Book One.

Photograph by Lauren Gherardi
Poses and Angles
Here is the tricky part.
No matter how the model is posed in the images, the products need to be visible, and that means the pose needs to show off the products.
With these images, I wanted the models to seem approachable. I tried to keep the body language open and inviting.
If the pose better suited being a little closed off, then the model is smiling and pictured as having fun and an all-around easy-going vibe.
What I often found myself doing as the photographer was having the model get into a pose and adjusting the pieces as necessary, so they stood out in the image.
Then, I adjusted the camera settings so as many items as possible were in focus.
Photograph by Lauren Gherardi
Using a wide aperture would not be ideal in a product photography situation such as this (image above), as you end up with a shallow depth of field which can leave the product partially out of focus.
Use the knowledge that you gained about your client’s brand to direct posing and the overall tone of the images.
You’ll notice in these example photographs that shooting straight on to the model really gave the items maximum visibility, but that’s not always the case. You can certainly have fun with angles depending on your subject.
Key Lesson: Don’t be afraid to use props with models if they add to the image without drawing attention away from the products.
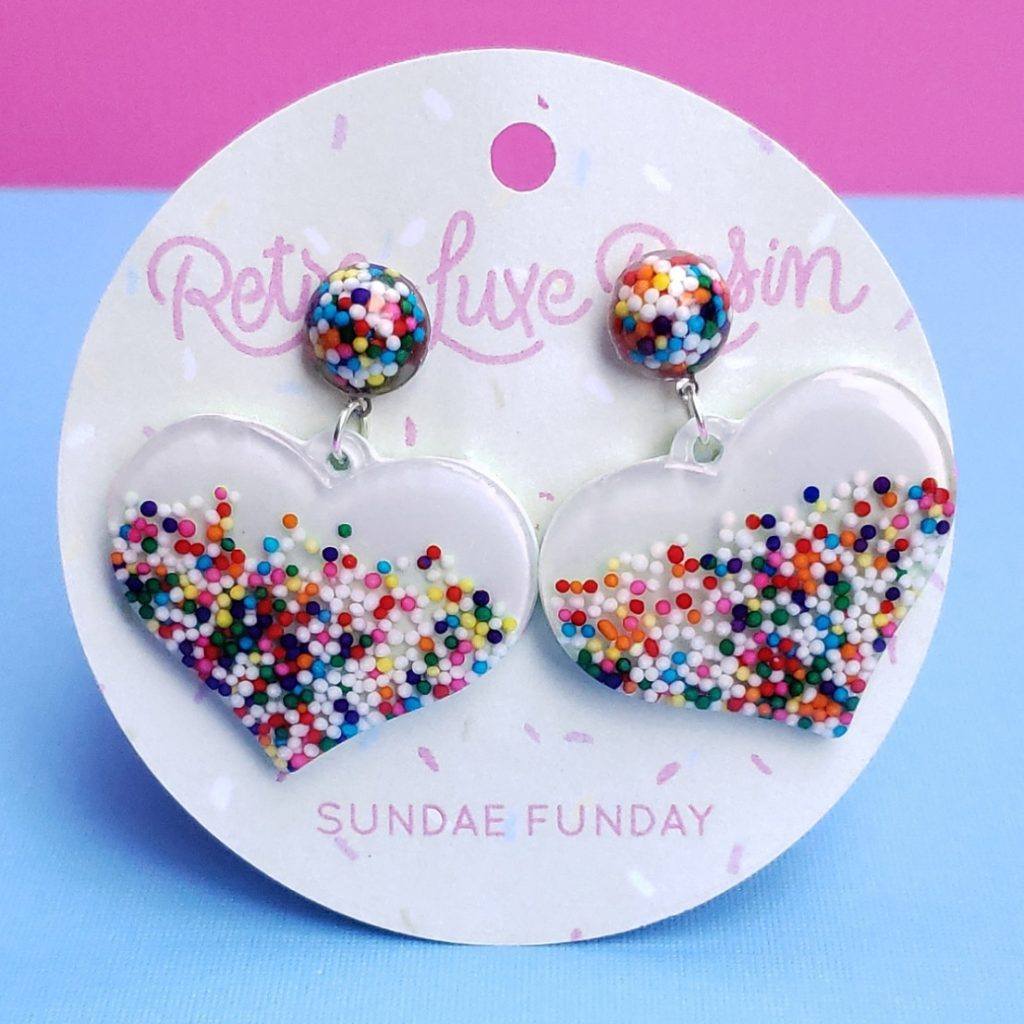
Product Photography
Ok, we have done the easy part of shooting the product on the models, so what’s next?
Now it’s time to make those products shine on their own.
There are so many ways to do this. I find it important to get comfortable shooting the products on their own, and with their packaging, without the use of props first.
Being able to show off the product without help from props gives the consumer nothing else to focus on except the product itself.
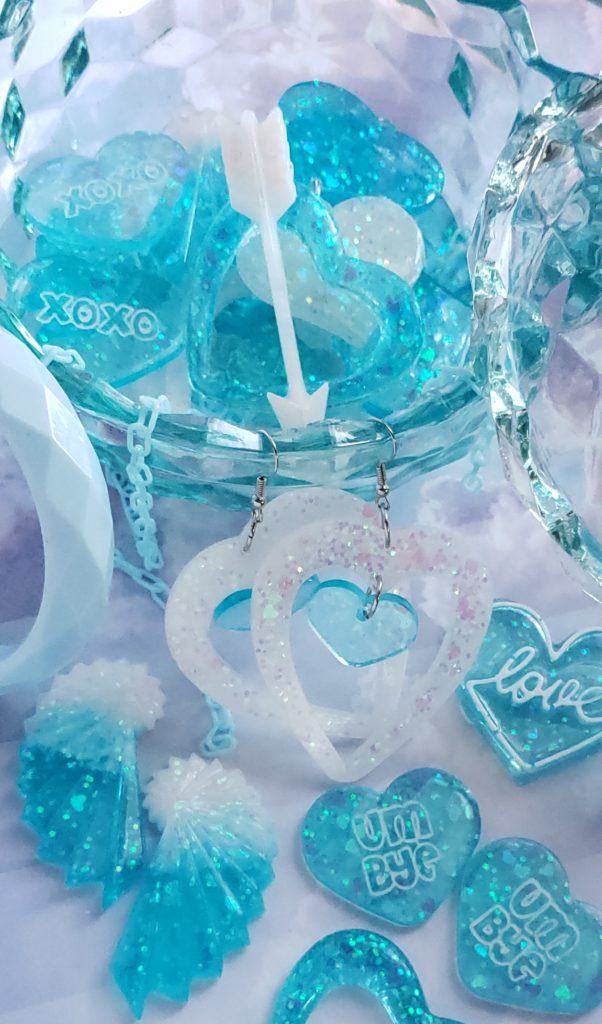
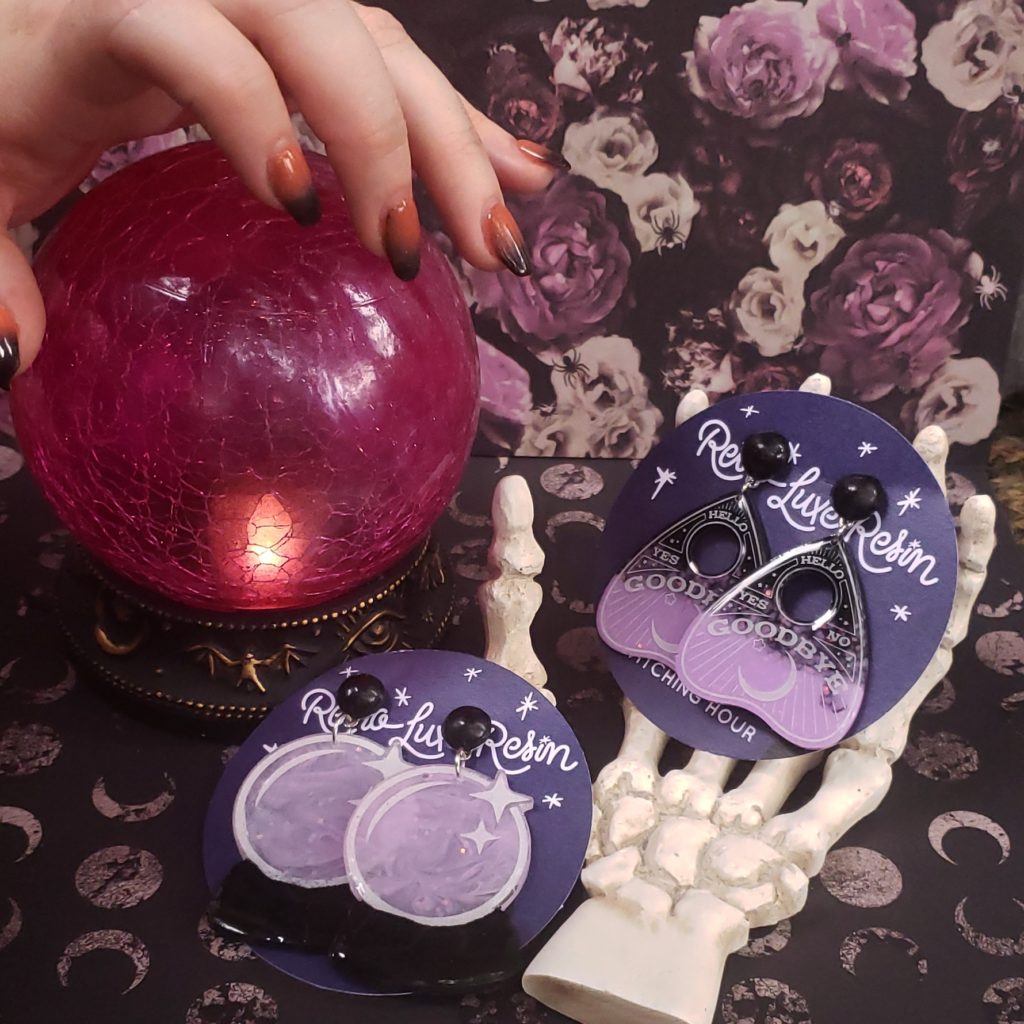
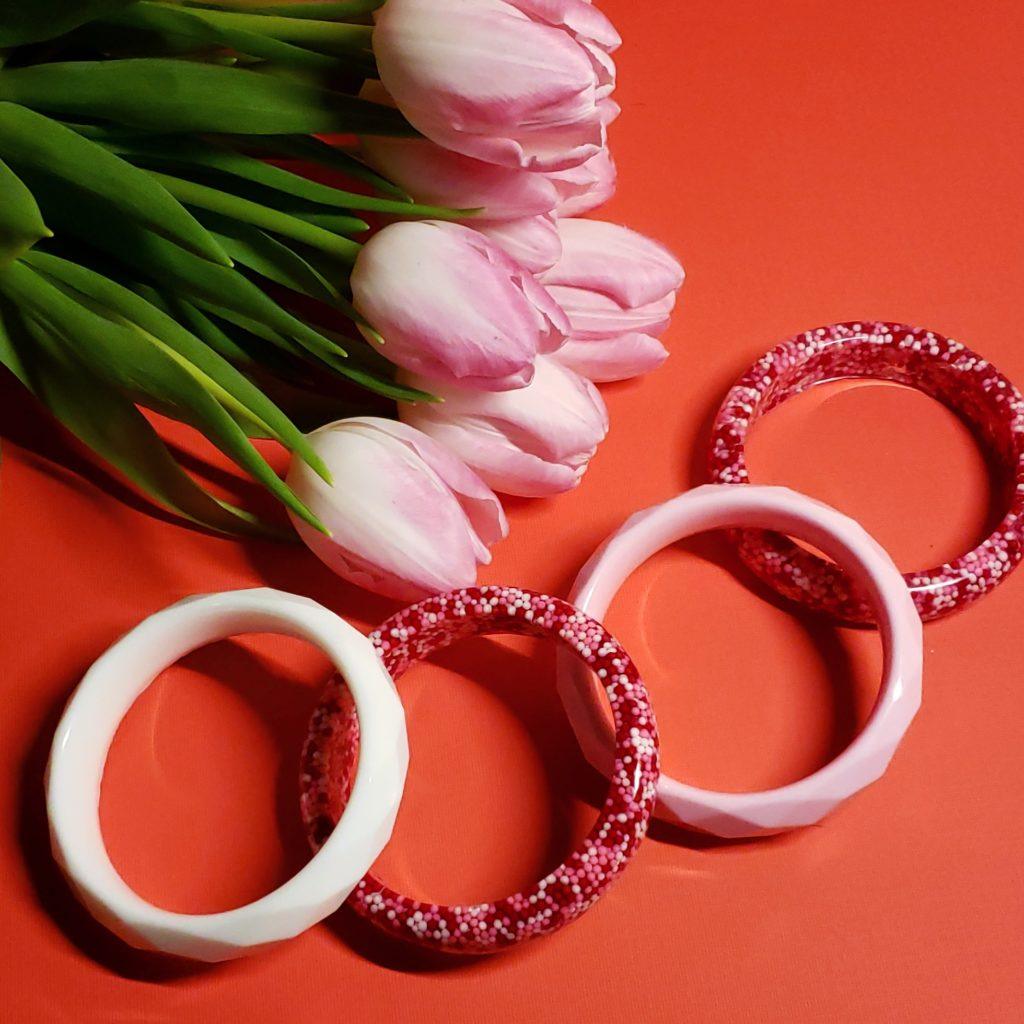
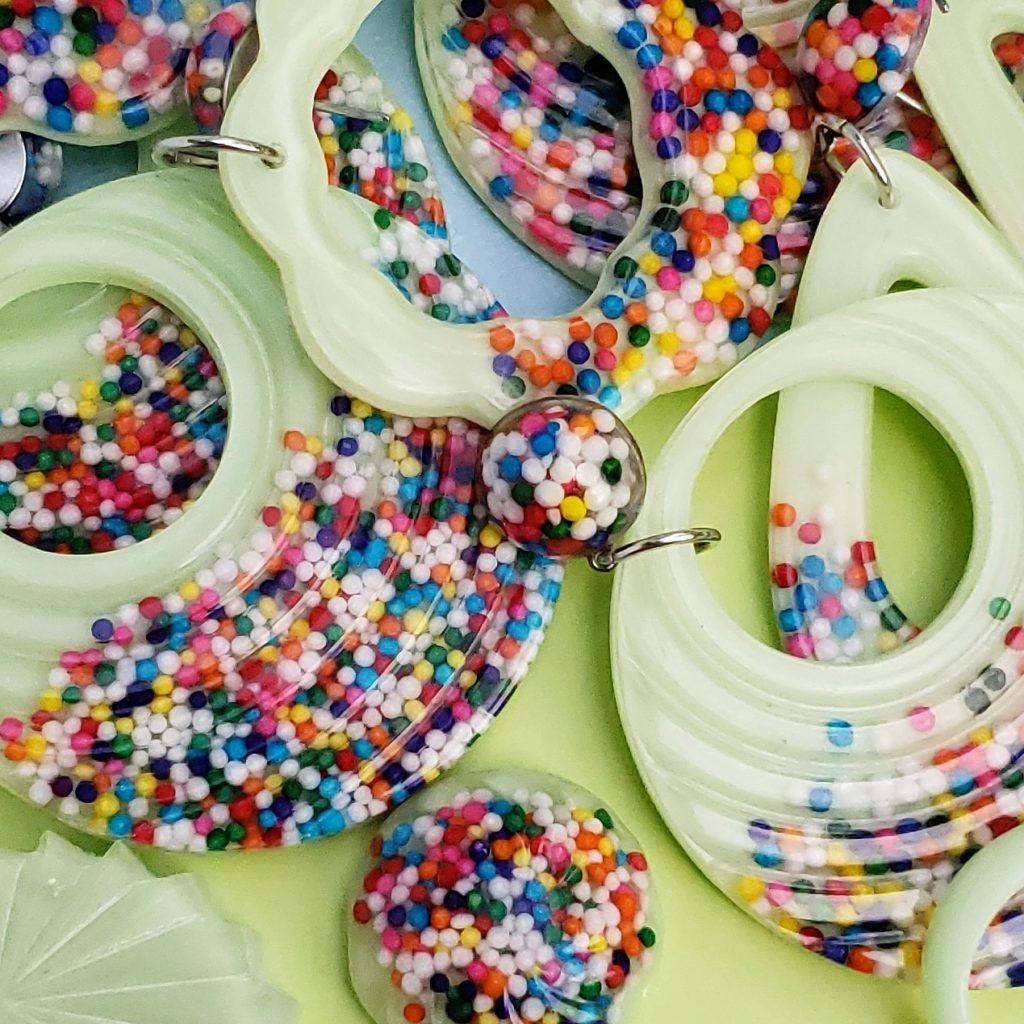
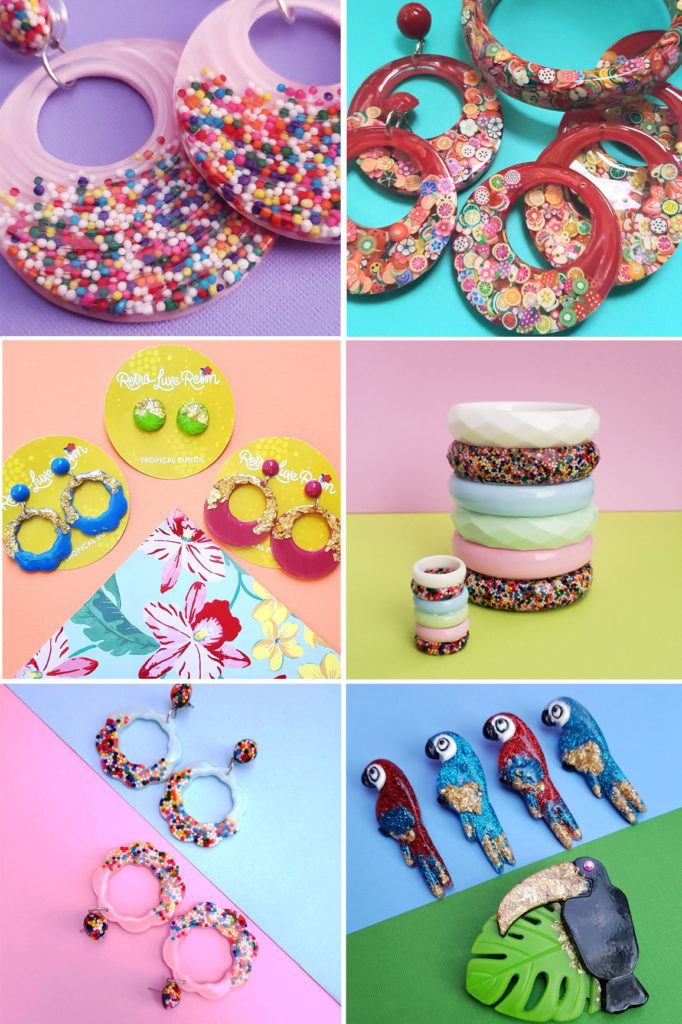
With my brand being all about vibrant color, shooting on white backgrounds isn’t going to create as much interest.
I chose to shoot on colored backgrounds in order to add to the vibrant and fun feeling that I want my customers to have when they look at the product photos.

Photograph by Lauren Gherardi
For this particular line, I shot all the product photography with the same setup.
I chose my shooting surface from a number of scrap book paper pads that I have.
I used window light and a section of white foam core as a reflector.
I normally set my camera on a tripod so I can move the items around at will and get nice, clean shots.
The reason that I chose natural light is because these pieces are highly reflective and will pick up and reflect artificial lighting even with diffusers and in light tents.
The natural window light doesn’t cause as much of a harsh reflection.
Being able to show off the product without help from props gives the consumer nothing else to focus on except the product itself.
Depending on the item that you are photographing, I would suggest studio lighting, as you have way more control over the light, and you can shoot around the clock with the same results. But every project is different.
In order to get the same lighting results across all of the product photos, I tend to shoot a lot of content all at once.
If I need to shoot on multiple days, I will shoot at the same time of day each day to mimic the same natural lighting.
In the image above, you can see my set.
Materials and Props
Let’s start with some of the basic materials that I use to achieve my product photography.
I use scrapbook paper pads. You can grab them in every color and texture at your local craft store. They have multiple pages in them to choose from and create a nice flat surface for the items to sit on.
If you are shooting larger products, then poster board or studio backdrop paper works great as well.
White foam core makes a fantastic reflective surface for both natural and artificial light.
Now that you have your shooting surface and your lighting taken care of, let’s talk about props.
Props can be an amazing addition to any product shot. They can add character and say more about the items than just the product itself. Is there a such thing as too many props? Sure, it all depends on the scale of the item that you’re photographing. You don’t want to overwhelm the product.
Keep the props simple and make sure they serve a purpose to the product.
These types of images are awesome for social media or banner ads on
websites.
Photograph by Lauren Gherardi
Common Mistakes and How to Avoid Them
We all make mistakes from time to time. When you’re hired by a client, the
pressure is on to deliver an exceptional product.
Some mistakes that I have come across shooting jewelry, for example, are as
follows:
- Losing the products in bad poses and angles
- Harsh reflections on jewelry pieces from the lighting
- Out of focus/blurry images
- The coloring is off
- Overwhelming props and backdrops
A way to avoid these challenges is to come to the shoot prepared. If at all possible, work with experienced models. If you don’t have access to an experienced model, that’s perfectly okay; just use simple directions and a keen eye to make sure that the products are front and center, and that the model and overall mood of the shoot matches what the client shared with you.
Photograph by Lauren Gherardi
Also, keep any props or additionally included item that is not the product itself as neutral as possible.
When I shoot my jewelry on models, I try to use a wardrobe that’s playful but which doesn’t overwhelm or distract from the jewelry.
Harsh reflections can be fixed with artificial and natural light when you make sure the lighting is balanced on both sides.
If you use strobes or modeling lamps, consider diffusing your light source for softer light.
Key Lesson: Out-of-focus or blurry images can be rectified by stabilizing your camera on a tripod. If you want to shoot handheld, then avoid low-light situations or wide apertures on larger sets with multiple items.
Photograph by Lauren Gherardi
Adjust the white balance to match your lighting and get as true to life color as possible.
Depending on the client and the scale of the items that you’re shooting, props can really add to the interest generated by the picture.
Key Lesson: I recommend only using props that complement the products that you’re shooting. Try to keep them simple.
Recommended Reading: After learning about camera settings, improve your photographs by understanding how light works! Grab a copy of Photzy’s premium guide: Understanding Light Book One.
If you’re shooting images for a catalog, or listing items on a website for sale, then I do not recommend using any kind of props or complicated backdrops. Keep those images as simple as possible.
Photograph by Lauren Gherardi
Wrapping It Up
Creating product photography for a company can seem like a daunting task, but it can also be a great portfolio builder and an exciting learning experience for you.
If you are interested in getting into product photography for the first time, you can shoot all kinds of fun products around your house for practice and then ask a small business if they need help with their marketing.
Remember that it’s always important when working with a client that you gather as much information as possible about the brand that you’re working for in order to create a final product that they are happy with.
Make sure the models you choose match their target audience. For example, it would not be wise to shoot a child in clothing or accessories that are made for adults.
Photographs by Lauren Gherardi
When shooting with the models, you need to have the product front and center. Also, make sure you have the models sign a model release.
When you venture into the actual studio product photography and flat lays, try experimenting with just the products first. Then, once you’re comfortable with that, start introducing simple props onto the set with the consent of your client. Only use props that are relevant to the products.
Finally, try to be as prepared as possible coming into the shoot day. Be aware of the model’s poses and how they articulate the products. Make sure you avoid common mistakes by having even lighting and stabilizing your camera. Make sure your camera settings are correct to save time in post-processing.
If you follow these simple steps, you’ll be well on your way to marketing products with your photography.
- What questions should you ask your client to get to know their brand?
- Why is it important to get to know the client and brand?
- How can being familiar with the client’s target audience assist you in casting the correct models?
- What are some things you should be aware of when posing a model?
- Don’t be afraid to use __________ with models if they add to the image without drawing attention away from the products.
- Why is it important to shoot the products without the use of props first?
- Keep the props __________ and make sure they serve a ________ to the product.
- What are some common mistakes with product photography?
- Briefly summarize how you can avoid these mistakes.


