


Flash photography and movement are two things that photographers can find intimidating. How do I know my flash will not throw dark shadows or cause highlights to blow out? Will my flash even fire every time? What can I do to freeze the movement of my subject when the light is low? These are common questions that have some reasonably straightforward answers.
In this guide, I’ll walk you through how I use Flash to help optimize motion in my photos and why I do so. Learning to manage your flash well is not so difficult when you have an understanding of how the flash and camera, particularly the shutter speed, work together. Once you know how it works, you can control your flash and shutter speed to either choose for blurring to occur or freeze your moving subject.
Key Lesson: When learning this technique, give yourself plenty of time to practice and experiment. Use the same subject, moving at a constant speed. This will help you gain a better understanding of the principles of how to optimize motion in your photos.
Recommended Reading: If you’d like to learn how to use your flash unit for better photography, grab a copy of Photzy’s Electronic Flash – Parts and Practices premium guide.
Understanding Flash Photography and Motion
Whenever you photograph a moving subject, your choice of shutter speed is crucial. If you want a clear subject with no motion blur, you must use a fast enough shutter speed. If you want to capture the essence of movement in your photo, you’ll need to use a slower shutter speed. How slowly you set your shutter depends on how fast your subject moves.
Sometimes you’ll want to freeze your subject but find there’s not enough light, and you must use a shutter speed that is too slow. In these circumstances, you can adjust your ISO to a higher setting, making the camera’s sensor more responsive to light. This allows you to select a faster shutter speed and maintain good exposure.
When you don’t want to increase your ISO, you can pop in a little flash. This will help freeze a moving subject or, at least, reduce the amount of visible blurring. Adding just the right amount of flash when balanced with a reasonable shutter speed helps to create a sharper-looking image.
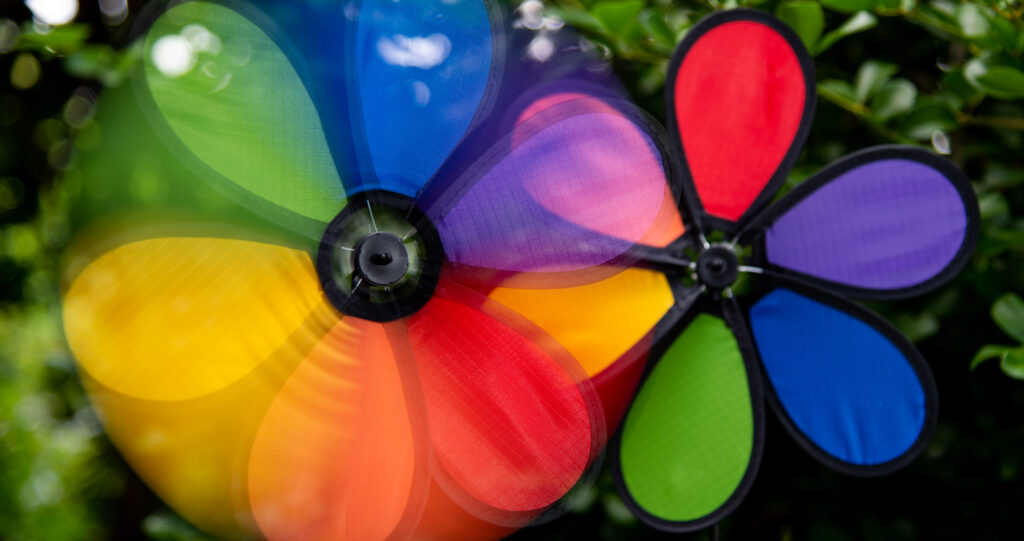
In this image, the front pinwheel flower was moving and the back one was not. I measured the ambient light and set my exposure to slightly underexpose. I chose a shutter speed of 1/40 of a second and popped in a little flash. This result shows the motion blur while also capturing the shapes of the flower petals as they spin. Photograph by Kevin Landwer-Johan
By using flash with a slow shutter speed and a moving subject, you can also capture a very interesting motion blur. Choosing a slow shutter speed, one that slightly underexposes your subject, you can then add a pop of the flash. This will balance your exposure and often create a more interesting, blurred look than you’ll get without using flash. The blur is most interesting when you have your camera and flash set to fire synchronized with the rear shutter curtain. Confused? Keep reading, and I’ll explain this rear curtain sync technique in more detail.
By using flash with a slow shutter speed and a moving subject, you can also capture a very interesting motion blur.
Shutter speed choice influences both your exposure and any movement that occurs during the exposure. The faster your subject moves, the faster shutter speed you’ll need to freeze the motion. Flash also affects your exposure and influences the look of any movement.
Key Lesson: Find the balance between the ambient light, flash output, shutter speed, and subject speed. This is key to capturing the most interesting photographs.
Settings to Optimize Motion When Using Flash
It may seem a bit overwhelming at first. Juggling all these variables is more complicated than merely deciding the best moment to press the shutter button. It does take understanding and practice to become familiar with using flash to optimize motion in your photos. But once you understand the principles of this technique, I’m sure you’ll begin to find many situations where you can put it to good use.
The first thing to do is set your exposure mode to manual. You need to be in control of each of your exposure triangle settings to optimize this technique. Because many variables affect the exposure and movement, you need to set each one carefully. If you leave your exposure mode set to any of the auto options, your results will be even more unpredictable.

For this image, I used a shutter speed of ⅕ of a second and an aperture of f/9. Photograph by Kevin Landwer-Johan
When using this technique, I measure the amount of ambient light reflecting off my subject first. I adjust my settings so the light meter indicates my subject is slightly underexposed. Then I adjust my flash output to where I think it needs to be. This is a calculated guess.
I then take one or two photos and check my results. I look at the exposure and the amount of motion. If my photo is too bright or too dark, it means my flash setting is off, so I adjust it usually just a little at a time. Then I repeat a few more test photos. I also take note of the amount of blur.
If there’s not enough blur, I’ll slow my shutter speed down a little and choose a narrower aperture. The speed at which you set your shutter speed depends on how fast your subject is moving and how much blur you want in your photos.
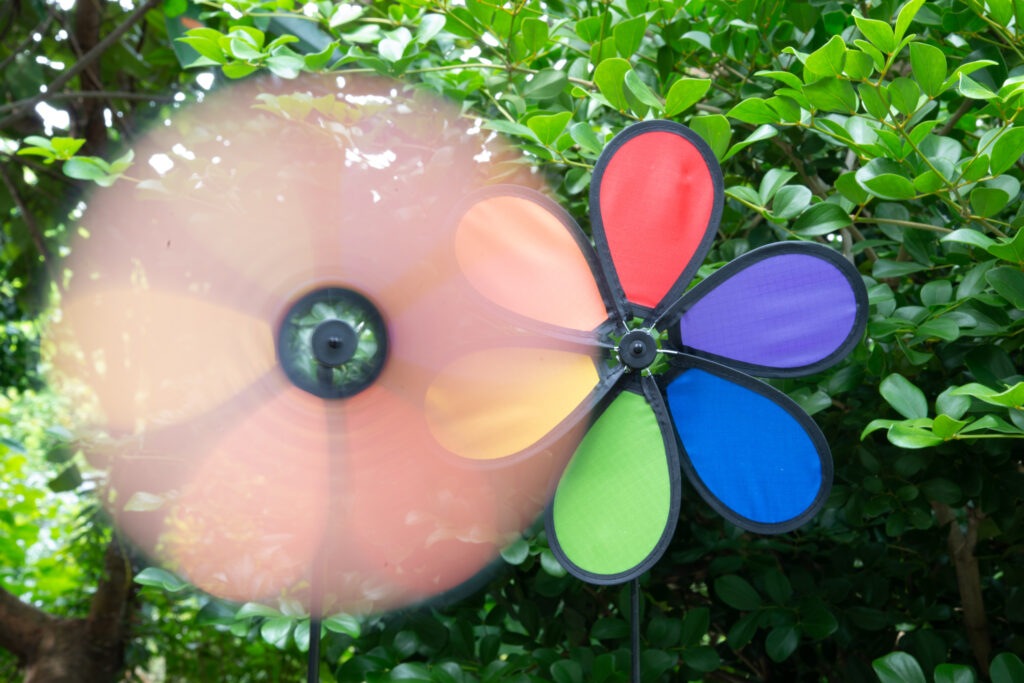
For this image, I changed my shutter speed to 1.6 seconds and adjusted my aperture to f/18. Comparing these two photos and the first one, you can see the difference in the amount of blur and the influence the flash has. An electric fan was creating the wind, so the pinwheel flower was spinning at a constant speed. Photograph by Kevin Landwer-Johan
Key Lesson: There may be a more scientific approach to this technique, but I find it more enjoyable to experiment with the variables and review my test images. I tweak my settings until I’m happy with them and then keep experimenting. The amount of blur you want to see is subjective, so there is no right or wrong way to adjust all your settings. Often, you’ll have no control over the speed of your subject so cannot be consistent and precise.
Why I Prefer Rear Curtain Flash Sync
My cameras are always set to rear curtain flash. This setting is an option on most cameras that allows you to control when the flash fires in relation to the opening and closing of the shutter.
By default, cameras are usually set so the flash will fire immediately as the shutter opens, but you can adjust this setting so the flash will not fire until just before the shutter closes. This may seem trivial, especially when considering the duration of the shutter is less than one second.

I photographed these colored balls on a black background using a shutter speed of 1/3rd of a second. My flash was set to rear curtain sync, and you can see how the blurred tails of color appear to follow the balls. Photograph by Kevin Landwer-Johan
The effect of setting your camera to rear curtain flash synchronization helps you to better optimize the motion in your photos. The look of the blur is different than when using front curtain sync.
With your camera set to front curtain sync, the flash fires and freezes your moving subject at the beginning of the exposure. This illuminates the subject before any blurring is recorded by your camera’s sensor, so the blur appears ahead of the direction in which your subject is moving.
Using rear curtain sync, the flash freezes the moving subject at the end of the exposure. Any amount of blurring recorded before this moment appears behind the subject. This makes the motion blur look more realistic (even though we never naturally see this without a photograph).
Tips for Experimenting With Flash and Motion
Introducing flash adds another variable to both exposure calculation and your creative control. The better you understand the effects of adding flash, the more creative you can become at using it. Experimentation is the key.
Experiment With Speed
Try photographing a selection of subjects, or the same subject, moving at different speeds. Take a series of photos starting with a fast shutter speed and then slowing down the shutter speed by one stop each time you take a photo.
Then adjust the speed of your subject and repeat the series of photos, working through different shutter speeds.
Try photographing a selection of subjects, or the same subject, moving at different speeds.
Compare the results. You’ll see that when a subject is moving faster, you’ll need a faster shutter speed to freeze it. You will also notice that for a fast-moving subject to appear blurred, it will do so at a faster shutter speed than a slower-moving subject.
Use Off-Camera Flash
Using off-camera flash adds a more interesting dynamic to your photos. You can achieve different effects when balancing your flash with the ambient light.

In this image, I set my exposure for the ambient light and then slightly underexposed it. It was a cloudy day, so the light was soft. The sun was behind the water spray. I had my flash off to one side of my camera, so it illuminated the spray of drops from the front. Photograph by Kevin Landwer-Johan
Zoom or Use Intentional Camera Movement
When you zoom your lens or move your camera intentionally while using a slow shutter speed, you can create abstract photos. Adding a pop of flash can help to enhance the movement.

In this image, I zoomed my lens while making a ¼ second exposure. Photograph by Kevin Landwer-Johan

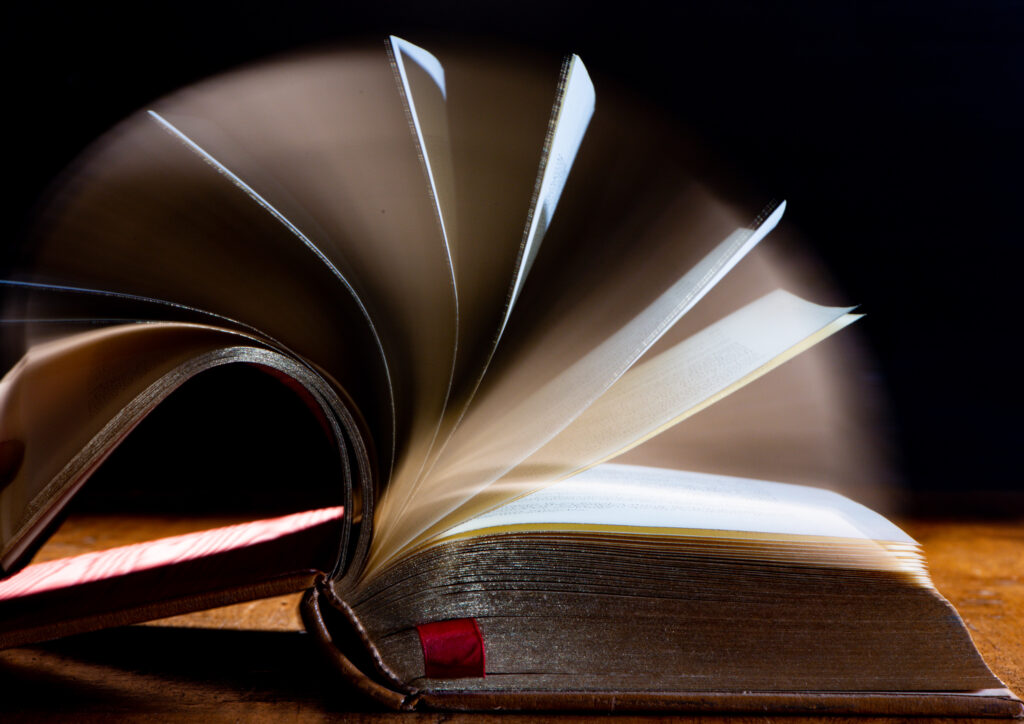
For this image, I moved my camera in a circular motion while making a 1/5th of a second exposure. In both examples, my camera was set to rear curtain sync. Photograph by Kevin Landwer-Johan
Experiment With Exposure Settings
Most of the time I use flash, I take an exposure reading and set my camera so it slightly underexposes my subject. When the flash fires, it makes up the balance, so my subject is well exposed. The background may appear a little underexposed and help the subject stand out more. This technique works well most of the time.
Experiment using settings that underexpose the ambient light. This means that if you don’t use flash, your subject will appear too dark, and so will the background. You must rely on your flash to illuminate the moving subject. Often, this will result in a more pronounced blur appearing in your photos.
Diffuse Your Flash
Adding a softbox, umbrella, or another diffusion to your flash helps to create a more natural-looking light. This less harsh light often blends well with the ambient light and produces less contrast. You still need to manage your flash output, but the softer light also helps to avoid hard-edged shadows.
Photograph by Kevin Landwer-Johan
Freezing the Motion
When you want to freeze motion in your photos, choose a fast shutter speed and use flash. Adding a pop of flash often helps to sharpen a moving subject because the duration of the flash is so fast.

For this image, the exterior of our pizza oven was too dark, so I popped in a little flash. I did not want to use a slower shutter speed (it was set to 1/100th of a second) because I did not want the fire to appear any more blurred. Photograph by Kevin Landwer-Johan
Flash Can Be Used for More Than Illuminating a Scene
Begin to think of how you can use your flash when photographing a moving subject to create some interesting photos. Don’t confine using flash to only adding more light. Begin to play with motion and blurring.
The more you experiment with this technique, the better understanding of it you’ll have. As you practice, you can come to appreciate how shutter speed, subject movement, and flash work together to produce a wide variety of results.
Recommended Reading: If you’d like to learn how to use your flash unit for better photography, grab a copy of Photzy’s Electronic Flash – Parts and Practices premium guide.
Self-Check Quiz:
- Why is it helpful to practice these techniques with a subject moving at a constant speed?
- What must you do if you want a clear subject with no motion blur?
- With a slow-moving subject, do you need a faster or slower shutter speed to show motion blur when using a flash?
- What setting should you adjust if you want more blur?
- Are auto or manual settings best when experimenting with flash and motion blur?
- What is the effect of using rear curtain synchronization with flash and a slow shutter speed when photographing a moving subject?


