

What do we mean when we talk about low light? And how do you take great photographs when there isn’t much light available? In this guide I’ll answer these questions and more, giving you my five top tips for low light photography. People often shy away from taking photos in low light, mistaking it for simply ‘bad’ light. And yes, shooting in low light is technically and compositionally challenging, but with a little know-how, it’s possible to produce visually stunning images.
Here’s what we’ll cover:
- Types of low light
- What gear do you need?
- Five tips for low light photography
Recommended Reading: If you’re interested in learning more about light and how you can use it to improve your photography, grab a copy of Photzy’s bestselling premium guide: Understanding Light Book Two.
Types of Low Light
First things first: what is low light? A lot of people presume that low light simply describes the dark conditions at night, but in fact, there are different types of low light. There is a huge range of light between bright sunlight and pitch black, so it’s easiest to divide low light into smaller categories:
- Visible low light – Whilst this sounds like an oxymoron, visible low light refers to the times in daylight that you’re shooting in shadow areas; for example, behind buildings or under large trees.
- After sunset – You can still see everything around you clearly, but the sun has set, and it is starting to get dark.
- Dark – Nighttime, when you can only see artificially lit objects or stars in the sky.
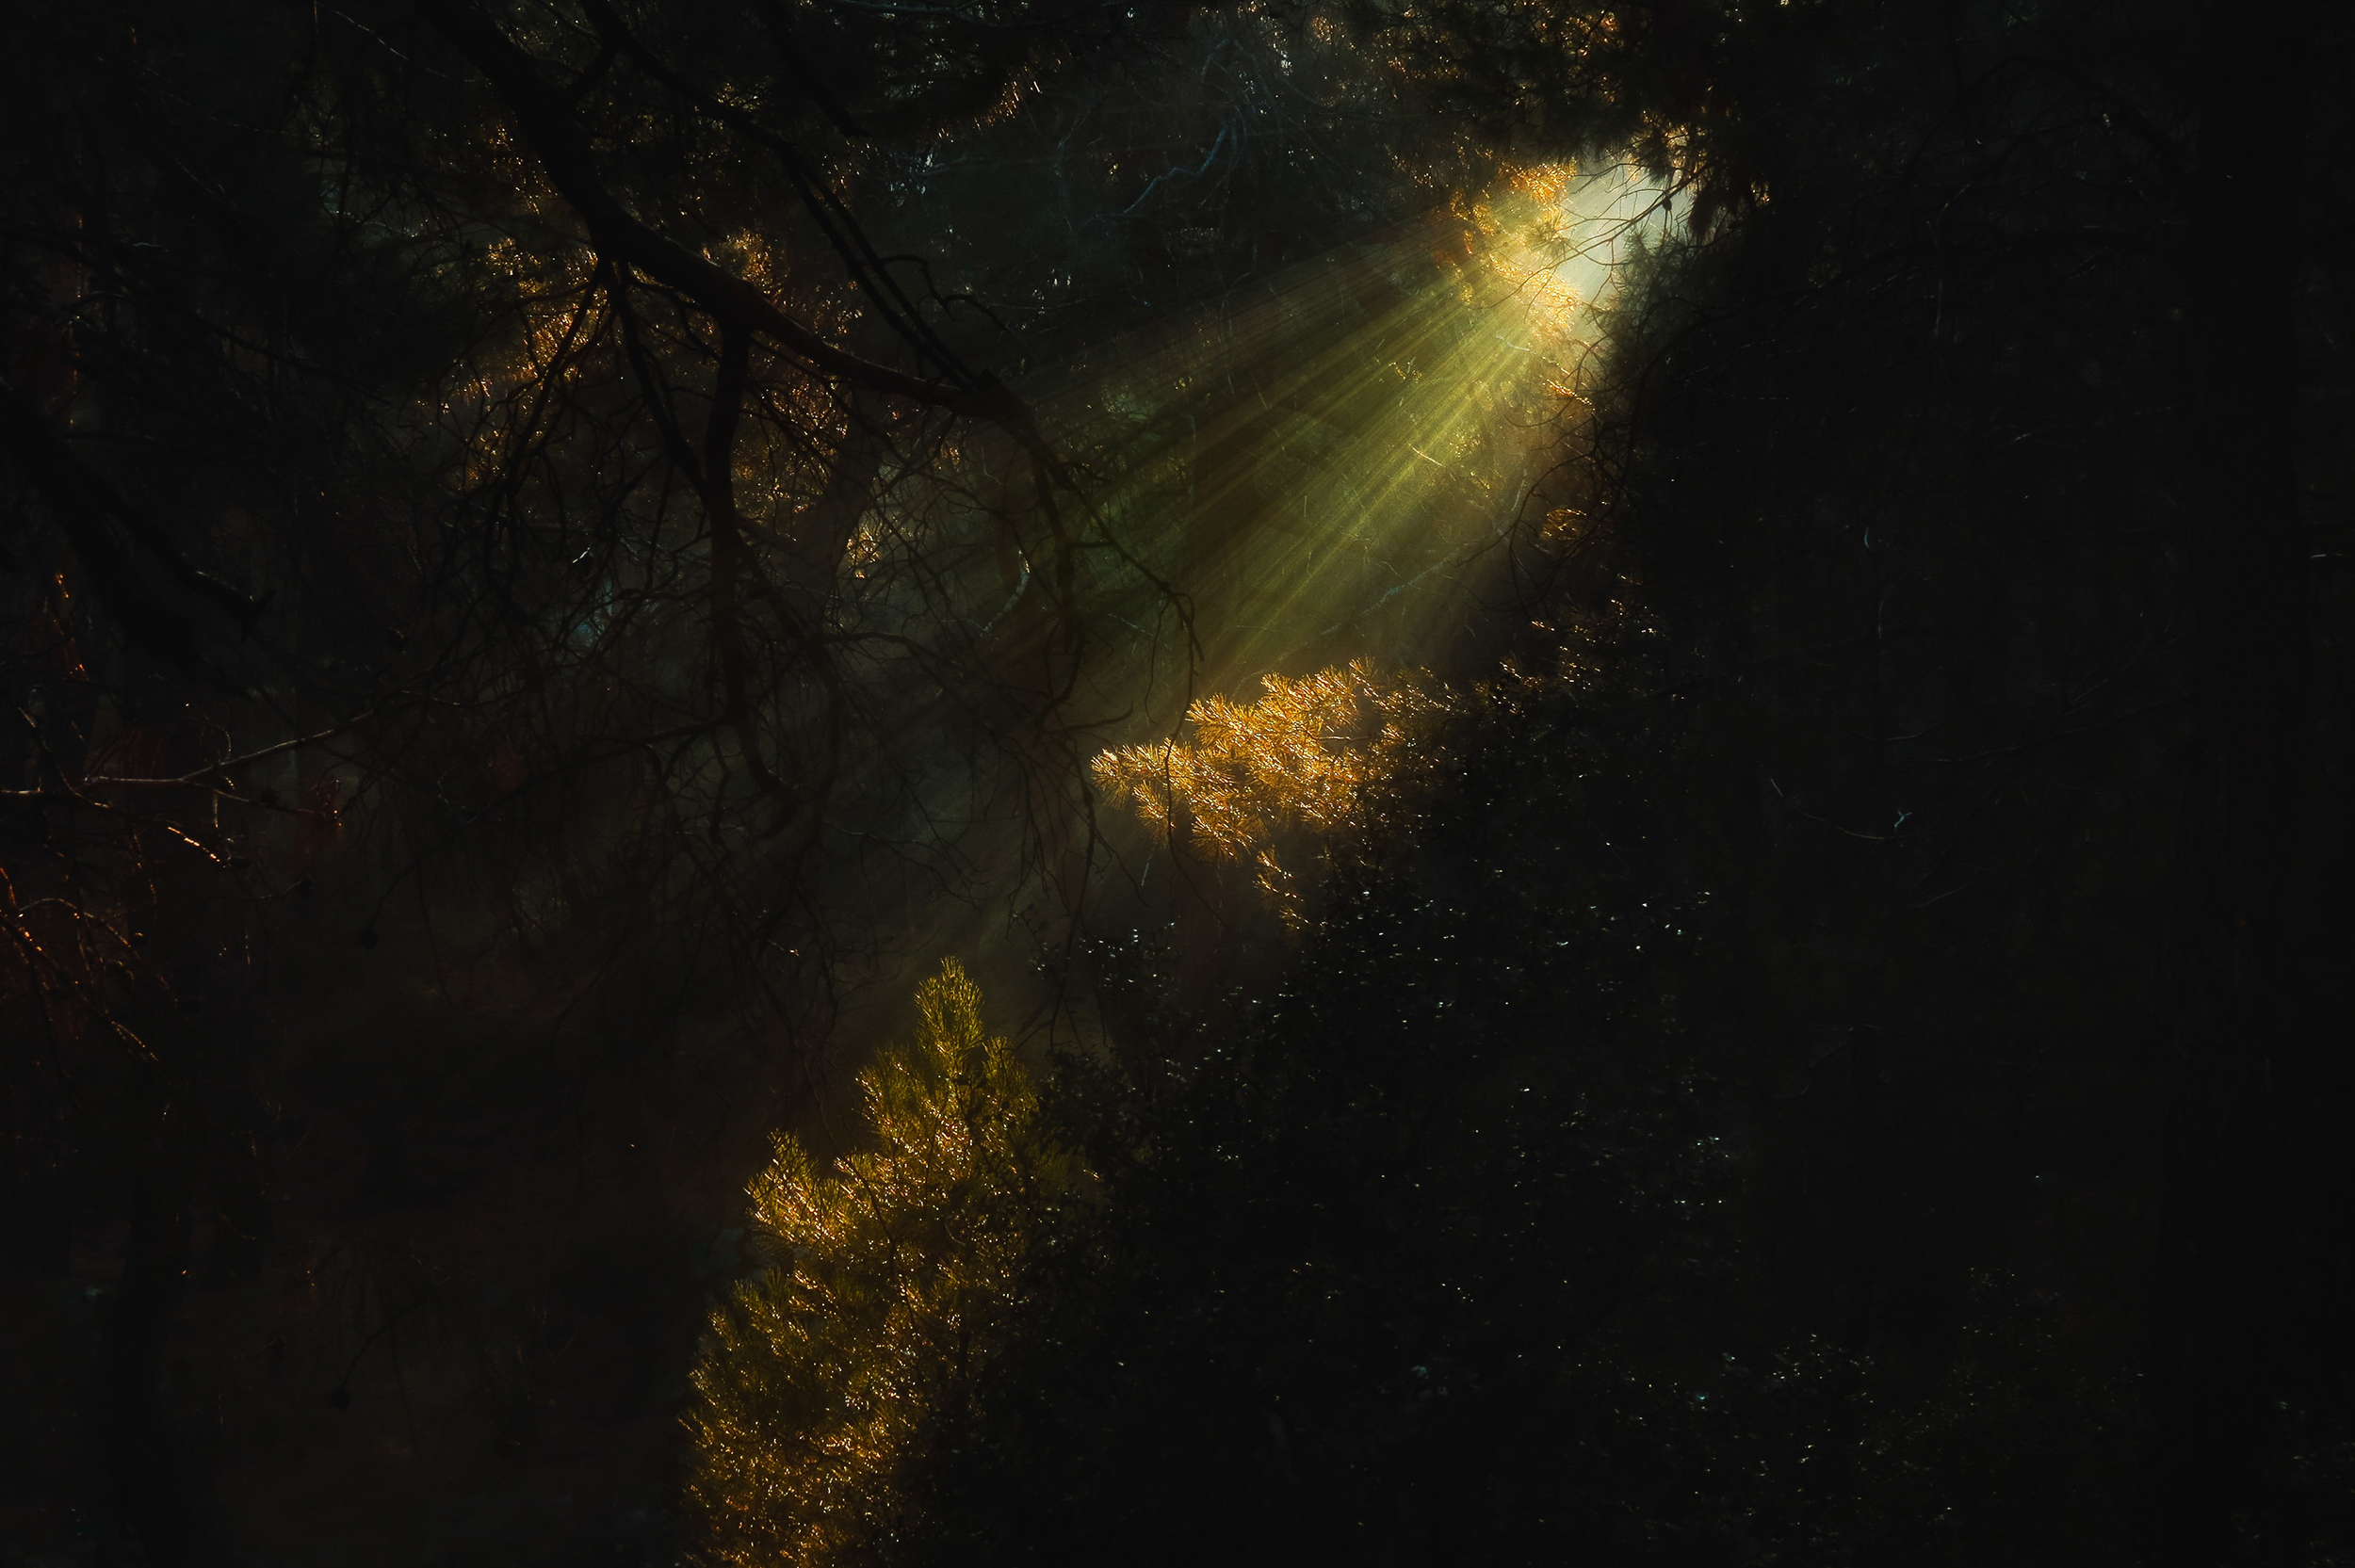
Visible low light is clearly illustrated in this photograph, with the shot taken from within a patch of shadow. Photograph by I.U
What Gear Do You Need?
When it comes to low-light photography, the kit you use can make a big difference in how easy it is to capture shots. Modern cameras are far better at coping with higher ISOs all around, but you will find, naturally, that the top-end cameras have the best ISO capabilities. Of course, there’s also the argument that if you need to use a ridiculously high ISO it should also be considered whether the shot is worth taking!
Key Lesson: One of the most important aspects of low light photography is having a lens that allows you to open up your aperture to let more light into your image. This doesn’t have to be a major expense – you can pick up a Canon or Nikon 50mm f1.8 for around $60, just to give one example. These prime lenses are extremely fast, but of course, you do have to balance this with the small depth of field you’ll get at f1.8, and this won’t be suitable for a lot of photographic situations.

Long exposures allow capturing events such as the Aurora Borealis seen in the night sky. Photograph by Vincent Guth
If you need to use a large depth of field for your low light shot, you’re going to be using a small aperture. This means you’ll need to get light into your shot through a long exposure or by raising your ISO. Using a long exposure is always (in my view anyway) preferable to raising your ISO, so you will find that a tripod is also an essential piece of kit for low-light work. A lightweight travel tripod made of carbon fiber will be the easiest to transport around, but it comes with a higher price tag than its aluminum compatriots. If you can’t take a tripod out with you, invest in ‘The Pod’ – a small beanbag with a tripod screw attached.
Of course, there’s also the argument that if you need to use a ridiculously high ISO it should also be considered whether the shot is worth taking!
Finally, keep a flashgun to hand. Sometimes there simply won’t be enough available light to get an acceptable ISO level. Or you may want to take action shots that require a fast shutter speed, which will reduce the amount of light coming through your shutter into the camera. Flash can also be useful for photographing people in low light, as it helps them to stand out from the background. Even with flash, you’re going to need a slightly raised ISO (probably at least 400), and don’t forget that flashlight is harsh – you’ll want to diffuse the light as much as possible. In addition to using a diffuser or mini softbox on your flashgun, you can also bounce the flash if possible, or use it off-camera.
Tip #1: Shoot Manual, Shoot Raw
Low light photography requires finite control over your image and it’s not a genre that you can shoot in Auto mode. Having control over your Exposure Triangle of shutter speed, aperture, and ISO is essential when there isn’t much light. You can then decide on things such as depth of field, whether you can use a long exposure, or whether your only option is to raise your ISO. Left to its own devices, a camera will always default to pushing the ISO up.
In addition, I would always shoot in RAW when shooting in low light. Shooting in RAW gives you far more opportunities to recover details without adding too much noise to your images. Although you can work with a Jpeg image in-camera RAW, your options to recover details are limited and your camera will have already applied compression, meaning that any changes will start to degrade the quality of your image.
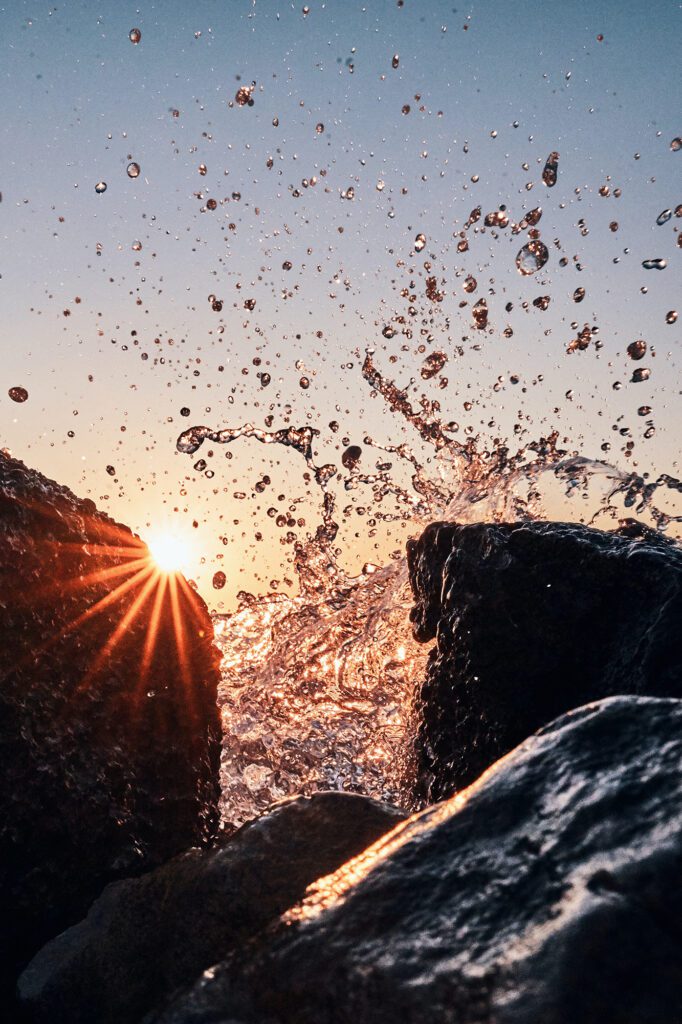
Shooting in manual allows full control over your settings, such as choosing a fast enough shutter speed to freeze the drops of spray in this shot. Photograph by Joshua Humpfer
Tip #2: Focusing
One of the hardest things to do in low light is to get the camera to focus correctly using autofocus. When you shoot in low light conditions, you’ll probably find that your camera struggles to autofocus. However, most modern digital cameras have an AF assist light. This is usually found at the front of the camera and lights up like a torch to help illuminate your subject. In very dark situations, however, you may find that this is not enough to illuminate. You can also try shining a torch directly onto your subject or use the manual focus ring to fine-tune the focus. Be extremely careful to lock your focus, as this will be easier if you use back button focus.
One of the hardest things to do in low light is to get the camera to focus correctly using autofocus.
Of course, if it’s dark, your autofocus will not function. Your AF assist light or a flashlight can help to illuminate a subject that’s close to the camera, but if a subject is further away, you’ll need to use manual focus. In this case, zoom into your subject whilst using Live View and then focus once you can see the subject.
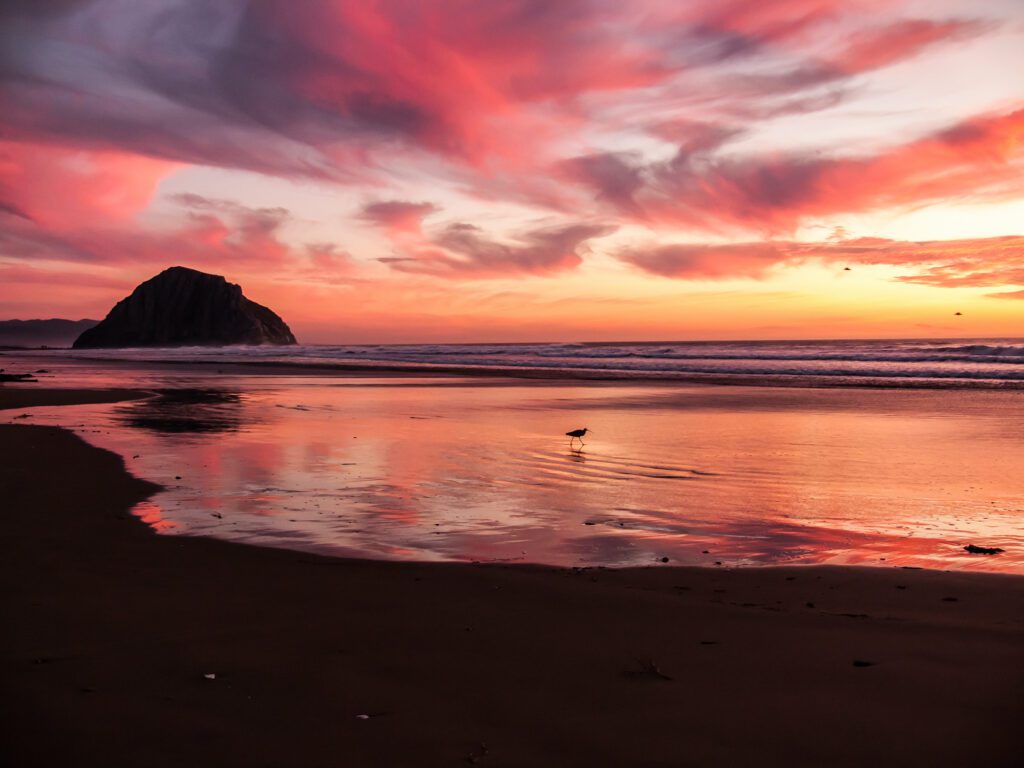
This is an easily recognizable low light shot, benefiting from careful focusing and good stabilization by the photographer. Photograph by Michael Baird
Tip #3: Stabilize Yourself
It’s not for everyone, but some people can learn to stabilize themselves and hold their cameras better. Start by supporting your lens and camera body by putting your palm under the camera, wherever the center of the weight is. Keep your elbows close to your body and, if possible, sit down and use your knee as support by resting your arm on it. Which arm you use will probably depend on whether you’re left or right-handed, so use a combination that feels natural to you. With practice, you may find that you can use lower shutter speeds and still get a sharp image without any camera shake. Don’t worry if you can’t perfect this technique; I’ve been taking photos since I was 10 and I still can’t use very low shutter speeds without a tripod in my 40s!
Tip #4: Use Image Stabilization
If your lens or camera has image stabilization (also known as vibration reduction, vibration compensation, optical image stabilization, or optical steady shot), you will find it very useful for shooting in low light. You’ll generally find image stabilization on longer lenses which would normally need a fast shutter speed to keep the shot steady. But image stabilization allows you to use slower shutter speeds and still get a sharp image. In some cases, it could allow you to drop the shutter speed by up to 4.5 stops. What’s the downside to these lenses? Well firstly, image stabilization can drain your batteries more quickly and the lenses aren’t always quite as sharp. In-body image stabilization is becoming increasingly popular (particularly with mirrorless cameras) and works extremely well as it’s built into the camera and doesn’t affect its performance.
Tip #5: Position Your Subjects Closer to the Light Source
If you’re shooting in a situation where there is still some light, make sure you position your subject as close to that light source as possible. For example, if you’re shooting indoors, remember that large windows are a great source of natural light, so make sure curtains are open and as much light as possible is getting into a room.

Positioning the subject close to these large windows allows light to fall on their face and arm, making for a striking composition. Photograph by Ari Williams
Key Lesson: One bonus tip for you is not to rely on the LCD screen! LCD screens have a tendency to make images look brighter than they actually are, which is particularly confusing with low-light images. Make sure you use your camera’s light meter and exposure line to ensure that you get correctly exposed images.
Recommended Reading: If you’re interested in learning more about light and how you can use it to improve your photography, grab a copy of Photzy’s bestselling premium guide: Understanding Light Book Two.
Conclusion
Low light photography can produce stunning results, but it requires a good knowledge of your camera settings and the confidence to shoot in manual. Using these tips should help you along the way!

Self-Check Quiz:
- What are the three types of low light?
- Why should you shoot RAW?
- What does an AF assist light do?
- How many stops can you lower the shutter speed by with image stabilization?
- Why shouldn’t you rely on the LCD screen?


