
Low light photography is photographing in any situation that has limited light. When photographing outside, this means anything from photographing in a deeply shaded forest to astrophotography. The sun is a bright natural light source. We can encounter low light any time the sun is blocked. But low light does not mean any light. Even at night, the moon provides light. Or we see with man-made illumination. We have at least some light to work with.
We often encounter low-light situations indoors. You may not notice that the light is dim because your eyes adjust to the low light. But your camera does not adjust automatically. You may be able to see, but your camera can’t. You will have to change some of your settings to photograph indoors. Let’s go through some of the most common adjustments you can make to make images in low-light situations.
Photography is painting with light. However, life happens when there is not a lot of light. Your photography does not have to stop at night or indoors where the light is dim. Here are five tips for low-light photography that will keep you going even when the light fades.
What we will cover in this guide:
- Opening the aperture
- Exploring a higher ISO
- Lengthening shutter speed
- Adding an external light source
- Embracing the darkness
- Gear for low-light photography

Lantern festivals can be magical but you must work with the low light conditions. For this image, my settings were f/4.0 at 1/60th of a second at ISO 10,000. Photograph by Jenn Mishra
Recommended Reading: If you’d like a comprehensive guide on using ND filters and producing gorgeous long exposures, grab a copy of Photzy’s The Complete Guide to Long Exposure Photography.
Tip #1: Open the Aperture
You can see in a dimly lit room or find your way by moonlight because your eyes adjust to the low light. Your pupils dilate or become bigger to let in more light. They get smaller when light is bright to limit the amount of light coming in.
The aperture, or opening, on a camera lens, works a bit like your pupils. You can make it larger to let in more light or smaller to restrict light. The size of the opening is described with an f-stop number. A low f-stop denotes a wider opening. So, f/2.8 is wider than f/8.0. Each lens has a maximum opening. A “fast” lens can open wide to f/2.8, f/1.8, or even f/1.4. Sports, wildlife, and concert photographers often use fast lenses. They can open the aperture wide and let in as much light as possible.

You can make the aperture, or opening, inside a camera lens larger to let in more light. Photograph by Lenstravelier
If you find yourself in a low-light situation, open your aperture wide. You can do this in manual or aperture priority mode on your camera. Aperture priority mode is usually marked with an A or an Av. In aperture priority mode, you set the aperture, and your camera figures out a shutter speed that will properly expose the image.
Opening your aperture lets you photograph in low-light situations and also changes the depth of field. At wide-open apertures less of your image will be in focus, so make sure that you lock focus on your subject.
Tip #2: Explore a Higher ISO
The ISO setting on your camera makes your sensor more sensitive to light. In a low light situation, a higher ISO seeks out whatever light is available. You may be surprised at how much light your camera can find.
The default ISO on most cameras is 100 ISO. Most photographers like to use 100 ISO because it creates the cleanest image. When you are in a low-light situation, explore a higher ISO. You may need to consult the owner’s manual for your camera to find out how to change the ISO settings. There is often a menu button or dial.

A small fire lights up the night. My settings were f/5.6 at 1/100th of a second, ISO 12,800. I removed the noise created by the high ISO in post-processing. Photograph by Jenn Mishra
Mid- to high-end cameras have a maximum ISO above 12,800. Higher ISOs create brighter images, but they can also introduce grain into your photo. Each generation of digital cameras improves the ability to make clean images at higher ISOs. Don’t worry about a little noise. It is better to have a noisy photo than no photo at all.
In a low light situation, a higher ISO seeks out whatever light is available. You may be surprised at how much light your camera can find.
Even if you get a little grain in your images, post-processing programs like Lightroom have a denoise function. This will remove some of the grain introduced by using a higher ISO. Or you can embrace the grain. It adds texture to your image, especially in black and white.
Tip #3: Lengthen Your Shutter Speed
You control how long the shutter of your camera is open. If your shutter is open, your sensor collects light. The light adds up and brightens the image. In dim conditions, you may only need to lengthen your shutter speed a little. A half-second or a second may be more than long enough to capture light in a dim room. When photographing at night, you may need to leave your shutter open for longer. Astro-photographers commonly leave their shutter open for 20 to 30 seconds to capture light from the stars.
If you find yourself in a low-light situation, lengthen your shutter speed. You can do this in manual or shutter priority mode on your camera. Shutter priority mode is marked with an S or a Tv depending on what camera system you use. In this mode, you tell the camera how long to leave the shutter open. The camera will figure out what aperture to use to make a correct exposure. You may want to use manual mode so you can also open your aperture as wide as possible.
A light meter will help you know how to adjust your settings. You can download an app like Photo Light & Exposure Meter that works from your mobile phone. You can also use the histogram on your camera.

On my mirrorless camera, the peaks in the histogram shown in the corner of the screen change as I adjust the camera settings. Photograph by Jenn Mishra
A histogram maps the light onto a graph. Darker values are on the left side of the graph. Lighter values are on the right. In a low-light situation, you will see peaks on the left. Change your settings to move peaks into the middle of the histogram.
Mirrorless cameras have a live histogram that reflects changes you make in your settings. You may also see a live preview where image exposure also changes. Some cameras show a histogram in Live View, but you can only see the actual light peaks once you take a sample image.

To capture fireworks, I set my shutter speed to 8 seconds. My camera captured a few firework bursts in one frame. The motion of the firework exploding shows as a light trail. Photograph by Jenn Mishra
There is one thing to watch for when you take a long exposure: motion. Any motion you make when holding the camera shows as a blur in the image. We all shake a little, but the shake only shows up when we lengthen the shutter speed. When leaving your shutter open to collect extra light, put your camera on a tripod or set it on another stable surface.
There is one thing to watch for when you take a long exposure: motion. Any motion you make when holding the camera shows as a blur in the image.
Also, any motion in the scene shows up as a motion blur. This can be a pleasing effect. Photographers take advantage of this when they are photographing moving water or fireworks. People moving at night may be blurred. This is not necessarily bad. You get an interesting effect. Just know that this will happen when you open your shutter for a long time.
One way to photograph in low-light situations is to leave your shutter open for a long period. The trick is finding the right balance between how long to leave the shutter open without inducing motion blur.
Tip #4: Add an External Light to the Scene
Low-light situations do not have to stay that way. You can add light to the scene with a variety of external light sources. These help you make a well-exposed image, but they can also add interesting shadows as a photographic element.
Start by taking advantage of light already in the scene. If you are photographing street scenes at night, look for street lamps or illuminated signs. At night, a full moon puts out a surprising amount of light.
You can also add light using the flash on your camera or phone. Camera flashes add light, but you may not be able to control the direction and amount of light. On-camera flashes often give an unnatural look to your photos. Therefore, portrait photographers often use external lights that they set up away from the camera. The best light is usually from the side rather than the front. Also, camera flashes have a limited range. They will not illuminate subjects more than a few feet from the camera.

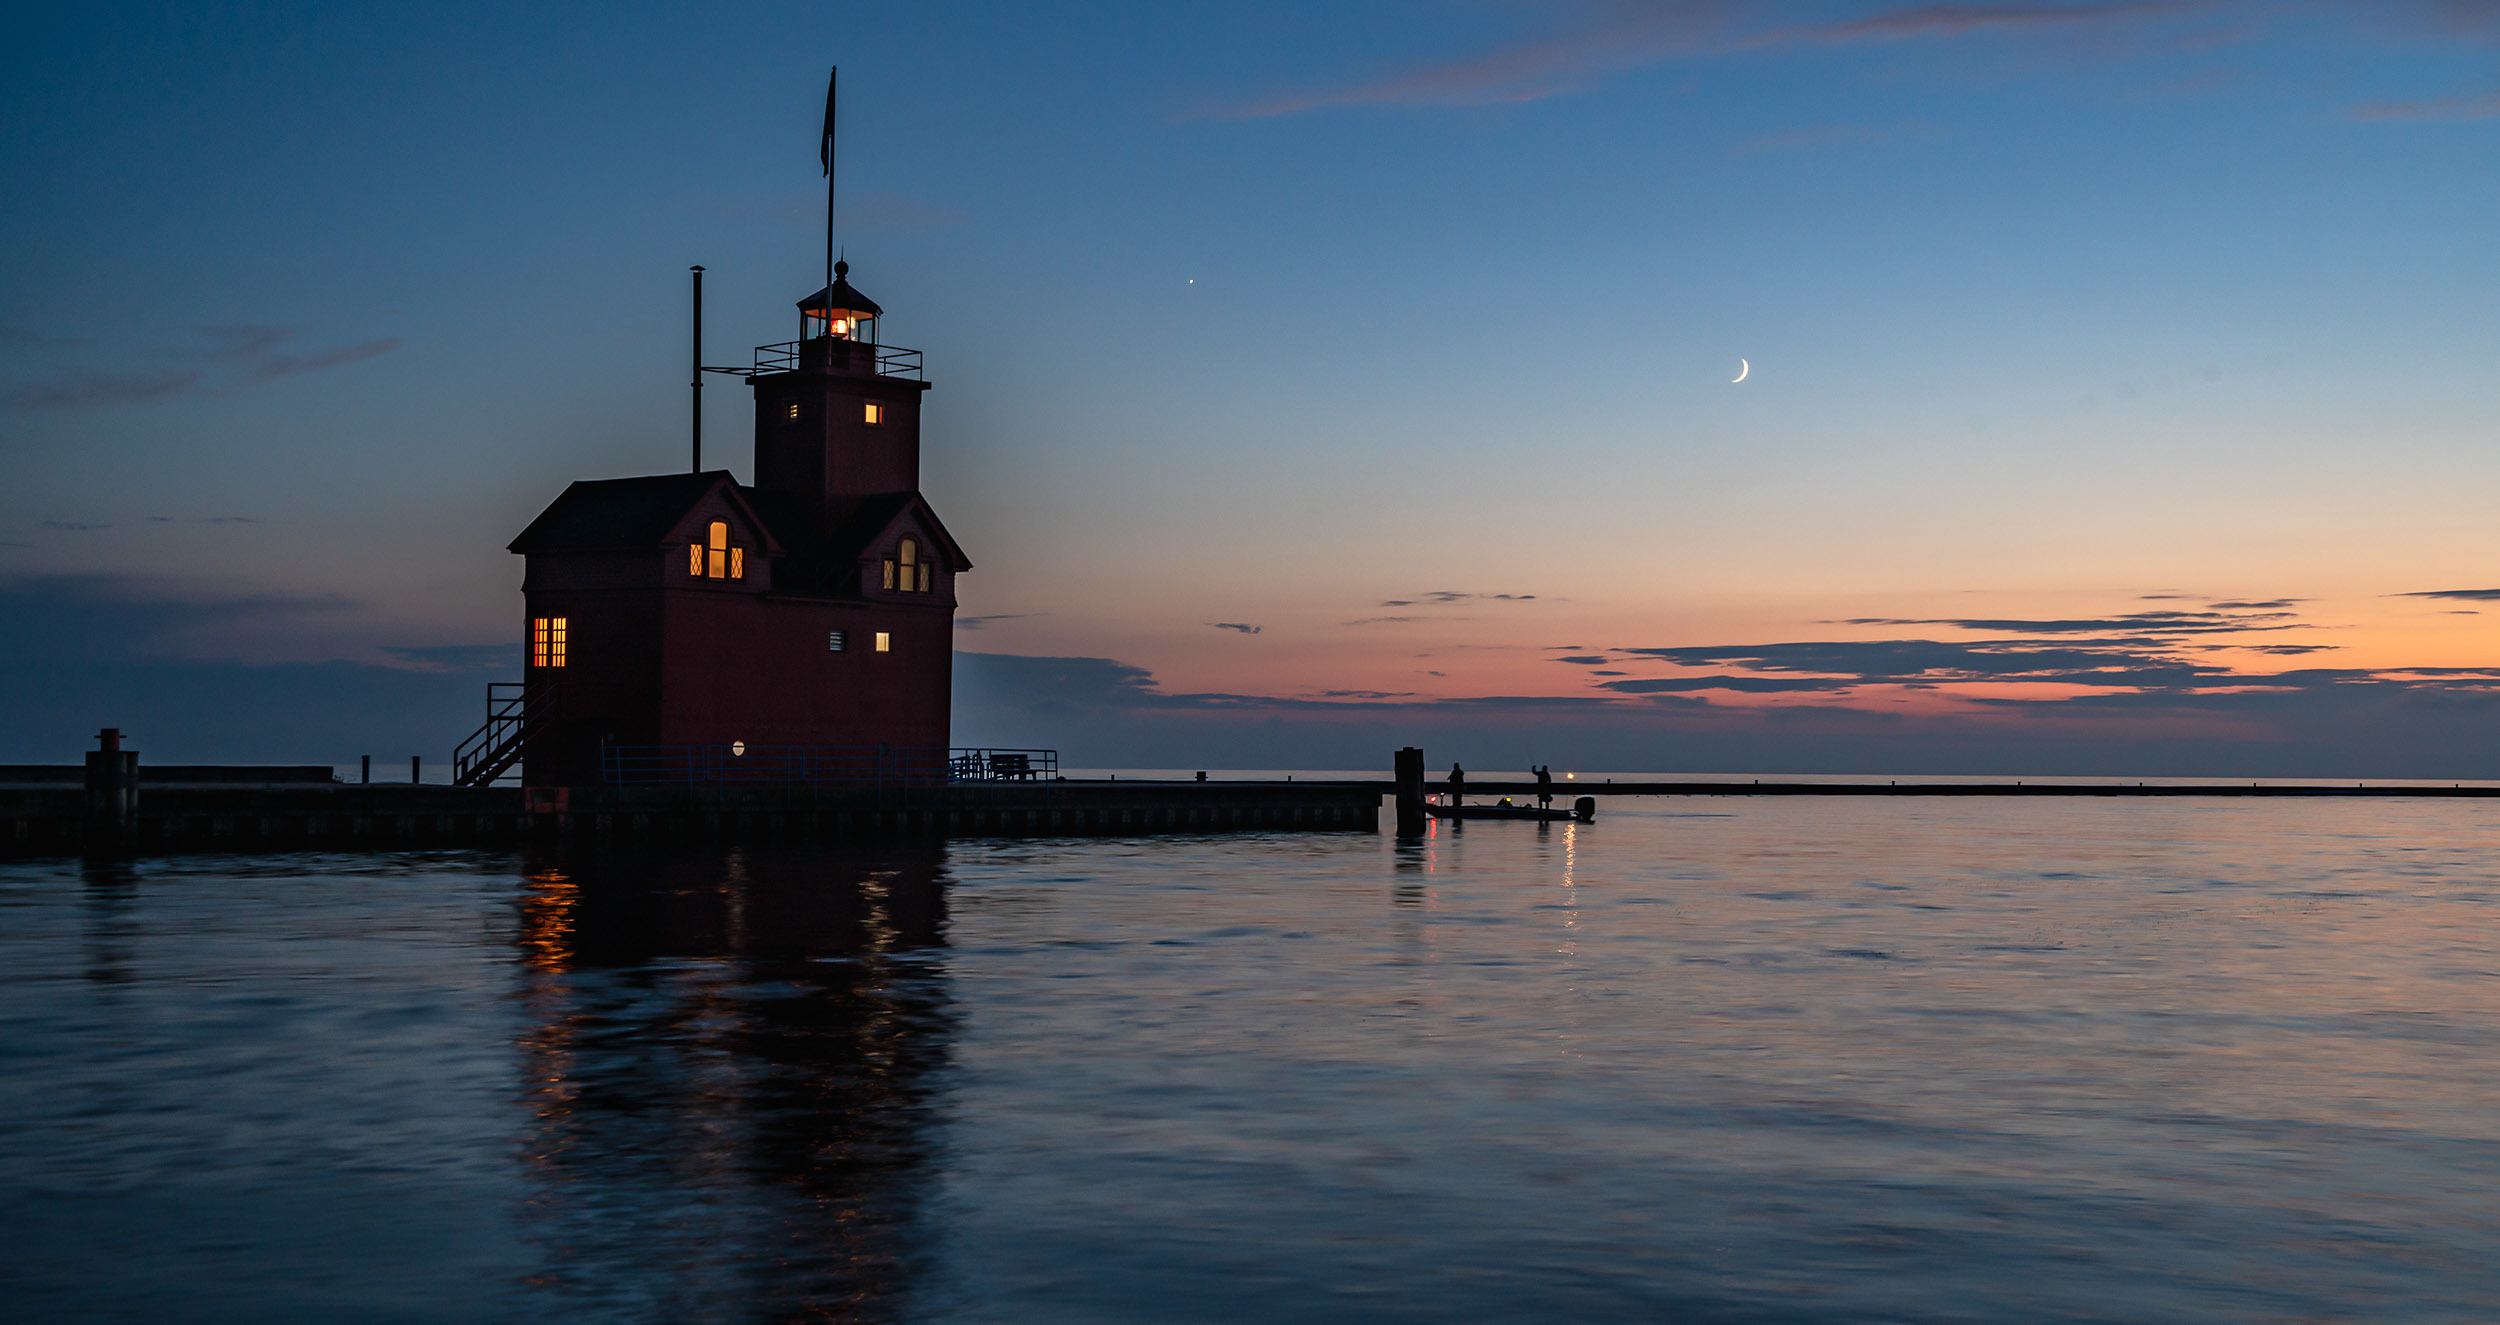
A small LCD light illuminates the red mill on a dark night. My settings were f/2.8 at 10 seconds, ISO 6400. Photograph by Jenn Mishra
Your flash is not your only source of external light. You can use any light to illuminate the scene: your phone, a flashlight, or a lamp. You may not need to add a lot of light. Use an external light source with camera settings like a long exposure. You can easily light up structures on a dark night with just a flashlight.
Learning to control external light needs a guide of its own. One thing to know is that light bounces. You can direct light towards a flat surface, like a ceiling or wall. The light will bounce back and spread. Also, the direction of the light matters. If the light is behind your subject, you will get a silhouette. If the light is to the side, you will see shadows. This adds depth to your subject. Light from the front is flat and usually the least pleasing.
Tip #5: Embrace the Darkness
Not every photo needs to be exposed the same way. If you are in a low-light situation, embrace the darkness. Focus on the available light and let everything else go black. This is low-key photography. This type of photography emphasizes darkness and shadow. You purposefully underexpose the image.
To explore more, see my guide Low Key Photography Defined and Explained.

For this image, I used two external studio lights. My settings were f/9.0 at 1/160th of a second, ISO 100. Photograph by Jenn Mishra
Also, just because your image looks dark does not mean that it is. Your camera may have captured more light than you think. Try editing your photo in a post-processing program like Lightroom. You may be surprised when you brighten the exposure and bring up the shadows. You may see the grain in the lightened shadows. Many photo editing programs have a denoise feature that helps reduce the grain and create a cleaner image.
Gear for Low Light Photography
If you are really interested in low-light photography, you may want to invest in a camera or lens designed for dim situations. Night and concert photographers often use gear to help them make low-light images.
The Sony A7S III is a camera specially designed for low light performance. One reason the camera is so good in low light is the use of larger pixels. Usually, the number of megapixels is a big selling point, but this is not necessarily better for low-light photography. Fewer, larger pixels collect more light. The Sony A7S III has only 12.1MP. Sony’s more general camera, the A7 III, has 24MP.
If you are really interested in low-light photography, you may want to invest in a camera or lens designed for dim situations.
Fast lenses will also help you take photos in low light. This is especially the case in situations when you want to freeze motion. Lengthening shutter speed shows motion blur. To avoid this, use a lens that has a wide aperture. Look for lenses that are at least f/2.8. Fast lenses are popular with sports photographers who take images inside stadiums and other poorly lit venues.
When you can lengthen the shutter speed to let in more light, a tripod is a necessity.
Recommended Reading: If you’d like a comprehensive guide on using ND filters and producing gorgeous long exposures, grab a copy of Photzy’s The Complete Guide to Long Exposure Photography.
Conclusion

Photograph by Jenn Mishra
Digital cameras of today give you many options when photographing in limited light. You can lengthen the exposure, widen the aperture, or increase the ISO. Combine the three exposure settings to find the right camera settings for any low-light situation.
Taking the photo is just the start. Even when the image looks dark, there may be more light to find. Import your picture into a photo editing program like Lightroom, and you might be surprised at how much light you can find in a low-light scene.
Self-Check Quiz:
- What is low light photography?
- Which is the wider aperture, f/2.8 or f/8.0?
- Why do sports and wildlife photographers use lenses with a wide aperture?
- What is shutter priority mode?
- How does using a wide aperture affect focus?
- What is the downside of using a higher ISO to photograph in low light?
- Why do you need a tripod when shooting at long shutter speeds?
- Why do professional portrait photographers not use on-camera flashes?
- Other than a camera flash, what other external light sources can you use to illuminate a low-light scene?
- What is low-key photography?
Learning Assignment:
Find a low-light photographic opportunity. This may be inside a building with minimal window light or outside at dusk. Explore each camera setting that will help you photograph in low light. Open your aperture as wide as it will go, increase the ISO, and lengthen the shutter speed. Take a series of photos with different settings. If your camera shows a histogram, change settings until the peaks are in the center. In this same setting, try introducing a light source. You can use a flashlight on your mobile phone. Note how this changes the look of the scene and your camera settings.


