

One of the things I love most about photography is that, as a creative medium, there is space for everyone to create in their own preferred manner. If your thing is to have the sharpest, clearest images, then you can do that.
However, many of us prefer to be more artistic and creative in our photographic approach. We embrace the blur, making it part of the image, introducing a new way to evoke mood and to tell our stories in different ways.
While the ‘tack sharp’ purists are free to set up their tripods, dial in the numbers, and calculate the right hyper-focal distance, we are off waving our cameras randomly around, not even looking through the viewfinder at all.
My journey to creative photography started in nature and landscapes. It began with being focused on the numbers having as much sharpness as possible. Eventually I found that my ability to create was being confined by the requirement to have everything as sharp as possible.
I started to look for new ways to use my camera. A macro lens introduced me to nice, soft blurred backgrounds that are known as ‘bokeh.’ Then, using a narrow depth of field allowed it to be used selectively and, therefore, creatively.
This was still not enough. I wanted MORE BLUR!!!
...I found that my ability to create was being confined by the requirement to have everything as sharp as possible.
This eventually led me to buying a Lensbaby Velvet 56 lens, which has some delicious softness and glow.

Photo by Stacey Hill
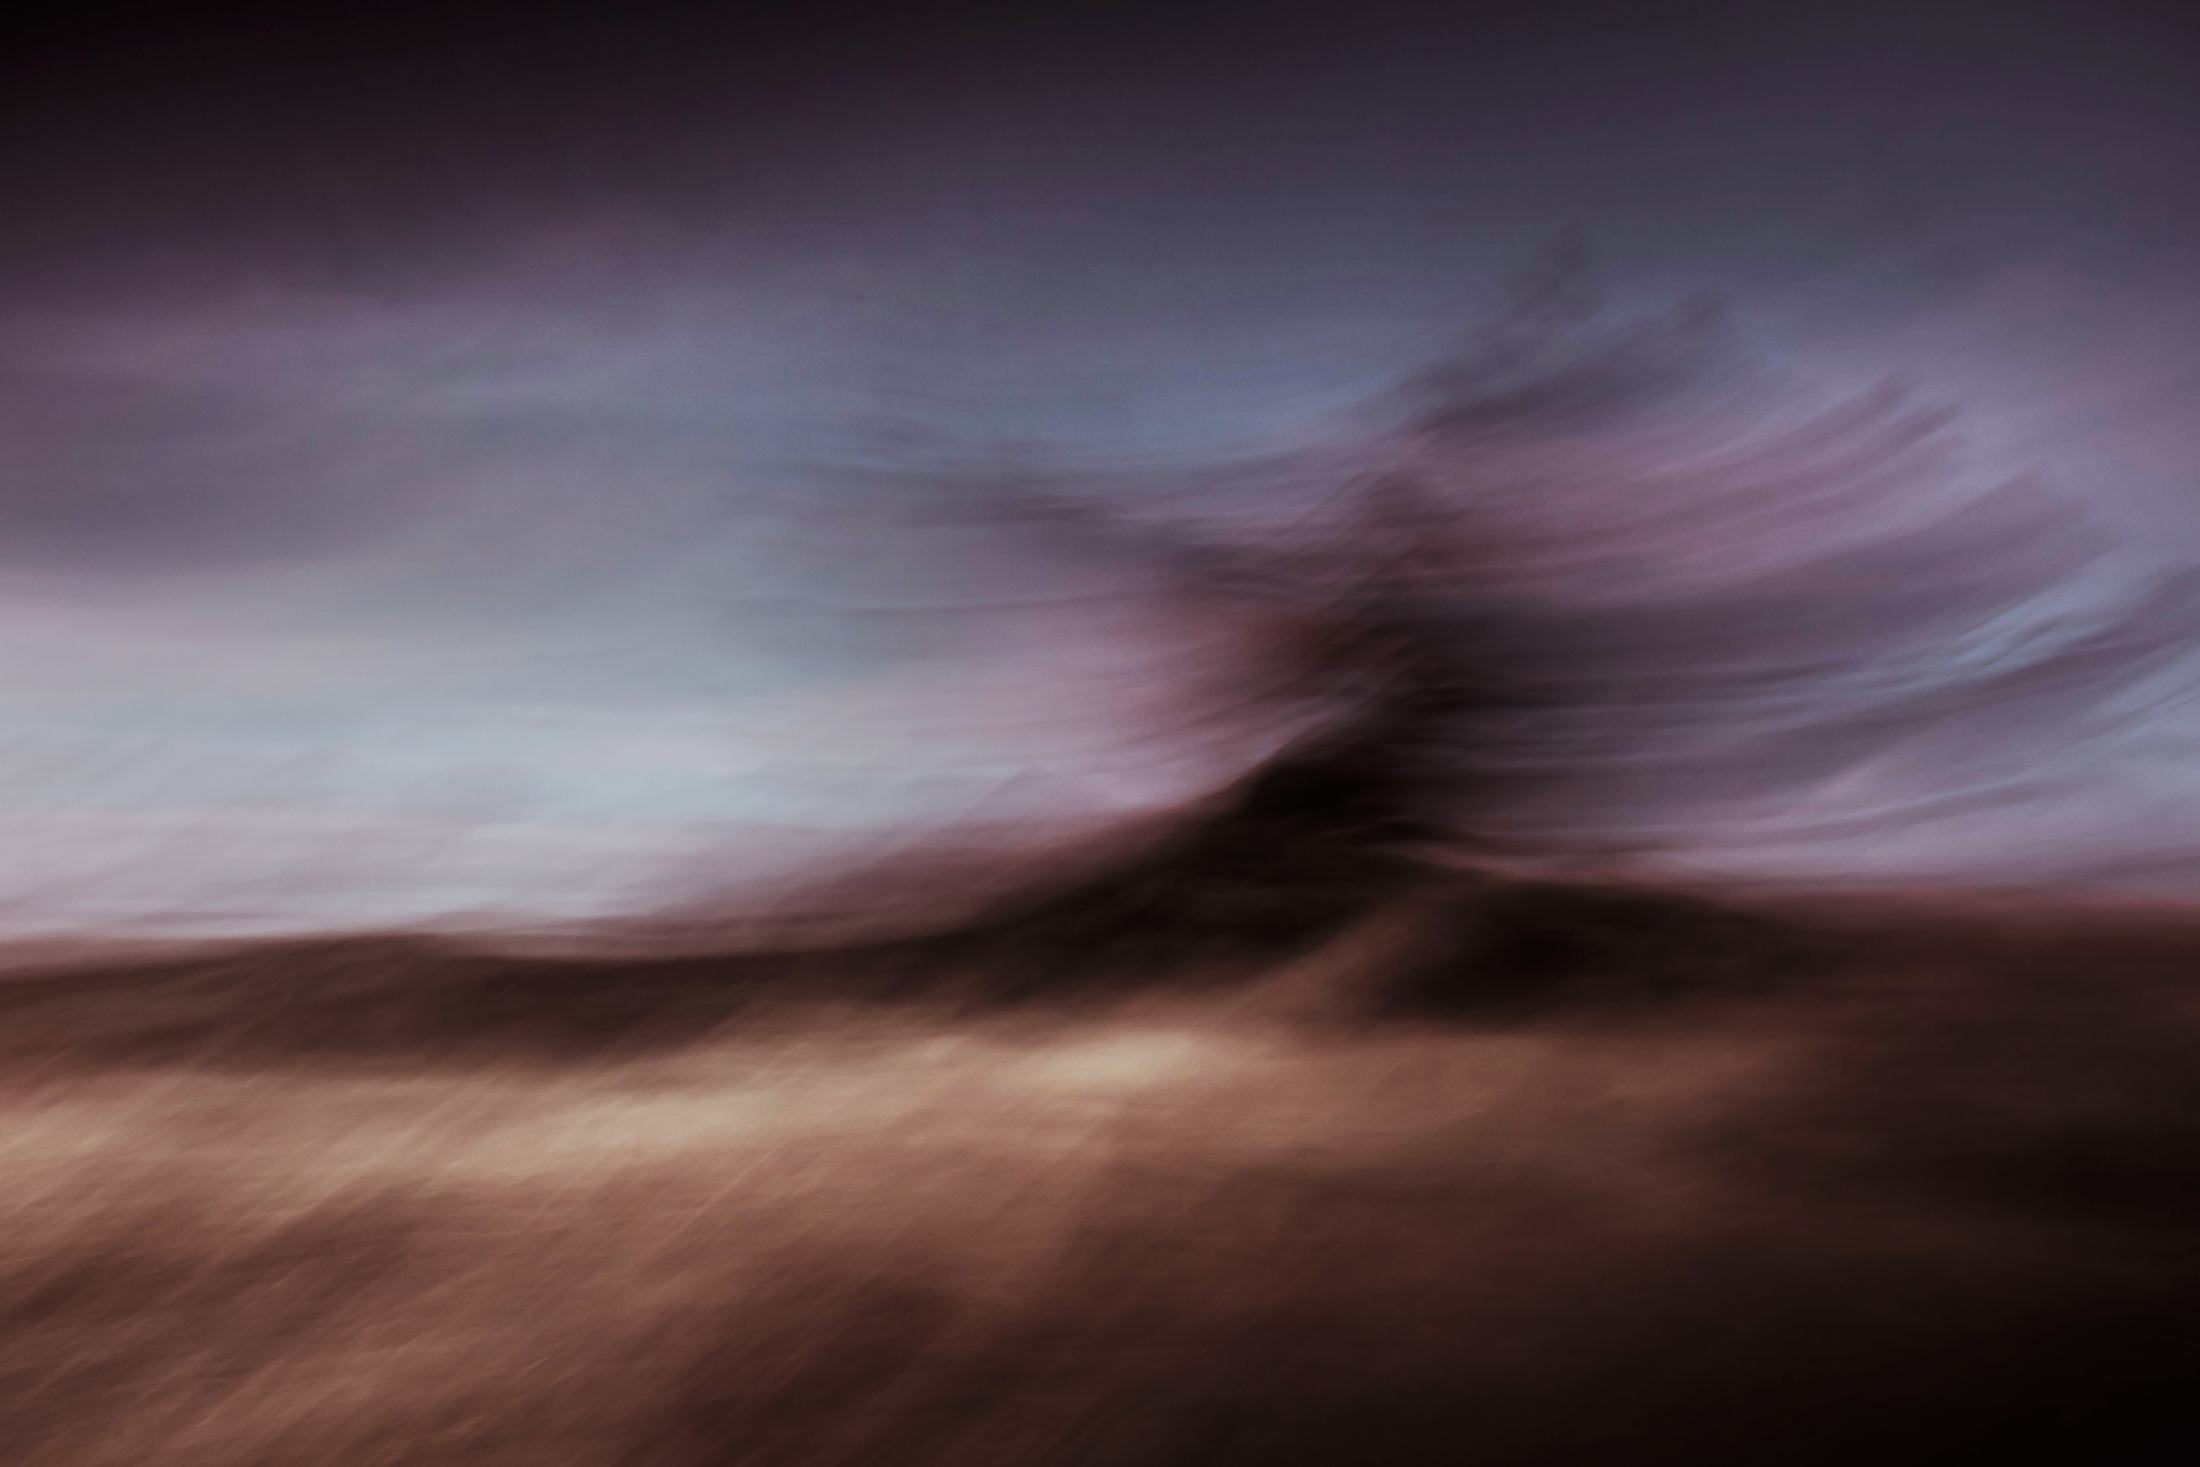
Over the Christmas holidays the weather was a bit average, so I decided to play with Intentional Camera Movement (ICM) as well, and here I found all the blur I could possibly want.
Key Lesson: Sharpness is an option in photography; it is a creative choice that the photographer can make to suit the image that they are creating.
Recommended Reading: If you’d like to improve your composition skills for better images, grab a copy of Photzy’s best-selling premium guide: Understanding Composition.
Different Kinds of Blur
Not all blur is created equal, and it can be used in different ways for different outcomes. It never fails to amuse me that all the ‘tack sharp’ crowd are out there shooting their wedding portraits and bird shots specifically using bokeh to blur the background, often with good reason, but they are using the blur as a creative choice.
Let’s look at the different kinds of blur and how you can use them.
1. Bokeh
Bokeh is achieved when you have some specific elements in play:
- The subject is closer to the camera than it is to the background
- The lens is capable of shooting at a wide open aperture; f2.8 is a pretty common option
- The quality of the lens is such that it will give a nice smooth level of blur in the background
Bokeh is popularly used for portraits, especially outside environmental ones, weddings, and for bird photographers. There is a particular fashion for getting a shot of a bird perched on a branch and a very soft blurred background.
The benefits of bokeh are that it is relatively easy to achieve and you don’t need any extra special gear once you have a fast lens capable of good-quality bokeh blur.
It also does a really good job of taking a messy, distracting background and making it smooth and soft and neutral.
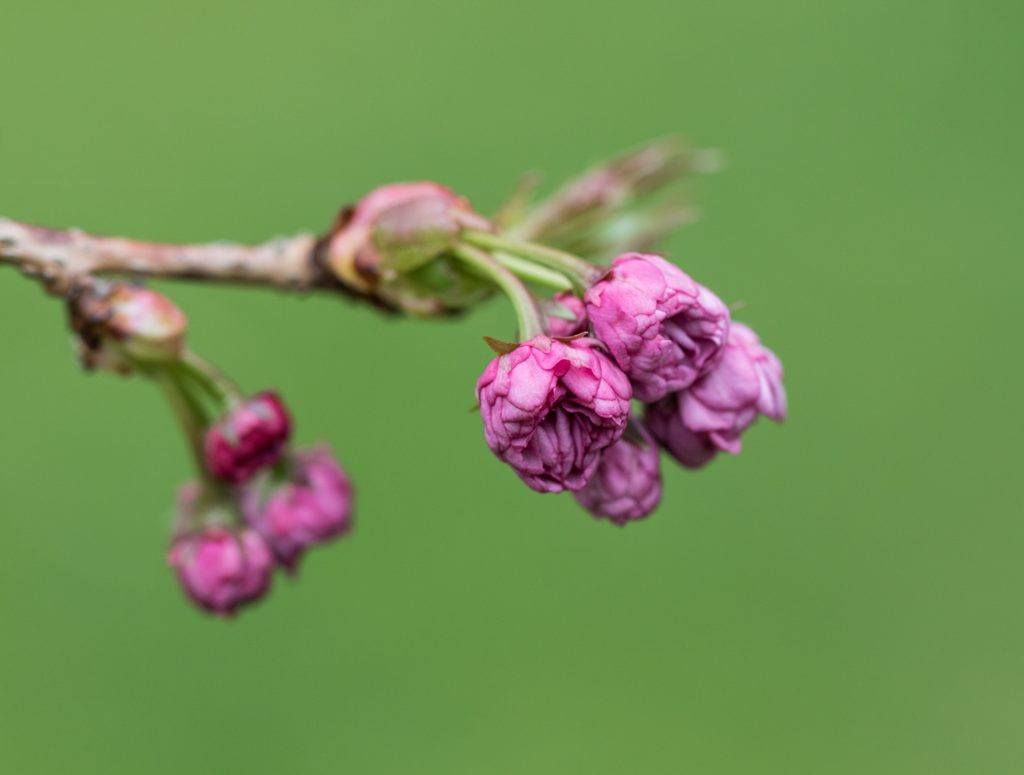
Photo by Stacey Hill
In this example, the green background is actually a big hedge and I positioned myself so that this bud of cherry blossoms was against it. Shot with my Canon 100mm F 2.8 IS L macro lens at around f4, I knew that it would be turned into this nice soft green background for the rich pink cherry blossom petals.

Photo by Stacey Hill
This fantail shot was taken with the same lens. It shows what happens when the alignment of the subject, camera, and background is wrong. The bird is much closer to the background than it is to the camera, so while there is some softness, it is still clearly leaves and branches that are visible behind the bird.
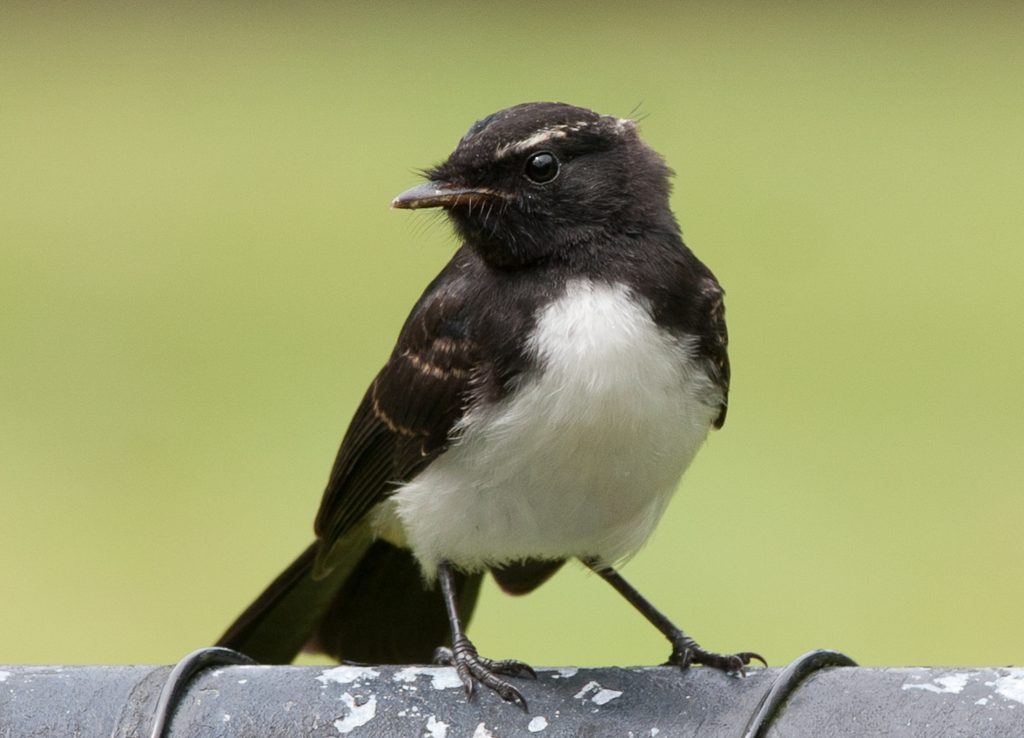
Photo by Stacey Hill
This willy-wagtail taken in Brisbane, Australia has positioned himself nicely against a grass field. The distance between the bird and background provides a nice soft blur from the bokeh of the lens.
Key Lesson: Bokeh is very popular but not always well understood as to how it is achieved. The key is for the subject to be closer to the lens than it is to the background!
2. Selective Focus
In my experience, selective focus tends to work best with a macro lens, but any good-quality lens capable of shooting at f2.8 or faster would likely do the job.
Selective focus is where you choose to use a very narrow depth of field to highlight one part of a subject and have only that part in focus.

Photo by Stacey Hill
It takes a steady hand on the camera, as it can be a physically very small slice of focus you are working with, measured in millimeters even. One breath in or out and you have moved your camera far enough out of the right plane of focus.
Selective focus is where you choose to use a very narrow depth of field to highlight one part of a subject and have only that part in focus.
The coin above is less than an inch in diameter, and it has a very narrow band of focus across the middle of it.

Photo by Stacey Hill
The individual florets of a dandelion head are very small and very light and they will move in the slightest breath of air, so slow, careful movements are required around them.
Key Lesson: When using selective focus, especially in a macro situation, keep your movements slow and methodical. This is necessary to ensure that your sliver of depth of field is placed properly in the frame.

Photo by Stacey Hill
My macro lens is my weapon of choice for selective focus. At f2.8, it does a splendid job. The image above is focused on the curl of one petal surrounding the center of a gerbera flower.
Key Lesson: Macro lenses are a special kind of lens. They are usually high-quality glass, expensive, and heavy. Most can focus down to a 1:1 ratio, but some have magnification factors included in their focusing capability as well. Do your research before buying.
3. Specialty Lenses
Lensbaby is a company that produces specialized lenses. It is well known for its range of creative lenses that do all sorts of interesting things, including controlled lines of focus, swirly bokeh, soft bokeh, and other wild effects. Some Lensbaby lenses are available as standalone lenses, and some are part of the “Composer” product line, where you buy a holder and that then acts as a mount for the particular Lensbaby optic that you are using.
A key element with the Composer is that it is moveable, so you can change the angle of focus.

Photo by Stacey Hill
The image above was taken with a Lensbaby Velvet 56 lens.
Vintage lenses such as the Helios and Vivitar were made around WWII and they often had defects within the glass, which gave them interesting results. These lenses often create a noticeable swirl around the edges of the frame. They are now sought after, as they were originally very cheap and even with the mount required to put them onto modern cameras they are still affordable.
Both of these options (Lensbaby and vintage lenses) are manual-focus lenses (in general), so they up the difficulty level a bit for you, but they also make using them more fun. Plus, it gives you more control and flexibility in how you use them.
Key Lesson: Manual-focus lenses like the Lensbaby and vintage lenses require a steady hand and a good understanding of composition to really work at their best. Do some research before investing in them.
Recommended Reading: If you’d like to improve your composition skills for better images, grab a copy of Photzy’s best-selling premium guide: Understanding Composition.
4. Intentional Camera Movement (ICM)
This is the technique that offers the most fun, flexibility, and failure rate. For every 500 ICM shots you may only keep two or three initially, but as you get the hang of it, you will still take 500+ but get some more keepers.
The challenging part is that you never quite know what you will get. In my experience, ICM works best if you are prepared to do a bit of editing to bring the best of the image out in post-production, so be prepared for some work in Photoshop or Lightroom to potentially finish your image off.
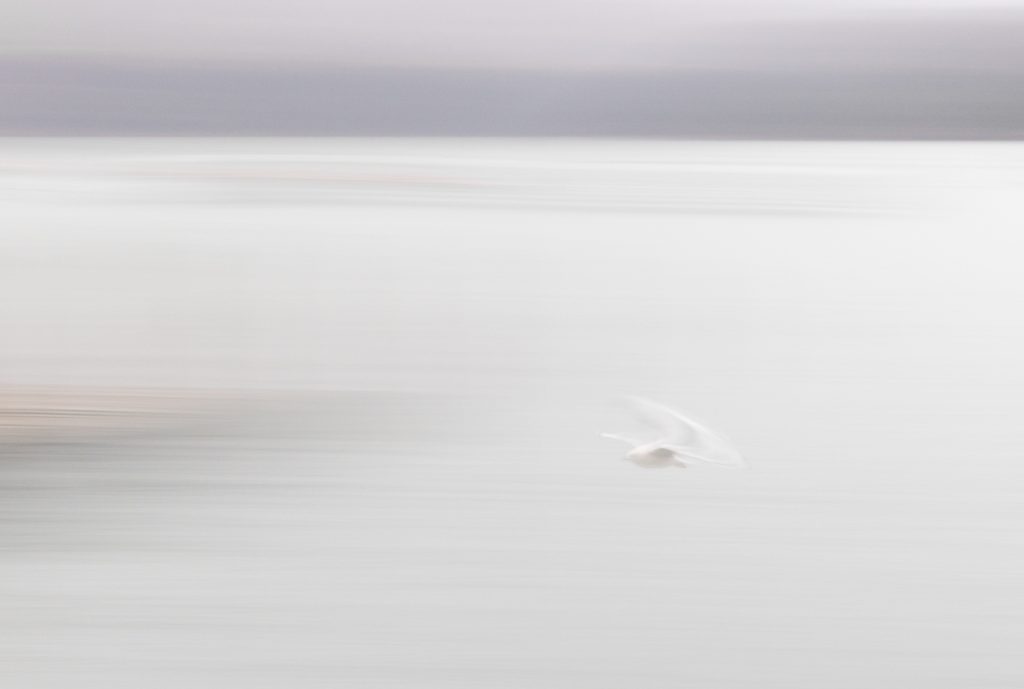
Photo by Stacey Hill
For ICM to work best, you need a neutral density filter (around ND4 seems to be the preferred option), but I have a Variable ND filter and it works really well.
My variable ND filter ranges between ND2 and ND4 and allows me to block light even on a bright sunny day, as the image on the next page taken of sea grasses on sand dunes at the beach in early afternoon in summer shows.
The point of ICM is to slow the shutter speed down a bit, and while you are taking the shot, move the camera in a direction as you take the shot.
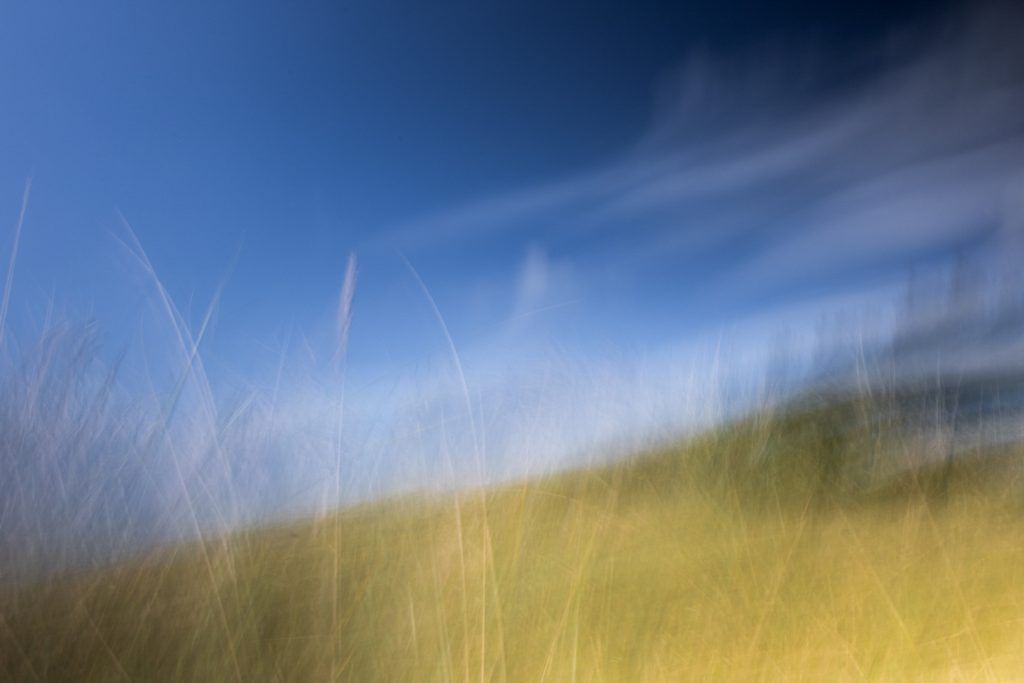
Photo by Stacey Hill
Does it make a difference what direction you use? Yes and no. Some things seem to prefer a certain movement to make them look the best; for example, you will often see English forests done with a vertical up-down movement. If you try to do side-to-side, it just looks odd.
Bigger landscape scenes have a bit more flexibility. Seascapes are often shot with either a flat, horizontal sweep for a very painterly finish, or swoopy, curly movements following the flow of waves in to shore.
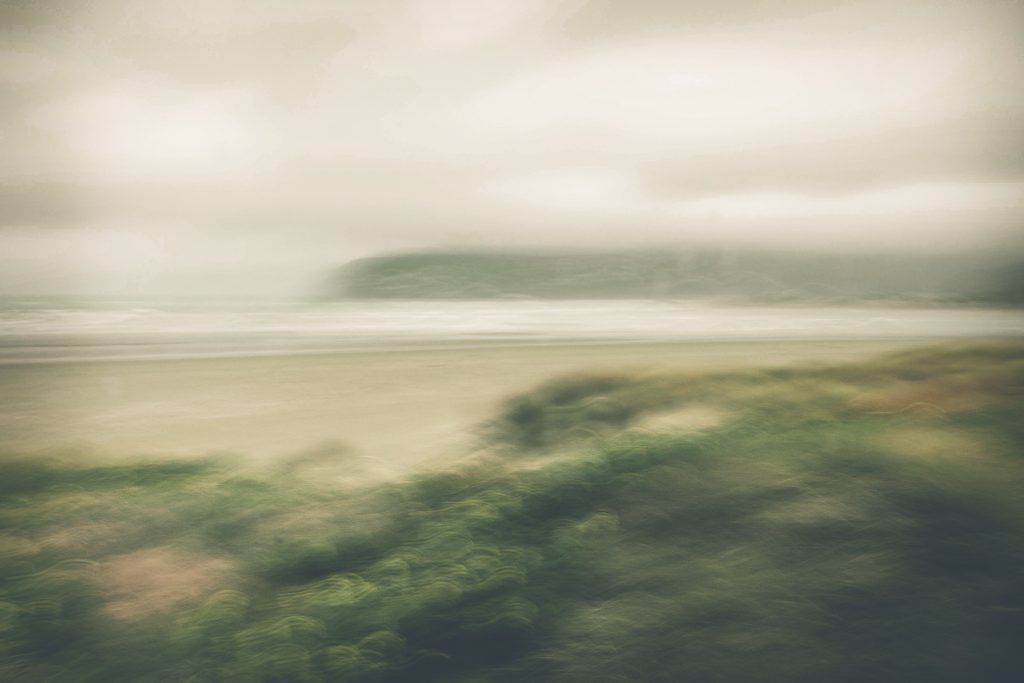
Photo by Stacey Hill
The trick is to try EVERYTHING and see what works. It’s digital after all, and you can take as many frames as your card (and computer hard drive) can hold.
Is there an ideal shutter speed? Again, yes and no. It can depend on the light, how much you are moving the camera, what you are taking photos of, and how much movement you want to introduce.
The trick is to try EVERYTHING and see what works. It’s digital after all..
These are all creative choices that necessitate you trying different settings and seeing what you get.

Photo by Stacey Hill
Here are some ICM tips from my personal experience:
- If you have a longer shutter speed you can do a lot of movement at the beginning and then hold the camera still to get more of the subject in focus (like the seagull on the left).
- A smoother amount of blur happens if you start the camera moving BEFORE you press the shutter release button.
- Wear tall gumboots so you can wade out into the surf and get up close with nice textured shots of the waves.
- Some subjects suit lots of movement, whereas some are better suited to only a little blur.
- Moving your whole camera rather than just tilting the lens gives you different results. The whole camera gives a smoother line.
- You will have loads of failures, so go into it as an experiment. Delight in the successes and learn from the experience.
- Around 1/3 to 1/5 of a second work best for me, but experiment with your own camera and ND filter to find your ideal time and movement combinations.
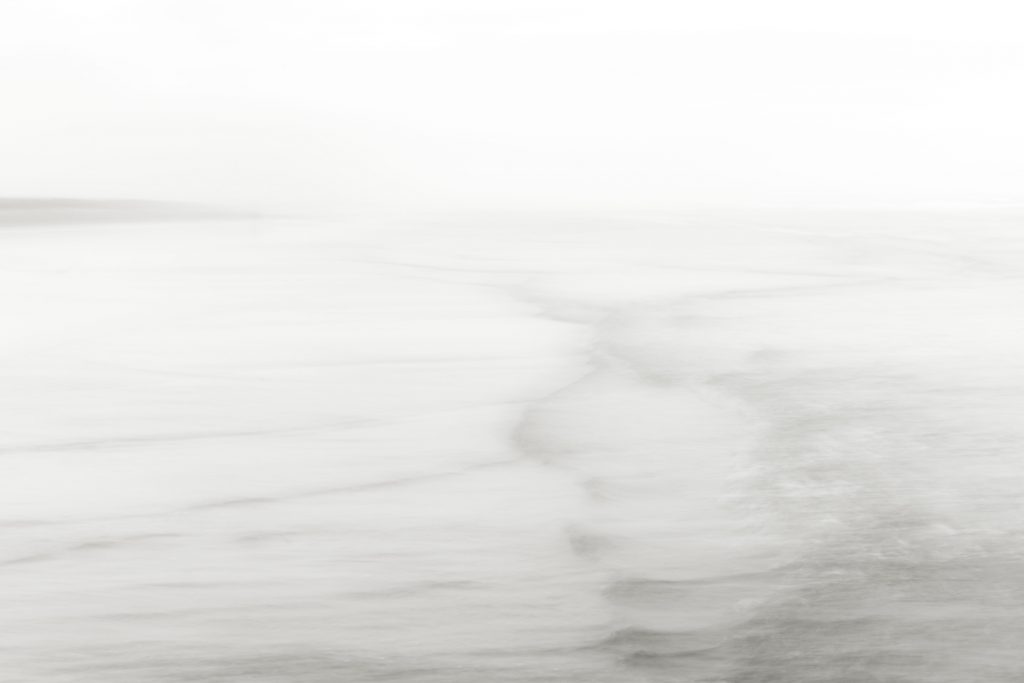
Photo by Stacey Hill
This shot (above) was taken knee-deep as the tide was starting to come in. I like the softer texture of the blur in this one, as it allows you to see more detail in the waves.
What is interesting about ICM is that you can do it anywhere; it is often used in nature photography, but it’s not uncommon to be used in urban/street photography as well.
Essentially, any panning is ICM too, but with the intent of keeping the subject in focus.
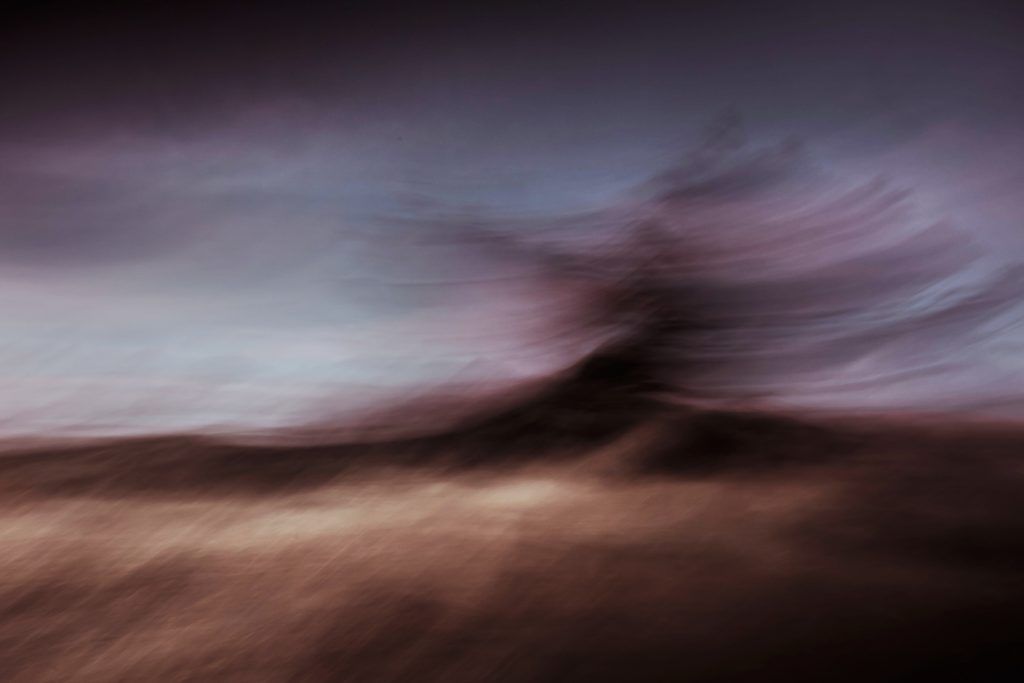
Photo by Stacey Hill
Yes, it does require the purchase of some specialty glass (the ND filter), but if you are doing landscapes, you can use the same glass for other long exposures like waterfalls and creek flows, so I would consider it an investment.
The variable ND filter that I have is a cheaper option than going with a professional kit (like Lee or Nisi etc.). It does have the limitation of being one size, so if your lenses are different sizes and you want more than one, then the kit option gives you more flexibility there.
Key Lesson: ICM is lots of fun but harder to get the hang of than you might expect. So, stick with it. Try lots of different shutter speeds and angles of movement. Eventually it will make sense to you.
The Benefits of Blur
First of all, it’s a lot of fun. Second of all, it will improve your work and expand your portfolio. All of the above options will challenge you to think about your images and your technique in different ways.
You will have to compose your images differently and see the possibilities in different ways.
Learning to shoot with a macro lens and with a narrow DOF is not easy, and it’s very hard to do well hand-held. A tripod may be a requirement.
Contrast that to wandering about, pointing the camera and waving it about randomly hundreds of times in the hope you get a good shot. Well, that is a completely different learning curve, and I can promise you from the tips that I have given you today that it isn’t quite as simple as you may think.
Creatively this will expand your horizons, give you new ways to create, new skills when using your camera, and new tools to add to your capability.
Recommended Reading: If you’d like to improve your composition skills for better images, grab a copy of Photzy’s best-selling premium guide: Understanding Composition.
Conclusion
I personally don’t think as adults that we let ourselves play enough. Something that is an essential part of our childhood gets lost in the responsibilities of adulthood, and I feel that this is at great detriment to our health and well-being.
Play and creativity go hand in hand. By playing, we make mistakes, take risks, and make new discoveries that we can then go on to use purposefully.
So my message to you is “embrace the blur.” Let go of the rigid restrictions of having everything in focus and find joy in playing, experimenting, and enjoying the accidental discoveries.
You never know, you might just love it!

Photo by Stacey Hill
Self-Check Quiz:
- What is bokeh?
- What is Lensbaby?
- What does ICM stand for?
- What does an ND filter do?
- Does an image always have to be 100% sharp?
- Bokeh is when the background is very blurred and soft but the subject is in sharp focus
- Lensbaby is a company that makes a range of creative artistic lenses where soft focus is a particular element
- Intentional Camera Movement
- It cuts down the intensity of the light coming into the camera sensor thus allowing for the shutter to be open longer
- No, it’s a creative choice that’s up to the photographer


