

Depth of field is a powerful tool for photographers. It can be used to direct a viewer’s eyes. It can also establish a mood or even alter the perceived perspective of an image.
Most photographers are aware of the term depth of field (DOF), but many seem less sure about how it works or how to put it to use.
Landscape photographers tend to be a bit more in tune with depth of field, but this critical factor in photography is equally vital to almost any genre, from macro to portraiture.
In this guide, you will learn the following:
- What is the depth of field?
- Why the lens focal length matters
- What is the hyperfocal distance?
- How to use the 1/3 Rule
- How the ‘Infinity’ setting on the lens focus barrel is super important to the depth of field
- Placing the depth of field window in the correct spot within the frame
- What aperture is selected / Overusing minimum depth of field
- How to use apps to create a depth of field illusion and what to avoid when using them
Recommended Reading: If you’d like to master camera settings to create gorgeous, creamy, blurry backgrounds, then grab a copy of Photzy’s premium guide: Beautiful Background Blur.
What Is Depth of Field?
The term depth of field, also called by the acronym DOF, refers to the distance between the nearest and farthest objects that appear sharply focused in a photo. That space between near and far is known as the DOF window.
The depth of the field window varies based on several factors, including the following:
- The focal length of the lens used to create the photo
- How far the camera is located from the point of critical focus
- The distance from the critical point of focus to the background and foreground
- What aperture is selected
- The size of the camera sensor
There is a mathematical formula one can use to determine the DOF window, and there are apps to help with that determination as well. But truthfully, unless you are a professional or an extremely detail-oriented amateur, you can achieve wonderful results with some understanding of the process and a few easy tips.
But truthfully, unless you are a professional or an extremely detail-oriented amateur, you can achieve wonderful results with some understanding of the process and a few easy tips.
What is essential to understand is that the combination of the above five factors determines the DOF window, and the size of the window will change when any of those five factors changes.
The Focal Length of the Lens
Key Lesson: The wider the lens’s focal length, the greater the depth of field will be at any given f/stop when the point of critical focus stays the same.
For example, if you focus on a subject fifteen feet in front of you, a 20mm lens will have a larger DOF window at f/8 than a 50mm lens, and a 50mm lens will have a larger window at f/8 than a 135mm lens, and a 135mm lens would have a larger window than a 200mm lens, etc. The reverse is true as well. For example, a 20mm lens would have a much wider DOF window than a 200mm lens at the same aperture.
Let’s put this into a real-world perspective. You’re taking a portrait of your dog, who is fifteen feet ahead of you. You want to use your 200mm lens to minimize the disruptive background, but you don’t have enough depth of field to keep both eyes sharply focused at your chosen aperture of f/8. What can you do? You are going to have to change one of the other four factors that affect DOF.
- You could go to a smaller aperture as the DOF window increases as the f/stop decreases (smaller number to a larger number, for example, f/8 to f/16).
- You could move the camera further away from the subject. However, that might make the disruptive background a problem once again.
- The camera sensor size is set, so there is not much one can do about that one. Remember this: the smaller the sensor, the larger the DOF window at any given aperture. So, an APS-C sensor will show a larger DOF window at a given aperture than a full-frame (35mm film) sized sensor.
- You could change the f/stop to a larger number (this is a smaller aperture opening, which is known as stopping down). This last choice makes the most sense, given the situation.
What Is the Hyperfocal Distance?
I considered leaving this discussion out of this guide as it is unnecessarily technical. The vast majority of photographers should never need to calculate the hyperfocal distance of a situation.
I have been a working professional photographer for forty years, and I have only needed to make this calculation a handful of times.
The vast majority of photographers should never need to calculate the hyperfocal distance of a situation.
But for those who are into the tech side of things, here is the definition of hyperfocal distance.
In optics and photography, the hyperfocal distance is a distance beyond which all objects can be brought into an “acceptable” focus (the DOF window). As the hyperfocal distance is the focus distance giving the maximum depth of field, it is the most desirable distance to set the focus of a fixed-focus camera. – Wikipedia
In layperson’s terms, that means the ideal point to place the critical focus that will establish the deepest DOF window from is (typically) Infinity to a nearer point in front of the camera.
The only time that I needed to calculate this in my career was in product photography, where the entire product needed to be in focus.
Landscape photographers seem to talk about the hyperfocal distance a lot. It’s a mathematical formula; if you love math, you’ll perhaps enjoy working with the app in the image below.
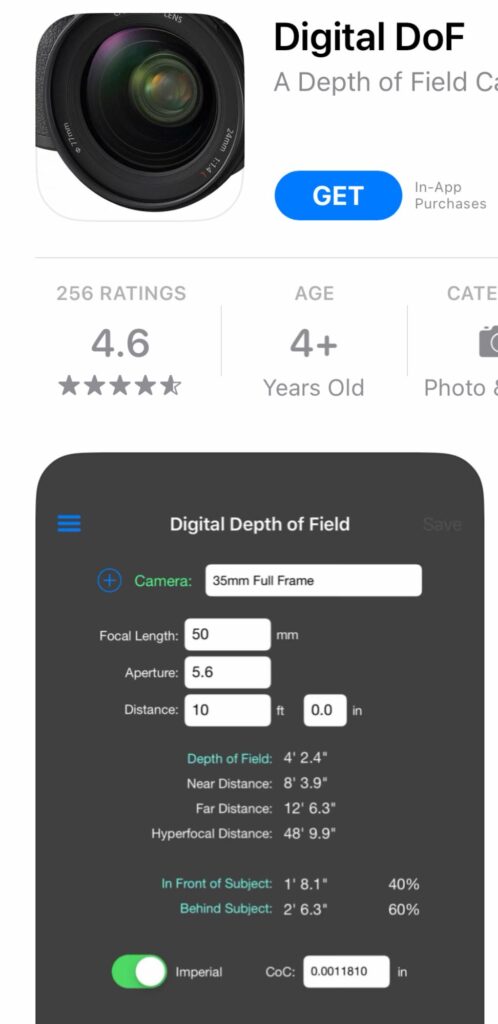
Screenshot by Kent DuFault

Key Lesson: In case any newer photographers out there are unsure what the term ‘infinity’ means in photographic optics, it is the final focus point on the lens barrel that indicates that everything from that point on will be in focus, even at the maximum wide-open aperture. It is marked with a symbol similar to the one in the image above.
Recommended Reading: If you’d like to master camera settings to create gorgeous, creamy, blurry backgrounds, then grab a copy of Photzy’s premium guide: Beautiful Background Blur.
How to Use the 1/3 Rule
A much easier way to assess where the DOF window will fall is a rule of thumb trick known as the 1/3 Rule.
Key Lesson: The depth of field window is roughly placed 1/3 in front of the point of critical focus (i.e., the distance that you focused the lens – often the subject or in a landscape situation somewhere in the overall scene) and 2/3rds behind the point of critical focus.
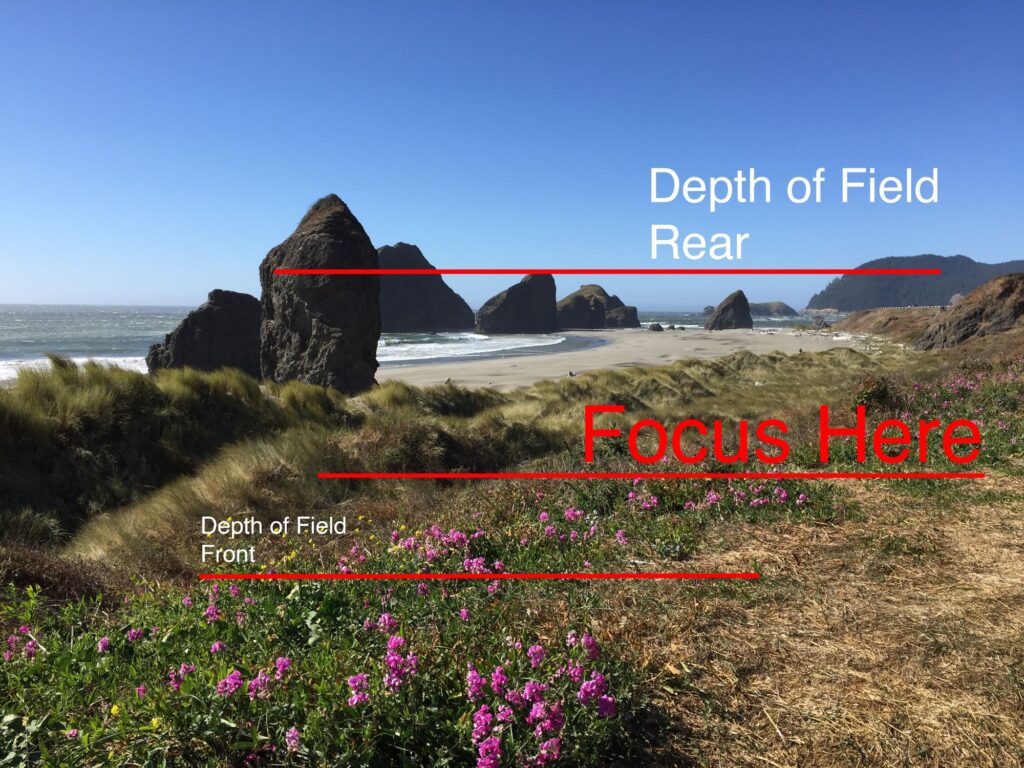
Photograph and graphics by Kent DuFault
This 1/3 Rule is valid no matter what distance the lens is focused at (except Infinity because everything beyond the point of Infinity will always be in focus, as we previously discussed) and no matter what aperture is selected.
Let’s look at a real-world example.

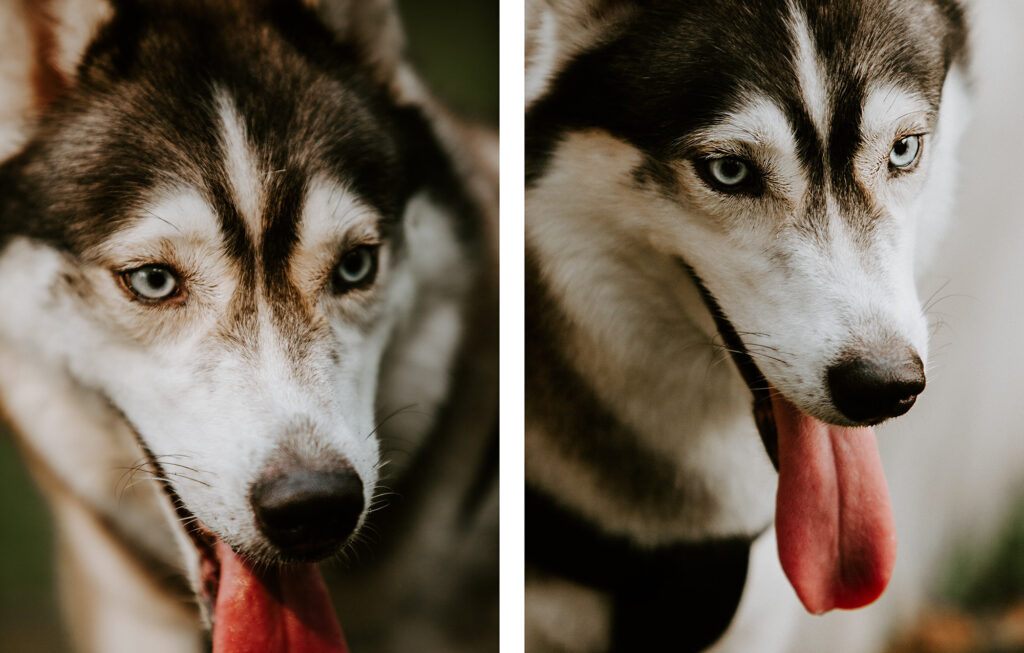
(l) Canon EOS 500D, 50mm lens at f/3.5 and (r) Sony ILCE-6400, 30mm lens at f/4.5. Photograph (l) by Alyona Grishina and Photograph (r) by Avdalyan
The two images above shows us several things:
- Both cameras had the same sensor size as an APS-C.
- The photo on the left had a slightly longer focal length lens and a slightly wider aperture.
- The photo on the right had a shorter lens and a slightly smaller aperture.
In a situation like this, placement of the DOF can be critical depending upon how much of the face and head you want to be in focus.
Key Lesson: In portraiture, the rule of thumb is to place the critical focus on the eyes and set the DOF window to cover from the tip of the nose back to the front of the ears.
The photo on the right achieved this proper placement of the DOF window, and the left photo slightly missed the mark.
In this case, does it matter? Probably not, which supports my earlier statement that the placement of the DOF window shouldn’t get you all tied up in knots.
If you use the 1/3 Rule and a mid-range aperture, then 90% of the time your DOF window will cover the situation.
How the ‘Infinity’ Setting on the Lens Focus Barrel Is Super Important to Dof
When setting up a shot, knowing where the infinity setting falls can be critical when placing your critical focus and determining your DOF window.
Let’s do a hypothetical.

35mm lens at f/4. Photograph by Dom Hill
The equipment for the image above was a Canon EOS 5D Mark IV (a full-frame camera) using a 35mm lens (a moderate wide-angle focal length on a full-frame camera) at f/4 (a wide aperture setting).
If the photographer wanted everything in focus from the model to the basketball hoop, it could have been accomplished by setting the camera distance so that the Infinity mark on the lens barrel fell just before the basketball hoop and the model was placed in a location within the proposed DOF window, and the aperture was chosen keeping in mind the 1/3 Rule.
Key Lesson: All of that might seem complicated, but with a bit of practice it is like riding a bike. You won’t even think about it; it will just happen.
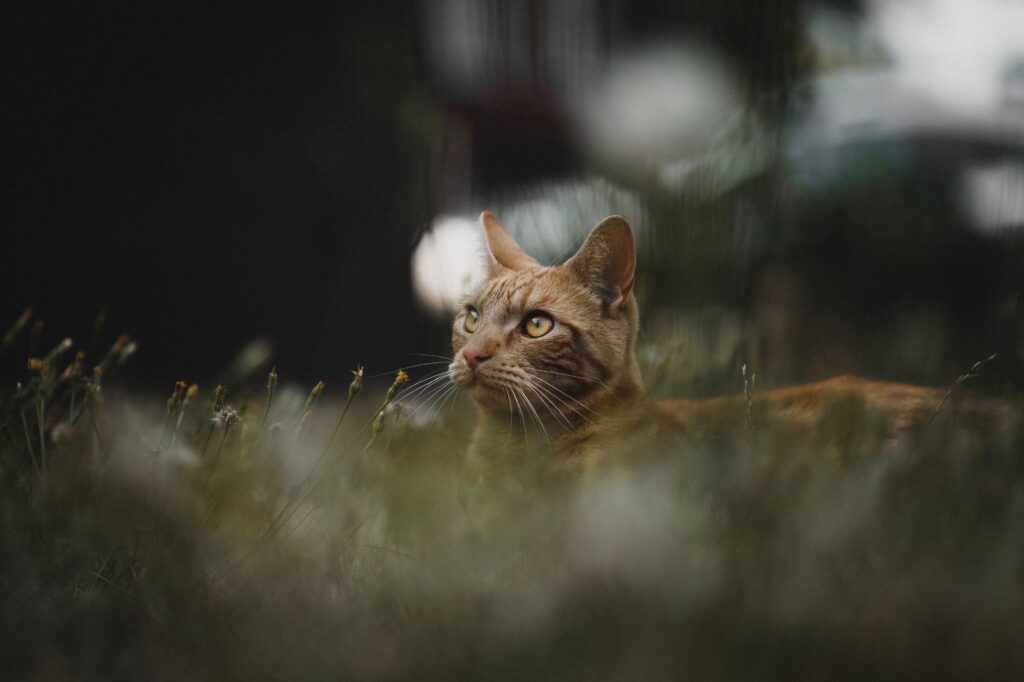
What Aperture Is Selected? Overusing Minimum DOF

85mm lens at f/1.6. Photograph by Photograph by Annie Spratt
The minimum depth of field seems to be the rage. I think it’s possible to overdo the effect. I see that in the image above.
Keeping the girl out of focus was an acceptable decision. However, choosing an aperture as wide as f/1.6 on an 85mm lens turned her into a white blob. Maybe you feel differently, and that’s fine. This is art.
Key Lesson: Virtually every lens produces the best quality it can in mid-range aperture settings.
I almost universally try to keep my aperture around f/5.6 up to f/11. Let’s say I’m using my 20mm lens and photographing a landscape vista like the Grand Canyon. The widest aperture could easily provide a capable DOF window, but choosing an aperture in the f/5.6 to f/11 range will provide a better field of focus and higher critical quality across the entire image plane.
Key Lesson: Careful consideration of your choice of aperture is mandatory to becoming a skilled and professional photographer.
Using Apps to Create a Depth of Field Illusion and What to Avoid When Using Them
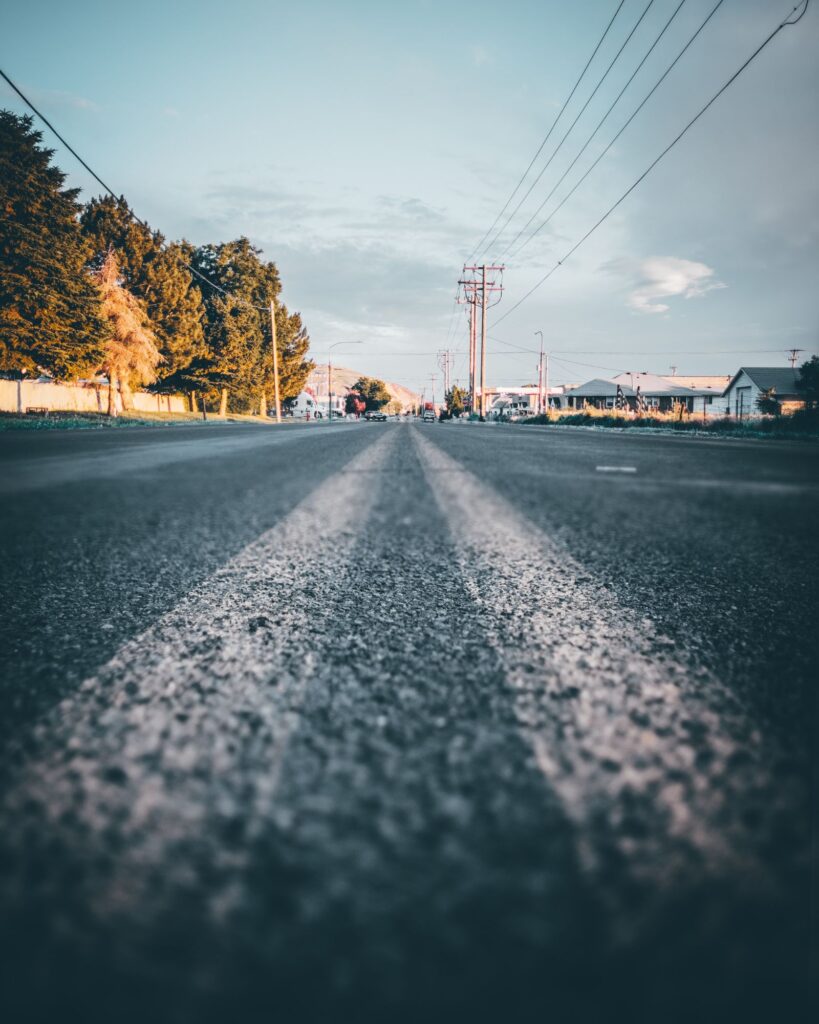
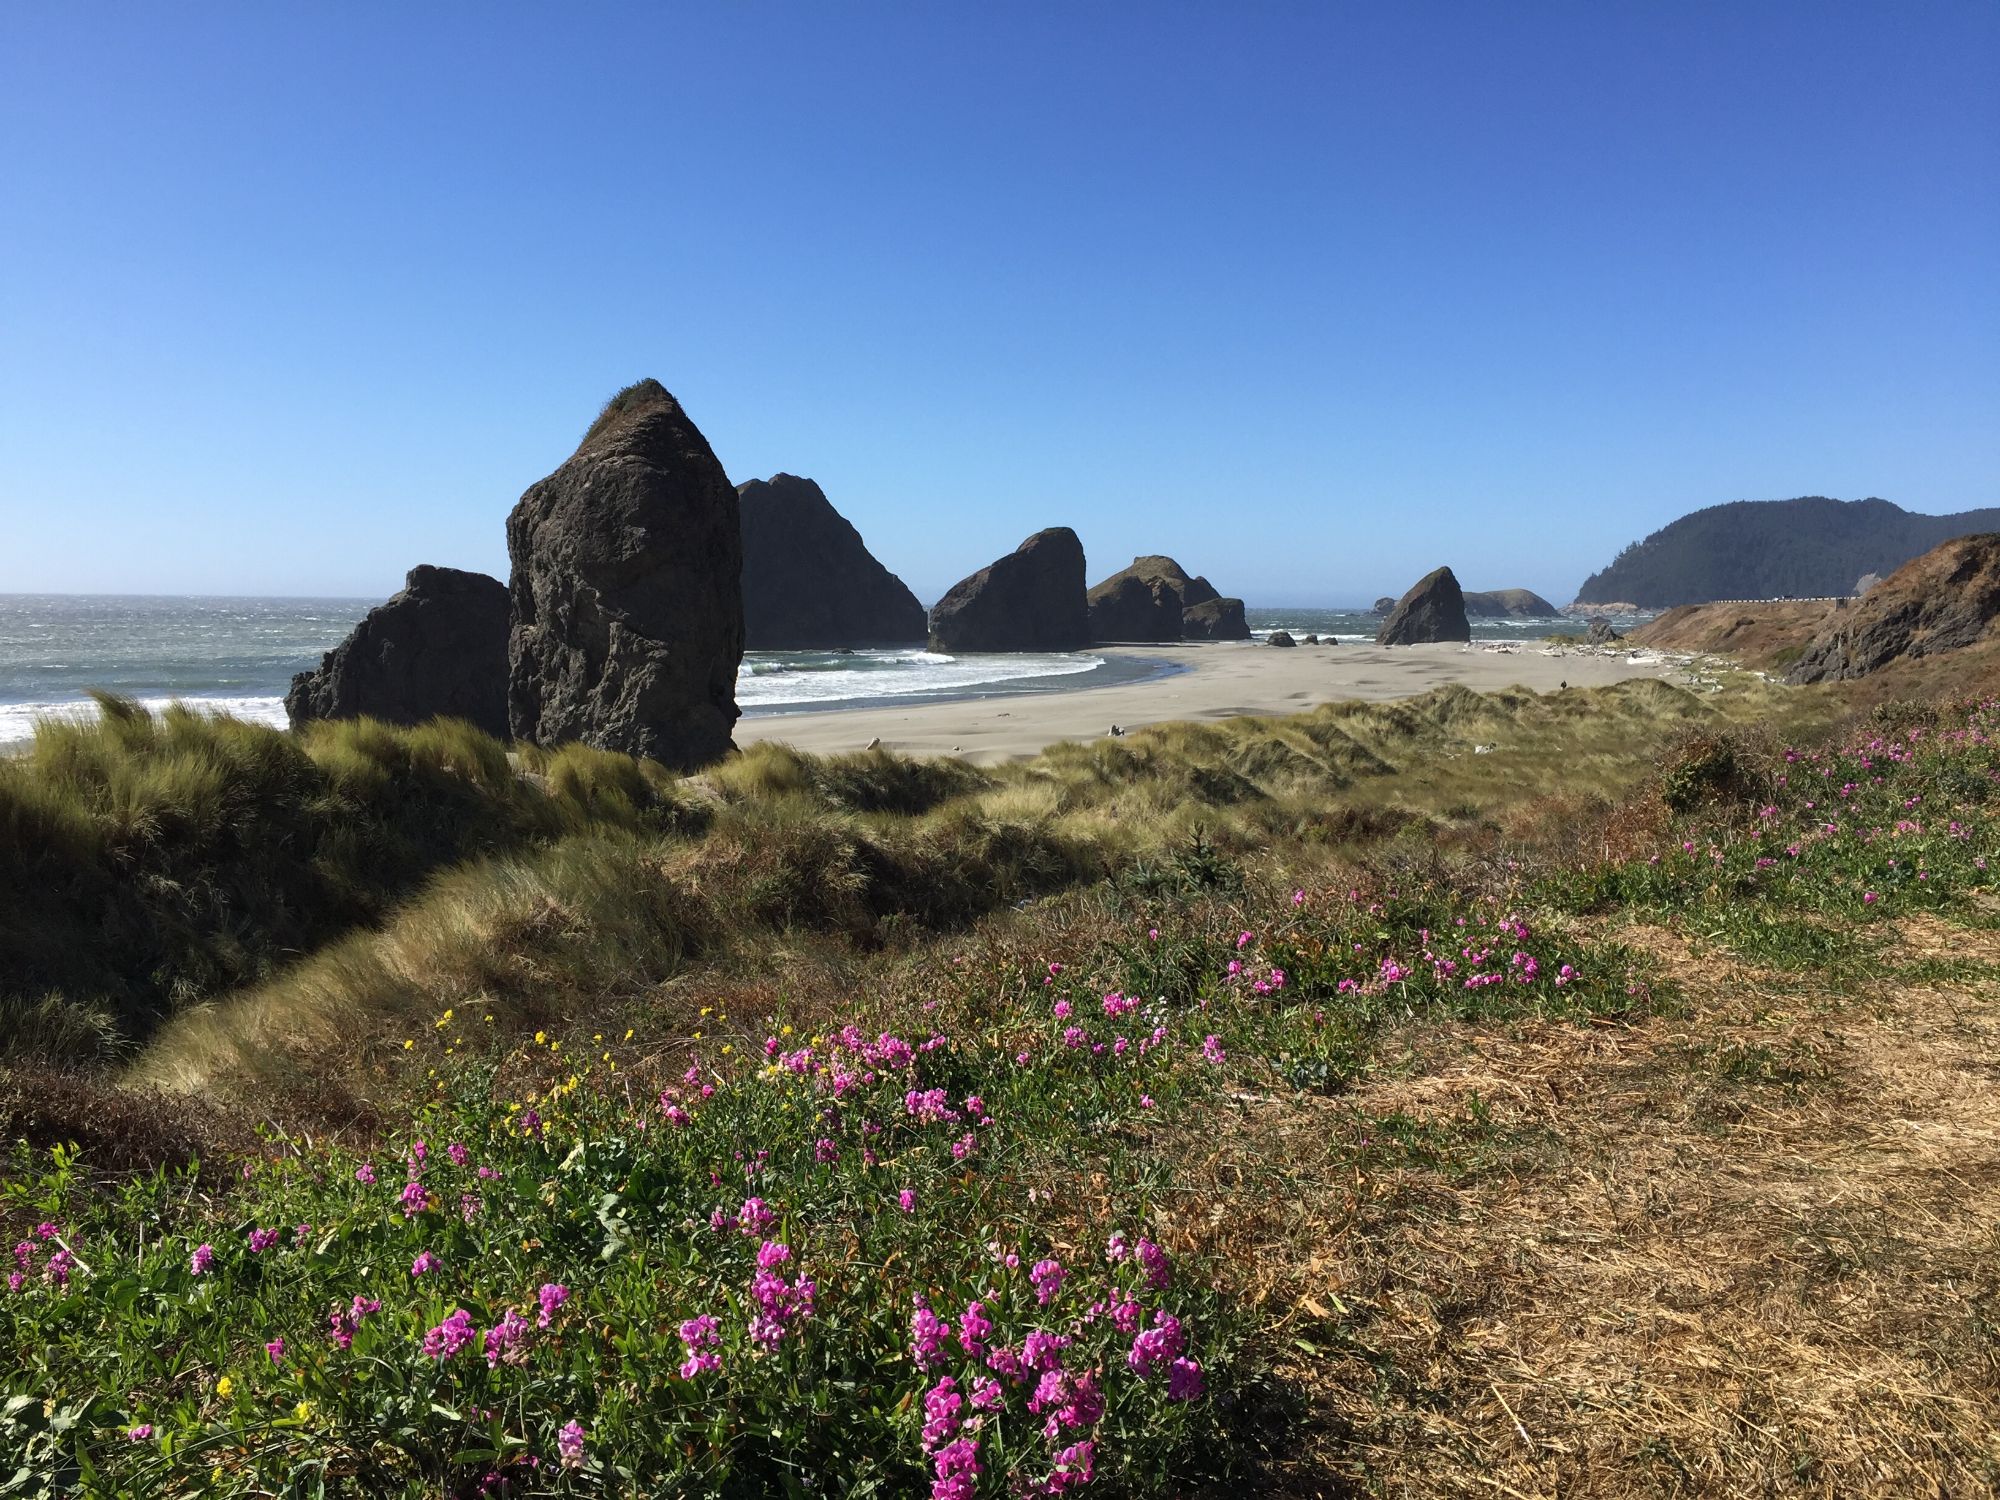
Look carefully at the image above. Does something look ‘off’ to you?
This image has an artificially created DOF. It may have been made in an app or program like Lightroom or Photoshop.
How do I know that it was artificially created? I know because it breaks the physics of optics.
The foreground is out of focus. Then the middle area is in focus. (Here is where the trouble starts.) Then further into the middle ground, it goes out of focus once again. And finally, the background is entirely in focus.
Key Lesson: A DOF window is contiguous from front to back. It doesn’t start and stop. It’s OK to create DOF illusions in post-production, but… unless you are trying to create some abstract point of view, make sure that you follow the rules of optics.
Recommended Reading: If you’d like to master camera settings to create gorgeous, creamy, blurry backgrounds, then grab a copy of Photzy’s premium guide: Beautiful Background Blur.
Conclusion
Depth of field is a powerful composition and storytelling tool for photographers. Make choices and use them wisely. Learn the five attributes that affect the DOF window. Also, learn how to place that window within a specified location within the scene. If nothing else, consider the 1/3 Rule when focusing.
Self-Check Quiz:
- What is the depth of field in photography?
- What is the acronym used to describe the depth of field?
- Name the five attributes that affect depth of field.
- How does the focal length of lenses affect the depth of field?
- What is the Infinity setting on a camera lens?
- How does the 1/3 Rule work?
- At what aperture settings does a lens produce the highest quality?
- Can a depth-of-field window start and stop in a scene?


