Creating Skillful Macro Photography: An Action Assignment

New / Noteworthy
NOTE: This is a photography project taken from the Action Cards set. For more, take a look here – Learn Photography Through Projects
Total Time: 4 Hours
Difficulty Level: Advanced
Skill Points:
- Composing with extreme minimal depth of field
- Creating sharp images at high magnification
- Capturing a moving subject
"Macro photography is not ‘close-up’ photography..."
Macro photography is not ‘close-up’ photography. It is defined as a photograph in which the size of a small object is reproduced onto the negative or image sensor at 1/2 life size to 5X life size.
Key Lesson: The simplest way to get to macro magnifications is with a macro lens. You can also use extension tubes, a reversal ring, or a bellows. Depth of field is crucial; do not use an aperture wider than f/16. Shutter speed is also crucial; use a tripod or increase ISO.
Equipment
| Camera | Any camera with macro capability |
| Lens | Macro lens or a lens with needed accessories like a hood |
| Filter | Extension tubes or reversal ring for low expense entry |
| Highly suggested | Tripod + Bounce cards |
| Helpful | External off-camera flash |
Tips
These settings can vary widely. This is a starting point.
| Shooting Mode | A/Av |
| Shutter Speed | 1/125th or faster |
| Aperture | f/11 to f/22 |
| Meter Mode | Center Weighted |
| Format | RAW + JPEG |
| White Balance | AWB/Auto |
| ISO | 400; and adjust as necessary for shutter speed |
| Lens | Use a tube, reversal ring, or filter if necessary. A bellows is not recommended for beginners. |
Action Assignment
1. Study the sample photographs below:
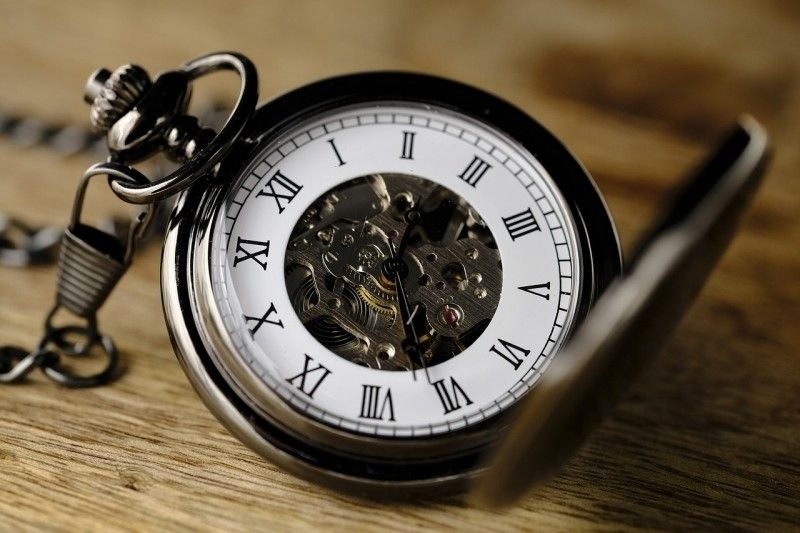
Pocket Watch
Begin with objects that don’t move. This will help you learn how to place focus, work with minimal depth of field (DOF), and achieving a sharp picture.
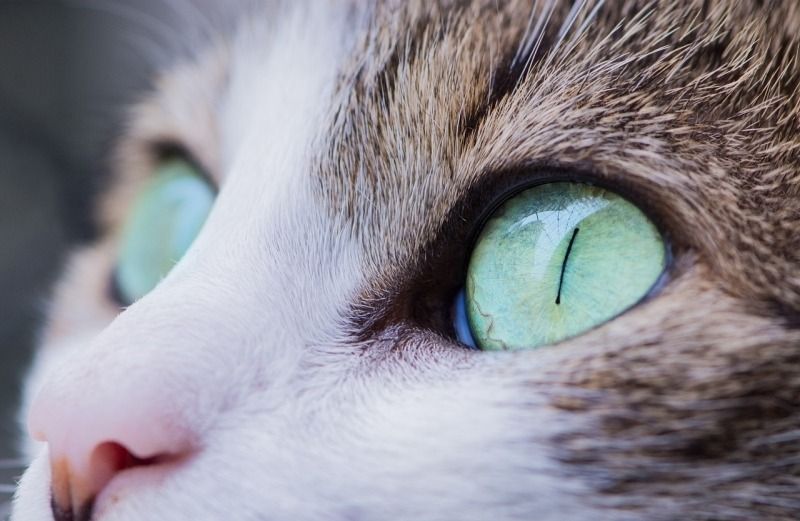
Cat's Eye
Proper focus placement is critical in macro photography. For subjects that don’t move use a tripod. Keep the f/stop closed down. However, do not go to the smallest f/stop. Use the aperture just before the smallest. If the smallest f/stop on your lens is f/22 – then use f/16.
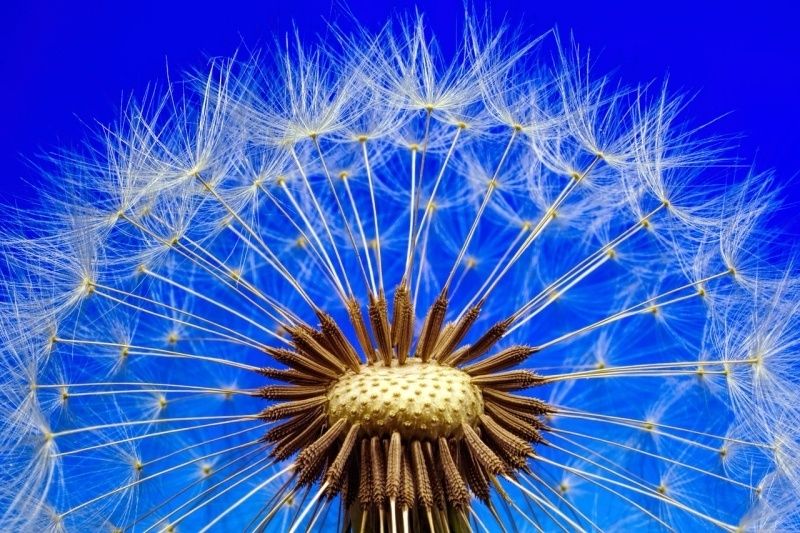
Seeded Plant
Excellent macro photography typically examines common objects from an unusual angle. This is part of what makes these photos exciting. Be prepared to get onto the ground.
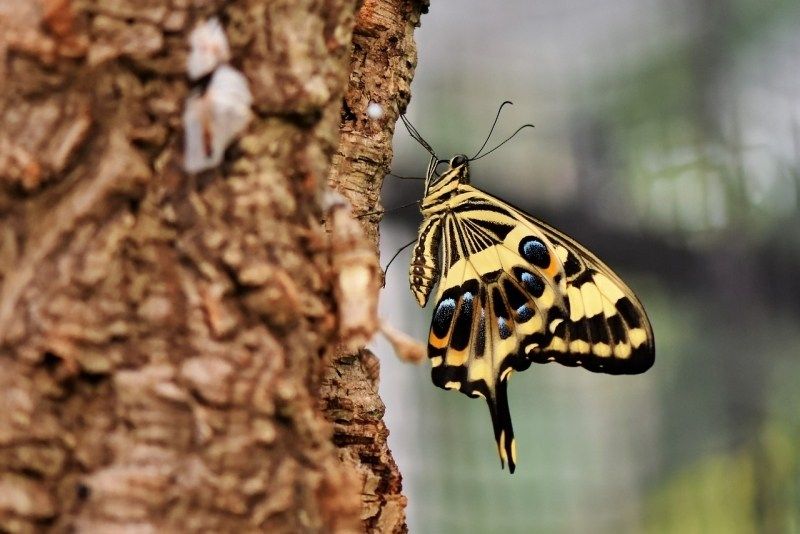
Butterfly
The use of a tripod is difficult with moving subjects. Instead, brace the camera tightly to your face and tuck the elbows in. Set your focus ring. Use your upper body as a focusing tool by gently moving it forward and backward. When the proper part of the subject comes into focus, freeze your body, and release the shutter.

Key pad
Part of the fun in macro photography is to highlight common subjects very closely. Make sure that your shutter speed is fast enough to create a sharp picture. Pay attention to your lighting, especially backlighting. Use reflectors or electronic flash if necessary.
2. Setup your camera and capture some macro shots, applying what you learned from the photographs above. Drive mode and focus mode are optional to preference.
How Did You Do?
- Did your shot have a magnification of 1:1 or larger?
- Did you use the upper body technique to place focus?
- Is your image sharp and free of camera shake?
- Did you properly place your DOF window?
BONUS: I've got something special for you on the next page...
The above content is taken from our hugely popular Action Cards – printable project sheets that will give you over 200 photography assignments, covering everything you can imagine. You can see the Complete Photography Action Card collection below:
If you enjoyed the above assignment and would like to know more about this project-based photography learning tool, do take a look at the Action Cards here.
Click below now, to read about it on the next page…

About Kent DuFault
Kent DuFault became a photographer in September of 1974. He took a “Basic Photography” class in high school and was hooked for life. His best-selling product, The Printable Action Cards have helped thousands of photographers worldwide learn photography through a unique, project-based learning system.

