

The radial gradient tool in Lightroom is great for making local adjustments in Lightroom, yet it’s often underutilized. Using the radial gradient tool, you can alter specific areas of an image in many different ways.
With the radial gradient tool, you can apply an ellipse to a certain area of your composition. Once you’ve positioned and sized this where you want it, you can apply a wide variety of edits inside and outside the ellipse.
With it, you can:
- enhance color,
- adjust exposure,
- tweak contrast,
- control white balance,
- style a vignette,
- and much more.
You have all the sliders available to you that you use in the Basic Panel of Lightroom. These can be applied to the area within the ellipse or outside of it. By also using the Brush tool within the radial gradient tool, you can customize the area that’s being affected.
So, when you have a shape that’s not a perfect ellipse, it’s not a problem because you can use the brush to add to or subtract from the selection area.
Let’s take a look at some of the ways you’re most likely to take advantage of the radial gradient tool, which is also known as the radial filter in Lightroom.
Recommended Reading: If you’re interested in improving your post-processing workflow, check out Photzy’s Understanding Masking premium guide. It has sections on Lightroom and Photoshop, as well as Snapseed for mobile users, too.
With the radial gradient tool, you have all the sliders available to you that you use in the Basic Panel of Lightroom.
Enhancing Color in a Specific Area
Photograph by Kevin Landwer-Johan
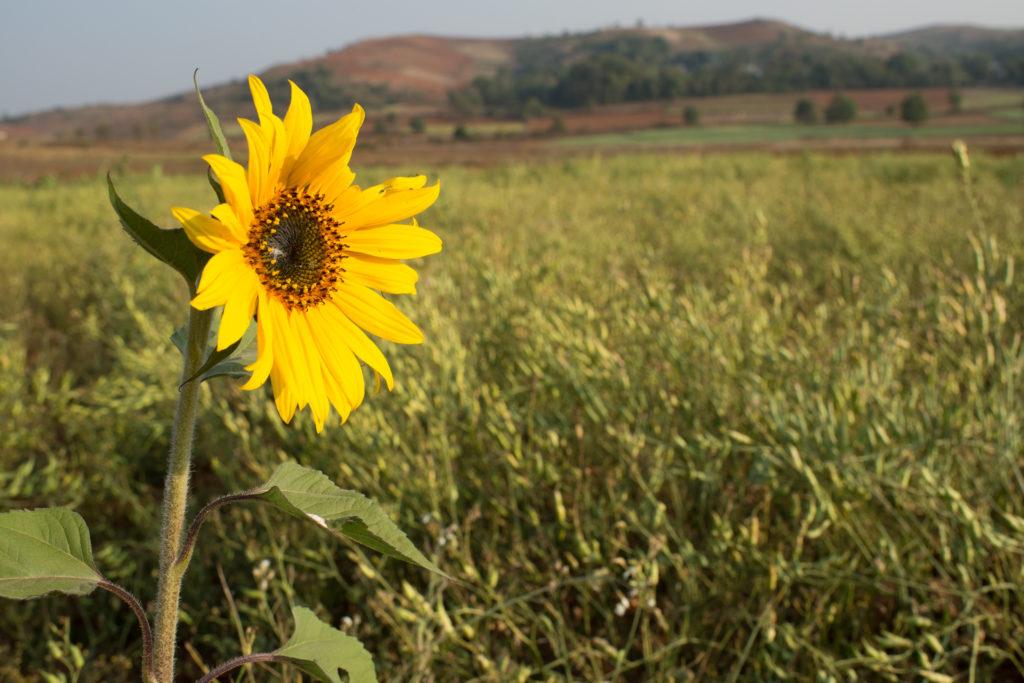
Starting with a simple image of a sunflower in a field, I want to boost the color of the flower’s center and then desaturate the color of the surroundings. This edit will draw more attention to the flower.
Above is the unaltered image.
Photograph by Kevin Landwer-Johan
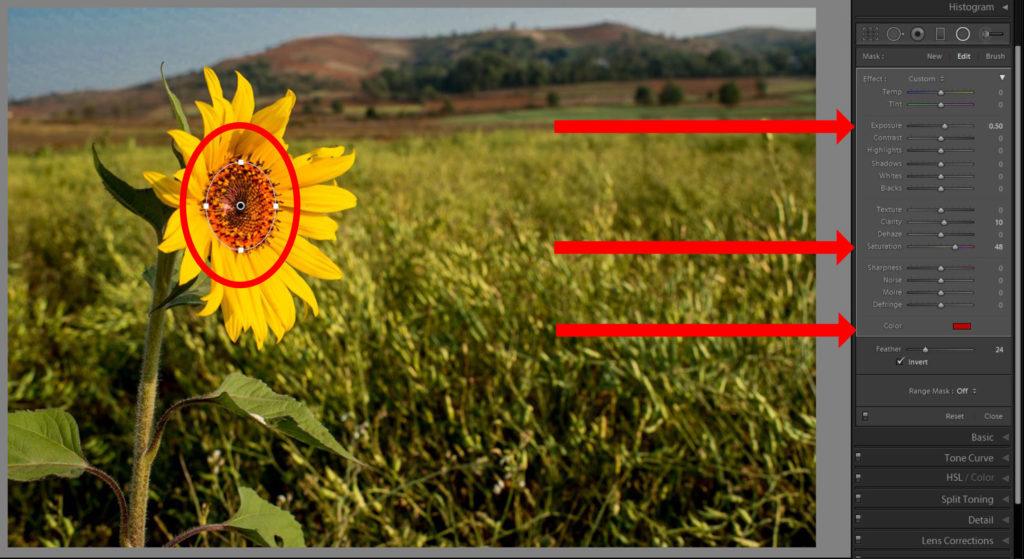
I first added a radial filter to the center of the flower. By default, the filter affects the area outside of the ellipse, so I checked the Invert box, which is located under the sliders. Now, when I use the sliders, the effect will take place within the ellipse.
I added a red color and increased saturation. I also increased the exposure value slightly. These edits make the center of the flower brighter and more colorful.
Photograph by Kevin Landwer-Johan
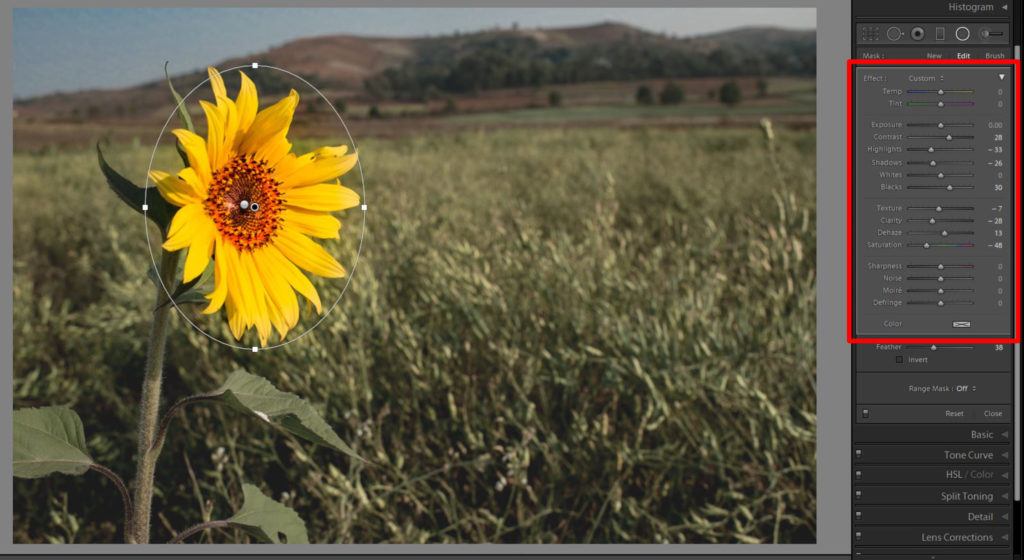
Next, I added another radial tool ellipse around the whole of the head of the sunflower. I adjusted some of the sliders to reduce the surroundings’ saturation and tweaked the contrast to help create the mood I wanted for this image.
By using more than one radial filter, you can see how unlimited the possibilities are to alter the colors in specific areas of a photograph.
Adjusting Exposure Using the Radial Gradient Tool
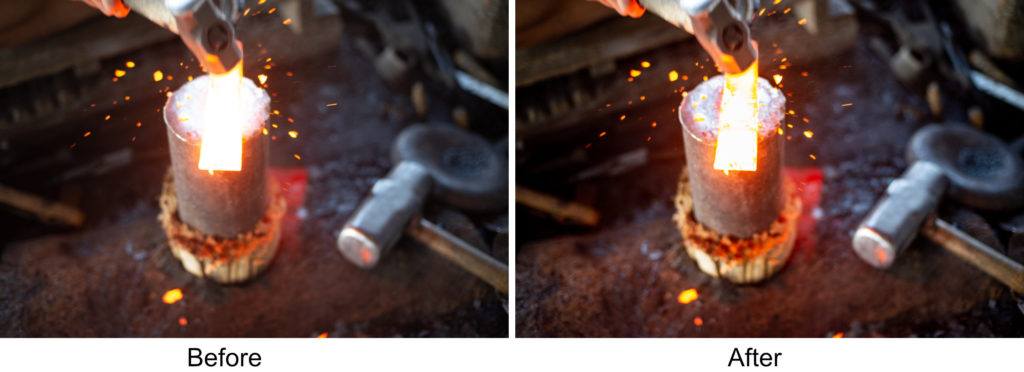
Decreasing the exposure on an overexposed image or part of an overexposed image must always be carried out carefully. It’s very easy to end up with the adjustment looking dull and gray.
Photograph by Kevin Landwer-Johan
I purposely selected the following image (above) because most of the area I want to apply the filter to is very overexposed, and some of it only slightly.
I added a circular-shaped radial filter to the main area of the top of the anvil and the blade the blacksmith was working on. At this stage, I inverted the filter. I then used the brush to extend the filtered area to include the part of the blade that was protruding.
By using more than one radial filter, you can see how unlimited the possibilities are to alter the colors in specific areas of a photograph.
As I added the filter and brushing, I turned on the opacity by tapping the ‘O’ key. This action highlights the filtered area, making it possible to be more precise with its placement.
Using the sliders, I worked to bring down the exposure, but I used more sliders than just the Exposure slider. Being too aggressive with the exposure slider will result in an unsightly graying of an overexposed area. I moved the Texture, Clarity, and Dehaze sliders to the right to help bring out details in the affected area.
Recommended Reading: If you’re interested in improving your post-processing workflow, check out Photzy’s Understanding Masking premium guide. It has sections on Lightroom and Photoshop, as well as Snapseed for mobile users, too.
Tweaking Contrast With a Radial Filter
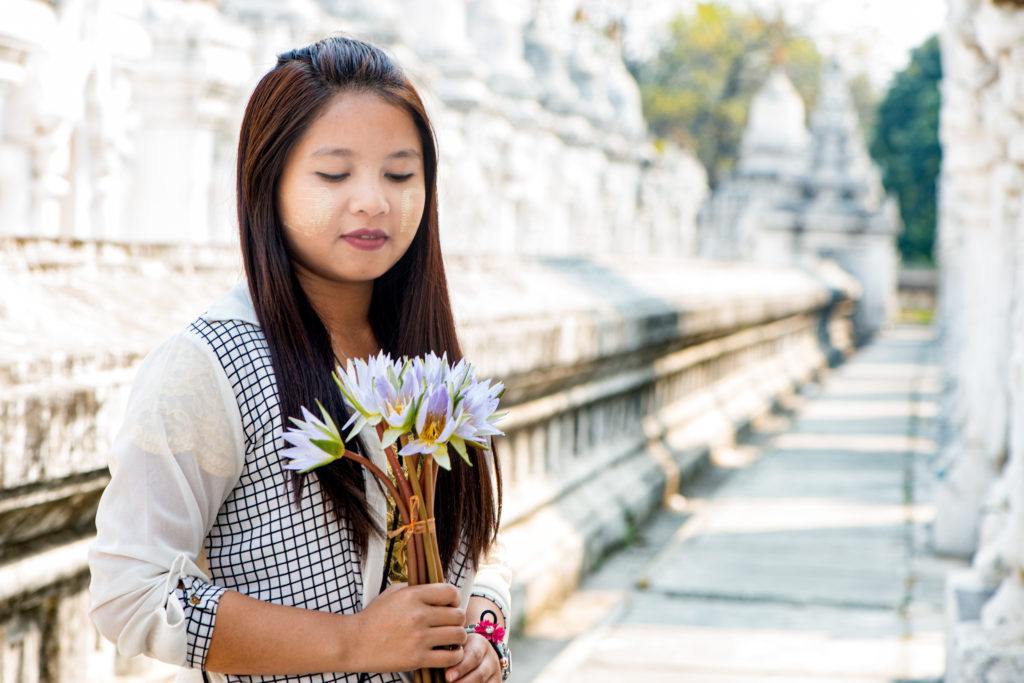
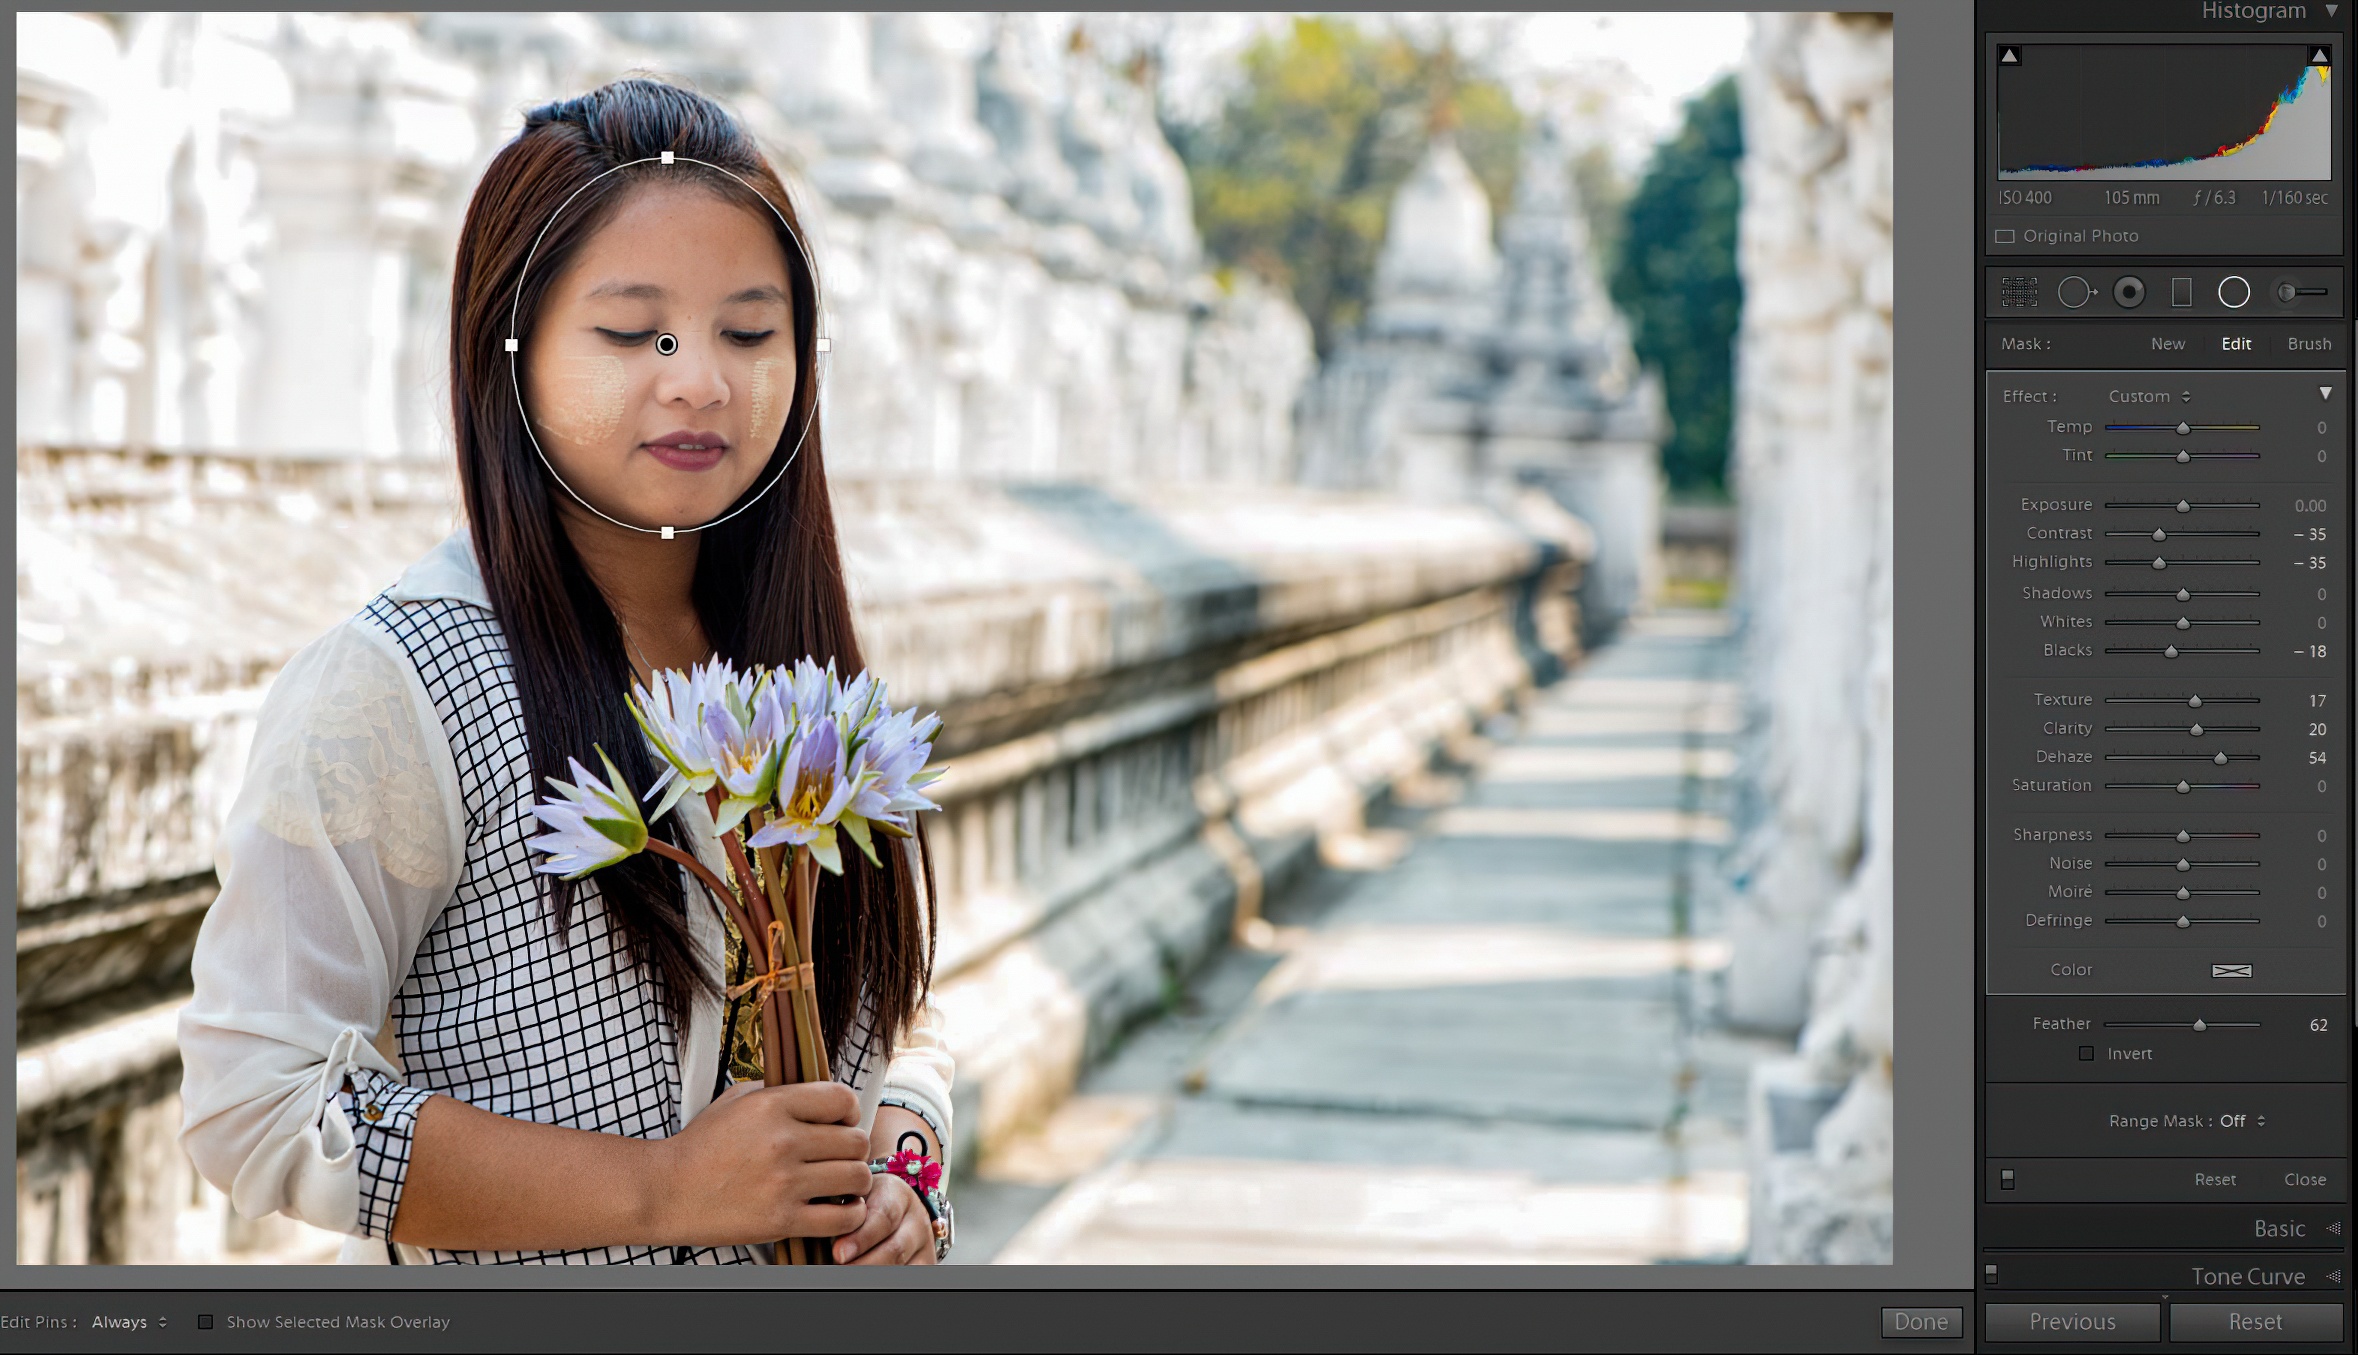
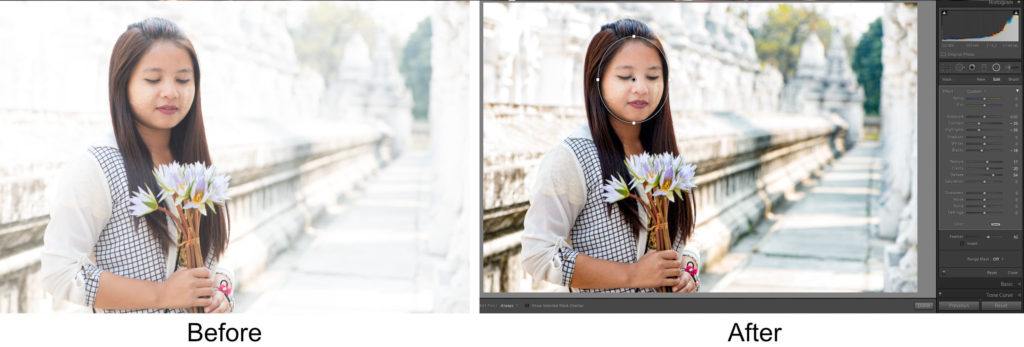
I wanted to keep the young woman’s face soft in this portrait and enhance the detail in the background. I aimed to do this without significantly adjusting the exposure. Photograph by Kevin Landwer-Johan
Using the radial gradient tool, I created a filter to cover the subject’s face in this photo. I then adjusted the sliders for the:
- contrast,
- highlights,
- blacks,
- texture,
- clarity, and
- dehaze.
This combination of slider adjustments worked well to see more contrast in the background, but her face then looked too dull. I used the Brush tool to lightly apply the filter to her eyes and eyebrows a little. I then very gently brushed over her lips.
I use a pressure-sensitive tablet and pen tool rather than a mouse when using the brush tool. These tools allow for greater control. You could also reduce the Flow and Density of the brush to avoid a heavy-handed application.
Photograph by Kevin Landwer-Johan
As with any of these adjustments, you could also use the Adjustment Brush to achieve similar results. Using the radial gradient tool speeds up and simplifies the editing process.
Using the Radial Filter to Control White Balance
Being able to control the white balance in selected portions of an image is helpful. This action is most useful when you’ve taken a photo where there’s more than one light source affecting your composition.
White balance problems can happen when you have daylight and electric light contributing to the illumination. Two or more light bulbs or tubes with different light temperatures will also cause problems that a well-applied radial can remedy.
Even with a single light source, altering the white balance using a radial gradient tool can help. This white balance issue is the case with the photo of the Buddha image in the shrine. The only light source was the sun, but the light at the shrine’s entrance and at the back where the statue was was noticeably cooler.
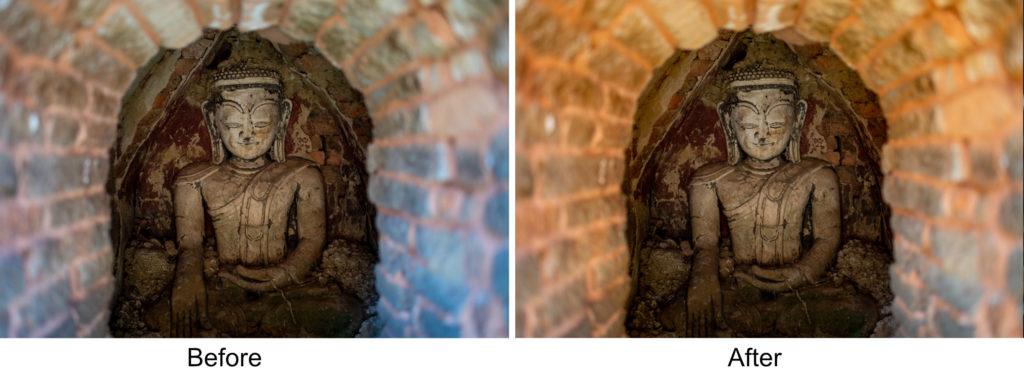
I used a radial filter to surround the Buddha image and then warmed up the bricks, which are closer to the light and had a bluish tint. Photograph by Kevin Landwer-Johan
Styling a Vignette Using the Radial Gradient Tool
Styling a nice vignette is probably one of the most common uses for this tool in Lightroom. It’s very easy to create and apply a vignette using the radial gradient tool. You can use it to either darken or lighten the peripheral of your photos.
Adding more than one radial filter allows you to build the vignette effect more subtly than when using a single instance of the filter.

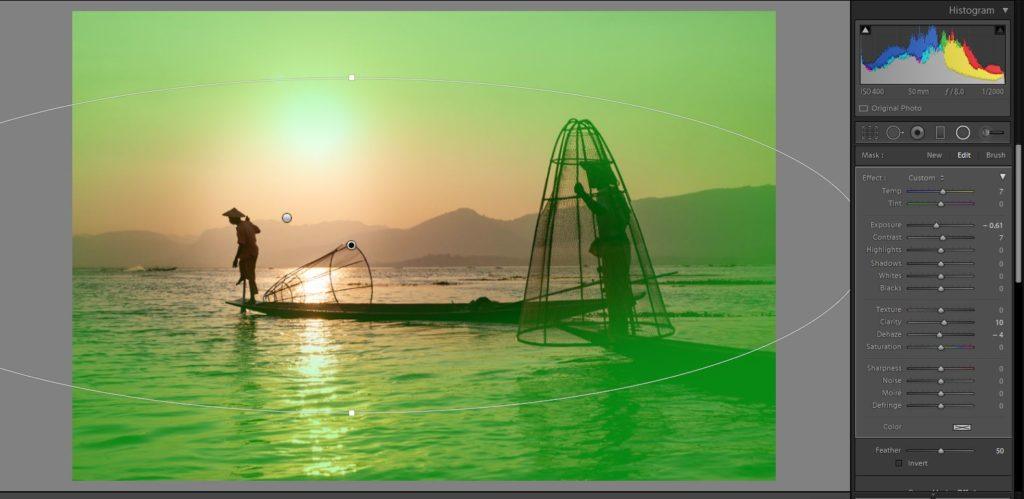
Photographs by Kevin Landwer-Johan
Here I created two filters: one around the fisherman and the sun that you can see in the image (top), and one covering a larger area to darken the sky and the lake but not affect the middle zone of the composition (bottom image).
Using more than one filter, I was able to have more control over the areas I covered and the density of each vignette. I typically prefer to be more subtle than aggressive when applying vignettes. It depends on the image and your taste as to how strong you like the graduated effect.

Photograph by Kevin Landwer-Johan
A Few More Tips for Using the Radial Gradient Tool
As you drag to create an ellipse, hold down the Shift key if you want to create a circular shape rather than an ellipse.
Once you have created your shape, you can resize it using the handles on the edges of the filtered outline. Hovering your pointer close to this edge, you’ll notice it changes shape to a curved, double-headed arrow. You can then click and drag to rotate your ellipse.
At the top of the sliders panel, there’s a small drop-down menu that is by default labeled Custom. If you click on this, you will find many options for making adjustments with presets. If you have custom Lightroom presets installed, you can use these to add to your selected area.
Feather the edge of your radial filter to apply it where you want it to be seen more subtly. If you use a very hard, un-feathered edge, this often results in an obvious, unnatural-looking contrast between the affected and unaffected areas.
Recommended Reading: If you’re interested in improving your post-processing workflow, check out Photzy’s Understanding Masking premium guide. It has sections on Lightroom and Photoshop, as well as Snapseed for mobile users, too.
Conclusion
The radial gradient tool is incredibly flexible and can be applied to make endless adjustments to many aspects of a composition.
Starting with intention and knowing what you want to achieve with any image editing is always a good idea. It’s easy to become engrossed with using this filter and apply it in ways that significantly alter an image. There’s nothing at all wrong with this, so long as you know what you want and are in control of the results.
If you’re not familiar with this clever little tool, practice with it. Spend time applying ellipses of different shapes and sizes to different images and fiddling with the sliders. This practice is how you’ll best find a feel for the look you like.
Use multiple sliders in various combinations to get the look you want. Using one slider and pushing it to one extreme or the other can result in the image beginning to break down. You’re better off using a few different sliders to create the look you want.
Experiment with different photos and different applications of the radial filter on virtual copies of the same photo. You may surprise yourself by creating a whole different look and feel to an image you may have thought was less than wonderful.


