

When you saw the word ‘framing’ in the title of this guide, you probably thought of wooden, steel, and other frames used to frame a print. Well, that is not what the guide is about!
The framing we’re going to discuss is a composition technique. It involves framing done in-camera and/or done using post-processing.
The framing happens inside of an image and does not necessarily have anything to do with its edges.
We’re first going to look at why anyone would want to do this type of framing and then look at a few types and examples.
Note: It is not possible to discuss the ‘how’ of each framing technique in detail because each of them justifies a guide on its own. I will sometimes add a few details, though – just enough to let you decide if it’s something you would like to try out or not.
Here is what we will cover:
- The purpose of using a frame within a photo composition
- The two main categories of a composition frame
- The vignette and blur technique
- Panning as a frame
- Using a zoom burst as a frame
- The camera rotation and flash burst technique
- Finding natural frames
- Contrast as a frame
- Light and shadow as a frame
- Posing as a frame
Recommended Reading: If you’d like to improve your composition skills for better images, grab a copy of Photzy’s best-selling premium guide: Advanced Composition.
What Is the Purpose of Compositional Framing?
- The main purpose of framing is to emphasize your subject (to place focus on it)
- To draw attention to your subject (perhaps more of a forced drawing of attention to it – the same as leading lines)
- To create a mood
- To create a specific artistic effect
- To remove clutter (or to make it less prominent)
The main purpose of framing is to emphasize your subject.
Two Main Categories of Framing

There are a lot of framing techniques from which you can choose to draw attention to your subject. All framing techniques fit into two main categories: partial and full framing.
Partial Framing
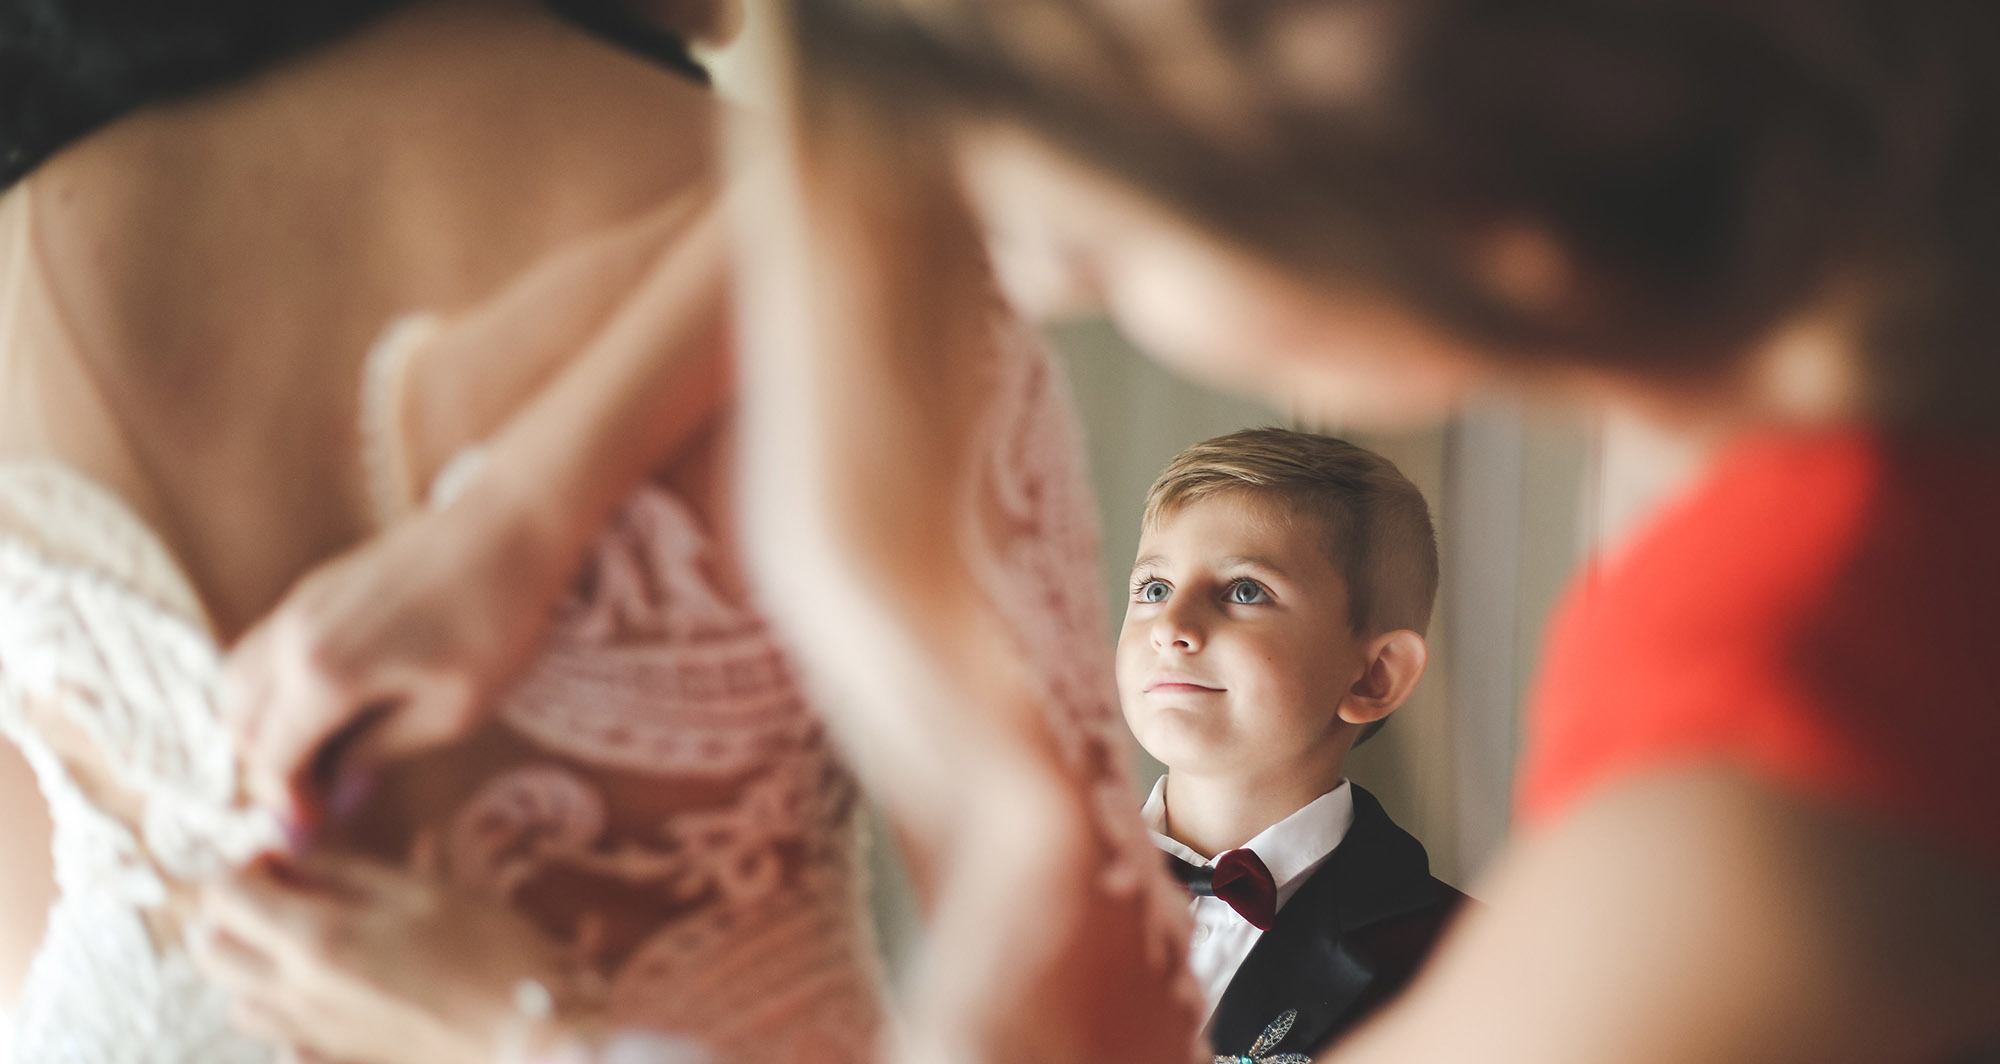
This framing method involves the blocking of part of your image in order to force focus onto your main subject.
Full Framing
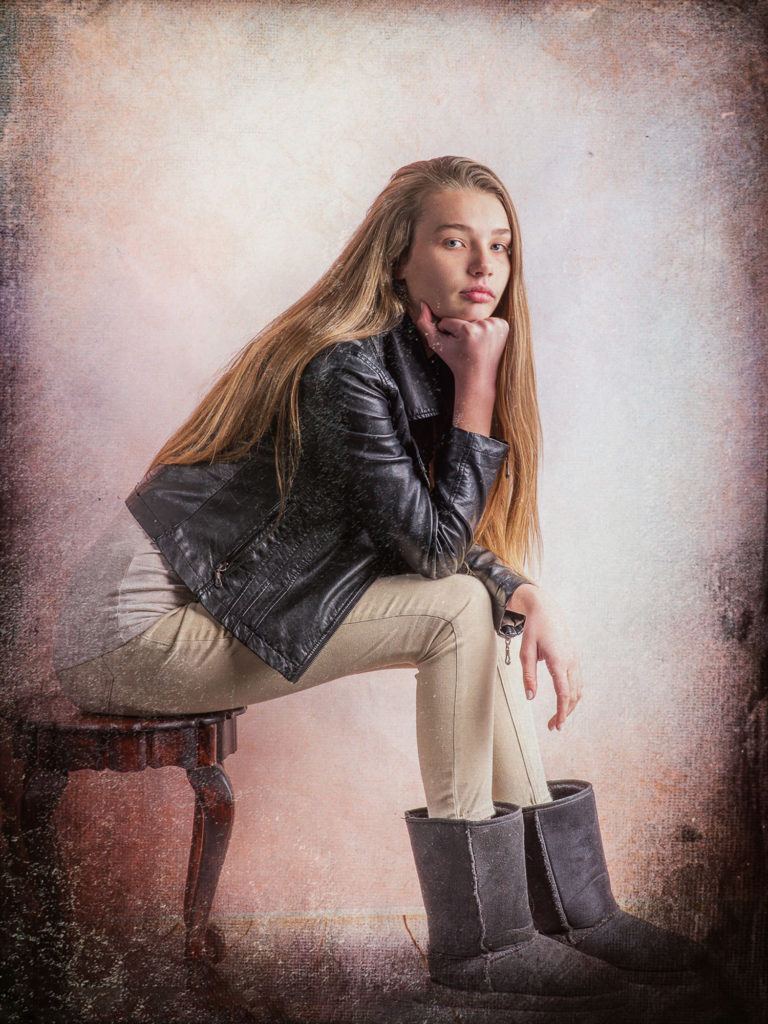
This frame was added in post-processing (Topaz Texture Effects) to enhance focus on the model and to add interest. Photograph by Tobie Schalkwyk
In full framing, the full image is framed to channel the viewer’s eyes toward a subject.
Key Lesson: Don’t get stuck with one or two particular ways of framing. Use it fully or partially, dark, light, or blur—or a combination of these—to force focus onto your subject or perhaps one particular aspect of your subject.
Framing Techniques
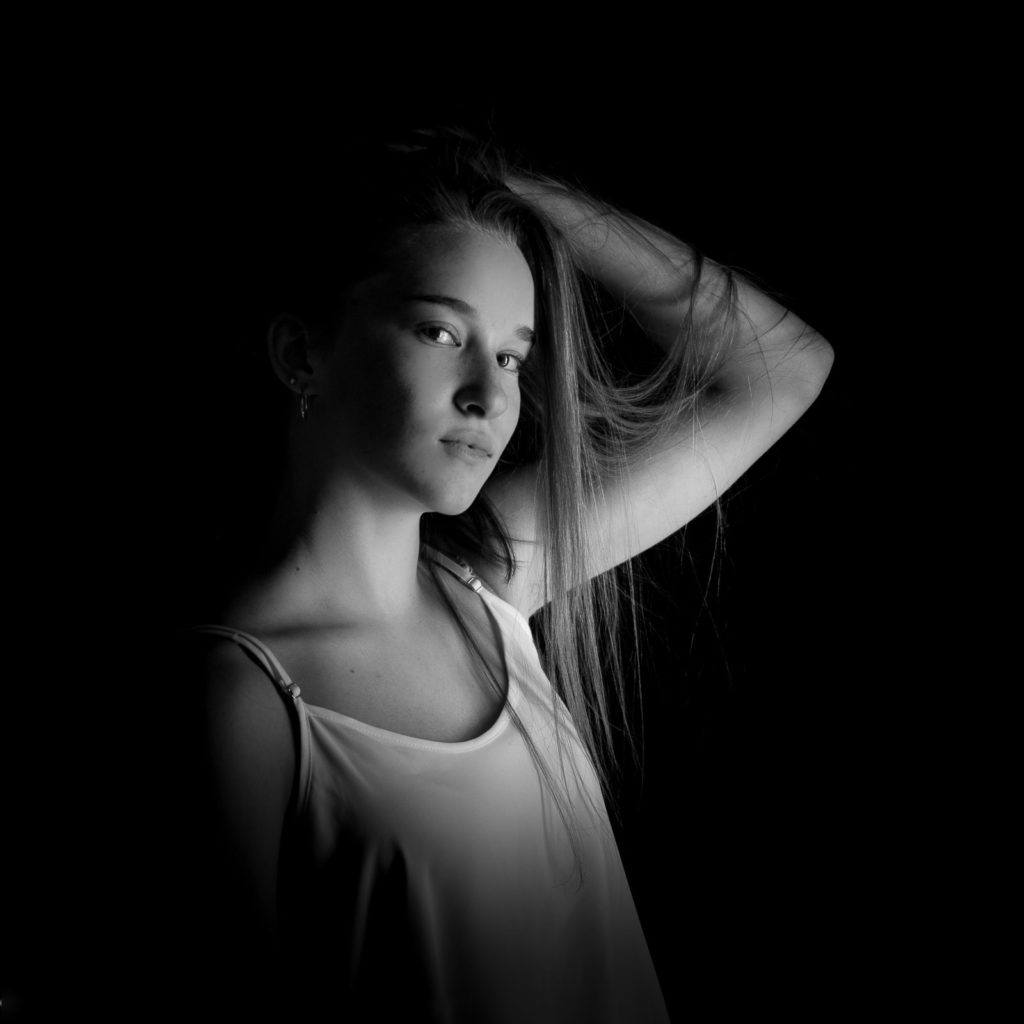
A darkening vignette was added in post-processing to channel focus to the model and to de-emphasize clutter. It also adds to a mystic mood. Photograph by Tobie Schalkwyk
No matter how many framing techniques I cover here, I’m guaranteed to miss tons of them. The fact is, the only limit to the type of frame used is your imagination.
Let’s look at a few.
Vignette and Blur
This is probably the most common framing technique used because it’s so easy to do and it’s available in just about every post-processing tool. The vignette can be split into two main categories: the darkening of borders and the lightening of borders. It may or may not be applied together with the blurring of borders.
How?
Post-processing tool.
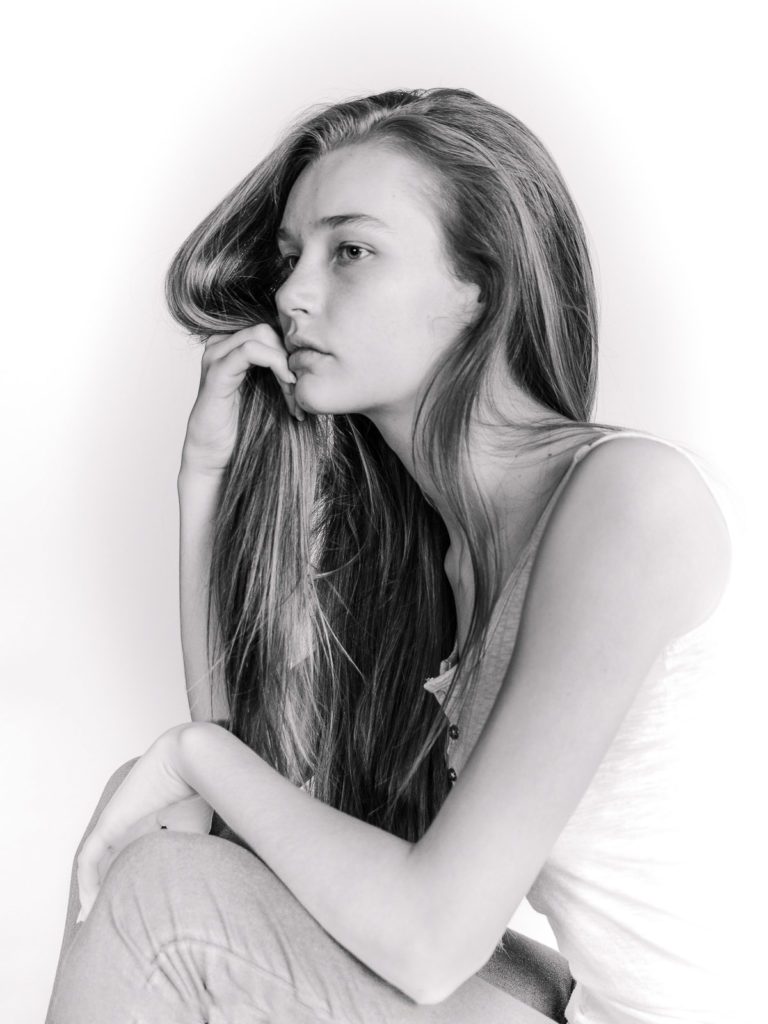
In this image, a lighter vignette was used on three sides to force focus onto the front part of the model. Photograph by Tobie Schalkwyk

This cheetah could easily get lost in the detail and clutter of foliage around him. Focus is kept on him by blurring his surroundings. Photograph by Tobie Schalkwyk
Key Lesson: Never allow clutter to take focus away from your subject. Crop it out, remove it with a vignette, or blur it. Always give your viewers’ eyes a place to come to rest.
Recommended Reading: If you’d like to improve your composition skills for better images, grab a copy of Photzy’s best-selling premium guide: Advanced Composition.
Effects as a Framing Technique
Various framing effects are available in photography. Let’s have a look at a few.
Panning
How?
A slow shutter speed (1/60s) was used to create the effect of motion while panning the camera at the speed of the car through the viewfinder.

In this image, a frame of ‘perceived movement’ was used to channel focus to the driver’s cockpit. The viewer’s eyes have nowhere else to settle down. Photograph by Tobie Schalkwyk
Zoom Bursts
How?
This technique involves slow zooming in/out with your lens or camera while keeping the focus on your main subject. Exposure times are extremely long (sometimes 20–30 seconds) to create the burst effect. In the daytime, ND filters are required to slow down your shutter speed sufficiently to accomplish this.
Such long exposures obviously need a tripod and a steady zooming hand to create straight burst lines.

In this image, the eyes have no choice but to come to rest on the cue (white) ball. All of the other balls together form the channeling frame around it. Photograph by Robert Zunikoff
Camera Rotation
How?
This technique involves the quick rotation of the camera which is set to a slow shutter speed. An on-camera flash (or external camera controlled wirelessly) is used to light up and freeze the couple in the frame.

The camera rotation was used to frame the dancing couple. The frame was formed by the light streaks in the background. It forces the eyes to come to rest on one place only: the dancing couple. Photograph by Tobie Schalkwyk
Key Lesson: Many effects are available to help you frame your subject. Study them and practice them wherever you go. The day will come when you need them and then you will apply them with confidence.
Natural Frames

Photograph by Jonathan Borba
Natural frames may comprise natural or man-made structures.
One of the classic uses of a man-made frame at a wedding is a door.
How?
Compose your subject inside the lines of a clearly defined object that surrounds the subject.

Photograph by Marius Muresan
A classic frame used for weddings is a car window.

A beautiful example of how a couple was framed with the help of architecture. Photograph by Alex Perelmuter
The sun entering the building in the background helped to light up the surroundings. A light source may be used on this side of the couple to add more detail. Contrast can create a frame.

In this image, the shade of a cross beam as well as two vertical poles of a fence was combined to force the viewers’ eyes to come to rest on the model’s eyes. Photograph by Tobie Schalkwyk
Key Lesson: Many natural frames are available during a shoot. Look around you and don’t be afraid to innovate. Watch for light and shadow frames.
Recommended Reading: If you’d like to improve your composition skills for better images, grab a copy of Photzy’s best-selling premium guide: Advanced Composition.
Poses as Framing Technique

Photograph by Tobie Schalkwyk
A lot of fun can be had by playing with posing ideas and, yet again, your imagination is your only limit.
Don’t be scared to create your own frames utilizing specific poses. This model’s hands leave no doubt where she’d like your eyes to settle: on her beautiful eyes.

A fun idea is to frame the sun at sunset. Photograph by Tobie Schalkwyk

This natural frame places focus on the bunch of baobab trees in the distance. Photograph by Tobie Schalkwyk

A frame created by the bride’s shoe. A blurred vignette adds to channel focus to the wedding bands. Photograph by Tobie Schalkwyk
Conclusion

Photograph by Marius Muresan
Framing is a magical tool to introduce variety to a wedding album, or any photo session for that matter. The possibilities are endless. The cherry on the cake is that they are free!
Always be on the lookout for framing possibilities. Don’t be afraid to combine various framing techniques to produce super shots.
Most importantly, enjoy your shoot!
Self-Check Quiz:
- What is a composition frame?
- A frame can emphasize the subject, create mood, create an artistic effect, or remove ______________.
- What are the two main categories of composition frames?
- The three types of vignette frames are dark, light, and _______.
- Combining a slow shutter speed with camera movement and a moving subject can create a frame with the technique called ______________.
- What is a zoom burst?
- How do you set up a camera rotation framing effect?
- Name several natural frames.
- You can create a frame using light and ___________.
- Can you create a frame in the posing of your subject?


