

Raise your hand if you’ve ever returned from a photography outing to find that all the shots you took were terrible.
Snow did that to me.
As a very new photographer, I once spent an afternoon taking photos of my kids playing in the snow. They were sledding, making snow angels, and building snow forts. I returned with my 100+ photos eager to look at them and share them with family and friends.
The snow, which looked bright and white to my eye, looked dull and dirty in the photographs. Every single shot looked like it was taken at twilight, when I had been shooting in the middle of the day.
I was determined to find out where I had gone wrong. I was shooting in automatic mode. What could have gone wrong? Well, it turns out that even our very smart digital cameras can be tricked by snow.
"I was determined to find out where I had gone wrong. I was shooting in automatic mode. What could have gone wrong?"
Whether snow is your main subject or not, there will come a time when that white stuff will make you cry out in rage and frustration and make you question your photography hobby or profession.
Shooting in the snow has its own special set of rewards and challenges. But once you master the challenges you can enjoy creating some very exciting
images.
Snow provides opportunities to create contrast (in textures and tone) and change the world around you in new and interesting ways.
In this article you will learn:
- how to make the most of your camera settings, such as metering and white balance, to get great snow shots;
- how to look for scenes that ‘pop’ in the snow by utilizing texture, tone, and contrast; and
- some different ways of catching snow in action
Recommended Reading: If you’d like to succeed in creating stunning outdoor shots even in bad weather, check out Photzy’s Producing Top Photography In Bad Weather premium guide.
Metering
Snow can be a tricky subject. Whether the main subject or just present in your photo, it can cause your camera to make some adjustments that, if you aren’t careful, may ruin a good shot.
Cameras are designed to meter for middle gray. However, if you have a shot that is mostly snow, and therefore mostly white, your camera is going to turn that white to gray. So, most shots with a predominantly white scene come out looking underexposed.
There are a few ways around this problem, but you must be aware of what your camera is doing and how you can compensate for it.
The quickest and easiest way to fix the “gray snow” problem when shooting in modes other than manual or automatic is to use exposure compensation (EC). You can go into your camera’s menu to do this, but most cameras have a shortcut. Quickly increase your EC a stop or two and resume shooting, with whiter results.
Note: When shooting in automatic, the camera makes all the adjustments for exposure for you. If there is an abundance of white in the scene, the camera will expose those whites as middle gray. I highly recommend you shoot in manual mode and make your own adjustments to get the correct exposure.
Key Lesson: If your camera is set to aperture priority or shutter priority mode when shooting snow, use your exposure compensation to bump the exposure up a stop or two to get snow that looks white instead of gray.
Another way to avoid dirty-looking snow is to use spot metering. I recently discovered spot metering when I was shooting hummingbirds against the bright background of the sky. I got some great hummingbird silhouettes until I adjusted my camera to spot metering.
Most likely, your camera is already set to meter using the entire scene before it. On my camera, a Nikon, this setting is called Matrix Metering, but different brands use different terms for the same result.
With spot metering, the camera makes a metering calculation from a small area in the middle of your screen. For this reason, you will want to aim your camera at a middle-toned subject in your scene (alternatively, you can use a gray card if you have one), press the shutter part way to lock the exposure, then recompose your shot and shoot.
If you are shooting in manual mode (which is my preference and I encourage you to always do so), then another alternative is to simply adjust your shutter speed a bit. If you are getting gray snow at 1/800th sec., try setting your speed to 1/400th sec. or slower. This allows more light into your shot and makes the snow appear whiter.
Photograph by Leanne Cleaveley
Key Lesson: If you feel that adjusting the shutter speed may negatively affect your photo (perhaps you are shooting skiers and want to freeze the action), then you can adjust the ISO or aperture as an alternative.
The main thing is to be aware of how an abundance of white in your photo can influence your metering and make an adjustment to compensate for that. Don’t forget to keep an eye on your histogram and watch for spots that are overexposed too!
Key Lesson: Use your histogram to check your exposure regularly when shooting in the snow. Leaving your review screen on “Highlights” when it is a sunny day can allow you to quickly see if there are any areas that are “blown out” or overexposed.

Photograph by Leanne Cleaveley
White Balance
Always take the time to adjust your white balance setting before shooting in snow. You want those lovely whites to appear white, not yellow or blue. Take a moment to consider your light source and adjust accordingly.
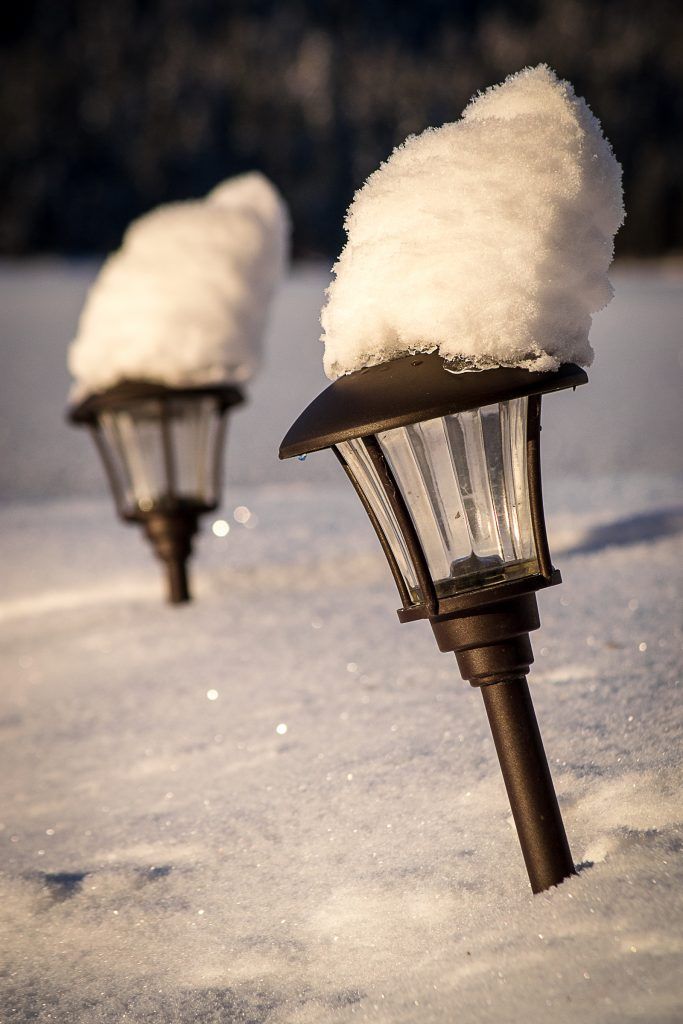
Snow tends to come out looking a little blue in most photographs. At other times, the snow having a slight yellow hue would look correct, especially if photographing in the late evening (like the lamps images above). Be sure to shoot in RAW; you can make some color adjustments later during post-processing.
Always take the time to adjust your white balance setting before shooting in snow. You want those lovely whites to appear white, not yellow or blue.
Shooting in RAW will also help you when you have multiple light sources and are struggling with which white balance setting to use. Again, you can easily change the white balance settings on a RAW photo during the editing step in whatever program you like to use.
Key Lesson: Adjusting your white balance and shooting in RAW are two things you can do to ensure that the color of the snow looks right in your photograph.
Another option, when shooting in the snow, is to use black and white. This is actually a great way to force yourself to pay attention to tone, or the range of light to dark, in a scene. Alternatively, you can shoot in color and convert to black and white later when editing your photograph.
Contrast
Pssst! I have a secret to tell you…snow is clear, not white. Surprised? When we look at a field of snow, we see white. But all those teeny, tiny snowflakes are clear ice crystals. They appear white to us because of the way they reflect and refract the light.
What does that mean to you as a photographer? Well, a great sea of white all by itself looks very much like a blank piece of paper. Not too exciting a subject and probably not photo-worthy in and of itself.
However, snow provides something that every photographer seeks. When you add the right subject, you get this wonderful thing called ‘contrast.’
Key Lesson: Strong contrast between your subject and the things around it can make it stand out. Weak contrast allows your subject to blend in. Take advantage of snow and look for contrasting tones to really make your subject “jump out.”
Photograph by Leanne Cleaveley
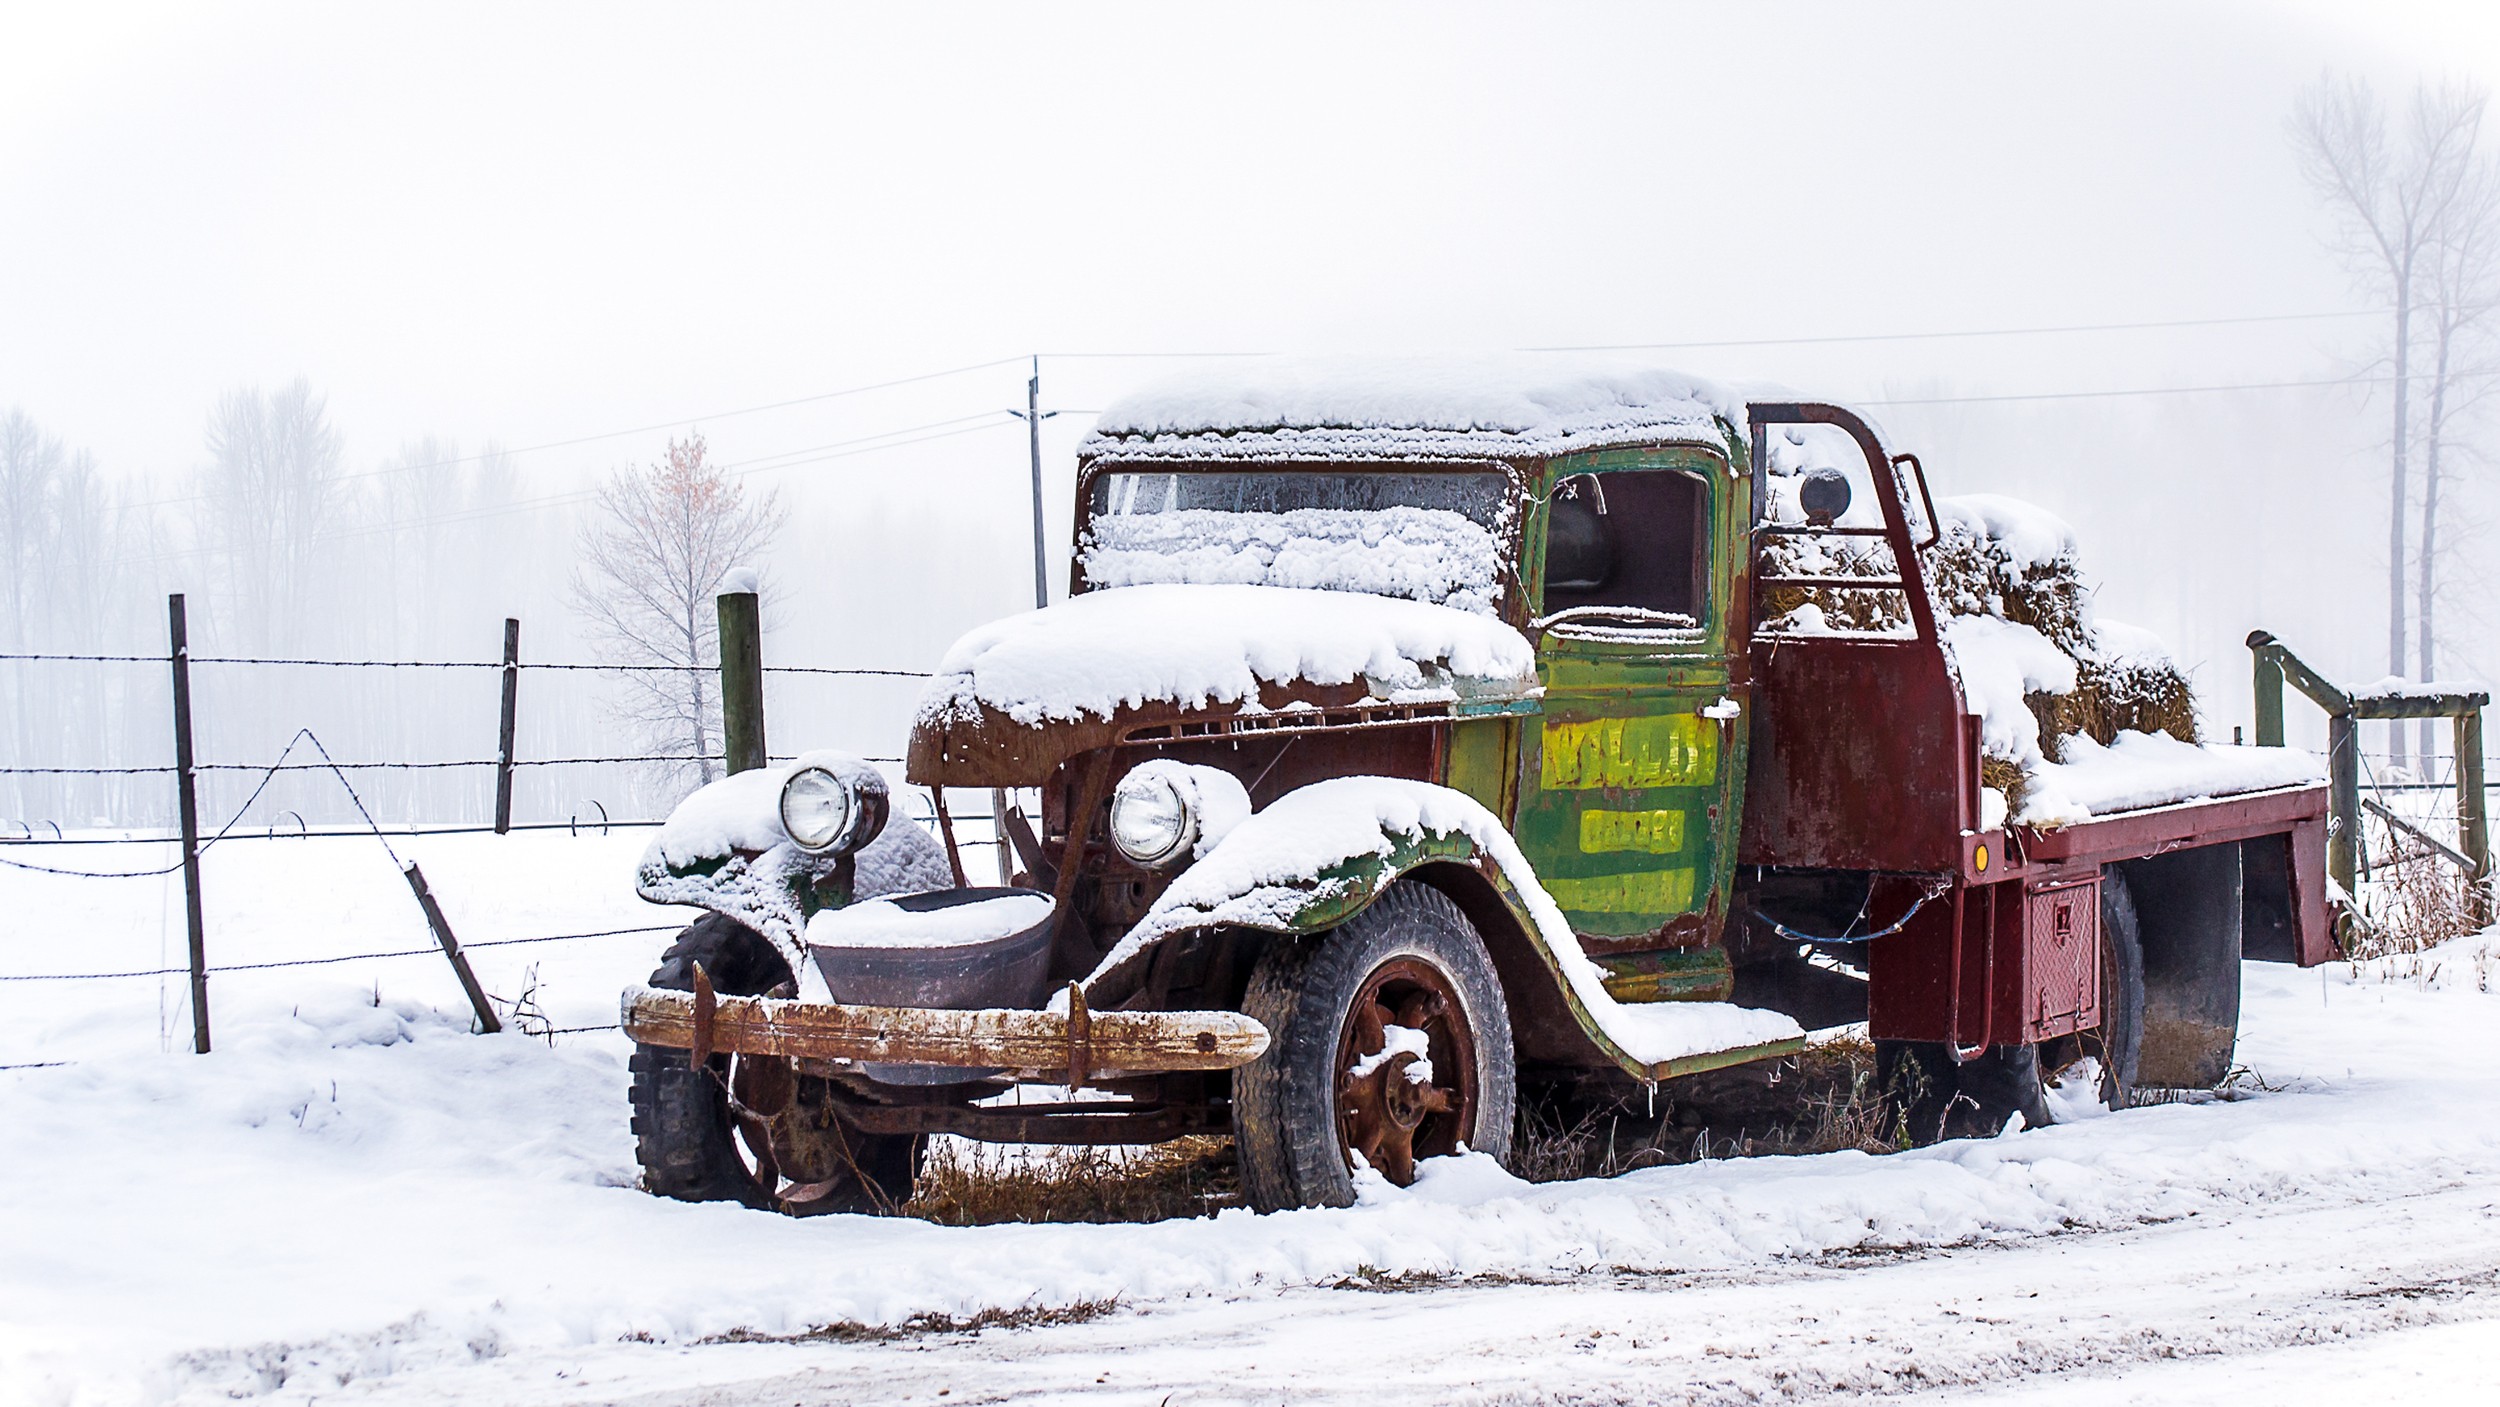
When photographing in the snow, you will want to look for contrasting tones, colors, and textures. If you are shooting a landscape with snow, you want to ensure that you have something, rocks or trees for example, to really make it all pop.
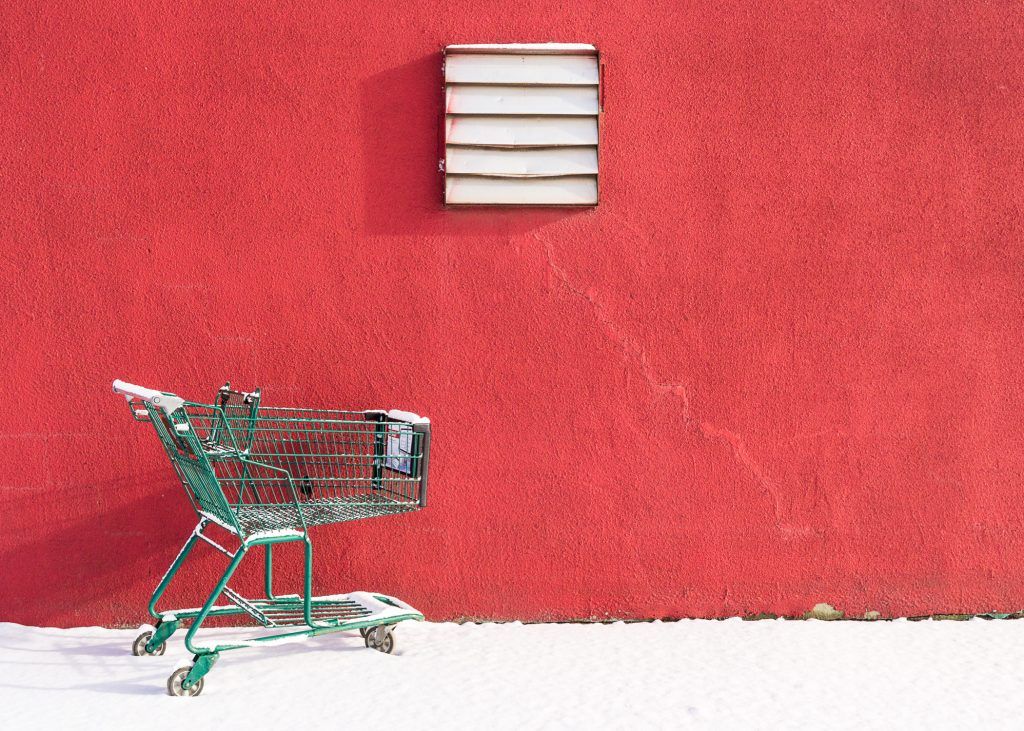
There isn’t much snow in this image (above), and snow isn’t the main subject, but without the snow in the scene the wall wouldn’t “pop” nearly as much. The snow and the contrasting colors of the buggy and the wall make for a photograph that has punch.
Texture
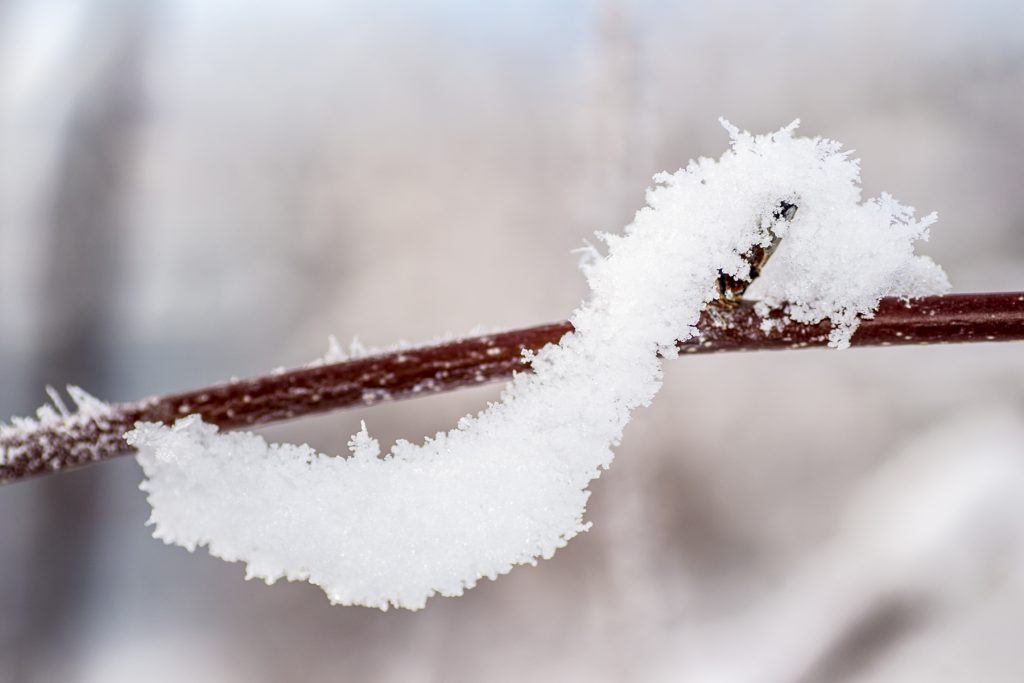
Snow comes in a variety of textures, from soft and smooth to icy and rough. Viewed up close, it can be made up of needlelike clusters, flattened disks, and frosted chunks.
If you are intent on shooting snow as a main subject, I highly recommend using a macro lens. But even at a more typical view, the texture of snow can make for a very interesting subject.
Recommended Reading: If you are interested in photographing snow as your main subject, check out my guide on Photographing Snowflakes.
Like most subjects shot straight on in very bright light, snow will look featureless. But with the right angle, you can really highlight the appearance of snow in your photographs. Try walking around and getting down low to see how the surface of the snow looks from different angles.

Photograph by Leanne Cleaveley
Snow Different!
One of the really great things about a good snowfall is how different the world around you can look. Snow softens harsh angles and gives character to everyday objects.
One of my favorite things to do is go for a photo walk after a good snowfall and see what new shapes exist in my neighborhood. The way the snow collects on a fire hydrant, creating a mushroom-shaped subject, or snow snaking across a tree branch, can make for some very interesting shots.
One of my favorite things to do is go for a photo walk after a good snowfall and see what new shapes exist in my neighborhood.
Photograph by Leanne Cleaveley
Key Lesson: Take advantage of how a snowfall can change your environment in interesting ways. Get out after a snowfall and go on a photo walk and see how the landscape has changed.
So be sure to visit some different places after it snows and see what you can create photographically.
Photograph by Leanne Cleaveley
In Action (Snowing)
If your goal is to capture snow while it is falling, there are a couple of techniques that get very different but interesting results.
By using a flash and adjusting your depth of field by opening the aperture, you can get some great snow bokeh (snow-keh). The shallow depth of field turns most of the flakes into blurry blobs while the flash bounces light off them in a very attractive way.
You also want to make sure that your shutter speed is quick enough to “freeze” the flakes, so you don’t get streaks of snow. The speed depends on how quickly the snow is falling, but I would start at 1/100th of a second and decrease the speed if necessary.

Photograph by Leanne Cleaveley
In this image, a fast shutter speed and the flash helped to freeze the flakes and create lovely bokeh with the falling flakes.
Be warned, though, that if the snowfall is very heavy, it may be tricky to get other subjects in your photo in focus. I will often switch to manual focus if this is the case and adjust it myself.
Another approach to catching snow in action is to lower your shutter speed. Use a tripod when you use this approach, as hand-held shots at slower shutter speeds create blur you don’t want.
The blur you DO want are the streaks of the falling snow. Keep in mind that other objects in your photo will appear soft and hazy, much the same way things might look if you were shooting in the fog.
Again, you may want to manually adjust your focus to get other subjects in the photo in proper focus. I find this approach works well if you are photographing things that are stationary, for example a building.

Photograph by Leanne Cleaveley
In this photo above, the blurred flakes really convey the feeling of a cold wintery day. I also like how the falling flakes make the trees in the background less visible, adding depth to the photograph.
Something to keep in mind is that white doesn’t show up particularly well on white. For this reason, try and choose a subject that provides good contrast to shoot against.

Photograph by Leanne Cleaveley
We often see snow as an inconvenience and nuisance, especially when there is a whole lot of it to shovel! But hopefully, with the tips above, you will view snow as an opportunity to create some very exciting photographs. So embrace winter and have some fun. Happy shooting!
Recommended Reading: If you’d like to succeed in creating stunning outdoor shots even in bad weather, check out Photzy’s Producing Top Photography In Bad Weather premium guide.


