

Photographs of flowers can look visually stunning. The vibrant colors, textures, and shapes lend themselves to beautiful imagery, but photographing flowers can be challenging. To really embrace flower photography, you need certain gear and potentially new settings and ways of working.
In this guide, I’m going to provide you with camera settings to help you get started, as well as looking at, other factors that will help you to get the best possible images.
Here’s what we’ll cover:
- Camera gear
- Composition tips to get you started
- Camera settings for flower photography
Recommended Reading: Want to create gorgeous, perfectly lit flower photographs? Grab a copy of Photzy’s premium guide: Photographing Fabulous Flowers.
Camera Gear
A camera with interchangeable lenses will give you the best options for flower photography. As with all genres of photography, it’s the lenses that make the difference, so being able to use the right one for your subject matter makes a huge difference. But of course, if you’re just starting you can experiment with the camera you already have – even if it’s a point and shoot!
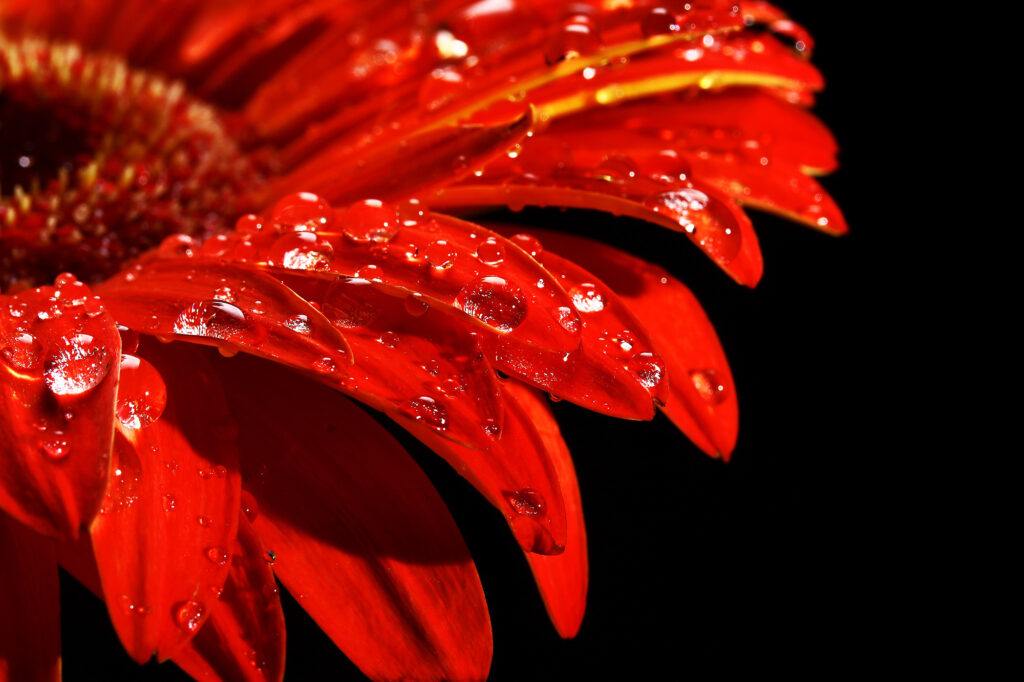
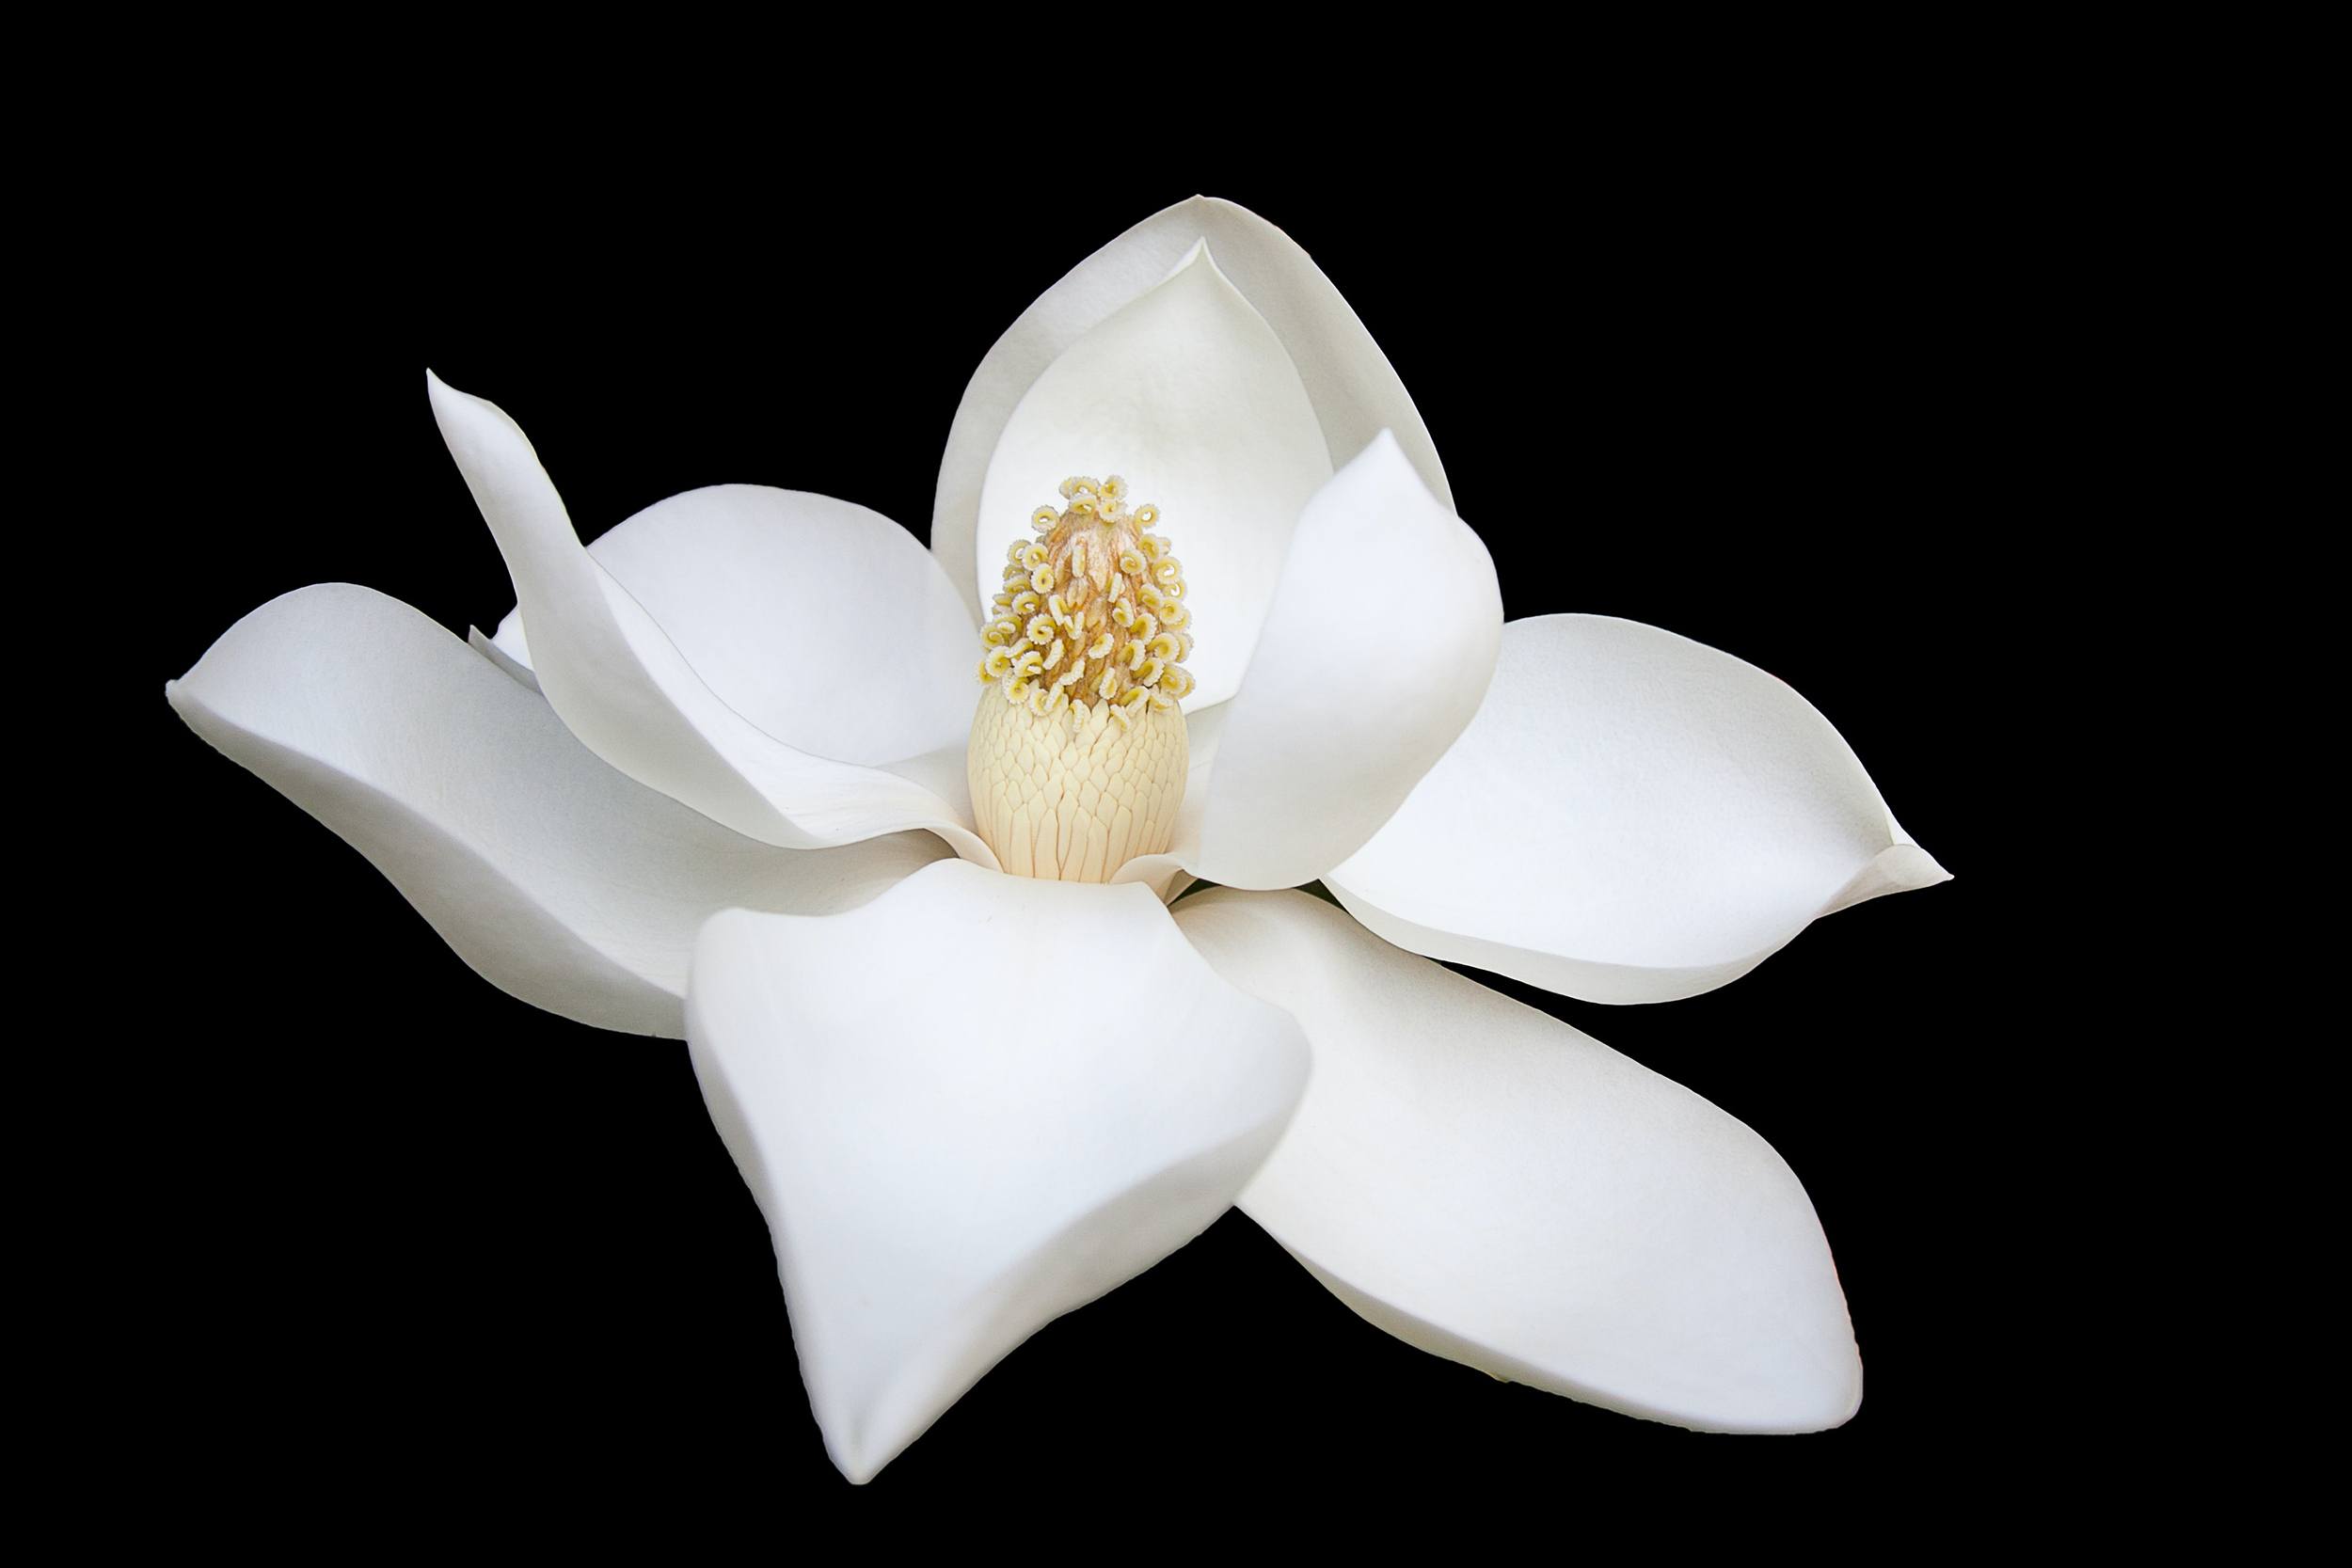
A macro lens will allow you to get detailed shots of part of a flower, even capturing rain droplets. Shooting with a flash at close range will turn your background black, which can be useful for removing distracting background details. Photograph by Engin Akyurt
When it comes to flower photography it’s possible to get great images using any type of lens, be it wide-angle or telephoto. The higher your lens magnification capabilities, the more options you’ll have for flower imagery. This is why the ideal lens for flower photography is a macro lens which will offer 1:1 magnification and allow you to get extremely close to your subject. If you’re not ready to invest in a macro lens, you can try extension tubes. These allow you to get closer to a subject and greatly reduce your maximum focusing distance. The downside is that you will lose several stops while using them.
A camera with interchangeable lenses will give you the best options for flower photography.
I would also recommend a tripod for flower photography. Flowers in the outside world are not stationary objects, so a tripod will help to keep your camera steady and give you more options with your exposure. If you don’t want to carry a tripod or want to photograph flowers close to the ground, I would recommend a ‘Pod,’ which is essentially a small beanbag with a tripod screw in the top of it. This allows you to balance your camera on the ground without it being damaged by any stones etc. A tripod isn’t essential – particularly if you have a steady hand – but it is undoubtedly useful.
Key Lesson: Whilst I personally prefer natural light, flash can be useful when photographing flowers, particularly if you have to shoot in hard sunlight and need to soften shadows. If you shoot with a flashgun at 1:1 or 1:2 magnification, you will also end up with a very dark or completely black background, which can be very effective at isolating and enhancing your subject. A small reflector can also be useful to help you reflect light onto the flowers.
Composition Tips to Get You Started
Flowers may be a smaller subject, but you still want them to pack a punch when you’re photographing them. One of the easiest ways to successfully photograph flowers is to fill the frame with them. This can be used to draw attention to smaller details of the flowers.
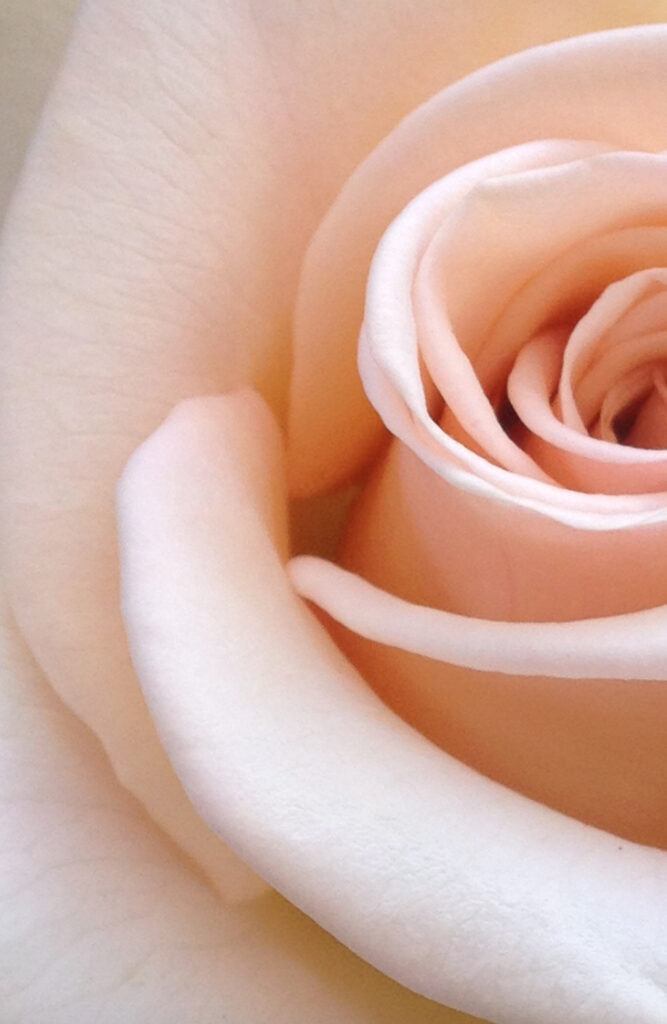
Fill the frame with your chosen flower for an image that packs a punch and draws a viewer’s attention. Photograph by Valerie Blanchett
It’s also important to pay attention to your background (if any is visible in your shot). It’s going to most likely be out of focus, but you need to use it to create a strong contrast between your flowers and the background. Solid colors work best and make sure to look for those that complement the tones in the flowers you’re shooting. Colorful shots will make the flowers ‘pop.’
One of the easiest ways to successfully photograph flowers is to fill the frame with them. This can be used to draw attention to smaller details of the flowers.
All photography needs a strong focal point to draw in the eye, but it’s even more important when you’re working with small subjects such as flowers. Remember that you don’t have to have an entire flower in focus; you can also choose to highlight details.

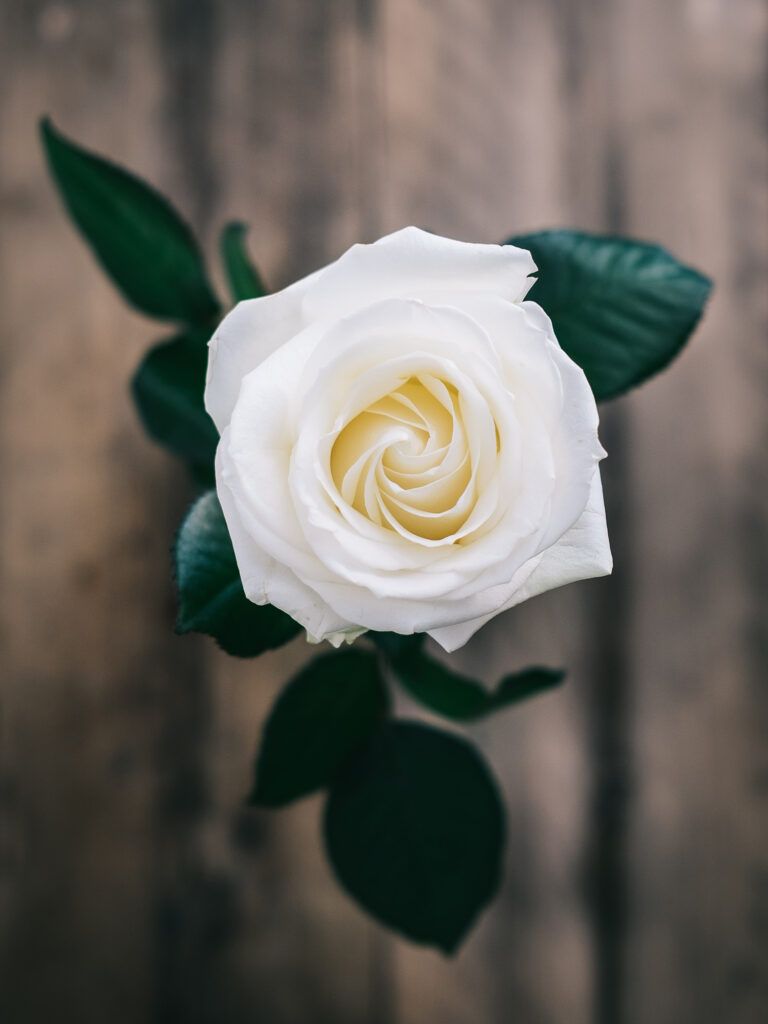
Use a smaller depth of field to blur out a distracting background and help your chosen flower to ‘pop.’ Photograph by Ilyuza Mingazova
Finally, although it’s not strictly composition, try and work in the most favorable lighting conditions you can. Whilst bright sunlight might bring out the colors when we look at flowers, it’s not the most flattering to shoot in. This is because it creates hard shadows, particularly around midday when the sun is brightest. A slightly overcast day is actually easier to shoot in as the clouds act as a giant softbox and blend out any shadows. If you have no choice but to shoot in harsh sunlight, you can use a flashgun to fill in shadows. Or if you’re not carrying a flash, a small reflector will help to bounce light and soften hard shadows.
Camera Settings for Flower Photography
Flower photography settings are best broken down into looking at the Exposure Triangle (Aperture, Shutter Speed, and ISO) alongside some other general settings.
General Settings
When you’re shooting delicate subjects like flowers, you want to have as much control as possible over your image in post-production. For this reason, I would always recommend shooting in RAW. Leave your white balance on Auto – you will be shooting outside and can always make any adjustments in post-processing. Focusing can be tricky when you’re working with small subjects. When photographing an entire flower, you should be absolutely fine with autofocus. Make sure that you switch your AF mode so that you can select your own AF point for detailed focusing. If you’re photographing a part of the flower, your camera will likely struggle with autofocus.
Key Lesson: If your camera can’t focus on the part of the flower you want to shoot with autofocus, switch to manual focus. When working with subjects where you’re focusing at 1:1 magnification or smaller, even moving your camera forwards or backward a few millimeters can throw out the focus. In these situations, it’s easier to set your lens’s focus at a specific magnification and then gently rock your camera forwards and backward in tiny increments until you’ve got a sharp image.
Aperture
As we know, aperture controls the depth of field as well as the amount of light coming through the iris of your lens. For many of your flower shots, you’re likely to be wanting to use a smaller depth of field to blow out any distracting background. However, because you’re working with a small subject, you’ll have a more minimal depth of field in the first place. This will only get smaller as you get closer. I would start with an aperture of f7.1, but be aware that you may have to use a far smaller aperture to get any depth of field at all with partial areas of a flower (e.g. f16).
Keep your shots simple and choose one strong flower to focus on. Slightly overcast skies also give a softer feel to a shot. Photograph by Annie Spratt
Key Lesson: If you’re struggling to get a large enough depth of field to get your flower sharp, you could try focus stacking. This is where images are shot with different focus points and then combined in post-production. This will leave you with an image with more depth of field.
Recommended Reading: Want to create gorgeous, perfectly lit flower photographs? Grab a copy of Photzy’s premium guide: Photographing Fabulous Flowers.
Shutter Speed
You may think that you don’t need a particularly fast shutter speed for flowers, but the slightest breeze can magnify blur in small subjects. Therefore, I’d recommend using a shutter speed of at least 1/125th or faster if the light allows. If you’re using a flashgun, then you’ll be tied to the fastest sync speed for your camera (usually 1/250th ).
ISO
Keep your ISO as low as possible to avoid noise distracting from the fine detail of your flowers. In sunny weather, it should be possible to use the faster shutter speeds you’ll need and a low ISO of 100/200. In overcast weather, you may have no option but to raise your ISO, particularly if you’re using a small aperture such as f16. I would suggest trying to keep your ISO at 800 and below if at all possible. Remember that using flash will also allow you to use a lower ISO but is likely to give you a black background.

Look for colors that complement those of your flowers to use in the background. The combination of soft colors in this shot really highlights the delicacy of the cherry blossom. Photograph by J Lee
Conclusion
Following the tips in this guide will allow you to start capturing beautiful shots of flowers, but don’t be afraid to experiment. Learn the basics and then use that knowledge to come up with your own take on flower photography. There are so many different flowers to choose from, with a whole range of vibrant colors. And don’t forget to look beyond the obvious for interesting and quirky detail shots! Photographing flowers is a really enjoyable genre of photography to experiment with and one that can, with a little knowledge, produce stunning results.

Self-Check Quiz:
- What effect will the flash have on the background of an image shot at 1:1 magnification?
- What is one of the easiest ways to photograph flowers?
- Why should you use manual focus for images that are shot at 1:1 or smaller?
- What is focus stacking?
- What is the normal sync speed for a flashgun and camera?


