

Introduction
I think all of us have been in a position at least once where we caught ourselves being fascinated by a piece of camera equipment or gear, perhaps thinking to yourself, “I want that!” or perhaps, “You will not catch me using that thing even if you pay me!”
Whatever your thoughts, something must have motivated the user of that piece of equipment to use it, so it must be serving some purpose!
This reminds me of a visit to our national show years ago. A young lady behind me looked into a container with gadgets in it and reacted with, “I also want one … pause …. what is it?”
In this article, we are going to take a quick look at the gear we do not see every day. Some may be handy to you and others may be just, well, interesting.
Recommended Reading: Want a step-bystep guide on photography skills with your DSLR? Grab a copy of our best-selling guide: the DSLR Crash Course.
Gear for Increasing Light
The Trusty Old Speedlight
I know that this sounds obvious, but if it’s so obvious then why are so few people using a speedlite for bird photography? Because its light can only reach ‘that’ far?

DIY snoot. Photo by Tobie Schalkwyk
Take my word for it; it’s worthwhile mounting a speedlite for shoots in forests or other dark locations. You’ll be amazed at how much it improves your chances of successfully raising the dark areas in post-processing. You will have a lot of detail coming forward rather than only an increase in noise.
A Snoot
I’m actually surprised by how few bird photographers are using this method of focusing their light onto birds in low-lit areas. Think about this: light coming out of your speedlite can’t just disappear into thin air. It must go somewhere.
All you have to do is prevent it from going all over the place by using an impenetrable snoot with a white inner lining. The light can then go in only one direction: to your subject!
The advantage of this gadget is that it can be self-made with the littlest of effort. Staple two sheets of A4 paper together (one white, one black) and voila! Just tape it to your speedlite, use a rubber band, or – the best option – use Velcro strips.
Fresnel Lens Technology
A Fresnel lens kind of does the same as a snoot: it focuses light to a smaller area. The result is an increase of 2–3 stops of light on your subject.
One (probably the most cost effective) way of deploying Fresnel lens technology for the purpose of increasing light is by using a ‘MagBeam’ lens in combo with a snoot (‘Magsnoot’) from the ever popular MagMod kit.
Read more about it here.
Off-Camera/Wireless Lighting
Yes, also obvious, but it’s hardly ever used by bird photographers where I come from. Why not? Not only do I regularly use my speedlites and wireless flash kit, but I sometimes use it in combo with my 600w studio strobe!
This is very handy in situations where you want to snap parents feeding their chicks in an area covered by a dense layer of overhead leaves, or a partial cave or other lowlight areas. You can even mount it on a studio light stand and raise it to 2-3m above the ground, ensuring a more desirable angle of light in relation to your subject.
The advantage of off-camera lighting is that you can zoom in from far away (or use a long-reach prime lens), as your lighting source is only a few steps away from your subject. Warning: check your histogram and make adjustments after your first couple of shots as you can easily misjudge the amount of light thrown at your subject.
The advantage of off-camera lighting is that you can zoom in from far away (or use a long-reach prime lens), as your lighting source is only a few steps away from your subject.
Granted, it is extra effort to drag a studio strobe with you, but I promise you when you’re post-processing your shots, you will thank me!

Paradise Flycatcher. Photo by Tobie Schalkwyk
This image was taken with a wireless controlled 600w studio strobe about 8m (26’) from the nest and raised to about 2.5m (7.5’) above the ground. I was 3m (10’) further behind the strobe.
The lighting is quite obvious (catch light included), but the shot would have been
impossible without this setup.
Key Lesson: No matter what your genre of photography is, light will always be of utmost importance. In the case of bird photography, a lack of light can be enhanced mainly by one of three methods:
- Adding power to your light source
- Placing a wireless light source closer to your subject
- Concentrating the light and then redirecting it to a smaller-than-usual area
Recommended Reading: Want a stepby-step guide on photography skills with
your DSLR? Grab a copy of our bestselling guide: the DSLR Crash Course.
Do not write off any of these methods. Do whatever is needed to win the battle for sufficient light. Immense satisfaction will be your reward as you work your way through the images afterwards.
Gear for 'Staying Invisible'
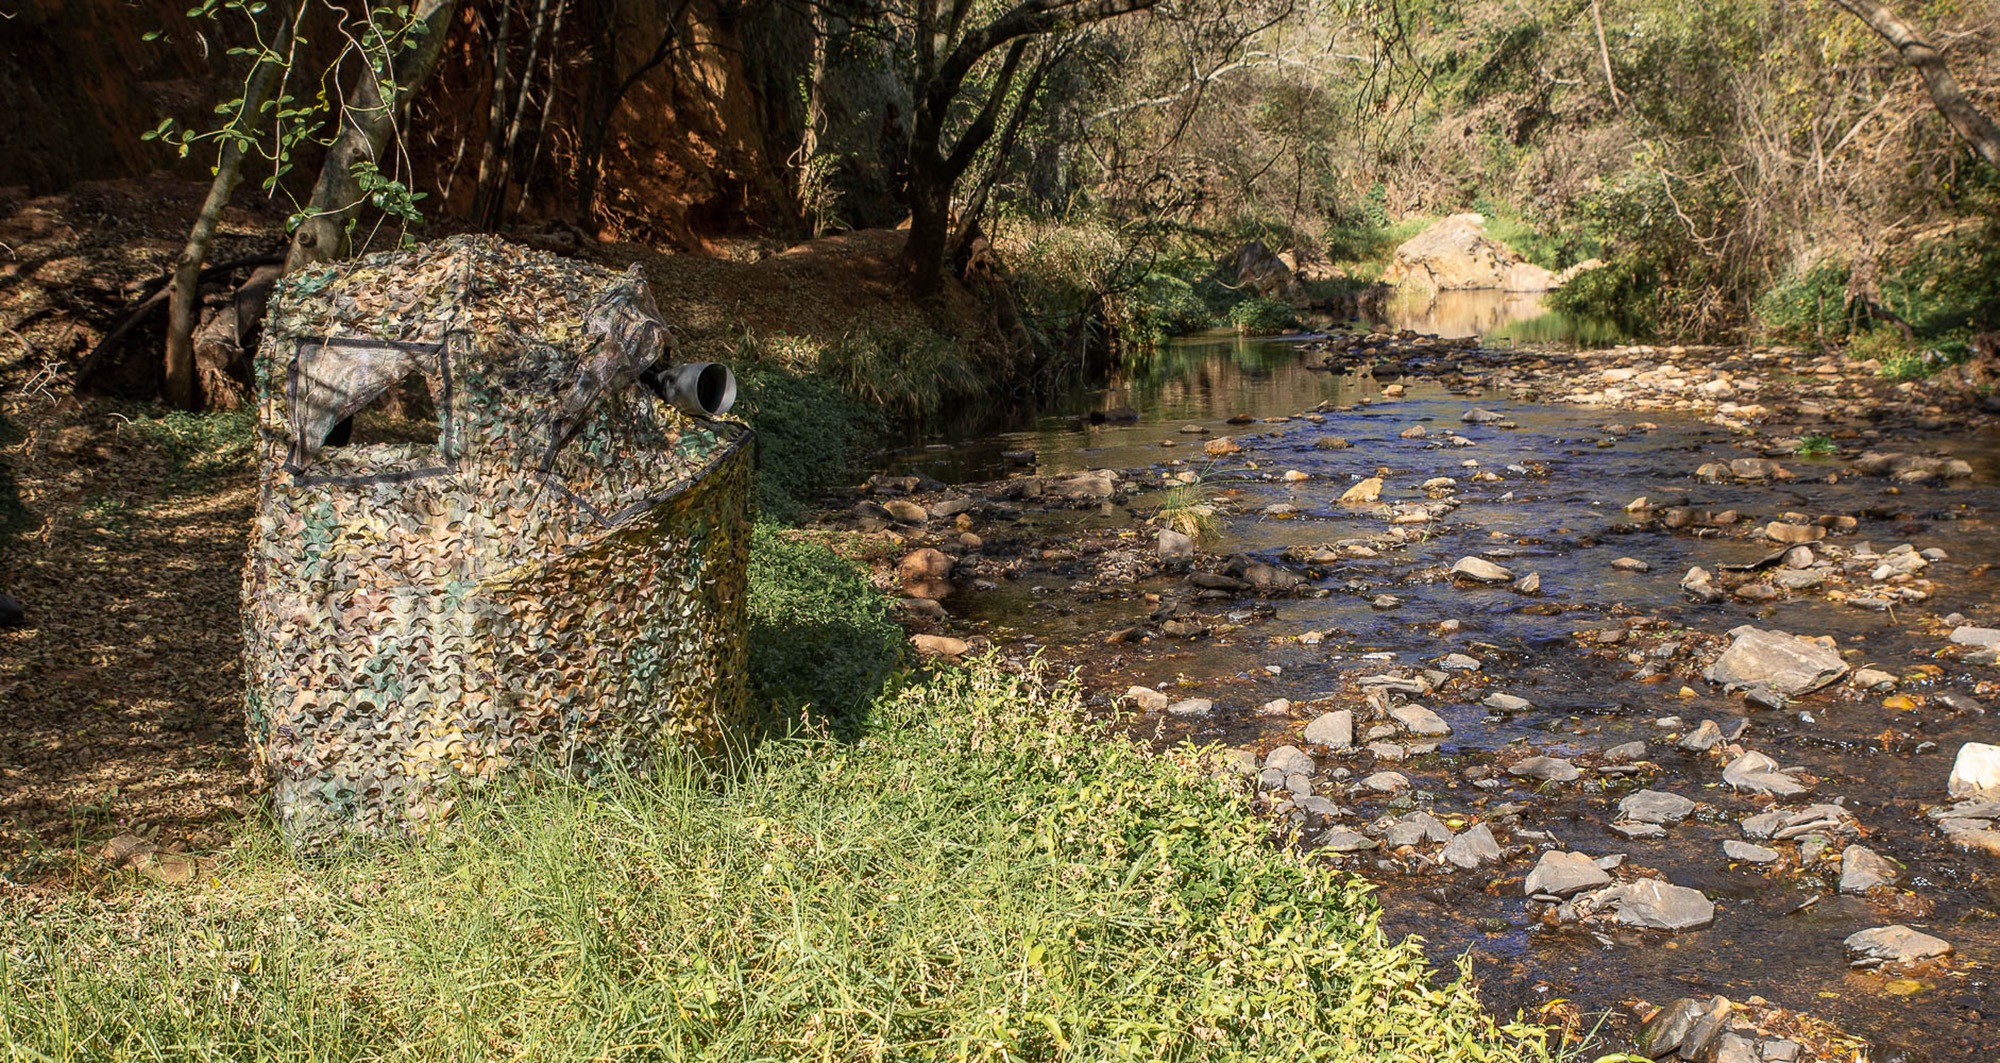
Bird Blinds

Photo by Tobie Schalkwyk
These gadgets (above) are also used by wildlife hunters. The one-man and two-man versions are the most popular.
The only reason I can think of why they are not that popular is the inconvenience of carrying them to your hideout. They are bulky, quite heavy, and can be awkward to carry around. Some of them have rucksack-type straps for carrying on your back.
Just remember to pack a bag with drinks and snacks before you settle down, because if the birds see you entering/exiting the hide a couple of times, your cover will be blown and they may rather look up another drinking/feeding spot not too far away.

DIY bird blind. Photo by Tobie Schalkwyk
Do not overlook the possibility of ‘making’ your own bird blinds. My most favorite ‘blind’ is a curtain at home. I photograph birds at our bird bath from behind it. The advantage is that I do not have to watch it all the time. I can quickly get into position whenever I see a beautiful bird at the bath, without being spotted by any of them.
Camouflaged Clothing

Do not underestimate how effective camouflage clothing is, especially when taking position in bushy or dense forest areas. Don’t forget to use a camouflaged hat, even in cloudy weather, as it breaks your usual ‘human’ profile.
Key Lesson: Wild birds do not welcome strangers into their world. Neither do you want to be an intruder around their nests or bathing areas. Try your best to be inconspicuous.
The gadgets to ‘be invisible’ is available. The effort of carrying a bird blind is well rewarded by the feeling of achievement as you watch a bird going through its normal daily routines, oblivious of the fact that you’re capturing its moves from only a few steps away.
Long-Reach Gear
Extenders/Teleconverters (TCS)
I’m not going to say much about these as they are well known and there’s a lot of information available on them. I do want to mention, however, that not all lenses are suitable for use with extenders/TCs.
My personal simple rules of thumb for using extenders/TCs without regretting it afterwards are as follows:
- The extender/TC coming from the Canikon stables
- The lens on which it is mounted also coming from the Canikon stables
- Only mounted on prime lenses
- Preferably mounted on f/2.8 primes, nothing wider than f/4 primes
- Nothing beyond 1.4x extenders/TCs
A handful of the latest and greatest lenses may be used with their latest generation 1.7x and 2.0x extender/TC counterparts. Do extensive research on these combos before spending your hard-earned bucks on them, though.
The cream of the crop are of course lenses with builtin extenders, such as Canon’s EF 200-400mm f/4L IS USM Extender 1.4x or Nikon’s NIKKOR 180-400mm f/4E TC1.4 FL ED VR. No dust will get into your lens as you mount/unmount the extender.
There’s no forgetting to pack it into your camera bag after cleaning it either. It’s there. You can enable/disable it as and when needed.
Key Lesson: The desire to increase reach probably started with the first camera, even before the digital age. That’s probably why we have the never-ending list of zooms lenses, extenders (TCs), and other gadgets such as the 2x extension tube I bought for my first bridge camera.
Recommended Reading: Want a step-by-step guide on photography skills with your DSLR? Grab a copy of our best-selling guide: the DSLR Crash Course.
The bottom line is, if you have a lens that does well with extenders/TCs, then get an extender for it. Just be aware that you may lose a touch of sharpness and autofocus speed. You do lose one or more f-stops of light, depending on what magnification extender/TC you use. The latest generation lenses and extenders/TCs do much better than the G1s as far as that is concerned, though.

Lesser Rhea; Nikon D600 + Tamron 150-600mm G2 @ 460mm f/6.3 | 1/800s | 160 ISO | Hand-held. Photo by Tobie Schalkwyk
Conclusion
There are a lot of gadgets around, each for a specific purpose. The gear will improve your bird photography experience in some way. If you can afford it, get it and use it whenever needed. It will certainly make your shoots more interesting and contribute positively to your photo shoot experience.
Gear can contribute positively to your bird photography experience.
Self-Check Quiz:
- What does a snoot do?
- What is a Fresnel lens?
- What is the advantage of off-camera lighting?
- What is a bird blind?
- What does camouflage do for the bird photographer
- What does a teleconverter do?


