

Introduction
Birds of prey photography is the pinnacle of nature photography, in my book. As much as I love all forms of nature photography, nothing beats the self-satisfaction of looking back at a good shot of a bird of prey and then thinking to yourself, ‘Yes, I love it!’
Obviously, some images are a level ‘above’ others depending on what the bird of prey was doing at that moment in time, but even a good, clear image of a stationary raptor invokes pleasant emotions from any passionate bird photographer.
Before we go any further, though, let’s define what we mean by ‘birds of prey’: birds that hunt and eat vertebrates. Some of these vertebrates may be quite large in relation to the size of the bird, to an astonishing degree. Vultures may appear to be not 100% at home according to this definition, but in general they are counted among them.
Birds of prey photography is the pinnacle of nature photography.
Birds of prey (also known as raptors) are roughly grouped as follows:
- Eagles (massive wings, large strong feet/talons used to kill prey)
- Ospreys (fish hunters)
- Kites (long wings, relatively weak legs)
- True hawks (woodland birds hunting from a perch)
- Buzzards (medium to large raptors with strong bodies)
- Harriers (hawk-like birds with long tails and thin legs)
- Vultures (carrion eaters, usually with heads and/or sometimes necks void of feathers)
- Falcons (medium size with long, pointed wings)
- Caracas (broad wings, naked faces)
- Owls (night hunters)
You may be wondering, “Why mention all of these groups? I know what a raptor is!” Well, the main traits of each individual group are going to play an important role later on when we discuss where to find these birds and how to photograph them.
Key Lesson: The ‘bird of prey’ kingdom is vast, to put it mildly. It includes all live vertebrate hunters, thus implicitly locking out other meat eaters like crows. Each group of raptors has specific traits which determine how and where they can be photographed. Consequently, it is to a raptor photographer’s advantage to know these traits.
Recommended Reading: Want a step-by-step guide on photography skills with your DSLR? Grab a copy of our best-selling guide: the DSLR Crash Course.
Equipment
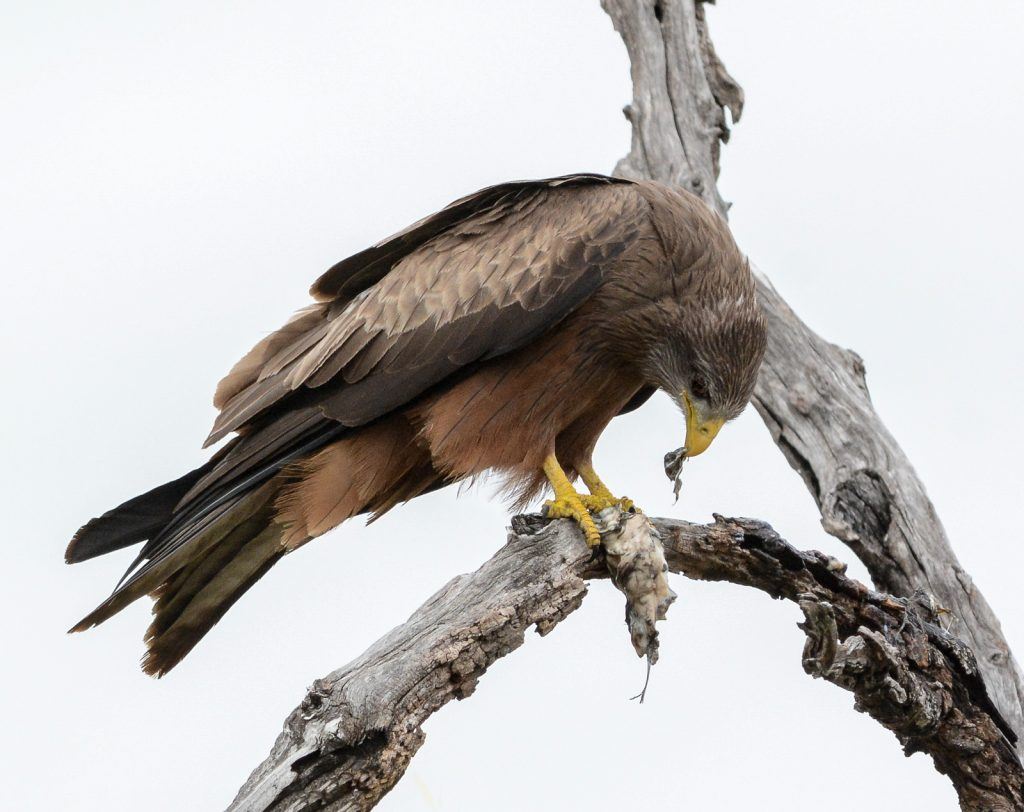
Yellow-billed Kite enjoying a meal | Nikon D7100 + Nikon 300mm f/4 (35mm equivalent: 450mm) f/7.1 | 1/500s | 800 ISO | Beanbag in car window. Photograph by Tobie Schalkwyk
I’m not going to spend much time on this as most of it has already been covered in previous guides in this series, but let’s mention the most important detail for completeness’ sake.
Camera
A camera with good high-ISO handling will certainly be to your advantage as you will regularly find yourself in unfavorable lighting conditions; think early in the mornings, late in the afternoons, cloudy days, and, to make it worse – a bird perched under thick leaf cover.
I am reluctant to even mention examples as the technology in this area is improving with leaps and bounds, but the Nikon D500 and other recent body releases by Nikon and Canon are solid proof that this is the area that all reputable brand techies are currently working on.
Lens
Needless to say, a lens with 400+mm reach is a must. To be honest, the only reason why I mention 400mm is the amazing quality of the name brand 400mm f/2.8 prime lenses, allowing you to maintain quality even at heavy cropping in post-processing. You can of course hook it up to a 1.4x teleconverter (TC) in order to stretch the reach to 560mm.
The only lens that I’d recommend with a reach shorter than 300mm is the Nikon 300mm f/2.8. From the evidence I have seen, it delivers excellent quality images even with the 2x Nikon TC. Buy the latest release TC to get the best quality.
As for us budget buyers, there are the Tamron G2 and Sigma Sport 150-600mm lenses. You may try the Sigma 150-600mm Contemporary, but personally (for bird photography specifically) I’d rather add a few bucks and buy the Tamron.
If you’re looking for a budget (although not ‘cheap’) 500mm lens and you carry Nikon equipment, have a look at Nikon’s 500mm PF lens.
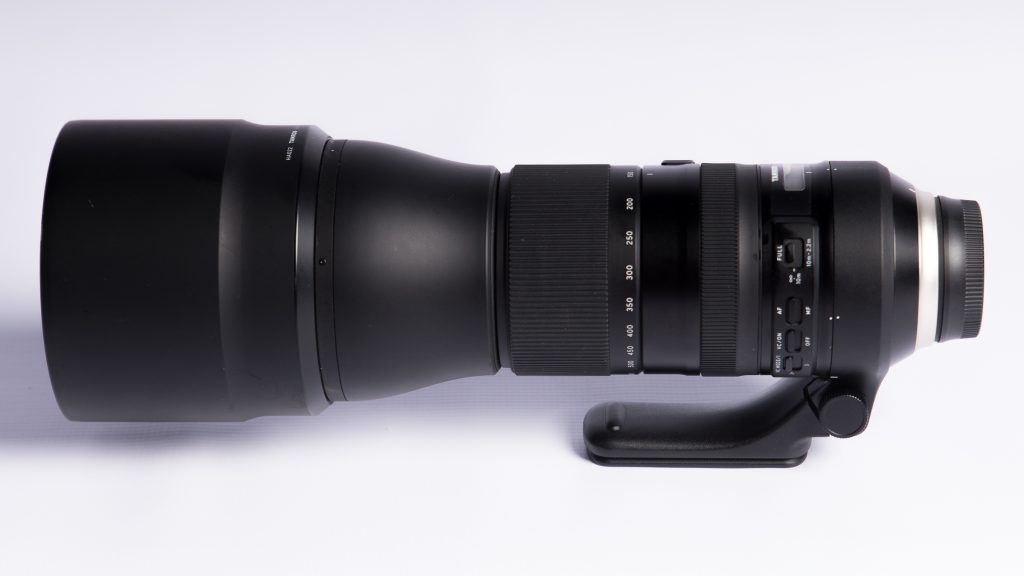
Tamron SP 150-600mm f/5-6.3 Di VC USD G2. Photograph by Tobie Schalkwyk
Other Equipment
I always carry my tripod with me if on foot, but the choice is obviously yours. In my own vehicle I use a bean bag in my car window, and in open-roof safari vehicles I use my monopod or I shoot hand-held.
Always have a bird guide with you, either on paper or electronic (phone or tablet).
Default Settings
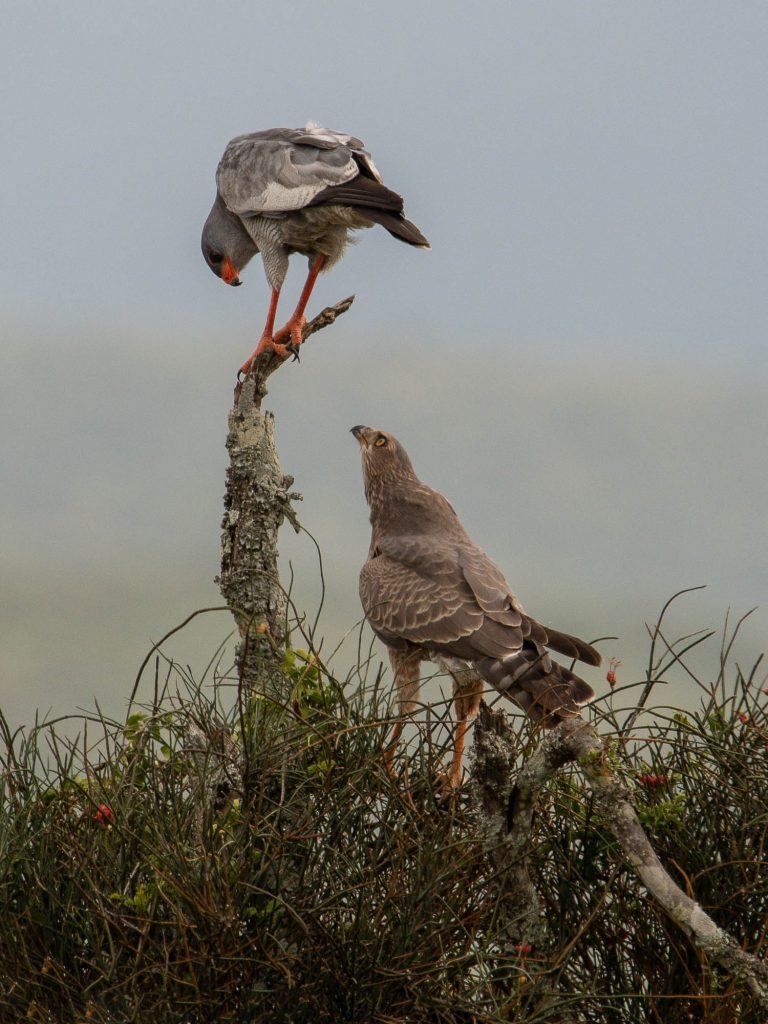
Southern Pale Chanting Goshawk juvenile (bottom right) begging for food | Nikon D600 + Tamron 160-600 G2 @ 600mm f/8 | 1/800s | 400 ISO | Beanbag in car window. Photograph by Tobie Schalkwyk
Conditions can sometimes change very quickly with bird photography, so I usually keep my settings on f/6.3, 1/800s, 800 ISO and then adjust as needed, if I have enough time. If you have a lens that can open up wider, do so in exchange for lower ISOs.
Always use spot metering, continuous focus, and continuous shooting mode. Back button focus is a strong recommendation to make continuous focusing easier as you pan a bird in flight.
Key Lesson:There’s a wide variety of gear available for photographing raptors. The most important is a long-reach lens of reasonable quality. Do not go too cheap, though, because then you’re guaranteed to be disappointed and frustrated. The better the quality of your lens, the higher the quality of your images.
Planning Your Raptor Photography Session
Unless you are photographing raptors on the go, it may be a good idea to sit down and plan your photoshoot based on the traits of the bird you’re planning to photograph. If you are planning to photograph any bird of prey coincidentally coming your way, you have an interesting time ahead because you will have to move very slowly and scan everything from the ground right up to the skies.
How to Approach Them
In general, I’ve found that the easiest way to photograph raptors is to move along slowly in a vehicle – no unnecessary talk, windows wound down so that you can listen for raptor calls. Obviously, it would be to your advantage to know what the raptors’ calls in your area sound like.
It may be a good idea to sit down and plan your photoshoot based on the traits of the bird you’re planning to photograph.
Sometimes you’ll need to be stationary, though, such as when sitting in a bird hide (not an ideal place to find raptors other than ospreys and eagles known to hunt for fish) or raptor feeding restaurants (not uncommon in South Africa), or while waiting for a raptor to return to its nest.
Photographing Raptors

Lesser Spotted Eagle ripping a dove apart | Nikon D600 + Tamron 160-600 G2 @ 600mm | f/6.3 | 1/1600s | 500 ISO | Beanbag in car window. Photograph by Tobie Schalkwyk
These birds offer a great variety of positions.
Perched/on the Ground
You will have the greatest success from the inside of a vehicle as the bird will not see you as a threat. If you see it ahead, slow down and approach it slowly. If you see it too late, do not hit the brakes because then it will most likely fly away. Instead, drive 100 yards on, turn around, and come back slowly.
If you have a bean bag or another way of supporting your camera, you can get away with quite a low shutter speed. Usually you will have enough time to do a few adjustments, but do not bet on it.
In Flight
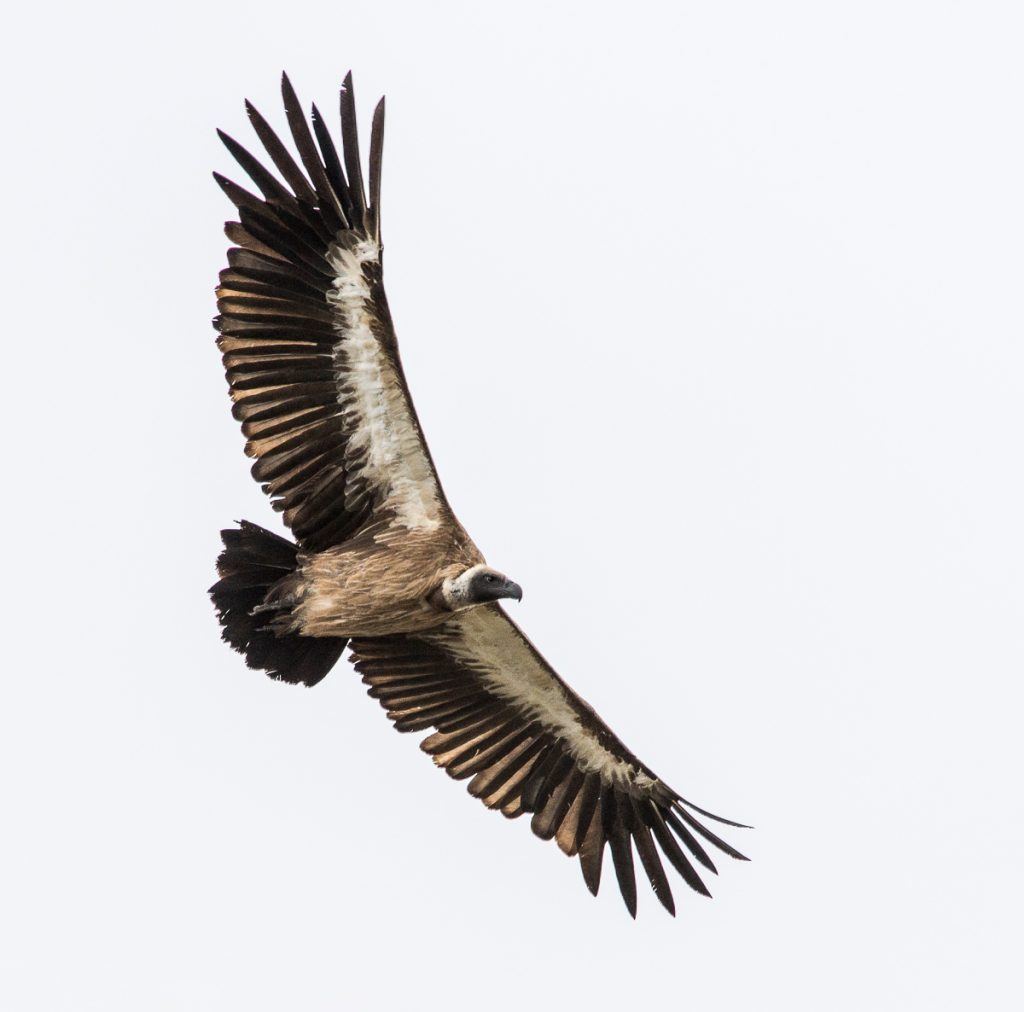
White-backed vulture | Nikon D600 + Tamron 160- 600 G2 @ 420mm | f/7.1 | 1/320s | 250 ISO | HH. Photograph by Tobie Schalkwyk
The most important skill/ability to have in this case is the one for panning. It’s not too difficult to master, but I have seen quite a few photographers struggle with it. I guess practice makes perfect (wink, wink)! This ability will allow you to photograph gliding birds at quite low shutter speeds due to their limited wing movement.
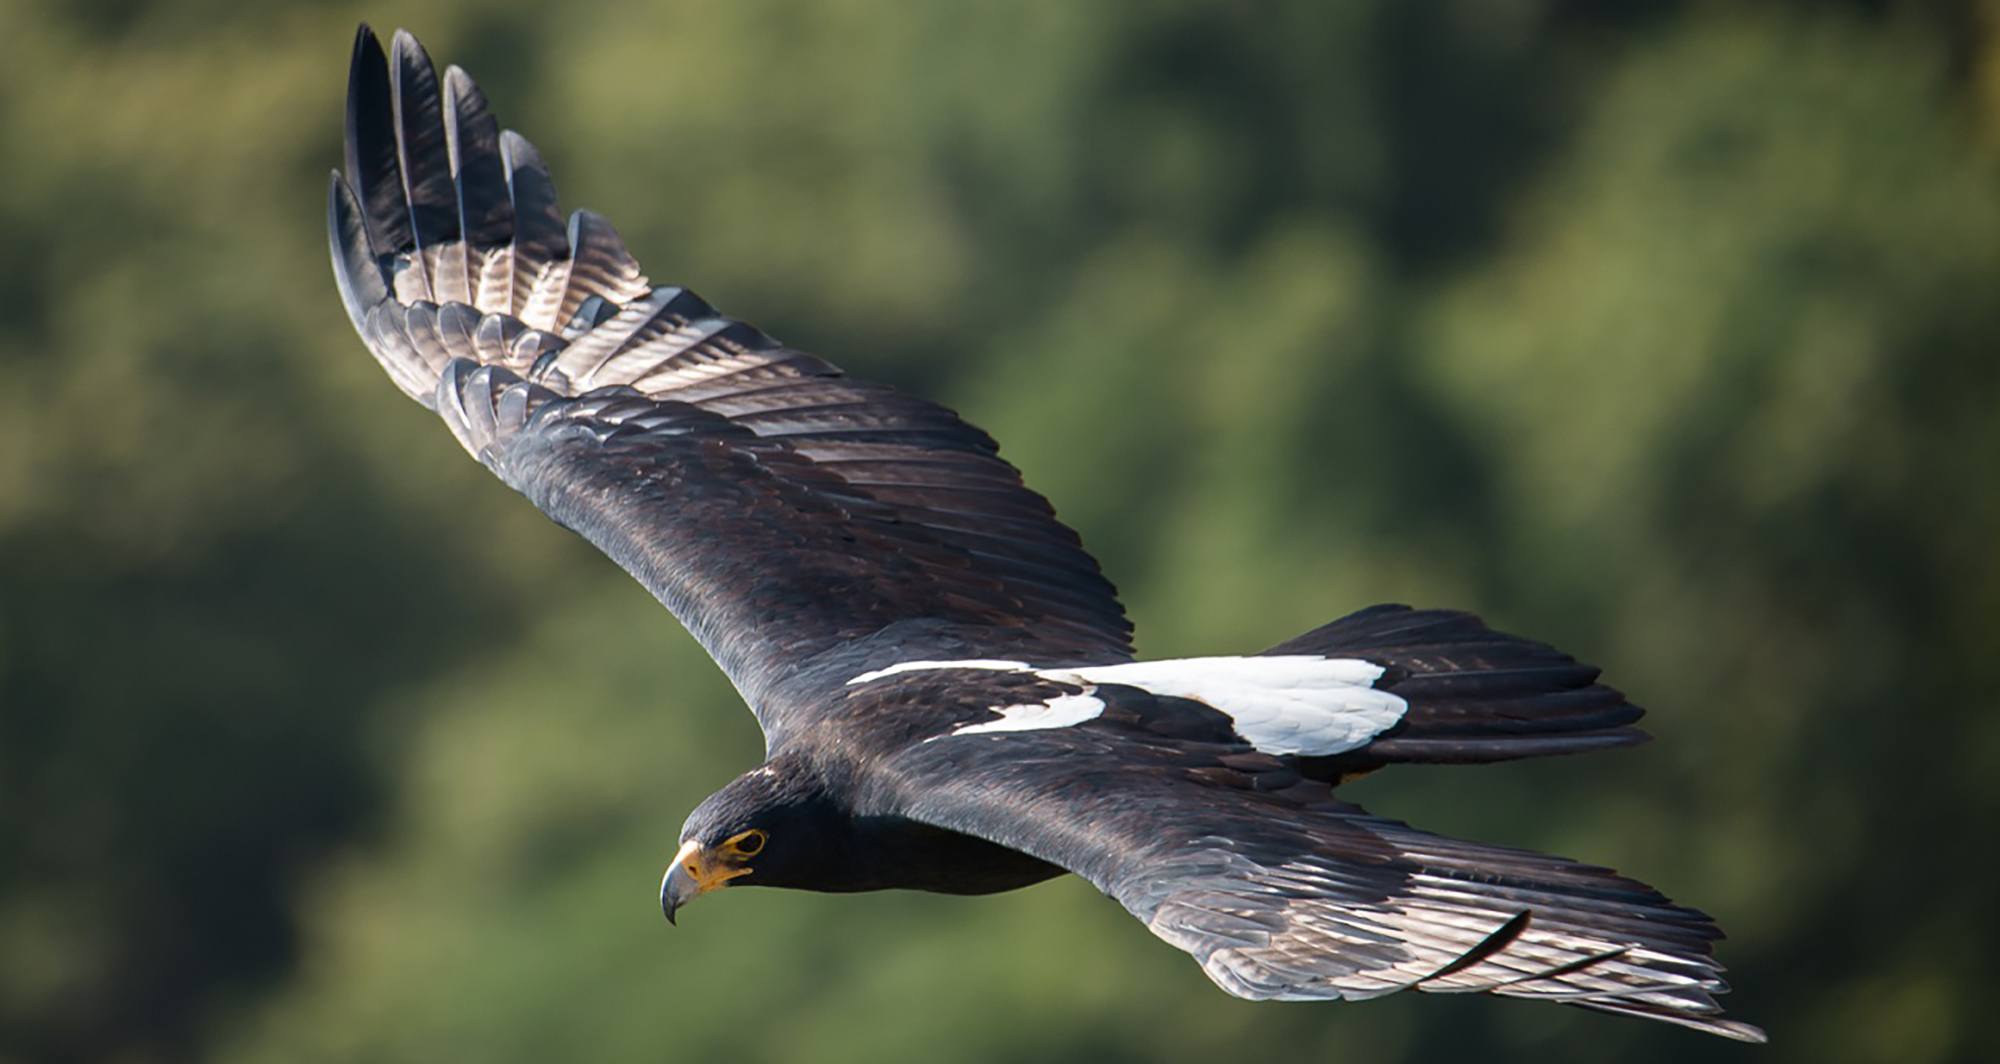
Keep a fast shutter speed if you do not want to have blurred wing tips as the bird’s feathers ruffle in the wind. The first image at the beginning of this guide was done at 1/640s, but I have taken decent images of gliding birds at about half of that speed (as the image above proves).
If you’re close to a nest with juveniles, try and wait it out until the parents return with food. It makes excellent and interesting in-flight shots! Obviously, a bonus would be to photograph them during a feeding session, if possible at all.
An eagle’s nest-building phase also guarantees quite interesting shots as the eagles gather nest-building material.
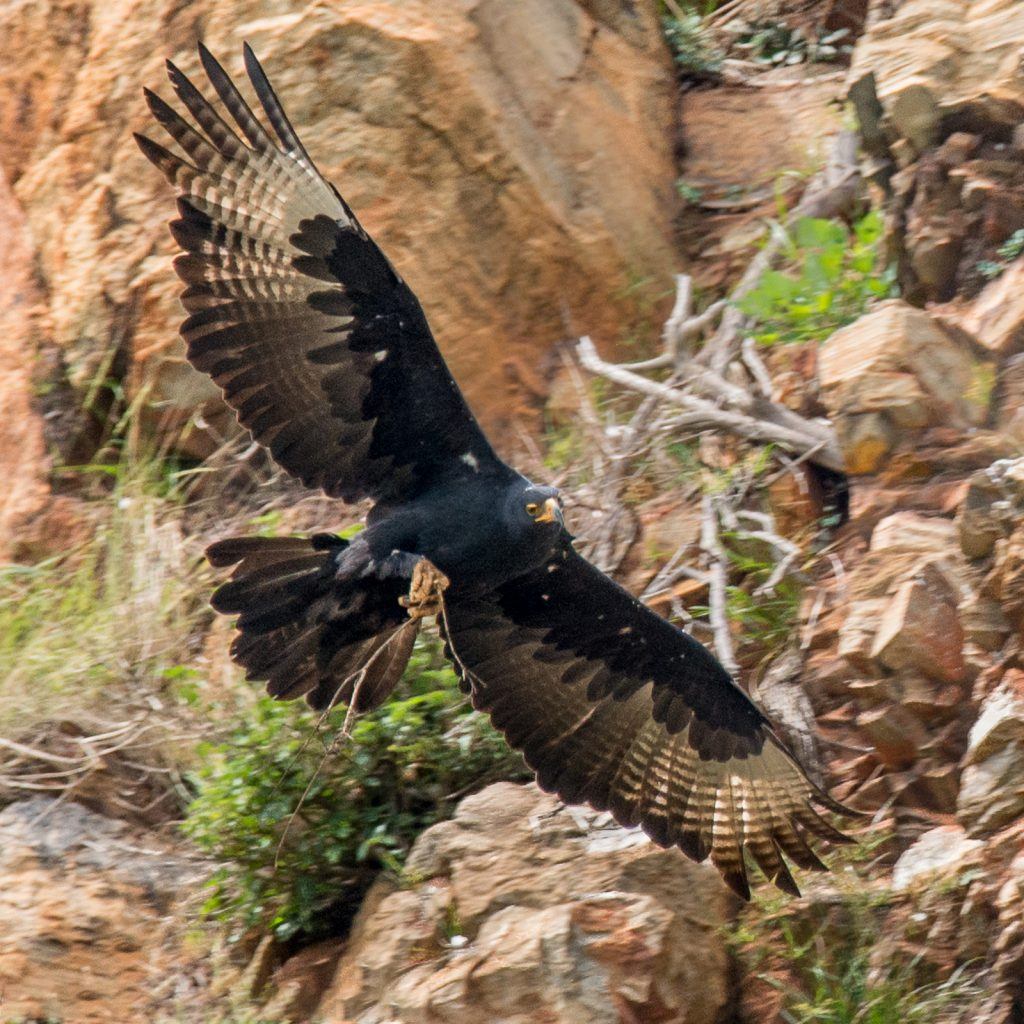
Verreax’s Eagle arriving with a stick for nest-building purposes | Nikon D600 + Tamron 160-600 G2 @ 600mm | f/8 | 1/800s | 1000 ISO | HH. Photograph by Tobie Schalkwyk
You’ll be amazed at how large some of the branches are that are being carried to the nesting sites!
If you are close to a mountain (such as with eagles and vultures nesting on cliffs), study them to determine what their most common flying patterns are, especially in the mornings when they regularly test the thermal winds before they finally take off for the day.
Keep a fast shutter speed if you do not want to have blurred wing tips as the bird’s feathers ruffle in the wind.
Once you know a bit about their flying habits, try to get a bit of height in, or try to get close to their flying path. It may give you a viewpoint which makes it look as if you snapped the bird from the top, such as in the main image of this guide. Sometimes they might come really close to you, giving you the opportunity to produce high-quality shots.
Recommended Reading: Want a step-by-step guide on photography skills with your DSLR? Grab a copy of our best-selling guide: the DSLR Crash Course.
Kites
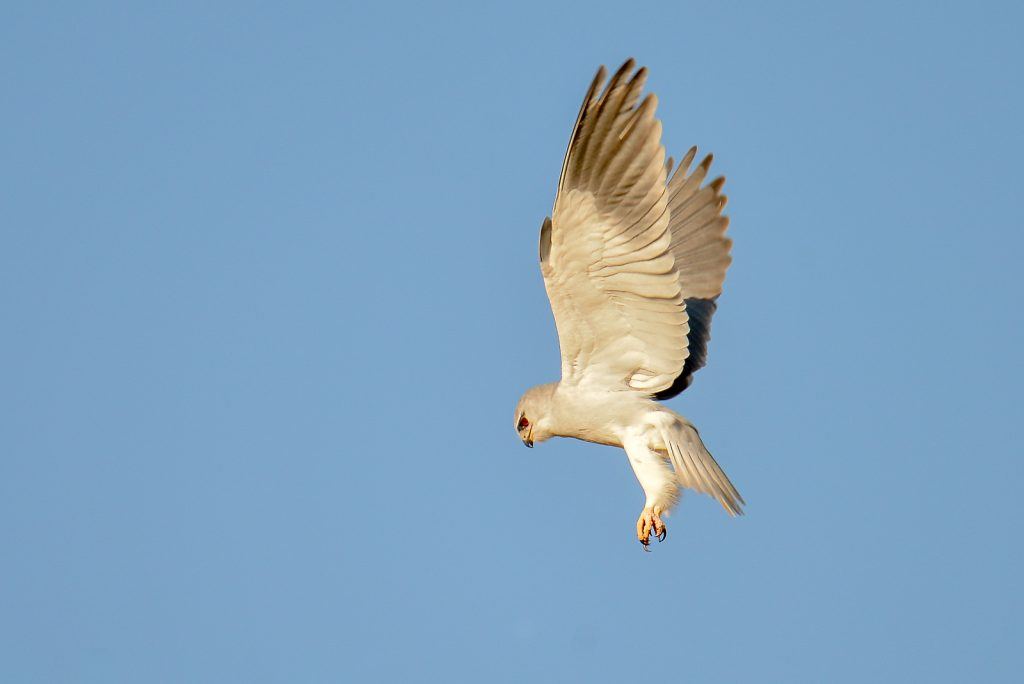
Black-Shouldered / Black-Winged Kite in hovering mode | Nikon D600 + Tamron 160-600 G2 @ 600mm | f/6.3 | 1/800s | 250 ISO | HH. Photograph by Tobie Schalkwyk
Kites can usually be found hovering above grasslands or other open areas (even roads, as they wait for small prey scattering away from your approaching vehicle – or even killed by it!). You will probably have most luck from the inside of a vehicle as they will then not see you as a threat. Watch them as they try to keep their heads as still as possible in order to pick up movement below.
If you want to eliminate blur caused by their quick wing movements, use a shutter speed of 1200/s or faster. If you’re lucky enough to see them dive, wait it out – they may devour their meal in mid-air, almost from the same (hovering) spot as before the dive. Otherwise, they may look for a perch close by.
If you see two or more of them in the air, just be patient and be ready for taking mid-air battle images as they compete for hunting space.
Hawks

African Harrier Hawk/Gymnogene raiding a weaver’s nest in early-morning light | Nikon D7100 + Nikkor | 300mm f/4 + Nikon TC 4 E II (35mm equivalent: 630mm) | f/7.1 | 1/800s | 1000 ISO | HH. Photograph by Tobie Schalkwyk
Prepare for action as you see this skilled hunter in alert mode, perched on a branch, especially if there are other birds’ nests close by. They love to raid these in search of a morsel!
Owls

Spotted Eagle Owl in the safari vehicle’s hand-held spotlight | Nikon D600 + Nikkor 70-200mm VR1 @ 170mm | f/5.6 | 1/60s | 6400 ISO | HH. Photograph by Tobie Schalkwyk
One could say that everything for other raptors is also true for owls. The big difference, of course, is that they can be seen mostly at night when our equipment is useless.
Having said that, I always carry my 70- 200mm f/2.8 lens in my bag and mount it when my other safari compadres have put away their equipment. Obviously, if you’re one of the fortunate ones with a 300mm f/2.8 or 400mm f/2.8 (oh, how I hate you! Wink, wink!), then you’re in the pound seats!
These lenses are quite capable of taking a shot in lighting offered by a flash/spotlight, such as those used by safari guides, or perhaps when one of our ground owl species refuses to be spooked by a car’s head lights. Obviously, you will not have daylight-quality images, but they will be fine enough to add to your collection.

Verreaux’s/Giant Eagle Owl at rest at dusk. The wings are open to combat extreme heat. | Nikon D600 + Tamron 150-600 G2 @ 600mm | f/7.1 | 1/400s | 10159 ISO (yes, that’s correct!) | Beanbag in car window. Photograph by Tobie Schalkwyk
Do not misjudge some of our owls’ determination to find a last meal in early-morning light, though. I have photographed a marsh owl as late as 9:00 a.m. as it swept the grasslands in search of anything moving below.
Owls are birds of habit and tend to occupy the same tree from day to day, even in the absence of a nest. Ask the local inhabitants of an area known to have owls, as they will most likely be able to direct you in the right direction. And don’t forget barn owls, of course – some of which occupy the same barn for generations!
When an owl is perching, you can really go low on shutter speed, if needed (compensating for bad light), because one of these birds’ stealth tactics is its ability not to flinch for long periods. I have taken very decent images of owls at as low as 1/20s.

Verreaux’s/Black Eagle | Nikon D600 + Tamron 160-600 G2 @ 600mm | f/6.3 | 1/640s | 400 ISO | HH. Photograph by Tobie Schalkwyk
Caution: If owls are discovered by other birds, they become hassled until they leave. This is not an ideal position for a nocturnal bird to be in at daytime! This is something to keep in mind as you approach them. Do not get so close that they are forced to give away their resting/hiding spot.
Ospreys, Fish Eagles, and Other Fish Hunters
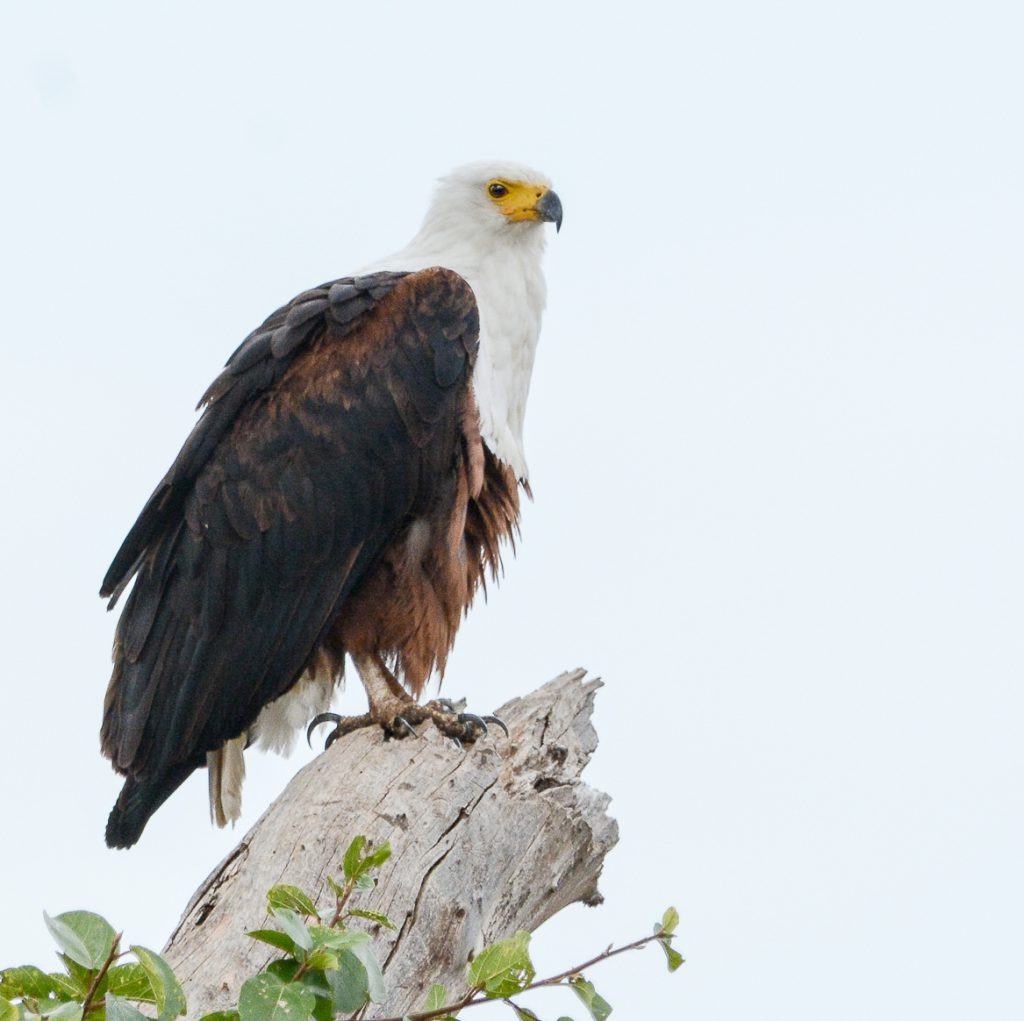
Fish Eagle overlooking a dam | Nikon D7100 + Nikkor 300mm f/4 + Nikon TC 4 E II (35mm equivalent: 630mm) | f/7.1 | 1/500s | 400 ISO | Beanbag in car window. Photograph by Tobie Schalkwyk
Do not be deceived by NatGeo’s perception that it’s easy to photograph these birds as they pluck a fish out of the water! I have heard that most of these shots are staged by letting a fish carcass float on top of the water, and I must say I do not need much convincing!
Obviously, a fast-focusing lens is a big asset in this case, as well as a lot of patience! If you see one of these birds perched at the water’s edge, wait it out. Something is guaranteed to happen – it’s only a matter of time! When it does, keep on refocusing as you follow it. When it’s getting ready to grab its prey, start with continuous shooting. Give it a second or two and then resume shooting as it leaves with its prey.
Key Lesson: Raptor photographers are spoiled for choice as far as opportunities are concerned. Day, night, flying, perched, hunting, observing, and so many other situations! These opportunities are a function of how much time we spend looking for birds, and our patience and knowledge of them. Common sense is also a virtue from time to time!
Recommended Reading: Want a step-by-step guide on photography skills with your DSLR? Grab a copy of our best-selling guide: the DSLR Crash Course.
Happy shooting!
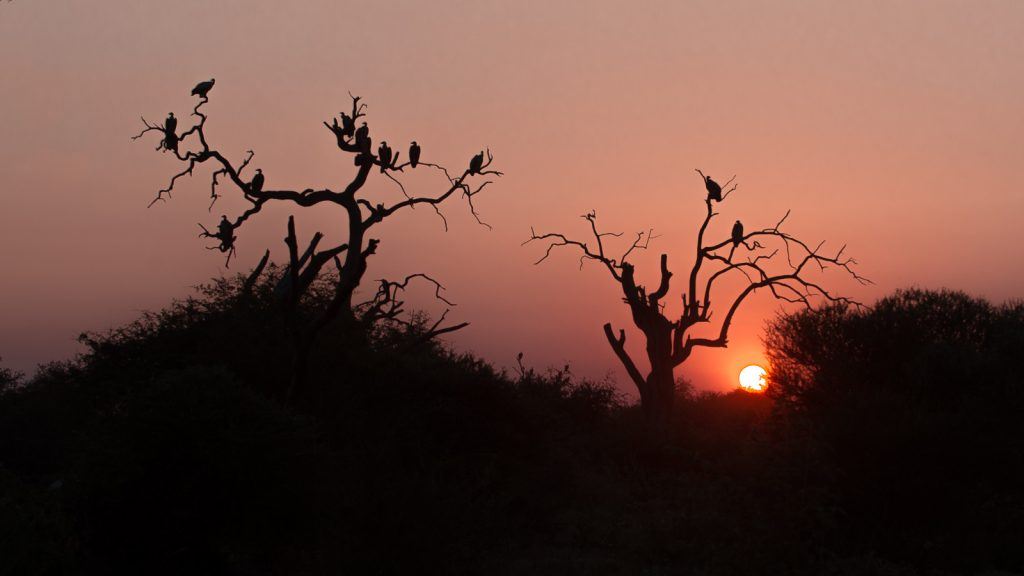
White-Backed Vultures at dusk | Nikon D600 + Tamron 24-70mm @ 70mm | f/5.6 | 1/500s | 400 ISO | HH. Photograph by Tobie Schalkwyk


