Introduction
I’m quite confident that I do not need to convince anyone of the need to keep things stable for bird photography. Those that need to hear this most urgently probably have high-zoom bridge cameras and (in general) take images for recreational purposes. Why? Because they will be in Auto or one of the semi-auto shooting modes and expect the camera to know what they’re up to.
What they do not realize, however, is that zooming in at a meagre 20x optical zoom has the same zooming effect as slapping a 560mm zoom lens onto a DSLR camera (depending on the lens of the bridge camera). For those who do not know, a 500mm lens is one of those long, impressive lenses used by wildlife and bird photographers. It’s a relatively heavy lens and is hardly ever used without a tripod or other means of stabilization.
Granted, one of the reasons is its weight; it’s simply not easy to take a bunch of hand-held images with it without your arms telling you that they’ve had enough, unless you are Arnold Schwarzenegger in his prime years! Another equally important reason is that the smallest handshake is guaranteed to produce blurred images, unless you shoot at ultra-high shutter speeds. But that implies wide-open apertures and high ISO settings, which are not always feasible or ideal on bridge cameras’ super-tiny sensors.
The bottom line is this: a 1mm (0.04”) movement of your lens on your side ends up being a movement of a couple of meters or more at your subject’s end. This led to the formation of the reciprocal rule of photography, which is beyond the scope of this guide. Let’s just say that it specifies a minimum shutter speed at a specific focal length in order to cancel out the average amount of hand shake.
With a heavy 500mm or 600mm lens, however, the amount of hand shake is a direct function of the amount of time you’ve been hand-holding it. It’s only a matter of time before the reciprocal rule goes out of the window!
With a heavy 500mm or 600mm lens... the amount of hand shake is a direct function of the amount of time you’ve been hand-holding it.
Now having said this, imagine how much more complex the problem becomes with a 65x optical zoom camera like the Canon SX70. A 65x adjustment of the lens on this camera will give you the 35mm equivalent of 1365mm! This is a lens beyond comprehension for a DSLR camera owner, and the problem described above just became magnified by a few times!
No wonder that most of the owners of these cameras can’t understand why they’re producing blurred images at the highest focal length settings. It’s because they’re not stabilizing their camera by means of a tripod or otherwise!
In this article, we are going to look at a few methods of stabilizing your camera (bridge or DSLR) in order to minimize camera shake. By the way, stabilizers enable you to disregard the need for using the reciprocal rule of photography.
We’re mainly going to look at the detachable stuff like tripods, but I’d like to spend just a little time with lens collars as well; the reason being that some of the best lenses on the market come with ‘cheap’ collars, or no collar at all. This is somewhat counterproductive in terms of camera stabilization.
Key Lesson: Do not fall for the false belief that owning a bridge camera excludes you from the same challenges as DSLR camera owners. In fact, these challenges are magnified due to the relatively light weight (easier shake) and small sensor of your bridge camera.
Recommended Reading: Want a simple way to learn and master photography on the go? Grab our set of 44 printable Snap Cards for reference when you’re out shooting. They cover camera settings, camera techniques, and so much more. Check it out here.
What You Will Learn:
- Stabilizing requirements
- The necessity of stabilized movement
- Stabilizing tools
- The importance of the mounting head
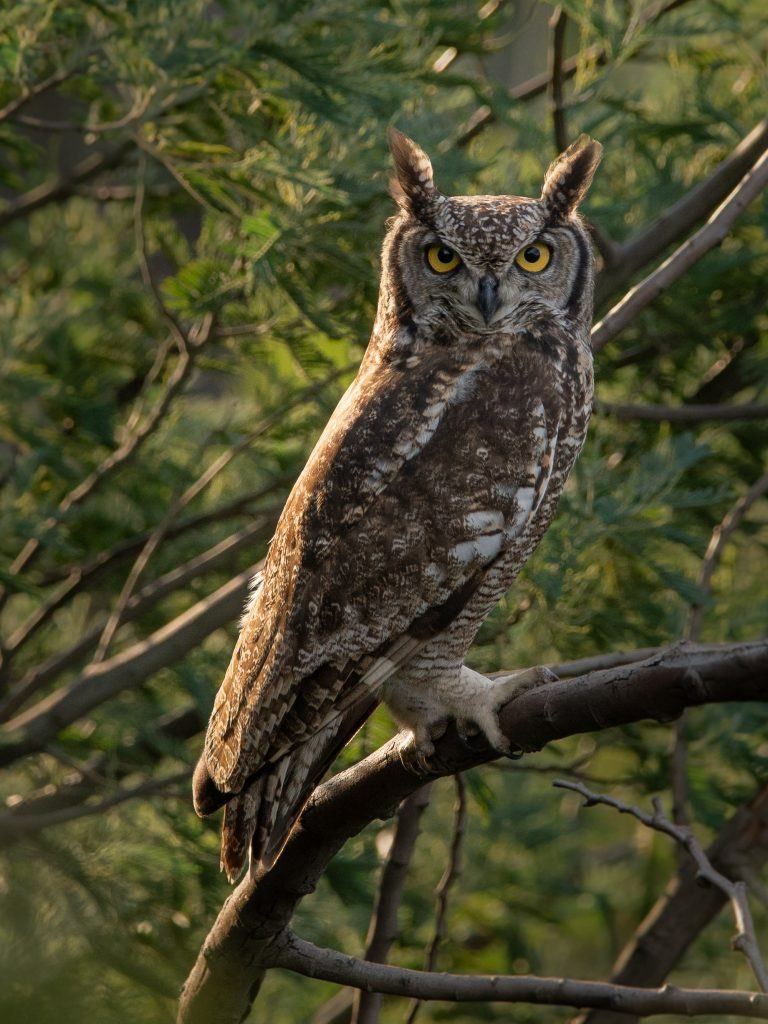
f/6.3 | 1/800s | 1000 ISO | Hand-held. Spotted Eagle Owl by Tobie Schalkwyk
Stabilizer Requirements
Bird photography has its own unique set of stabilizer requirements; unique in the sense that, in general, bird photographers move around a lot, and sometimes through places that are not ideal for walking, such as dense vegetation or water or over mountains or hills. They have to keep their cameras stable at uneven spots. So, they want their stabilization ‘tools’ to have the following characteristics:
Lightweight
This is especially true for non-mounted stabilizers. If you’re like me, there are no limits to how far I have to walk to that special spot from where I can photograph chicks of that special genre of birds on a nest. There is no use in carrying a heavy-duty studio tripod with you on a hike. You WILL regret it.
Adjustable
This is especially true in uneven terrain. If you’re setting up your tripod on a slope, you want each leg to be adjustable independently. If you need to take shots in a crouched position, you really appreciate any way other than your hands to keep your camera stable. In the event of mounted stabilizers, they must fit any vehicle as far as possible.
Strong/Stable
You’ll be amazed at how much camera shake you get from the wind, even on a tripod. Your challenge is to get a balance between the weight of your stabilizer and how strong/stable it is. In general, the more you favor the one, the more you will handicap the other.
Mounted stabilizers must keep your camera position regardless of the terrain.
Durable
You should not feel too protective toward your tripod or whatever other type of stabilization you use. If you want to make it stand in a shallow stream or soft sand, then so be it.
Mounted stabilizers must be able to withstand the forces of nature. You don’t want to unmount it in the event of drizzle or a sand storm that is gone and over in five minutes. Closely related is the freedom to remove your camera and close your car window if needed, without removing the stabilizer.
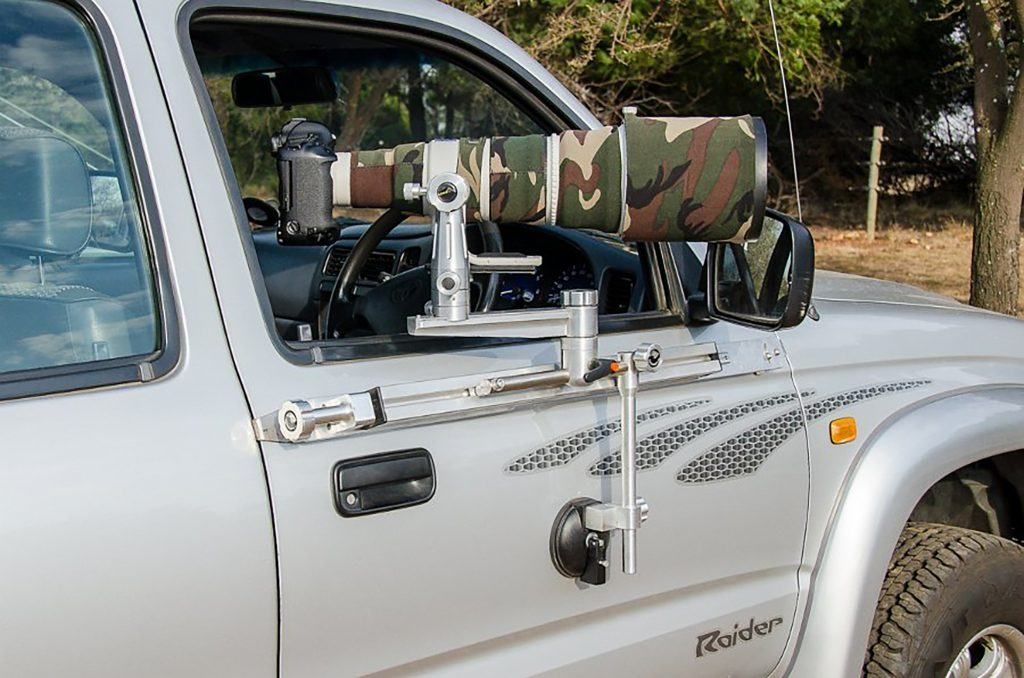
Photo by Ralph Pollack
Portable
This goes hand in hand with it being lightweight. If a tripod can fit into your
camera bag, or be easily attached to it, it’s a bonus!
Unlimited Movement
Mounted stabilizers should not only provide almost unlimited freedom in tilting your camera, but also in adjusting its position as you move about in your vehicle to catch the shot.
Key Lesson: All stabilizers share a certain set of requirements in order to be ‘good enough’ for the job. Make a shortlist of these and keep them in mind as you shop around for yours.
Stabilizing Tools/Equipment
There are numerous ways of stabilizing your camera, and no matter how many I mention I will miss out on some. I’m thus going to focus on those I’ve been using most of the time, and which I have seen being used with my own eyes.
The Tripod
This is the most common, go-to way of stabilizing your camera. A few important points when selecting one are as follows:
Stability
Don’t buy a flimsy tripod. I guarantee you, you’re going to regret it and eventually you’ll buy a sturdier one anyway. Every bird shot only crosses your path once. You will never have the chance to redo an identical one. Don’t waste it because of a flimsy tripod.
Don’t buy a flimsy tripod. I guarantee you, you’re going to regret it and eventually you’ll buy a sturdier one anyway.
A hook at the bottom of the center column is a great bonus as you can hang your camera bag (or bean bag, or anything else for that matter) on it to stabilize your tripod. Even a light wind can be quite a nuisance, especially if you have a long lens mounted on your camera.
Quick Height Adjustments
Make sure that you’ll be able to make quick height adjustments. I like the leg locks that can be flipped open with a single finger, no matter how many times it has pinched my fingers when closing them again! The most common locks are probably the turn-knob types, but they may be slow at times, especially if you have to adjust all three of them. They sometimes tend to become loose for no specific reason.
Flexible Tripod Head
The tripod head should allow you 360° horizontal swivel freedom as well as 180° up and down tilt. The reason for this is that you may want to snap birds above your head or well below you if you’re standing on the edge of a ridge or platform.
Lightweight
You may have to carry the tripod for long distances by hand or tied to your camera bag, so make sure you are able to do so without regret.
The Monopod
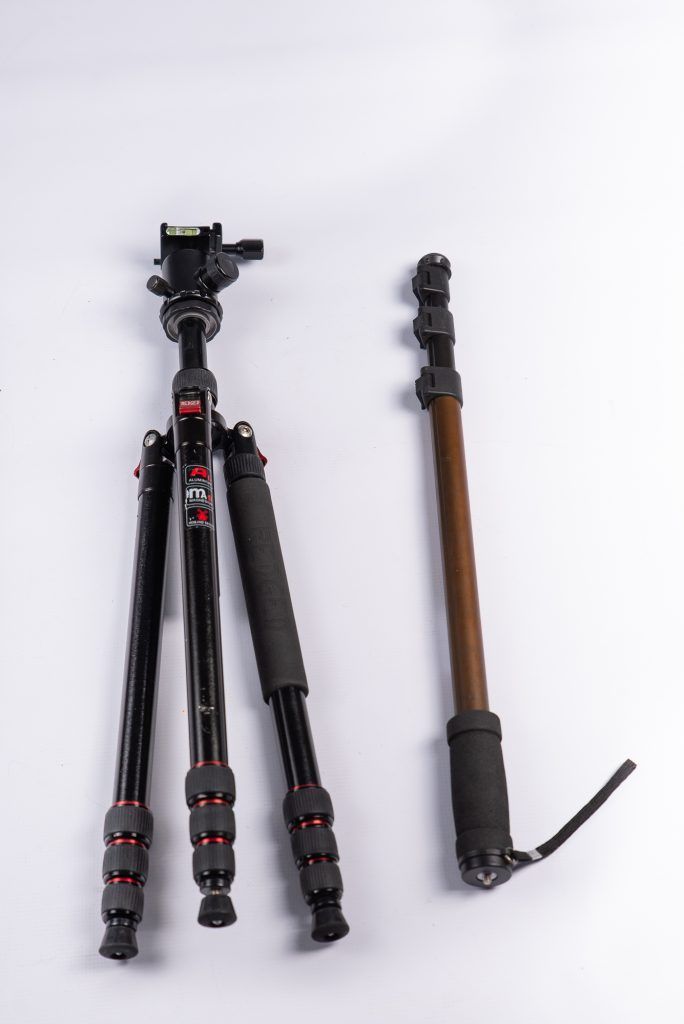
Photo by Tobie Schalkwyk
All of the properties to look out for on a tripod are true for a monopod. It is a nice tool to have if you do not want to carry your tripod, even though it’s not as stable as the tripod. It’s a great tool to have when you’re on a safari vehicle with very little free space.
Be on the lookout for hiking sticks that can be converted into a monopod by unscrewing its ‘hand knob.’ The same goes for tripods where you can unscrew one of its three legs for use as a monopod.
Bean Bag
Buy this simple little bag as soon as you can because you will certainly need and appreciate it.
- It is light enough to pack in your camera bag even on a hike.
- It is small enough to mount on a ledge in a bird hide or to balance on your vehicle’s window sill.
- It can be hung on your tripod’s hook to anchor it down.
- It is flexible, so you can carry or pack it in any way necessary.
Vehicle-Mounted Gear
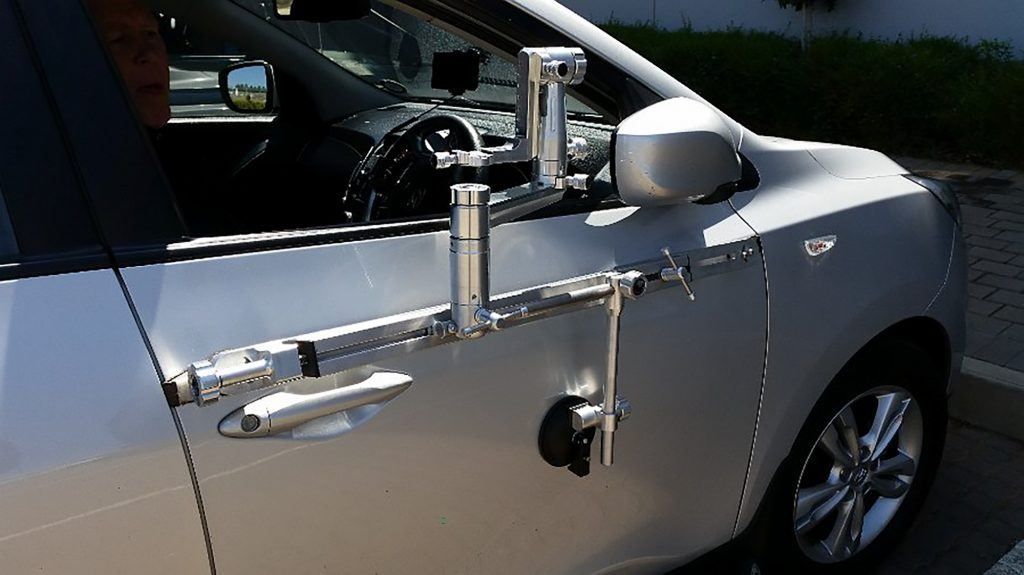
Photo by Ralph Pallock
This is for the more mobile bird photographers and is also popular with the wildlife togs, for obvious reasons. It usually comes at a high cost so it tends to be used by the more serious (read ‘pro’) photographers.
In general, the following traits make this gear very popular:
- Sturdy: made of solid, strong material like aluminum
- Flexible: you can virtually swivel your camera 360° horizontally
- Easy to mount and remove
- Quick release mechanism for your camera
- Protection of your car’s bodywork
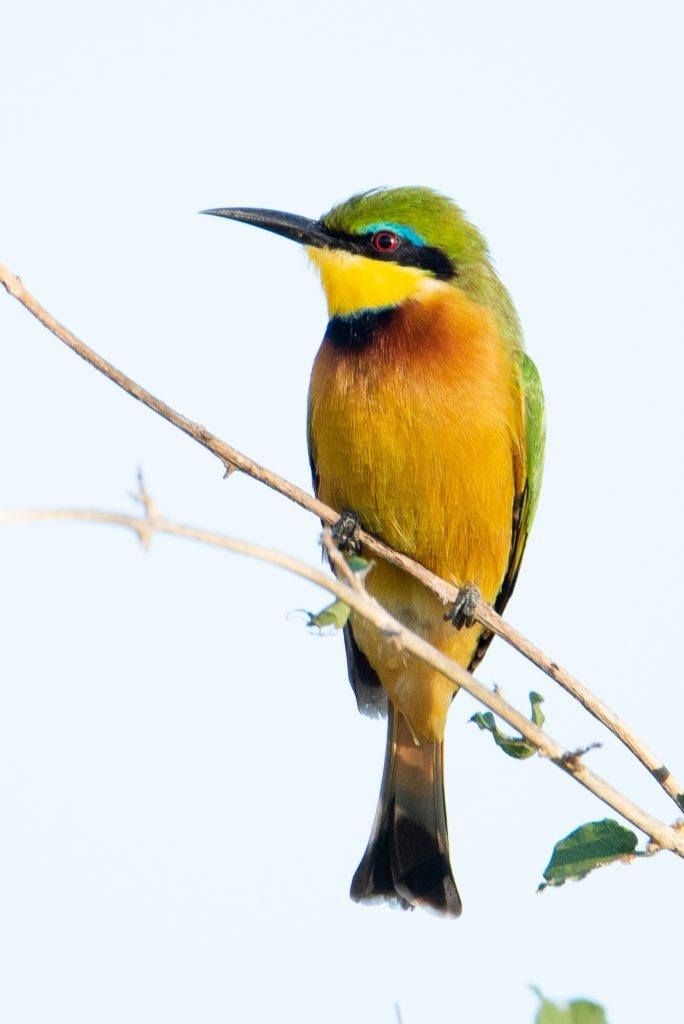
Key Lesson: Different circumstances require different stabilizers. Make sure that you own a set suitable for your own unique set of circumstances. Get the best you can afford.
Recommended Reading: Want a simple way to learn and master photography on the go? Grab our set of 44 printable Snap Cards for reference when you’re out shooting. They cover camera settings, camera techniques, and so much more. Check it out here.
Custom Gear
The only limit to this group of gear is its users’ imagination. I have seen a camera hanging from a wide rubber band which was attached to the vehicle’s roof handle. I have also seen a camera mounted on a rifle butt!
Any object can serve as a ‘rest.’ Don’t be afraid to think out of the box.
Lens Collar Tripod Mounts
I just felt that this guide would be incomplete without this section.
Some lenses are deemed by their manufacturers to be light enough to not justify a tripod collar so they are sold without one. Some users of those lenses do not necessarily agree and would like to mount these lenses on their tripod instead of mounting the camera directly on the tripod; for example, the 70- 300mm lens sold under most (if not all) brand names.
Some lenses do come with collar mounts, but these are way too flimsy or inferior for their users’ liking. It is of no use when you have one of the best tripods and other gear on the market, but you’re using a flimsy lens collar mount. Replacements are recommended for the more serious photographers using lenses with such collars. (For example, Nikkor 300mm f/4.)
If you are in the unfortunate position of needing a lens for the reasons mentioned above, ask around on online forums about the best solution available. The Kirk Lens Collar seems to be the most popular go-to replacement collar mount for the Nikkor 300mm f/4.
Tripod Heads
No matter what tripod you use, the tripod head is what makes or breaks it. The most important things to look out for in a tripod head is as follows:
- It is sturdy. Once you’ve set your camera in a specific position, it must hold that position.
- It allows free and unlimited swiveling and tilt.
Ball Head
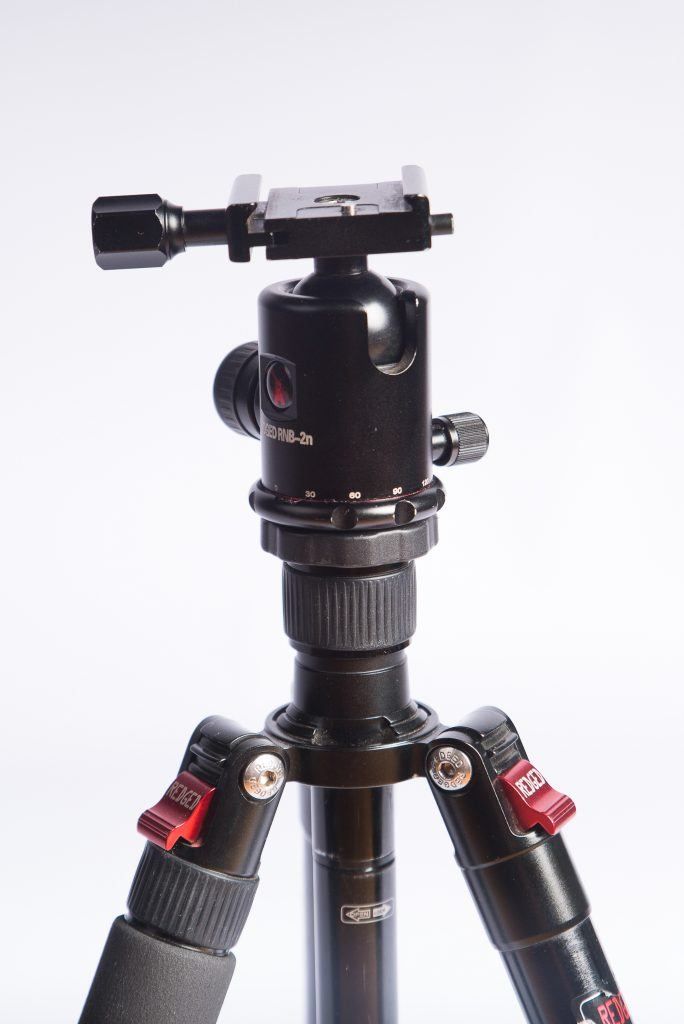
Ball Head by Tobie Schalkwyk
These are the most common heads used by those of us who do not make our living from photography, or who see no reason for paying the extreme prices of the high-end tripod heads. Of course, you get the exception to the rule and the more serious photographers simply bite the bullet and spoil themselves to the ‘higher class’ heads, regardless of their income.
Ball heads are relatively inexpensive and good value for money. If you buy one, make sure that it will allow you to tilt your camera high up until it gets to a position right above you.
Gimbal Head
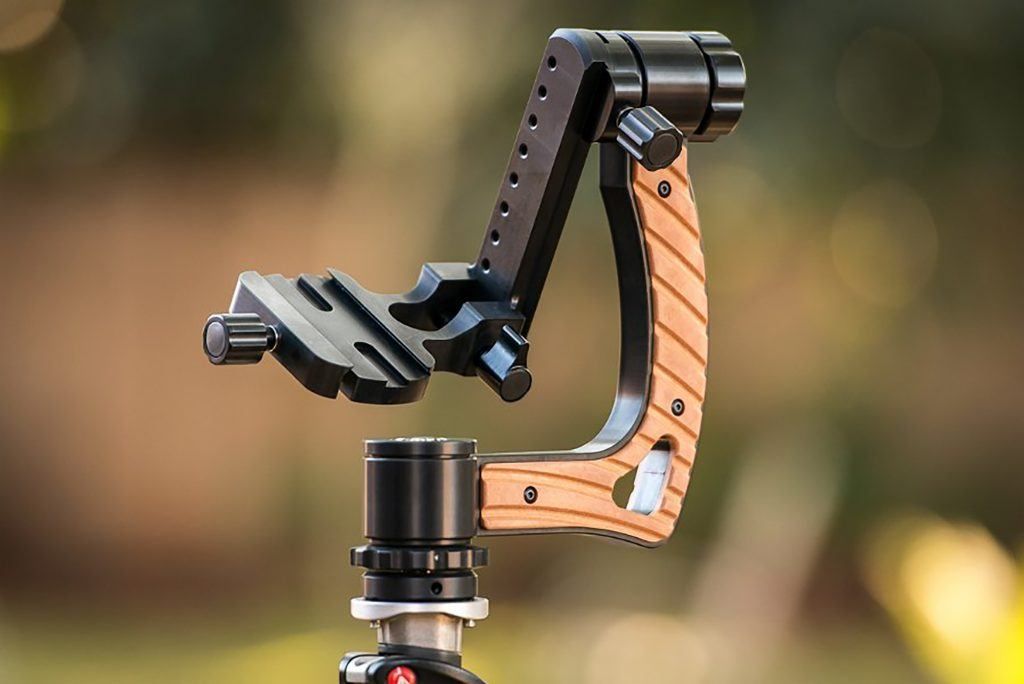
MK II Gimbal Head by Ralph Pallock
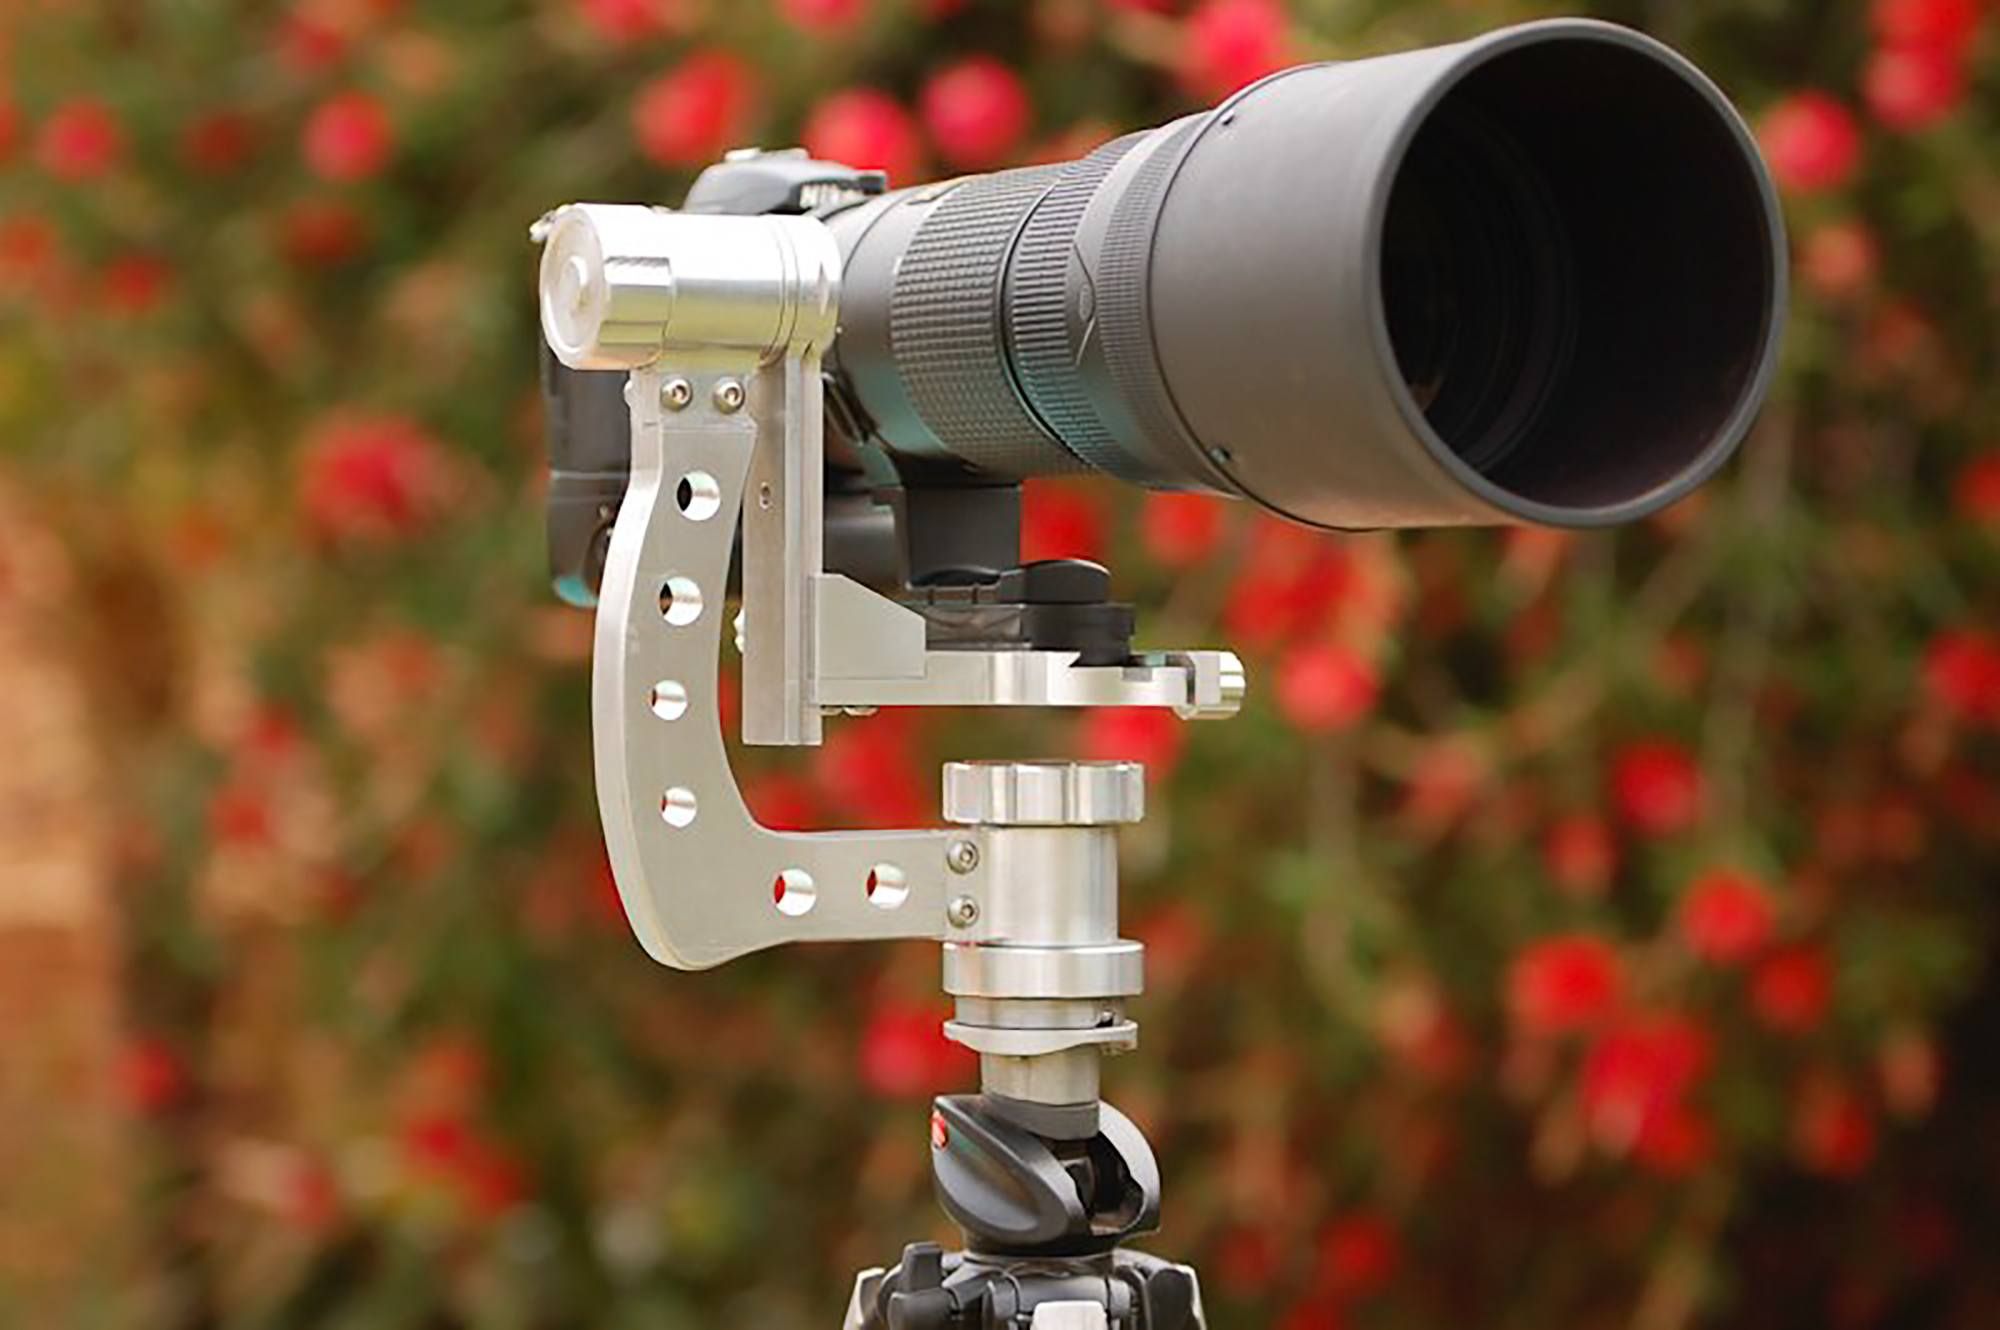
This head (or variations thereof) is the most popular among the more serious bird photographers. It allows for easy movement in any direction. They are usually made of super-strong material and have solid designs.
Gimbal-type heads are usually mounted on top of car door mounts or boat mounts, sometimes on an additional swivel arm that increases movement capabilities even more.
Other Heads
I’m not even going to discuss other head types as they occupy a very low and lonely spot in the world of bird photography. Or to put it differently: if you want to avoid disappointment and you’re shopping for a tripod head suitable for bird photography, make sure it’s a ball head or a gimbal-type head. You won’t regret it.
Key Lesson: You do not need to own the most expensive gimbal head to enjoy your photography. A good ball head will serve you well and for many years to come. The gimbal head types are a good option if you feel the need for something even better. It certainly allows for much smoother camera movement than a ball head.
Recommended Reading: Want a simple way to learn and master photography on the go? Grab our set of 44 printable Snap Cards for reference when you’re out shooting. They cover camera settings, camera techniques, and so much more. Check it out here.
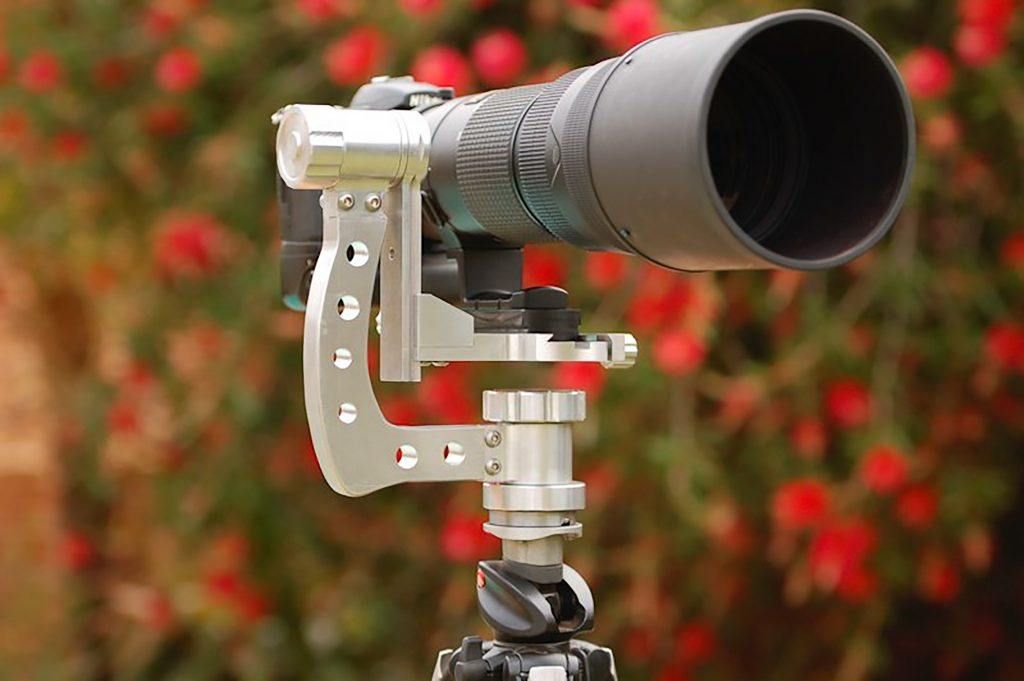
Photo by Ralph Pollack
Conclusion
The main traits of a good camera stabilizer can probably be summed up under two headings: sturdiness and freedom of movement. Add to that light weight (for portables) and durability and you can’t go wrong.
Whatever you’re going to use, don’t spoil the results from your expensive camera and lens by using an inferior tripod or tripod head. Go for the best you can afford! In the end it will play a big part in helping you enjoy every moment of your bird shoots – or not!


