

Metering and exposure is a fundamental skill in the art of photography. Yet, it is one of the least understood aspects of the process – especially with beginners.
While it’s true, in the digital realm, that a photographer can make adjustments to the exposure in post-production; it’s also a well known fact that the best image quality occurs when your original image is exposed properly.
Let’s dissect what exposure is, then we’ll dissect what metering is, and finally, we will look at how the two work together to create a properly exposed image.
Photo by Illusive Photography
Exposure
In photography, exposure is the quantity of light reaching a photographic film, or digital sensor, as determined by shutter speed and lens aperture.
Exposure is determined by three elements: ISO setting, Shutter Speed, and lens aperture.
Each of these three elements provides a parameter that determines proper exposure.
Let’s look at each one separately.
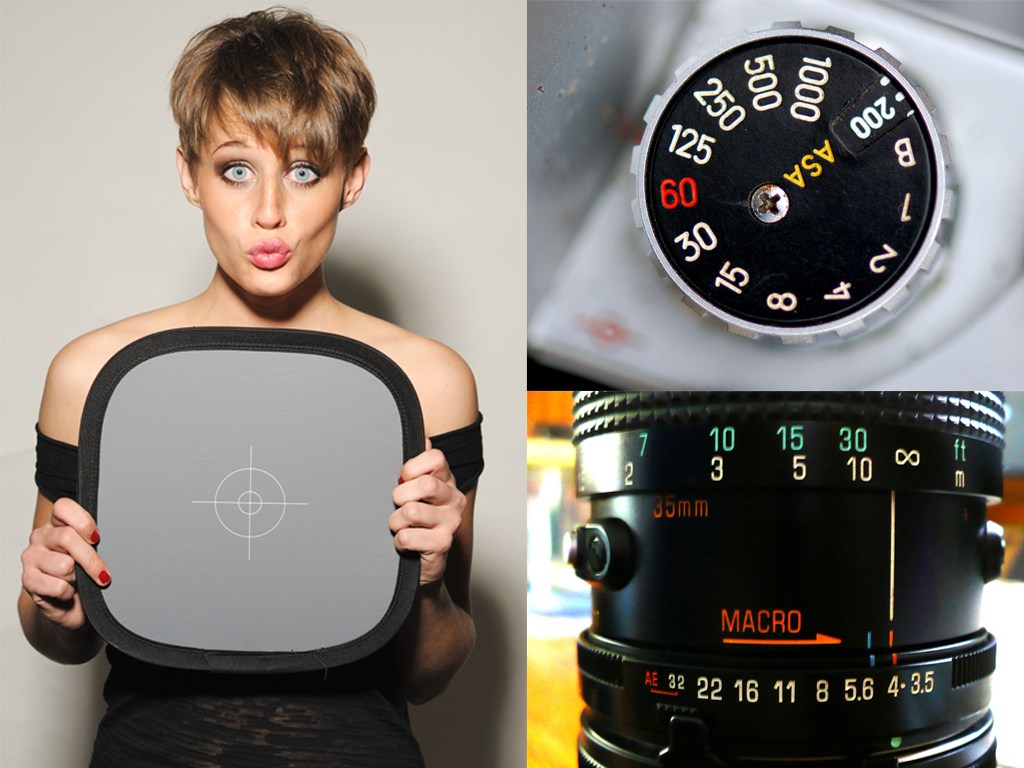
ISO Setting
The ISO setting is the sensitivity of the object that is recording the exposure. That object might be film, or, it might be an electronic sensor.
The sensitivity rating starts with a low number (typically 25 for film and 100 for digital) and goes up to a much higher number (typically 3200 for film and 6400 for digital). The lower the ISO number, the lower the sensitivity, and conversely, the higher the ISO number the higher the sensitivity.
It’s good practice to use the lowest ISO number that your situation allows. The reason for this is image quality degrades as the ISO number increases.
If you’re working with an older camera, or meter, you may see the acronym ASA. Don’t fret. The ASA designation and the ISO designation are exactly the same thing.

Photo by Steve Snodgrass
Shutter Speed
In order to keep the object that is recording the exposure (film or digital sensor) from becoming instantly overexposed, camera manufacturers put a “curtain” in front of it.
This curtain is called the “shutter curtain. In order to expose the film, or sensor, the curtain is lifted to allow light to pass through.
This lifted curtain could be from a fraction of a second to hours depending on the amount of light available for the exposure.
Typical shutter speeds are: 1s, 1/2s, 1/4s, 1/8s, 1/15s, 1/30s, 1/60s, 1/125s, 1/250s, 1/500s, 1/1000s.
The slower the shutter speed (ex. 1 second or more) the more time that light is allowed to pass through the shutter curtain and therefore more exposure occurs.
A fast shutter speed (ex. 1/1000th of a second) allows only a tiny fraction of light to pass through and therefore less exposure.
"A fast shutter speed (ex. 1/1000th of a second) allows only a tiny fraction of light to pass through and therefore less exposure."
It’s good practice to keep your shutter speed “fast enough” that your film, or sensor, doesn’t record camera movement.
Aperture
Inside the lens is a metallic diaphragm that closes down to a specific size when an exposure is made. These sizes are holes called, “f/stops”.
The size of the hole determines how much light is going to pass through to the shutter curtain, which will in turn open, to allow that light to pass through and hit the film or sensor, thereby creating an exposure.
The aperture, or f/stop, settings were originally determined by optical physics. They have an inverse relationship with shutter speeds.
We’ll talk about that more a little later.
The typical apertures (f/stops) that you will see on your camera are: f/1.2, f/1.4, f/2.0, f/2.8, f/4.0, f/5.6, f/8.0, f/11.0, f/16.0, f/22.0, and f/32.0.

Photo by Aperture Lag
This is a very important point to remember regarding shutter speed and f/stop: with each “step” between a shutter speed and f/stop setting, you are increasing, or decreasing, the amount of light passing through to the imaging object (film or sensor) by 100%.
These steps are referred to as “stops”. (I increased my exposure by one stop – I doubled the amount of light passing through to my imaging object.) Here are some examples –
Shutter speed
1/60th to 1/125th – light decreased by half (1 stop)
1/60th to 1/30th – light increased by 100% (1 stop)
Aperture (f/stop)
f/8.0 to f/11.0 – light decreased by half (1 stop)
f/8.0 to f/5.6 – light increased by 100% (1 stop)
Now that we understand the components of the camera that affect exposure, let’s talk about how we determine what these settings should be- in order to get an accurate exposure.
For those who don’t know- Underexposure is indicated by your image being too dark. You must increase the amount of light passing through to “lighten” it.
Overexposure is indicated by your image being too light. You must decrease the amount of light passing through to “darken” it.
The Light Meter
The device that determines exposure is called a light meter.
Virtually every camera today has a light meter built into the camera. In the old days, cameras did not have light meters built into them and a photographer would use an external “hand held” light meter.

Light meters became a part of the camera in the 1960’s. Photo by Robby van Moor


Photo by A. Germain
If you’re a beginning photographer, you can dismiss the hand-held light meter for now. However, in order to understand how a meter works, it’s important to understand some of the principles behind a hand-held meter.

Perfectly exposed scene! Photo by chrissylong
There are two types of light meters: reflective and incident. All built in camera meters are reflective (although you can buy an add-on device to turn it into an incident meter). A hand held meter can be reflective, incident, or both depending on the model.
Each type of meter has its advantages and disadvantages. The reflective meter measures the amount of light bouncing off of your subject. The incident meter measures the amount of light hitting the subject without taking into account the amount of light reflecting back.
When light meters were being invented, someone along the line determined that the average tone of any given subject was 18% gray.
When thinking of exposure, try to rule out color in your mind, think in terms of tonal value.
When thinking of exposure, try to rule out color in your mind, think in terms of tonal value.
What this means is that a blue object and a red object may have the same “tonal value”. The famous landscape photographer, Ansel Adams, determined that there were 10 basic tonal values, from white to black, that were capable of being recorded by the photographic process. He called this, “The Zone System”.
This is important to know because our eyes can record more tonal values than the photographic process is capable of recording.
What you need to know is that the 18% gray that light meters are calibrated for would fall right smack in the middle of this Zone System scale.

Ansel Adams 10 Step Zone System. Image by Rob
The reflective light meter is what 99% of you will be using because it’s built into your camera. Based on what I’ve already told you, you know that when your camera meters a scene –
This is what it is going to attempt to do-
This is a really important point
Your camera meter wants to turn “any scene”into an 18% gray value: whether it’s 18% gray, white, black, or somewhere in-between.

Illustration by www.clarisaponcedeleon.com
This works in most cases because an average scene has almost every tonal value within it.
Therefore all the values will record properly as they reflect varying amounts of light back to the camera.
But- What if you’re photographing a bride, in a white wedding dress, against a white wall, holding a white bouquet of flowers?
That’s right – underexposure – because the meter is going to turn that setup into an 18% gray (average tone) scene.
Let’s look at a few examples of what could (and probably will) fool your camera’s reflective light meter.

Photo by rick kloeppel
As in our example above, this scene has a preponderance of white. It is missing most of the black and mid-tone gray scale. The camera meter wants to record this scene as 18% gray: which is why the final image looks muddy and under-exposed.

Photo by Myrone Delacruz
In this example we have a preponderance of black. It is a night scene- with a dark sky, dark homes, a dark street, and very little light other than a few pinpoints here and there from some lights. The camera meter wanted to turn this dark scene into an 18% gray tonal value, hence the over-exposure. Now, let’s look at an average scene.

Photo by pualv
This is a scene where a reflective light meter works perfectly (without any necessary adjustments by the photographer).
This scene is filled with the full tonal scale from white, to black, and every middle gray tone in-between.

Incident light meter in use.
Photo by Vox Efx
Okay, so now that we have a basic understanding of how our camera (reflective) light meter works.
Let’s talk about the incident light meter.
Incident light meters measure the amount of light hitting the subject, rather than the amount of light reflecting from it.
With an incident light meter, you put the meter at the subject and point it toward the camera, or, toward the light source.
The advantage of an incident light meter is that it isn’t fooled by the subject’s tonal value. It measures the light and provides an exposure for 18% gray. Therefore- a black object (which reflects less light than 18% gray) remains black, and a white object (which reflects more light than 18% gray) remains white.

This is a perfect example for implementing an incident light meter!
Photo by wsilver
So, why don’t we use an incident light meter for everything?
Well, it has several disadvantages. You have to be located near the subject to take a meter reading. This isn’t always possible, such as in landscape photography.
The incident light meter also slows things down; you couldn’t simply lift your camera and take a photograph. This is a huge disadvantage for certain types of photography such as sports and/or any action oriented work that requires speed.
Incident light meters are a great tool for static work such as portraits, products, food, and architecture.
I mentioned earlier that there is a tool available to convert your camera’s (reflective) light meter into an incident light meter. If you’re just starting out- this may be a good way for you to get your feet wet with this alternative metering method.
Now, this product can also be used to set a custom white balance on digital cameras. For the sake of this discussion, I want you to ignore that part of the video. Simply watch the recommended video below on how he uses the Expodisc to measure for exposure.
Recommended Video: Expodisc Turns Camera into Incident Light Meter

Handheld Incident Light Meter
Photo by Chad Miller
We now know how each of the two types of light meters work.
What happens next?
The light meter will give you a shutter speed/aperture combination (based on the ISO setting) for a proper exposure.
Earlier, I alluded to the fact that shutter speeds and f/stops have an inverse relationship.
This is a very important point in understanding how your camera works, and how you’re exposing an image.
"The light meter will give you a shutter speed/ aperture combination (based on the ISO setting) for a proper exposure."
Have you ever created a photograph and it looked too dark, or too light, so you fiddled with the shutter speeds and the f/stops, took another shot of the same scene, and the new image turned out exactly like the previous shot?
This was most likely due to the inverse relationship of shutter speeds and f/stops.
Earlier, I showed you the standard scales for shutter speed and aperture.
Let’s say your meter determined an exposure of- 1/60th at F/8.0 That setting would give you a proper exposure.
Now, look at this
1/60th at f/8.0
1/30th at f/11.0
1/15th at f/16.0
1/8th at f/22.0
Any one of these combinations would give you a proper exposure. Why? It’s the inverse relationship.
Each combination allows the same amount of light to pass through to the imaging object (film or sensor).
Look at the above example again- Do you see how the shutter speeds are stepping down in the standard increments, just as the f/stops are stepping up in standard increments?
One setting is decreasing the amount of light 100%, while the other is increasing the amount of light by 100%!
If you were fiddling with your camera’s settings and ended up using any of these combinations you would get the same exposure.
Let’s say you shoot your picture at 1/60th at f/8.0 and it looks too dark. What do you do
You need to increase the exposure by CHANGING the combination of shutter speed and aperture that your meter provided you.
The easiest way to do this is to first decide which of the two parameters (shutter speed or f/stop) that you want to keep. In general, for beginners, I recommend you keep your shutter speed. (Remember- Use a fast enough shutter speed to prevent camera shake.)
- Your meter says 1/60th at F/8.0. You determine that the photograph is too dark. You need more light (more exposure).
- You decide to keep your shutter speed of 1/60th.
- You now change your f/stop to f/5.6. (You have changed the combination given to you by the meter.) You’ve increased the light passing through to the imaging object (film or sensor) by 100% (1 stop).
- You take another picture, and it looks great. If not, you continue to adjust ONE of the two parameters, (shutter speed or f/stop), while keeping the other one “set” until the photograph looks correct.
Let’s review what we know so far.
- We must set the ISO for our camera, or hand-held meter.
- Our camera meter is reflective and will give us a shutter speed / aperture combination that will want to make our scene into an 18% gray tonal value.
- Underexposure means an image is too dark. Overexposure means an image is too light.
- We have to look at our scene, evaluate if it will fool the reflective meter, and make adjustments accordingly.
- Incident meters are valuable for static subject applications.
- When the light meter gives us a shutter speed / aperture combination, we know that the inverse relationship is in effect. We must change one parameter while leaving the other one alone, in order to increase, or decrease, exposure.
At this point, I would like to impart a few tips and thoughts about metering and exposure that I would consider to be in the slightly advanced category.
I encourage you to read them and think them through, but you may wish to get a firm grip on the basics of metering and exposure before you begin implementing them.

Photo by Dave Dugdale
Virtually all cameras today have an adjustment that allows you to tell the meter how much of the scene you want the meter to evaluate. Most cameras have these three options: Matrix, center weighted, and spot.
You’ll want to pull out your camera manual and see what settings your camera has and how to change them. Some hand-held meters also have a variable setting for the angle of view.
However, with hand-held meters, it usually requires the purchase of an adapter or or a specific type of meter.
When you look through your camera’s viewfinder, or on the LCD panel on the back, you will see an array of boxes or dots. These can indicate several things – one of them being your meter’s current metering pattern.

Photo by Lousy Photography
This (above) is a hand-held spot meter. They usually read an angle of view of about 1 degree. They are extremely useful for taking critical reading of multiple areas from the camera position. Spot meters are reflective meters.
As I said earlier, most cameras will have these three options.
Let’s look at each on individually.
Matrix – Your particular brand of camera may have a different term for this setting. But they all work the same. In this setting, the camera meter will take into account everything it sees within the frame.
Center weighted – With this setting, the camera meter will ignore the outside edges and take its reading from the middle third of the frame.
Spot – If your camera has a spot option, it will usually be indicated by a small box in the center of the frame. It works just like the hand-held spot meter: usually measuring a one or two degree angle of view.
Why would you want to switch between these three settings?
Most of the time you will use the matrix setting on your camera’s meter; it’s the best general purpose setting.
Most of the time you will use the matrix setting on your camera’s meter; it’s the best general purpose setting.

Photo by Wilcozpics
This (above) is an excellent example of where matrix metering works well. You have a wide range of tones from black to white that are evenly distributed.
Center weighted is advantageous when your scene includes an extremely bright area in some part of the frame, but, the rest of the image is evenly balanced. In the matrix mode, the bright section fools the meter and skews the setting toward pulling that bright area down to 18% gray. By using the center weighted mode, you can essentially “cut” that bright portion of the frame out of the calculation.

The majority of this picture (above) is under exposed because the meter was fooled by the bright portion of sky on the right.
The spot meter setting is good for subjects that take up a small portion of the frame, BUT, they’re the most important part of the image.

Photo by Striatic
A spot meter would have helped this situation (above).
The exposure was completely thrown off by the large area of wall that was lit behind the subject.
This resulted in almost all of her face going completely black.

Photo by Poetprince
In this photograph the spot meter was the ideal choice. Even a center weighted setting would have under-exposed the woman’s face. By taking the reading directly from her skin tones, the photographer achieved a proper exposure.
The Dilemma of the Extended Contrast Range
Occasionally, you will encounter a scene that you want to photograph that has an extended contrast range. What this means is that the light to dark ratio is beyond the capability of the camera to record.
In other words – something has to give.
This part of photography can be fun, because it is a part of the creative process, but, it can also be frustrating if you don’t understand what is going on.
The best way to explain the dilemma of an extended contrast range is to show you an example.

Photo by Garbyal
Here the photographer wanted to capture the boys in the doorway. He set his exposure based on a reading of that section of the image- which happened to be very dark. What occurred then was that the entire rest of the image over-exposed. This image had an extended contrast range.
The camera was not capable of capturing the light to dark ratio. If the photographer had changed his exposure so that the exterior walls were properly exposed; the boys would have been in complete darkness.
So, when I said something has to give, I meant, you need to make a choice. Do you expose for the bright side of the scene? Or, the dark side of the scene; which tonal value is most important?
With some types of photography such as portraits, products, food, fashion, weddings, etc. – you have control- you can adjust the lighting to “squeeze” the light to dark ratio.
Recommended Reading: For more information on this, please read the article on lighting and light modification that I wrote for Photzy.com: Understanding and Controlling Light

Photo by European Southern Observatory
One final comment – Sometimes dark lighting situations will be beyond the capability of your meter. In these situations use your best judgment and take lots of exposures at various settings.
Situations such as this will be beyond the capability of your light meter: only experimentation and experience can guide you.
I hope that you now have a basic understanding of the metering and exposure process. With knowledge and experimentation, you will master this most important aspect of photography.


