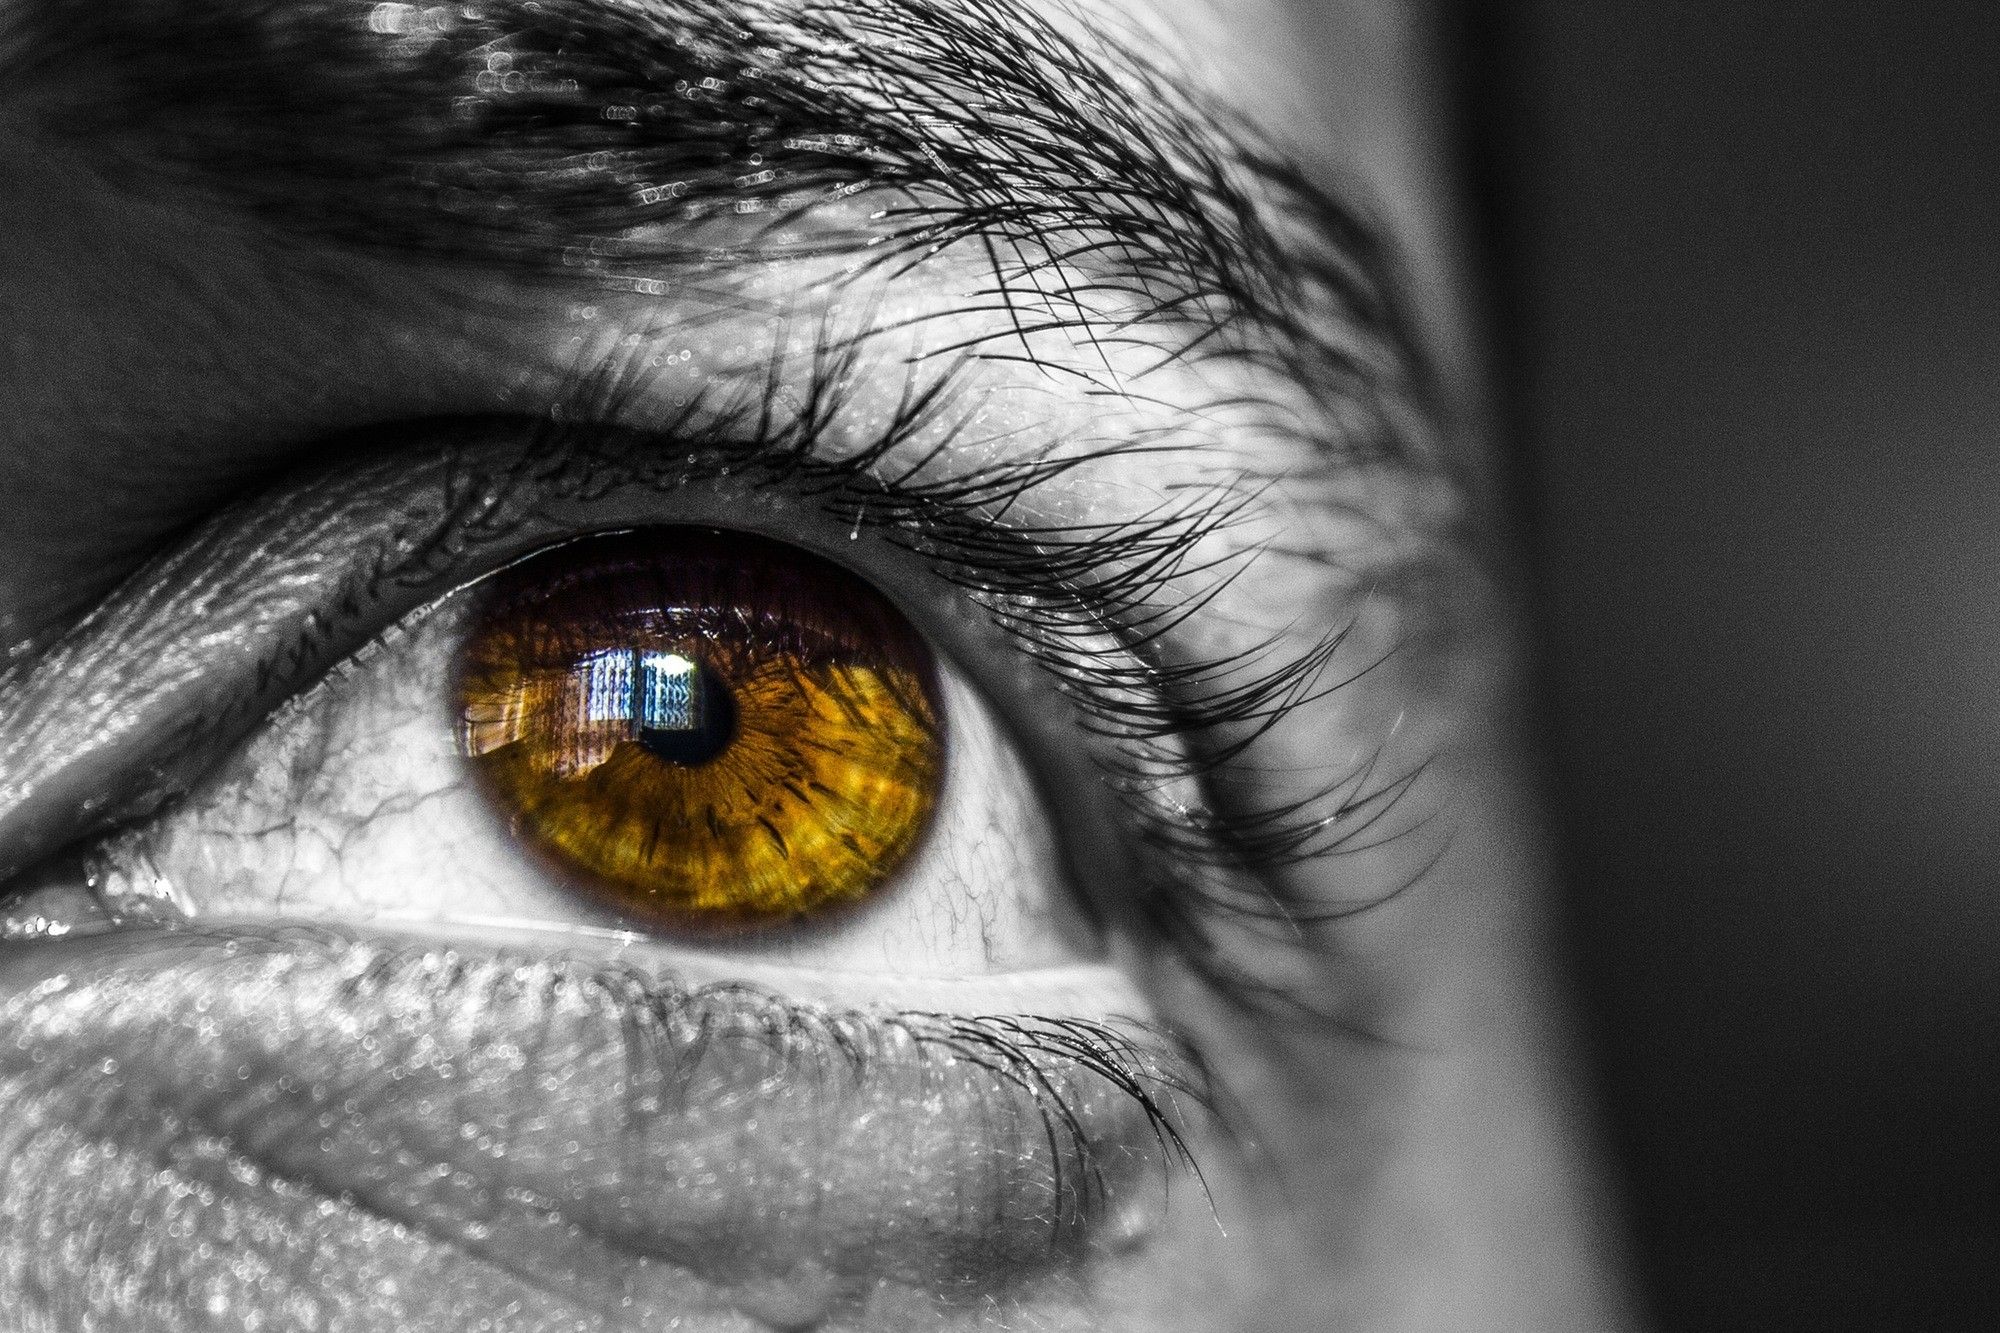
Analyzing a photograph is a very good way to learn lighting. A photographer’s development greatly increases when they focus on training their eye to see beyond; that includes being able to look at a photograph and determine what works and what doesn’t, and also being able to analyze the composition, lighting, and exposure in a shot.
At the time of writing, I have just finished watching another season of Sherlock, where actor Benedict Cumberbatch plays a very witty but very sociopathic Sherlock Holmes. The show focuses on Cumberbatch’s character, Sherlock Holmes, who is famous for using the art of deduction that goes beyond clever, a bit bizarre, but none-the-less fascinating and entertaining.
Today, we’ll allow ourselves to somewhat be like the Sherlocks of photography.
There is only one objective of this guide: that by the end of it, when you look at a photo, you would have gathered some information about a photograph to be able to determine what the lighting conditions may have been like when the photographer took the shot.
Was a reflector used? Where did the photographer position the light and how high did they set it up? Did they use an umbrella or maybe a softbox? If it was a softbox, what was the size of the softbox? What was the shape? Is it square? Rectangular? Maybe hexagonal? What was the intensity of the light compared to the other light source? These are some questions we usually ask when analyzing light in a photograph.
Analyzing a photograph is a very good way to learn lighting.
While there are different lighting elements and properties that can help in analyzing light better, today it is my desire that this guide will help you improve your skills in analyzing light by using catchlights. Since we’re only discussing one type of lighting element in this guide, we may not be able to answer all of the questions that I’ve mentioned above, but we will do our best to answer as many as we can.
Let’s begin.
Recommended Reading: If you’re interested in a more thorough discussion on the properties of light and how you can use it to improve your shots, grab a copy of Photzy’s Understanding Light Book One premium guide.
Identifying Catchlights
What are catchlights? Here’s a dictionary definition of the word ‘catchlight’ from my old pal Merriam-Webster:
Definition: Catchlight is a small spot of light reflected from a shiny surface (as from an eye in portraiture or from metal or glass in photography)
From this definition, we know one thing: any surface that is shiny and reflective has the ability to contain catchlights.
The term catchlight is a familiar word to portrait photographers. To them, catchlights are the highlights showing the specs of light reflecting on the surface of the eyes. Eyes, whether human or animal, including insects, are quite reflective.
Can you identify the catchlights in these two portraits below?
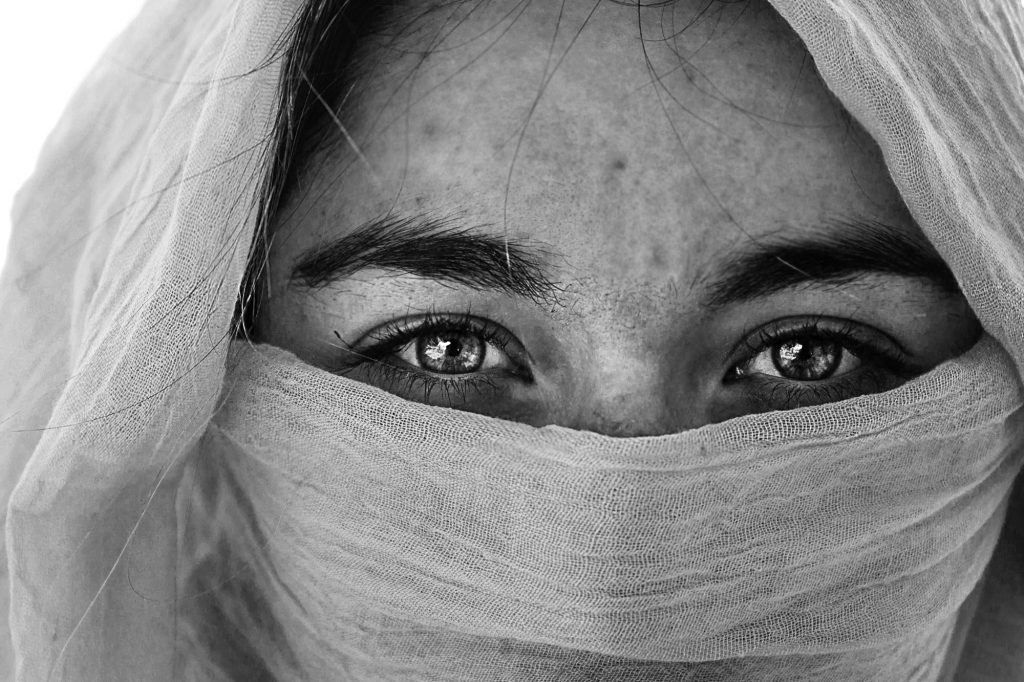
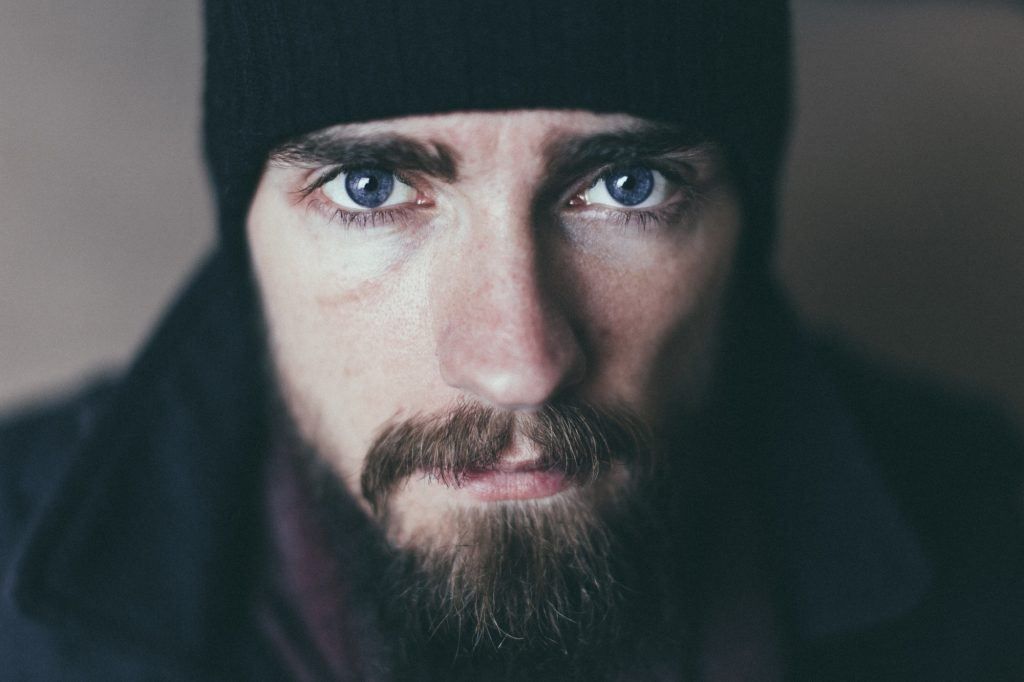
Did you find the catchlight on each photo? Here they are. Zoom in to take a closer look.
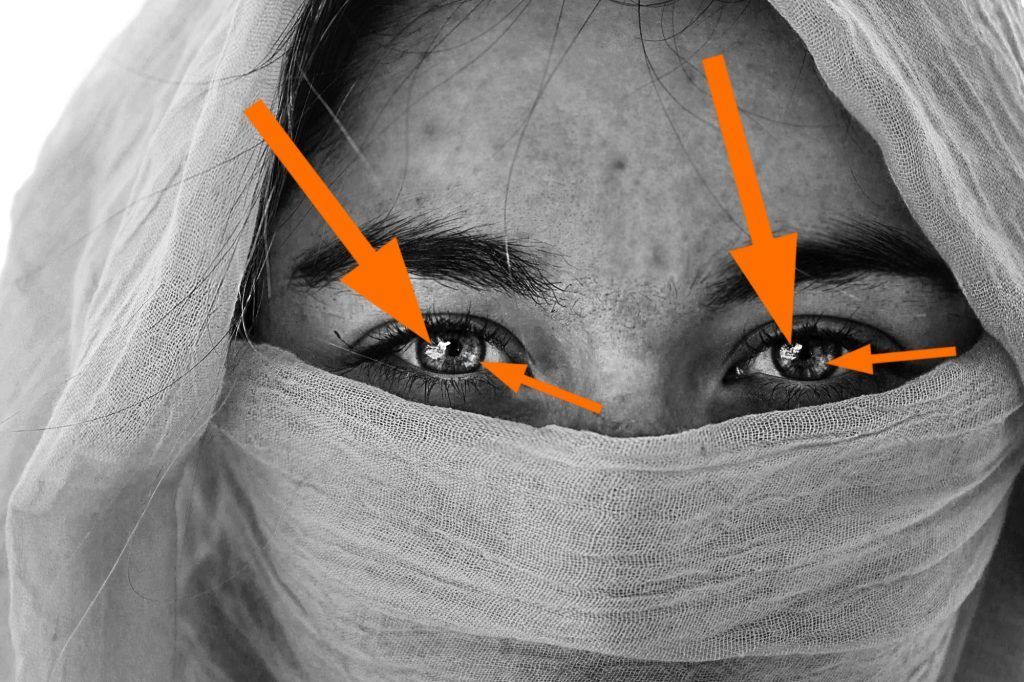
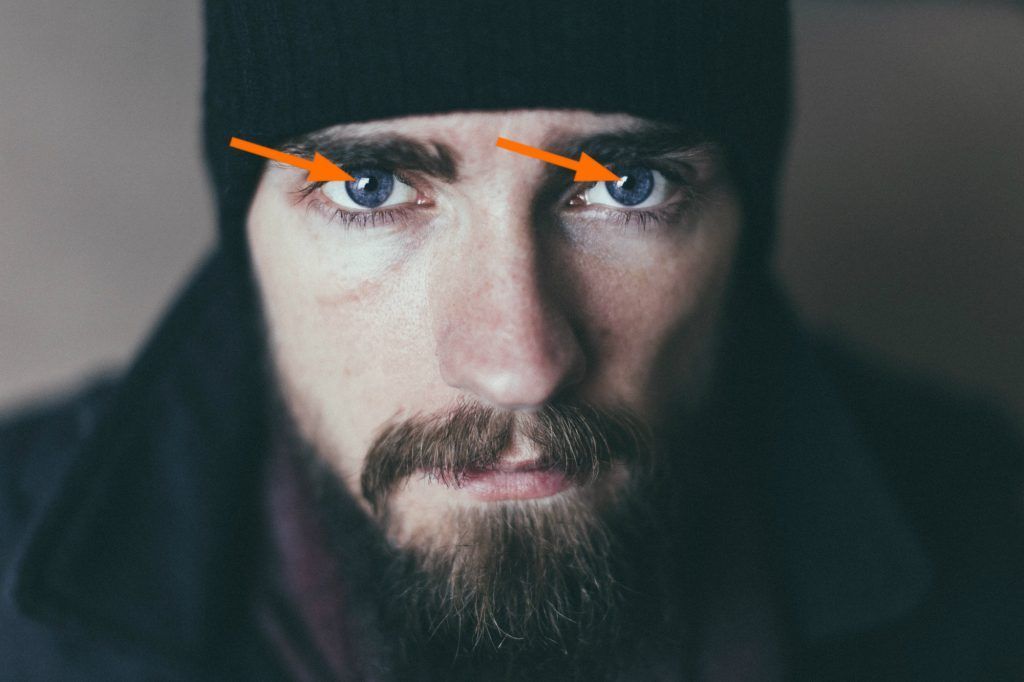
I’m particularly fascinated by catchlights because it is what makes the eyes of
subjects in your portraits sparkle.
Catchlights aren’t limited to portraiture, although for portrait shooters, it is an important feature that they most likely want to emphasize from time to time. For non-portrait shots, catchlights can exist as long as there are reflective surfaces within our frame and the highlights are seen within those surfaces. Catchlights are particularly important in some forms of photography, like when shooting metal, glass, jewelry, cars, and food.
Let’s look at some non-portrait photographs and look for some catchlights.
Let’s begin with this mobile phone photograph.
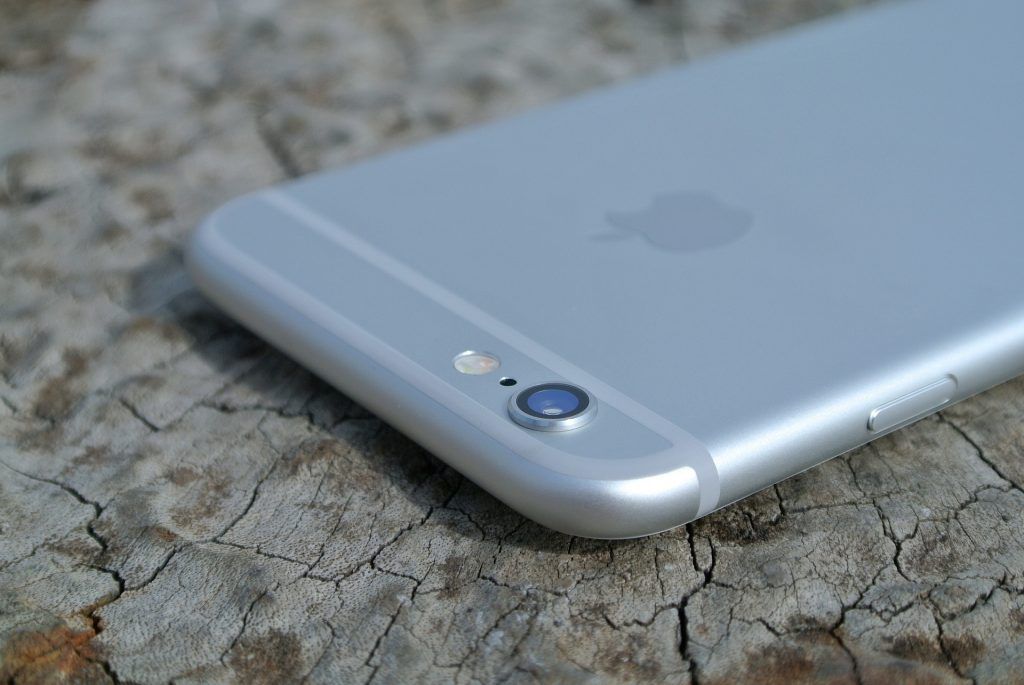
Did you find them? I’m sure you’ve found one, but there’s more. Zoom in and look closely. It can be really small.
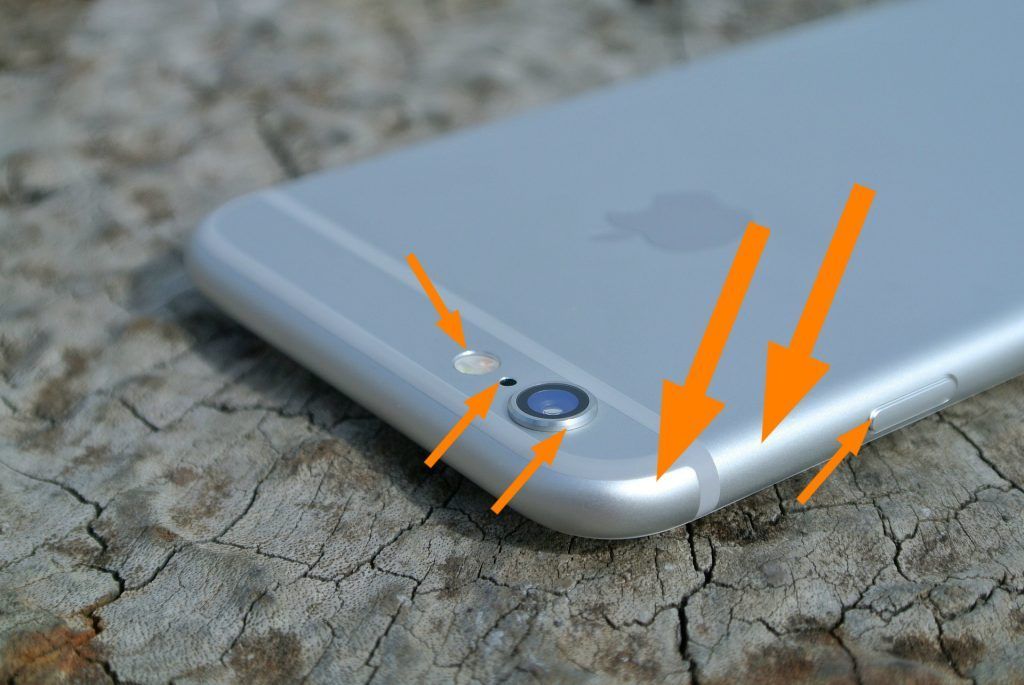
How many did you find?
I found six. Were you surprised that it was that many?
Here’s a clue to help you better: there are at least 10 in each photograph I’ll be showing you next. Some are smaller than others. And just like in this image, some can be really small.
Let’s go to the next image.
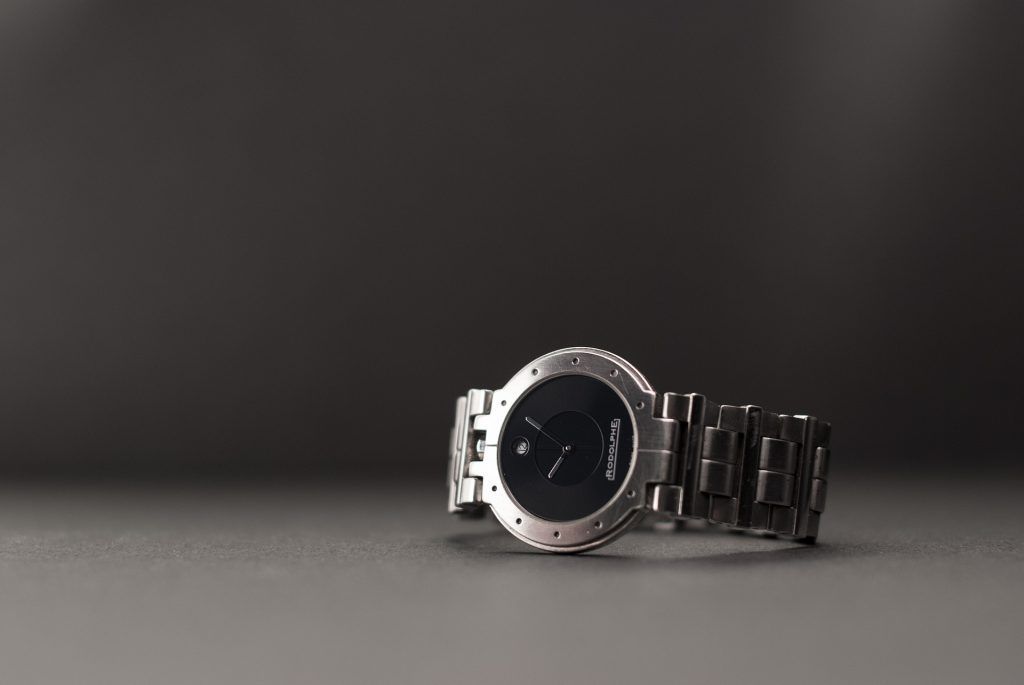
How many did you find this time?
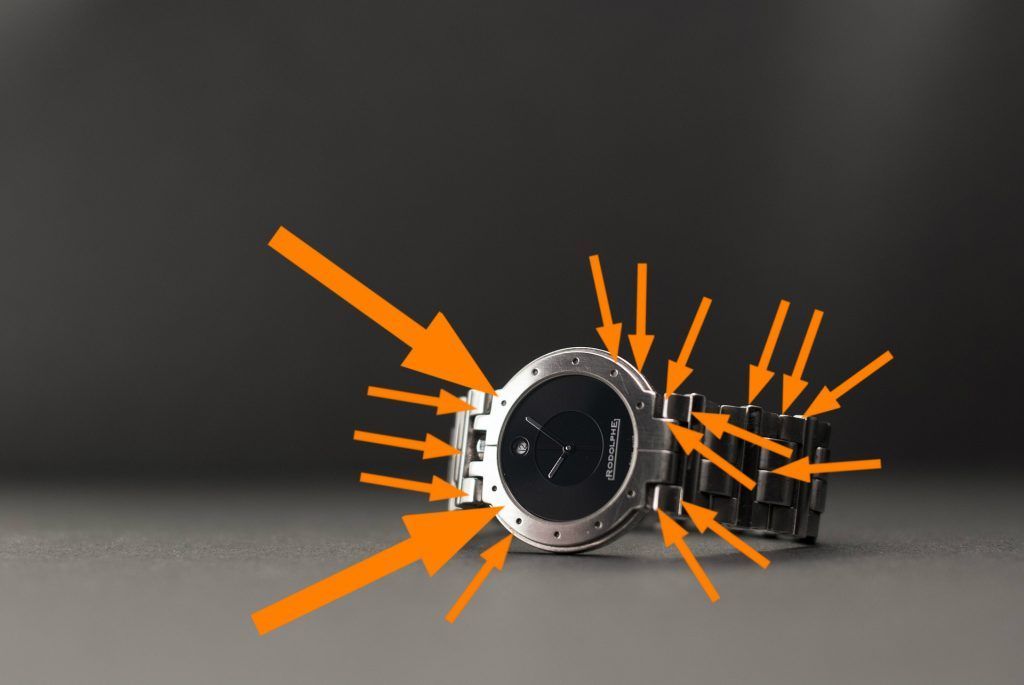
As you can see, the largest catchlight is found on the left side of the watch frame. The smaller ones are found on the watch band.
And finally…

How well did you do? Some are too small to even consider useful, but even a small dot of catchlight, like what you can see in these images, can still be very useful.
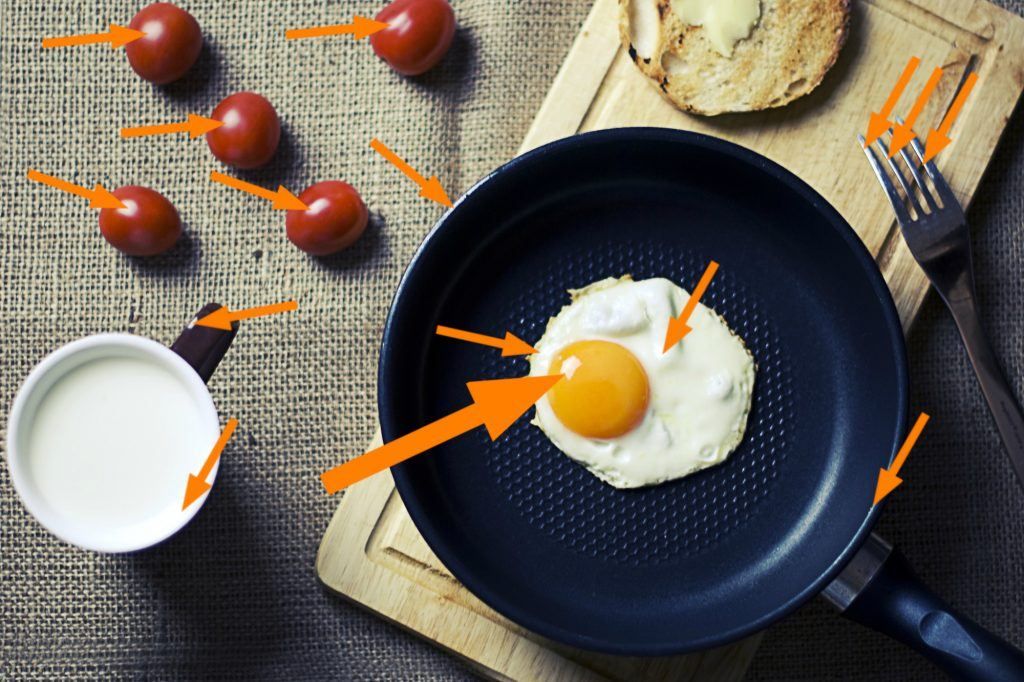
We’ll be using some of these photos again later.
Non-Shooting Exercise: Observe your surroundings. Try to find as many catchlights as you can. Unless you’re in a really dark room with no light in it, you should be able to find some.
Was the exercise easy or difficult for you? If it was easy, then good job. If not, no worries; go to the kitchen and try to do the activity there. I’m sure there’s a ton of reflective surfaces in there where you can find some catchlights.
The Purpose of Observing Catchlights
Now that you already know how to identify catchlights, let us now talk about how you could use these catchlights to analyze light.
It’s really pretty simple: catchlights can give us a starting point that allows us to determine the location and the type of lighting equipment that was used in the photograph.
Key Lesson: Since catchlights are highlights coming from light sources, the position, size, and shape of catchlights can reveal information about the light sources that create them. Also, catchlights are particularly useful when observing photographs where one or two light sources were used. It can get complicated when there are more light sources at work, especially with certain surfaces.
Catchlights can help determine two major things:
- The location of the light source
- The light source/light equipment used
In addition, it can also possibly help determine how many light sources are
present.
This, of course, will depend on the type of surface the catchlight is on.
Surfaces and how they reflect light
The shape and position of a catchlight will
look different depending on the shape of a surface, the size of the light source, and the perspective of the viewer. This has to do with how light bounces on a surface. If it sounds complicated, don’t worry. It’s really not.
This is why it’s important to first study catchlights that fall on surfaces that are easier to analyze. Once you’re used to that type of surface, then you can move on to more complicated ones.
Key Lesson: While some surfaces really make it difficult for us to determine the type of light source used and its location, others should be quite helpful.
Spherical surfaces are the easiest and the best, followed by curved and flat surfaces.
Contoured and cylindrical surfaces are tricky too, but you should be able to get some information out of it. With contoured surfaces, it will require a bit more getting used to since they don’t act like mirror images compared to spherical and flat surfaces.
Jagged surfaces are quite difficult, and rough and textured surfaces are the hardest because these surfaces reflect light in various directions, giving you a harder time to figure out the actual lighting conditions.
Catchlights Reveal the Location of the Light Source
With surfaces that are flat, we can treat these objects like a mirror, which means, if the highlight is closer to the left, then the light source is on the front-left. If it’s reflecting near the bottom of the surface, it’s also from the front-bottom. This of course also depends on where the surface is facing. We have to take note of the angle of the reflection. I’ll give some examples a bit later.
With spherical surfaces, we can treat it like a convex mirror.
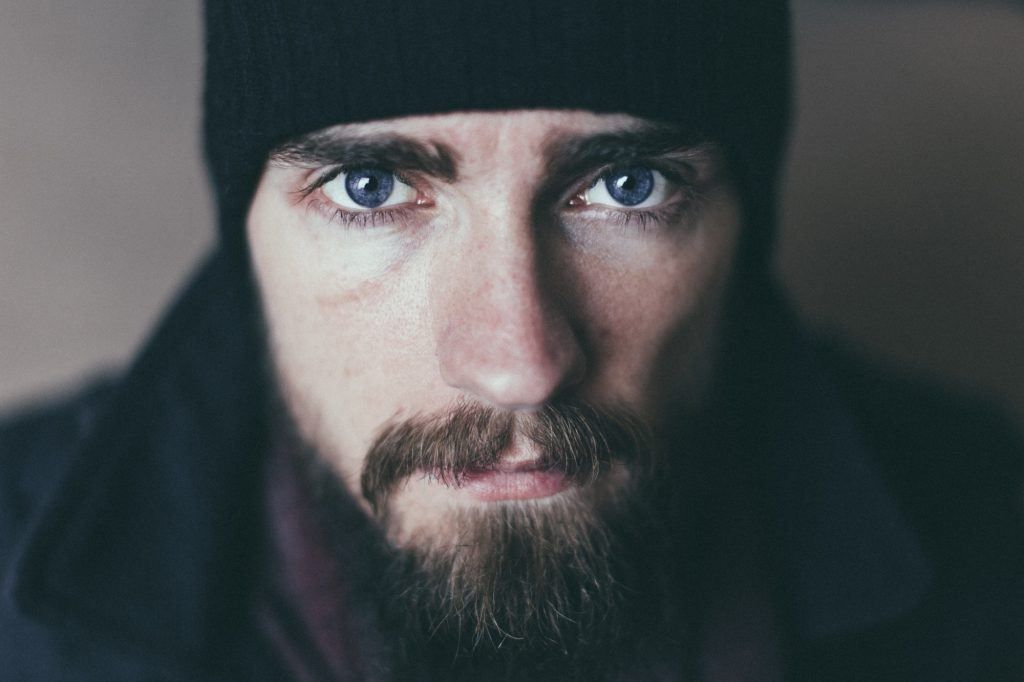
Eyes are spherical, so they can catch reflections from a very wide angle. Take a look at the catchlight using an earlier example (photo below).
Note: For easier reference, I will use the location of light sources based on the camera’s perspective. So when I say left, it’s to your left (right if from the subject’s perspective).
Where are the catchlights located? On the upper-left of the pupil (dark center of the eye) and on the iris (colored part) of each eye, right? Since the man is looking straight at the camera, this tells us that if there was a light source where the camera is located, then the center of the pupil will have a catchlight. This means that based on the location of the catchlight, the light source is positioned and is reflecting from the front-left of the camera, slightly higher than eye level. It’s not totally on the side since the catchlight is still within the iris and not on the edge where the sclera (the white of the eyes) is.
Catchlights Reveal the Number of Light Sources
Let’s take a look at another example.
How many catchlights do you see here (below)?
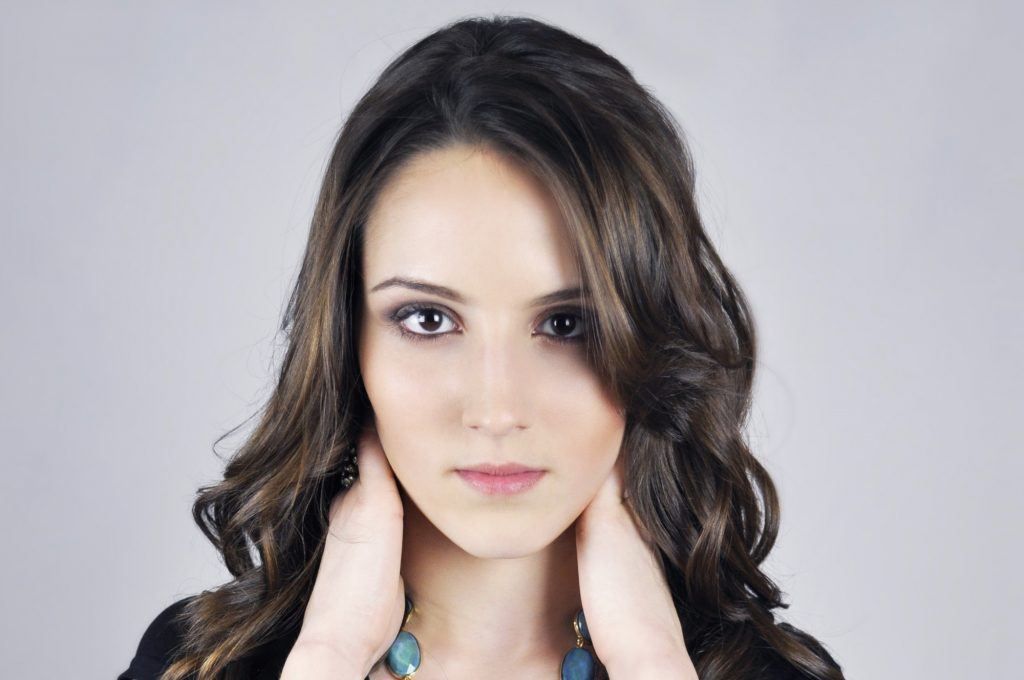
Two on each eye, right? Where are they located?
One is on the right side of the iris closer to the pupil and the other one is near the edge of the iris on the left side. This means there are two light sources used to illuminate the subject’s face. One is on the left and one is on the right, positioned approximately 30 degrees from the subject’s visual center. The height of these light sources are just about eye level.
Catchlights Reveal Lighting Equipment Used
Observing catchlights that appear on highly reflective spherical or flat surfaces is a really simple and easy way to know what light sources were used during a shot; yes, and I do mean the actual light source/equipment used.
Take a look at this photograph below and look for catchlights that reveal not just the location of the light source, but the light source itself.

Can you tell me the main light source in this photograph?
If you answered window light, then you are correct.
In this photograph, the reflective surfaces are in the form of gadget screens. There are three of these gadgets in this image, although only the desktop monitor, due to its position and angle, has a catchlight that reflects the light source. We can even see that the windows have blinds.
Awesome. That’s very good!
Observing catchlights that appear on highly reflective spherical or flat surfaces is a really simple and easy way to know what light sources were used during a shot.
Let’s get to the next one. Can you find the actual light source using the catchlights in this image?
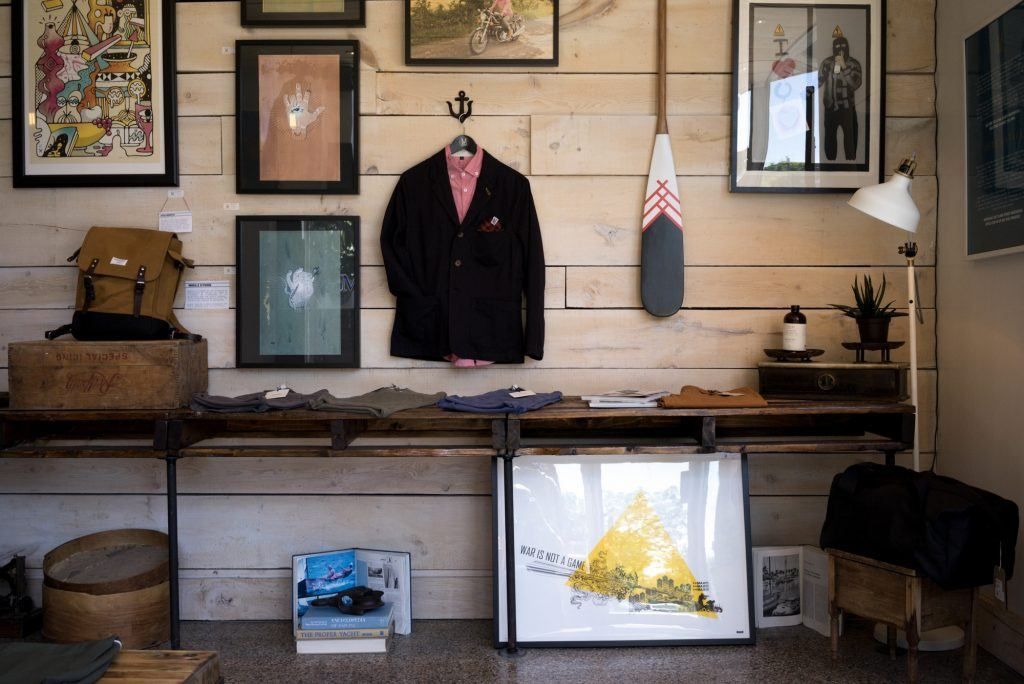
There are two objects in the shot that can show us the light source. Were you able to find them?
Yes, the two glass frames are where you’ll see the large catchlights: the big one on the floor and the frame on the top right. Like in the other photograph, these are flat surfaces so they act like regular mirrors.
In this shot, the catchlight reveals that the light source is behind the camera. Again, it’s window light. The window seems to have three panels and direct skylight is what’s passing through the window. The light is unobstructed since there are no blinds to diffuse it unlike in the previous photograph.
This is particularly useful when you’d like to pursue studio photography or at least make use of studio equipment, where you rely on artificial lighting.
In a studio environment, you may see several shapes of catch lights. Softboxes are usually square shaped, rectangular, octagonal, etc.
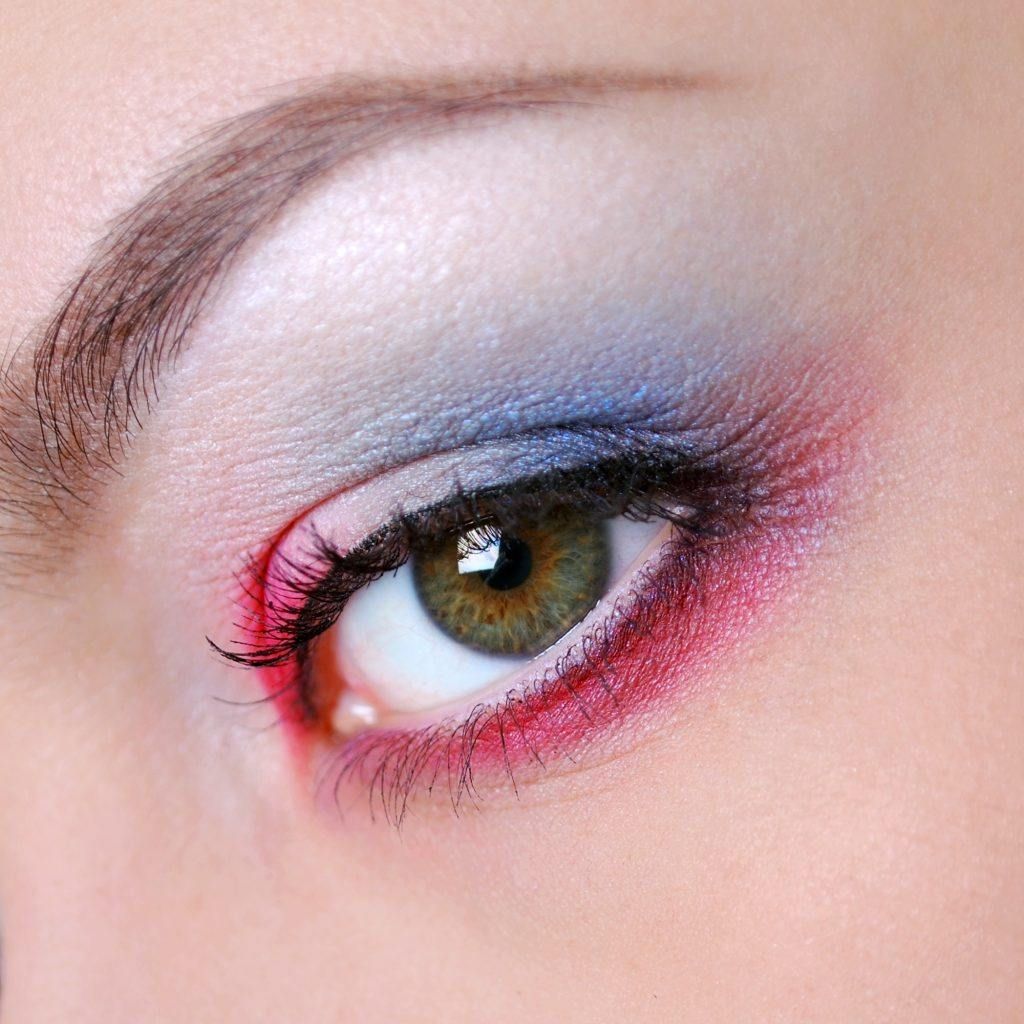
The catch light on this one (above) is square in shape. This means the photographer used one studio strobe with a square softbox. Softboxes are meant to diffuse light to make it softer.
Do you see how the light that falls on the face of the subject is quite soft, and it’s hardly creating any shadows from the eyelashes?
If you’re not familiar with softboxes, this is what a square softbox looks like:
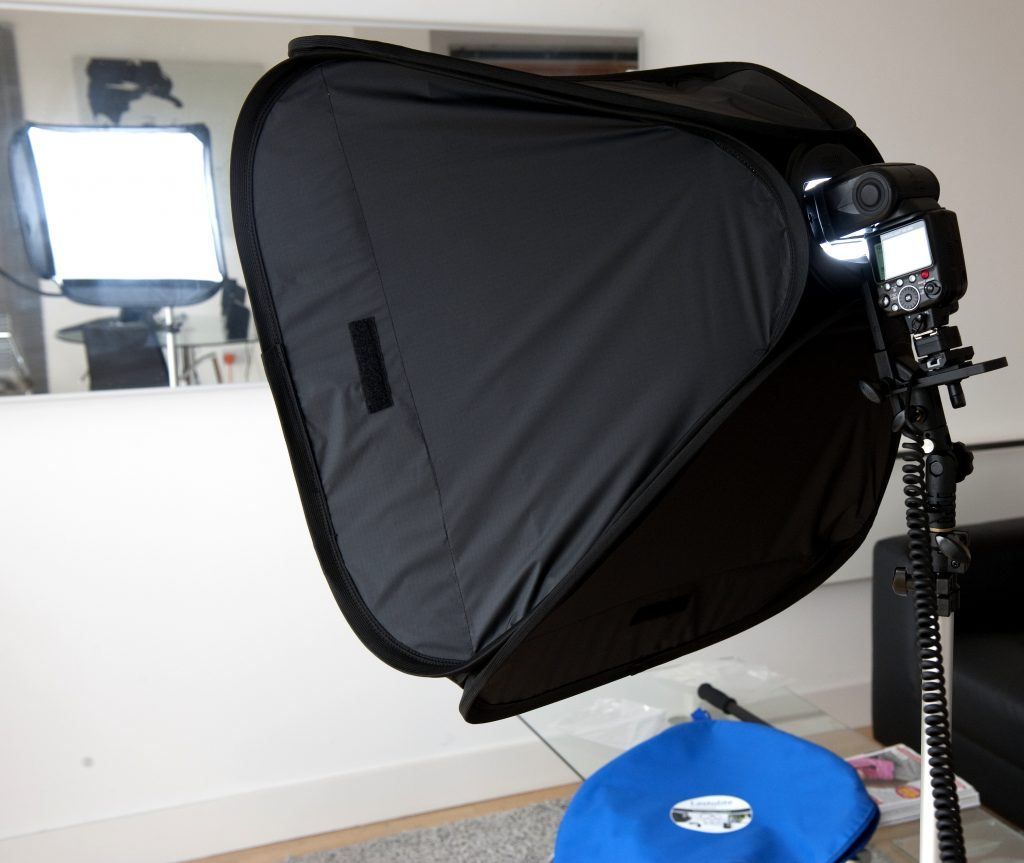
If you look at the catchlight on the eye closely, you’ll see that it’s this kind of
lighting equipment that was used.
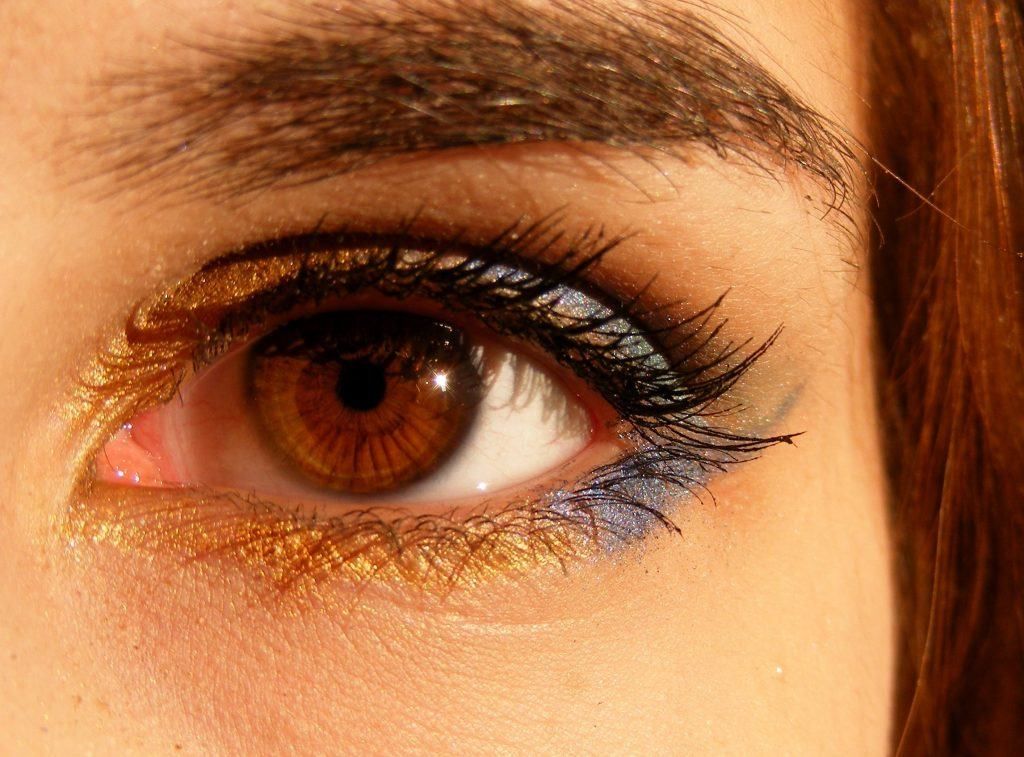
Compare that image with this one above. The catchlight shows a small shimmering dot. This one is using a bare strobe light which means it’s doesn’t have a diffuser, like a softbox or umbrella, to make the light softer.
Note: Since this is not a tutorial on lighting equipment but on analyzing lighting, we won’t be discussing the different types of lighting accessories here. You will encounter them as you pursue your study of light.
Recommended Reading: If you’d like to learn more about lighting equipment, here’s a free tutorial on Understanding and Controlling Light.
Let’s now take a look at a non-portrait example:

Remember this shot? Let’s try to analyze the lighting based on what we have learned so far.
Let’s start with the number of light sources in the shot. If we look at the catchlights on the egg and tomatoes, we’ll know that there’s only one light source.
How about the location. Since the shot is taken from a top view perspective, and the catchlights are located near the top-left of the eggs and tomatoes (based on the framing), we know that the light source was set behind the pan toward the left. The light source was also elevated since the catchlights on the tomatoes are not on the edge and a little bit closer to the center compared to the catchlight on the egg yolk. This also tells us that the light is closer to the tomatoes than the egg.
Alright, great. How about the type of light source used? Do we know what it is? If you answered, a softbox, then you are correct. It looks like a square softbox was used for this shot. The catchlight on the egg clearly reflects the light source. You don’t get the exact lighting information from the tomatoes since it’s less reflective.
Let’s stay with this photo a little bit longer since there are different surface types in this shot. The tomatoes and the egg have spherical surfaces and most of the lighting information we’ve gathered about this shot came from these objects. The other catch lights on this shot are on surfaces other than spherical.
For example, the mug contains two visible catchlights: one on the inside of the cup and one on the handle. Using both catchlights, we can analyze the number and location of the light source. It’s difficult, however, to find out the height of the source and the type of light source used. The surfaces of the mug in both catchlight places are curved in nature.
It’s the same story with the fork and circular edges of the frying pan. The flat surface of the pan (where the egg is placed), which is not really flat but jagged and textured in nature, does contain catchlights if you look closely, but they’re too small to get much information from. The only information it can possibly reveal is the location of the light source, but it’s quite impossible to get anything else.
Catchlights Et Al.
Knowing how to identify and analyze light using catchlights is pretty helpful, isn’t it? But do take note that it’s not the end-all and be-all of analyzing light sources.
Analyzing catchlights has its limitations. While you’re starting this journey of analyzing light sources, you will encounter misses.
Knowing how to identify and analyze light using catchlights is pretty helpful, isn’t it? But do take note that it’s not the end-all and be-all of analyzing light sources.
Let me give you two final photograph examples.
How many light sources were used for the shot below based on catchlights?
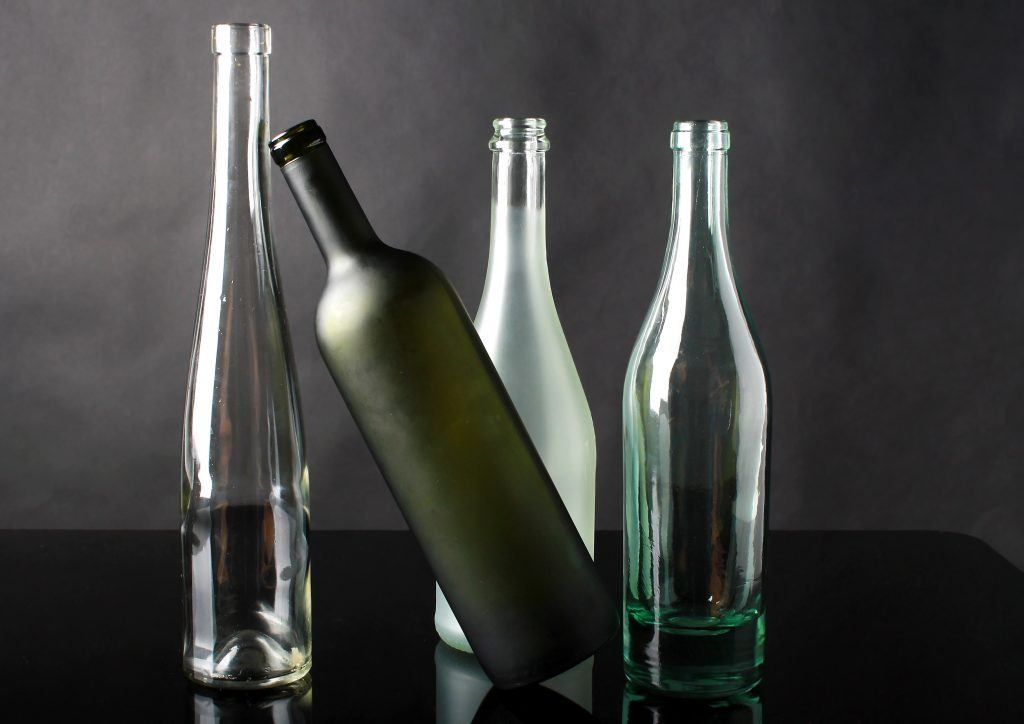
There’s actually just one – and again, it’s light from a window.
But if you observe the catchlights on the clear bottles, it may look like there are two light sources because the catchlights fall on the left and right sides of the bottles. In reality, the catchlights from both sides of the bottles are coming from the same light source, due to the transparency of the bottles. Try it out. Get a transparent bottle and place it near the window. Move around the bottle and you’ll see an angle where you’ll see a similar effect. See the odd translucent bottle? Do you notice that the catchlight on this green bottle only has one location? This reveals that there is only one light source used. The background also shows us that the right side of the frame doesn’t have enough light falling on it to even suggest that there’s a light source coming from the right side. In this example, we’ve used our knowledge of surface properties and observing the background to find out more information about lighting. In this particular example, we went beyond catchlights to confirm our lighting data.
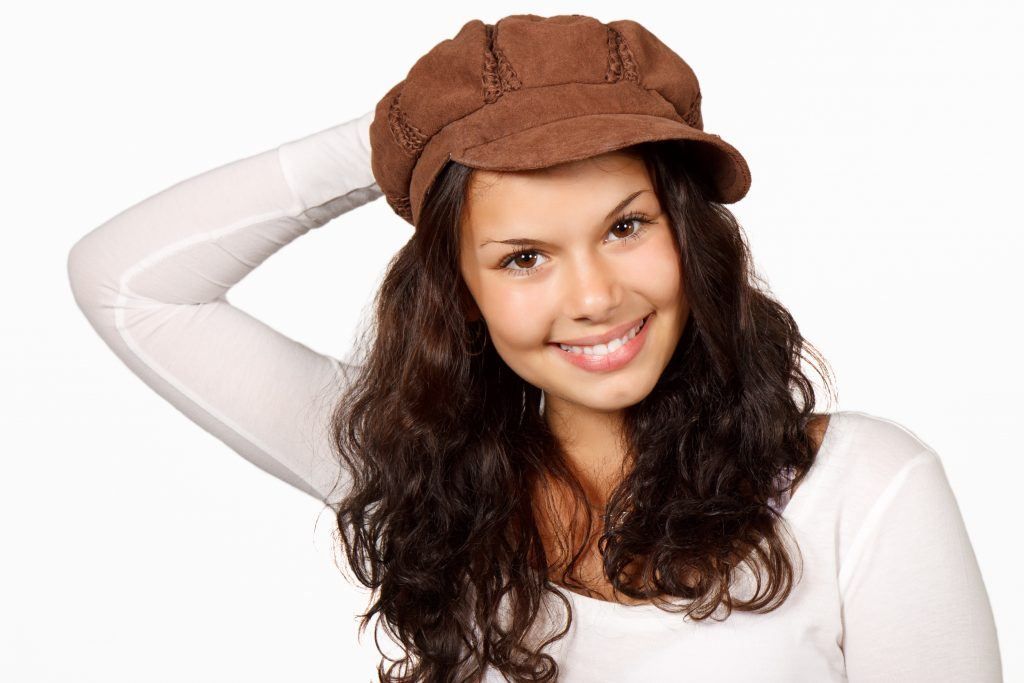
Take a look at this photograph.
Even without zooming in, experienced photographers will already know what the light sources are in this shot.
Let’s look at what’s obvious based on the reflection of the eyes. How many white dots do you see in the girl’s eyes?
Yes, three.
Three dots means that there are three individual light sources: one at center right (of the subject), one at center left, and another one a little bit more to the left.
Let’s zoom in to take a look:
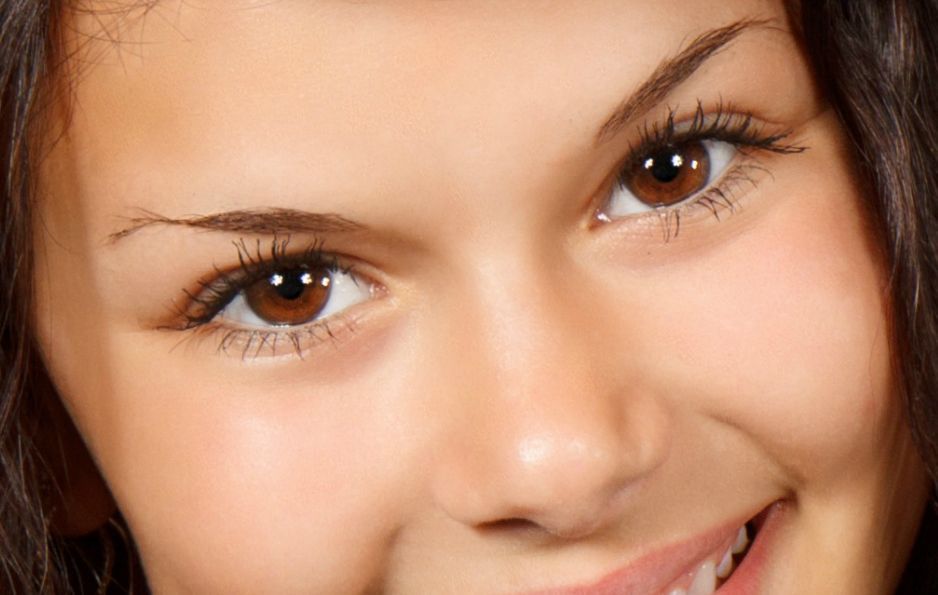
Do you see the three studio lights now?
But if you replicate this shot using three light sources, you will be disappointed, because thinking that there are only three light sources in this shot is incorrect. There are possibly around five.
It’s true that there are three light sources that you can see illuminating the front. This is when observing catchlights are most effective. But there are other light sources at work. See, this is a high-key image, where the subject is set on a white background. Unless there’s a light that’s illuminating a white background, or if the subject was cropped out and placed on a white layer during editing, any white background requires lighting so that it will not look grey. This is to balance out the light that’s hitting the subject.
Key Lesson: This tells us that because you don’t see a light source’s catchlight, it doesn’t mean there is no light source there. It’s usually because light is falling somewhere else or it’s falling on an object without a reflective surface, like the backdrop behind the girl.
We need to rely on information from other light properties that our photographs can show us to analyze light. Over time we get used to how light falls on a subject and we become familiar with it so that next time, it’s easier to analyze lighting on a shot.
Final
There’s actually one major objective of this guide that I purposely didn’t tell you about: that by the end of the guide, you’re no longer looking at objects as they are, but focusing more on how light falls on the objects. If you can remember the shapes of the catchlights even without looking back at the example photographs, then we have met that objective. If not, that’s alright; continue to observe the light in photographs and you’ll get there.
I urge you to continue learning and analyzing light. Study photographs and observe things around you. Take particular interest in how light falls on surfaces.
Form the habit of observing catchlights. It doesn’t have to be in the context of photography; you don’t need your camera to do it.
Just do three simple things: (1) identify catchlights around you, (2) observe which light source is producing which catchlight, and (3) observe how different types of objects create catchlights based on the location of light sources.
Form the habit of observing catchlights. It doesn’t have to be in the context of photography; you don’t need your camera to do it.
After you’re done with those three things, go beyond and observe shadows, color, and the other properties and characteristics of light.
When you don’t have the time to shoot, learn lighting by doing these simple exercises. You can do it while you’re on your daily commute, having lunch, or even when you’re on your break. When you’re stuck indoors and can’t take your camera out, these are the best times to continue learning photography, specifically lighting, in a very practical way.
Non-Shooting Exercise: Browse through a magazine and look for 10 images. Find the catchlights in those images and do the same exercises we have done with the images in this guide. See if you can identify light sources, their size, shape, and even location.
Recommended Reading: If you’re particularly interested in learning more about light and how you can use it to improve your photography, grab a copy of Photzy’s bestselling tutorial series, Understanding Light Book One and Understanding Light Book Two.


