

Photo by Kent DuFault
Pet photography is challenging for several reasons. It requires patience, technical skill, and knowledge of animal behavior.
Photographing pets is a lot like photographing children; the best results occur by letting them do what THEY want to do, or, tricking them into doing what YOU want them to do.
There are many types of pets, and since this is a quick guide, we’re going to concentrate on cats and dogs. Most of the principles discussed could apply to any mammal and most birds. Reptiles are a different story and probably need a guide of their own.
We knew a dog that hid every time she saw a camera. There was no rational explanation for this behavior; it just was. We also knew a cat that absolutely loved when a camera appeared; she would pose for hours without moving. Again, there was no rational explanation for this behavior.

Photo by Kent DuFault
A big step toward improving your pet photography has nothing to do with the photographic process. It has to do with “reading” your subject. This may sound silly, but it isn’t.

Photo by Emery_Way
There are many, MANY websites and blogs that discuss animal behavior. If your goal is to provide pet photography as a service to others, we highly suggest you spend some time reading them.
If you simply want to create better pictures of your own petwell- you’re the leading expert aren’t you!

Photo by Kent DuFault
There are two angles at which you can approach pet photography:
- The candid shot
- The posed portrait
These two different approaches to pet photography require a slightly different mindset and equipment list.

Photo by Emery Way
The Candid Shot
Candid animal photography requires you to be ready when the animal performs, or, you need to set-up a situation where the animal performs at your request; this is referred to as a “set-up” candid. Here are your main tools.

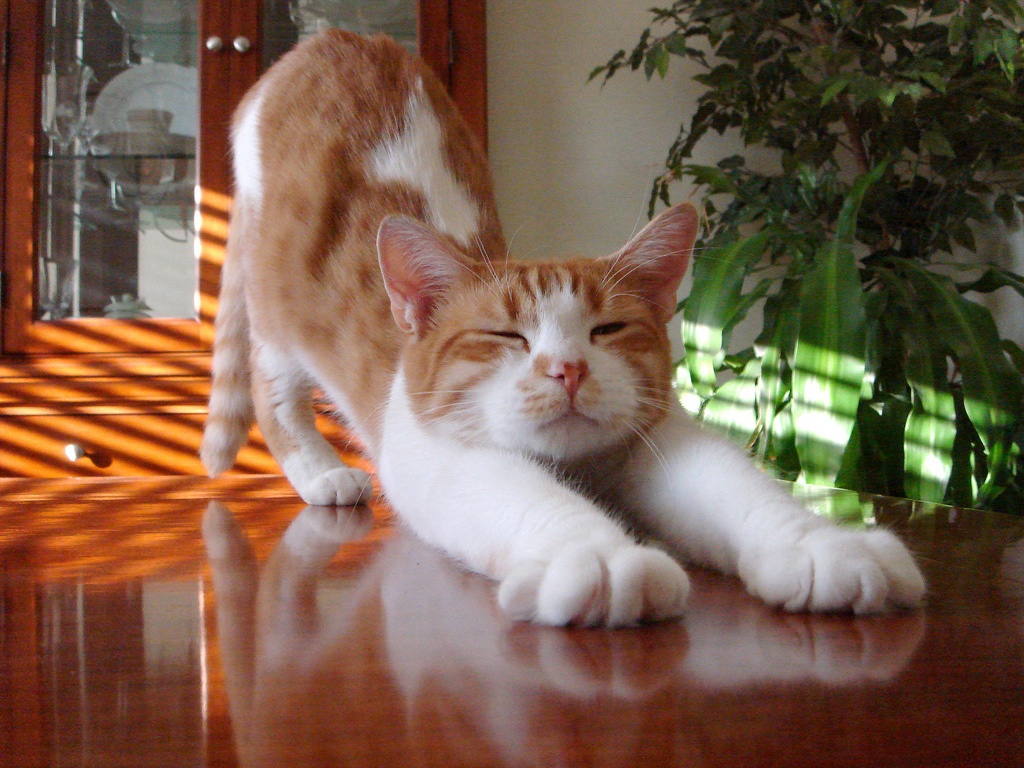
Photo by Kent DuFault
A true candid – The photographer noticed the cat sleeping next to the window (above). He crept into the room, pre-focused his camera and made a clicking noise to get the pet’s attention. Capturing a moment like this takes anticipation, preparation, and timing.

Photo by Jelly Dude
This is a set-up candid. The photographer increased his odds of a successful image (above) by having a helper excite the dog with a ball. The helper then threw the ball behind the photographer.
Important Tip: Pet photography is usually best done at the animal’s level. Don’t shoot down on them
- Patience
- Mobility
- Lighting
- Location

Photo by jpctalbot
Patience

Photo by psyberartist
Animals are not going to do what you want or when you want it. This means being ready.
If your kitten is doing something adorable- and then you decide to go get your camera – the scene will be long gone.

Photo by Kent DuFault
Rule #1 – Keep your camera handy at all times.
You will only get this type of candid image (above) by being ready. When shooting pets, shutter priority mode works best. Set your metering pattern to center-weighted or spot. Put your camera’s drive mode into its fastest motor drive setting. For general shooting use an ISO of 200 or 400.
If you’re shooting pets other than your own, great candid photography is usually created by using the set-up candid method.
"Great candid photography is usually created by using the set-up candid method."
This is where time spent in researching animal behavior will benefit you. What will the pet find interesting? How are you going to create that situation?
An example-
We photographed two cats. They LOVED a feather on a string and an empty cardboard box. But, we could roll a ball around in front of them all day and they would just simply walk away. It was as if they were saying, “Why would I bother?”
Give yourself the TIME to make something happen. A good pet photo session can easily last 2 to 3 hours. You need time to decide what you’re going to do, set it up, become acquainted with the animal, and finally take the photographs.

Photo by Kent DuFault
A Good Tip – Animals are generally suspicious. Don’t jump into the picture taking. Spend your first 30 to 60 minutes simply interacting with them. Build their trust level.
When doing a pet portrait for hire, we’ll often visit the pet a couple of times for play time before ever doing the shoot.
Many pets need a sense of trust before they’ll relax and reveal their true nature.

Photo by StuartWebster
Mobility
Animals will not sit still, and neither can you. If you’re working outdoors, pet photography is simple to accomplish. If you’re working indoors, you will have more challenges.
Mobility is an equipment issue. You don’t want to drive your ISO up because the noise will decrease those fine details that a pet photograph needs.
Noise will destroy the quality of your pet portrait. Try to use an ISO of 400 or less – only go to 800 if you have no other choice.
You don’t want to use direct flash indoors because an animal’s eyes will light up like big red spotlights.
You don’t want to use a slow shutter speed because the image will most likely be soft due to movement.

Photo by madabandon
Your best equipment list should include the following-
- A camera that has little to no noise up to ISO 800
- A lens in the 50mm to 200mm range with a wide maximum aperture (f/2.8 or larger)
- An external flash that pivots for bounced light
- Several nice extras would be a monopod and/or a flash bracket

Photo by MIKI Yoshihito
This is an ideal mobile set-up for pet photography: high quality camera, fast lens, excellent flash unit, and a flash bracket. The photographer even added a ball head to the bracket so that they could “flip” the flash on its side. You want to be able to move fast and adjust your lighting quickly.
You don’t need all these things to start, but put them on your wish list.
Lighting
If you’re shooting outdoors, the rules of human portraiture apply.
- Avoid midday light (shoot in the early a.m. or late p.m.)
- Use a fill flash or reflector boards if necessary
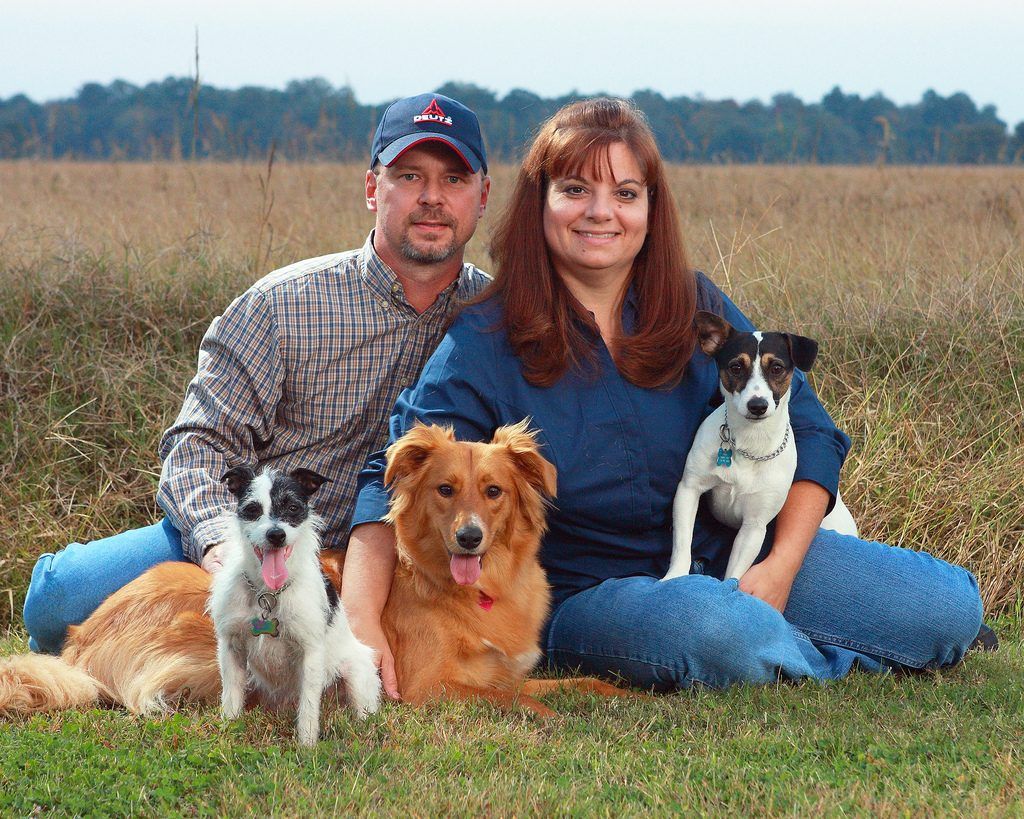
Photo by Emery Way
Indoors, lighting a pet photograph becomes more challenging. Animals have very wide pupils, so direct flash is almost useless because it reflects off their retina and turns their eyes red.
You need to use a bounced flash, or indirect hot-lights.
If you don’t have either of those capabilities, try to set up your candid shooting location near a large window with indirect lighting (no sunlight directly hitting the window).
Window light can be an excellent main light source.

Photo by ChrisK4u
Location
Your primary consideration for location is light. You need to have enough light to keep your ISO down, your shutter speed up, and hopefully with an f/stop around f/5.6 to f/8.0 for maximum depth-of-field.
Your second consideration for a location is containment. Try to pick a location that isolates the pet from running off.

Photo by Kent DuFault
A successful image of these puppies (above) was made possible by containment. The photographer placed them near an exterior wall of the home- facing the camera. Two assistants were employed; one on either side of the group of puppies. Each assistant held half of the puppies in a straight line until the photographer gave a cue to release them. The photographer got one or possibly two shots before the group scattered. They then repeated the same procedure about twenty times.

Photo by madabandon
The third consideration is background. Don’t include a busy background or a background with an obtrusive color. In pet photography, the image is all about the pet’s face and body language. Nothing will destroy that image faster than a garbage can behind their head.
A busy, bright, or visually strong background detracts from the animal.
The Posed Portrait
Many of the same principles of candid work apply. But- Here the expectations are higher; especially if you are doing this for hire.
Here are your prime considerations:
- Lighting
- Background
- Behavior Control

Photo by joshuahoffmanphoto
In a portrait scenario, you are trying to capture the beauty of an animal’s expression; particularly in the eyes. You also need to accurately show the color and texture of their fur coat. The positioning of their ears and paws is also important.
Proper lighting and attention to the pet’s body language is essential in pet portraits.
When doing a pet portrait, you’ll likely need some help. It’s also recommended to purchase an external camera release.

Photo by Kent DuFault
An external camera release (such as this one above) allows you to remove your face from behind the camera. It allows you to trigger the shutter without touching the camera.
Lighting
When lighting a pet portrait you’ll want at least a three light set-up. You will want a main light that comes from the side up to a 45 degree angle in front of the pet’s face.
You’ll also want a front fill light that is high enough so that it doesn’t reflect back from the animal’s retina.
Finally, you’ll want a backlight to reveal the texture of the fur coat.
A single light source might work for candid images, but it won’t work for a quality portrait!

Photo by shotbynicci
Important tip: Remember to remove the pet’s collar before taking your portraits.
The lights can be flash units or hot-lights. Your goal is to establish an exposure with a shutter speed of 125/th of a second (or above) and an aperture of f/5.6 to f/8.0 while using an ISO of 400 or less.
The above settings will provide you with the optimum window of opportunity for a successful image.
Your main light and fill light should be soft. This means bouncing the light or using umbrellas or soft boxes.
The backlight should be a bit harsher- but check your initial exposures to make sure the backlight isn’t too bright!
Mega Important Tip: The color of the animal’s fur will affect your exposure and lighting. If an animal is dark black or white, pay special attention to your exposure and lighting.

Photo by PentaxSLR
Take notice of the lighting on this black cat. The photographer has created highlights across the fur by using backlight. This kept the fur from turning into a dense black with no surface texture.
If your lighting capability is limited, construct your portrait setting by a large window with indirect light. Use bounce cards or mirrors to try and establish multi-angle lighting.
"The backlight should be a bit harsher- but check your initial exposures to make sure the backlight isn’t too bright!"
Background
The background is very important in a pet portrait! If you’re shooting a black lab, would you place them on a black velvet cloth? Would you place a cat with a brindle coat on a red fabric?
While there are many things that are right about this image, the choice of a red background was not one of them. The vibrant color detracts from the dogs and throws off the color balance of the image.
Important Tip: It’s generally best to manually set your white balance rather than use auto white balance.

Photo by Emery_Way
Obviously, you can choose any background that you want. The goal is to NOT distract from the animal’s features.
If you’re unsure about what background to choose, a good rule of thumb is to pick a background color that is close to the shade of the pet’s eyes. But keep it muted- nothing bright or patterned.
Behavior Control
This is essential for a great pet portrait because you need them to sit still. If you did your research, you’ll have some ideas on how to accomplish this. Here are some ideas to get you started.
- Bring treats and toys (try to tailor them to the animal).
- Exercise the pet before you begin (wear them out especially puppies and kittens).
- Build a controlled space. You can do this with a cardboard box or blankets strung over chairs; or use the corner of a room, etc.
Let’s develop an equipment list for your next petshoot!
- Camera with excellent low noise capabilities.
- A normal to medium-telephoto focal length lens with a maximum aperture of f/2.8 or larger.
- A three light set-up- use flash or hot-lights and bounce cards / umbrellas / or soft-boxes to soften the light. Flash has an advantage in that the light output is higher. Hot-lights have an advantage (especially with cats) because the heat tends to settle them down.
- A tripod for portraits and a monopod for candid images.
- A background that compliments the pet, especially the eyes.
- Treats and toys that are confirmed to work with that particular animal.
- A helper or two is invaluable- especially if you’re shooting multiple
animals.

Photo by Kent DuFault
One final very important tip –
An animal’s personality is revealed through their eyes and ears. Always make it a point to focus on their eyes. Keep your peripheral vision on their ears. Make sure the ears aren’t crimped oddly, or set back in anger; you want them looking alert but happy.
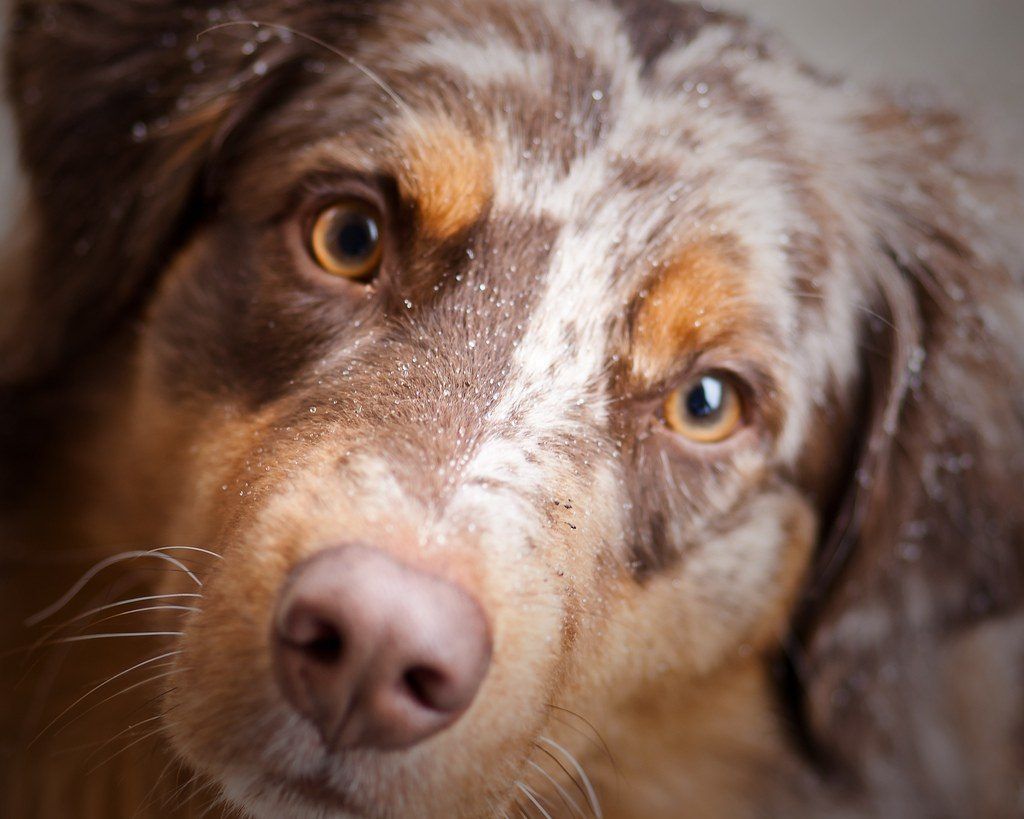
Photo by AndyMcLemore
Focus on the eyes – This is the window to an animal’s soul.
A lack of focus always detracts from a pet portrait. Sometimes having only one eye in focus is acceptable; it depends on the pose. You should ALWAYS focus on the eyes!
Best of luck with shooting pets; it’s a lot of fun!


