

Every photograph needs a focal point! But what is a focal point? And how do we use them in our photography? In this guide, I’m going to teach you how to use focal points in your photography to enhance your images and make them visually more appealing to your viewers.
Here’s what you’ll learn:
- What is a focal point?
- Placement of your focal point and depth of field
- Lighting, color, and contrast
- Other focal point tips
- Multiple focal points
- The viewer’s perspective
Recommended Reading: If you’d like to master camera settings to create gorgeous, creamy, blurry backgrounds, grab a copy of Photzy’s premium guide: Beautiful Background Blur.
What Is a Focal Point?
A focal point is most simply defined as the point of interest in an image and the area that is the center of attraction for a viewer. In the fine arts, the focal point is referred to as the point of interest that makes an artwork unique, and this is an interesting concept to carry over to photography.
Key Lesson: When you choose your focal point, you’re essentially telling a viewer where you want them to look. A big part of this is knowing how to focus properly. You must tell the camera where you want it to focus by having control over your AF points or by using manual focus. It’s no good choosing a focal point for your image and then allowing your camera to focus elsewhere in the image!
Placement of Your Focal Point and Depth of Field

Using light and contrast effectively in an image helps to draw a viewer’s attention to the focal point of a shot. Photography by Belinda Fewings
As the photographer, it’s your job to control the placement of your focal point and to arrange it in the best way you see fit. Part of focal point placement undoubtedly involves making your image accessible to viewers and directing their gaze. Of course, the most obvious place to put your focal point is in the middle of the frame, and this can work well in a lot of situations (for example, portraits), but you should also experiment with different positions of your subject within your frame. A simple compositional tip to try is the Rule of Thirds and place your focal point at the intersections of a 3×3 grid.
As the photographer, it’s your job to control the placement of your focal point and to arrange it in the best way you see fit.
Another way of directing your viewer’s gaze is by using a small depth of field. This means that your focal point and subject will be sharp, whilst the rest of the image is blurry. A viewer’s attention will always go to the sharp part of an image.

Using a small depth of field helps to isolate a subject and defines a focal point simply and quickly. Photograph by Eleanor
Key Lesson: Whilst we’re on the subject, here’s a brief explanation of how to control your depth of field. Depth of field is controlled by your aperture. Your aperture controls how much light is coming through the iris of your lens. So, f2 is a large aperture, letting in a lot of light. Conversely, f2 is a small depth of field. Thus, f22 is a small aperture, letting in very little light, whilst also giving you a large depth of field.
Lighting, Color, and Contrast
How a focal point is perceived is also affected by lighting, color, and contrast. A focal point that is brightly colored, or deeply toned if you’re shooting in monochrome, will draw the attention of a viewer, particularly if the rest of your image has otherwise muted colors and tones. You can also experiment with color combinations. Pick a scene with just two colors. One will act as your background and the other as your focal point.
As I’ve already mentioned, eyes are drawn to bright things, and you can use light and contrast to your advantage to highlight a focal point. Placing your focal point in the brightest parts of an image is a simple way to ensure your viewer will see it as the most important part of a scene. It’s easiest to find strong light contrast when the light is hard (around midday or with a directed artificial light). Remember that you can also hide distracting elements by hiding them in the dark, shadowy areas of the shot. In addition, do note that it’s often easier to physically move your camera around to an angle of view that presents light contrast at its best. Seeking out angles that avoid shooting straight into the sun will stop your shot from being overwhelmed by contrast and flare.
Other Focal Point Tips
When composing your image, try to remember that some elements quite naturally carry a higher visual weight than others. What does this mean? Put simply, some elements will attract a viewer’s attention more than others in a scene, making them a great focal point.
The most obvious of these elements is a human figure. We’ll look at a human figure before anything else in an image, followed by animals and objects such as trees and houses. Other elements with high visual weight are large objects and objects with text.

A portrait simply doesn’t work if your subject doesn’t have sharp eyes. The use of deep red lipstick adds a secondary point of focus, helping to guide the viewer through the image. Photograph by Andrey Zvyagintsev
Key Lesson: Coming back to people (and extending this to animals), it’s essential to make sure that the eyes are sharp if you have a person or animal as your focal point. Without sharp eyes, a person loses their impact and the shot just looks ‘blurry’!
Now, a lot of what I’ve spoken about so far relates to using a small depth of field to isolate a focal point. But what if you’re shooting a landscape? A landscape uses a large depth of field and hyperfocal distance (which establishes where to place your focus to get the largest amount of your shot in focus). So, when you’re shooting landscapes, it’s important to use color, light, and contrast effectively to focus your viewer’s eye. One of the easiest ways to start experimenting is by using leading lines. Look for lines made by the landscape, the sky, or manmade elements such as roads and walls and use them to lead your viewer to your focal point.
Multiple Focal Points
The Viewer’s Perspective
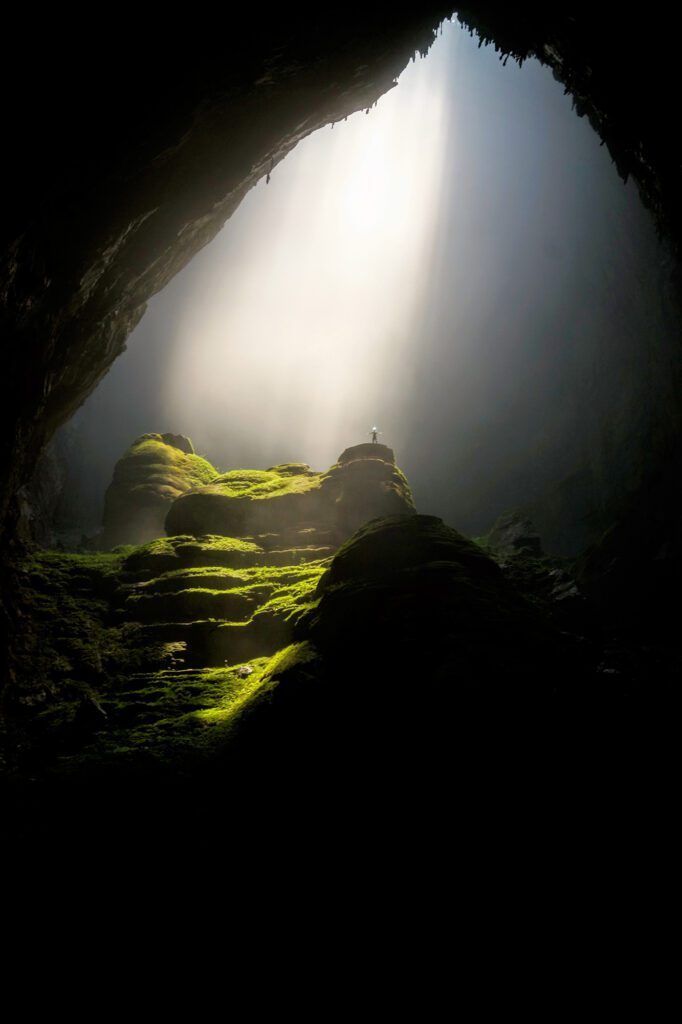
Rays of light and deep shadow provide a striking way to highlight the distant figure in this dramatic image. Photograph by Daniel Burka
We, as photographers, choose our focal points to guide our viewers into an image. But as will all art, the viewer’s response can vary from person to person, and this means that the viewer’s perspective is subjective. A detail can be overlooked by a photographer as an unimportant part of a shot but affect the viewer. Be mindful and aware of a viewer’s interpretation of an image. It’s your job to try and use your technical and artistic skills to effectively communicate with your viewer.
Recommended Reading: If you’d like to master camera settings to create gorgeous, creamy, blurry backgrounds, grab a copy of Photzy’s premium guide: Beautiful Background Blur.
Conclusion
A focal point is essential to any image. It shows your viewer where to look in an image and helps to focus their attention on a shot. This is why it’s imperative to learn the different ways to highlight and use focal points. Finding a focal point within an image is the easy part; making sure that the right visual weight is allocated to it takes a little bit of practice!

- What is the definition of a focal point?
- How do you control your depth of field?
- What will we look at first in an image subject-wise?
- What is an easy way to direct the viewer’s gaze in a landscape?
- When using multiple focal points, should you assign a primary one?