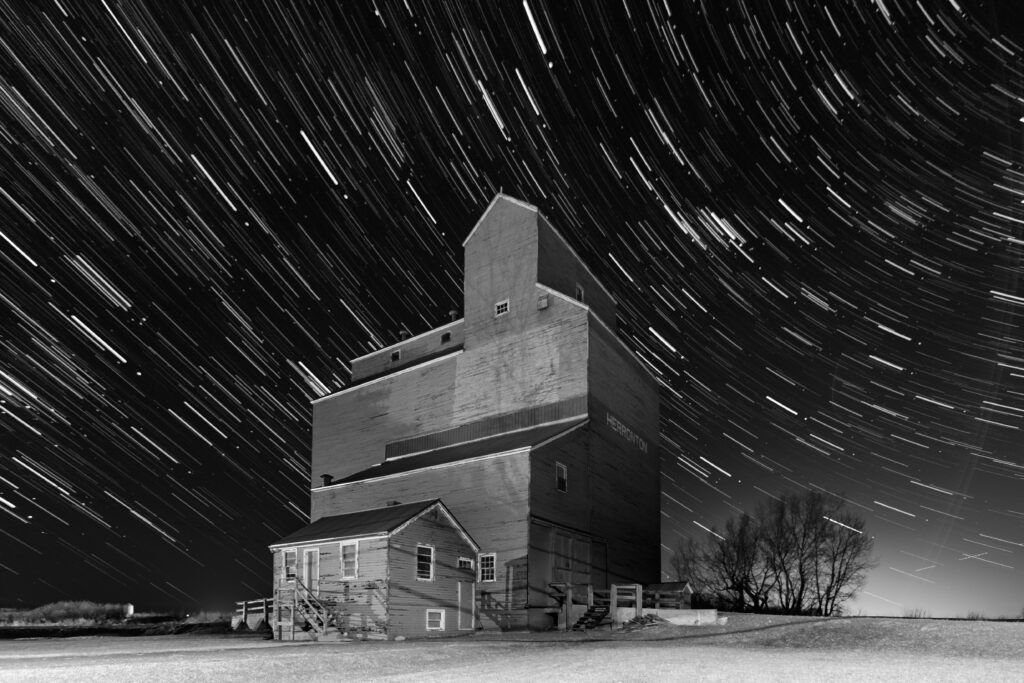

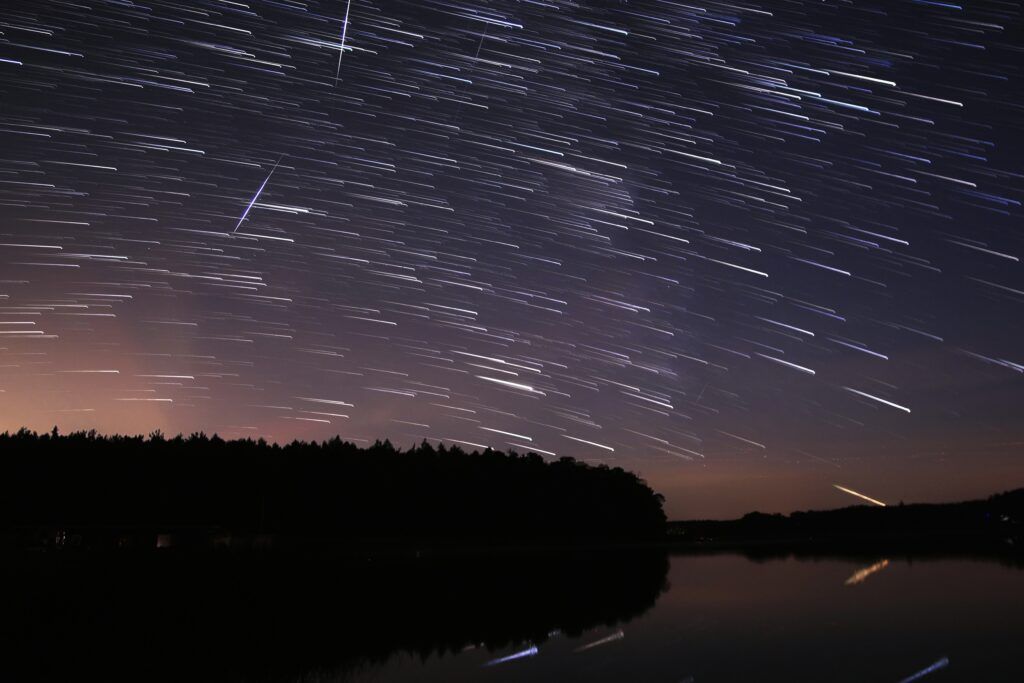
Images of the night sky have recently become one of my favorite things to shoot, but if I can be honest, the night I captured my first-star trail image, it wasn’t something I set out to do. I went out with my partner and a friend to shoot at an old grain elevator. Photographing in and around an elevator that was built in the early part of the 20th century was a unique opportunity in and of itself. When we saw the open skies above the elevator, we knew that it would be a great night to shoot some astrophotography.
I have always loved the night sky, and stars were a great fascination of mine when I was growing up. Like a lot of kids, I learned to identify some of the more well-known constellations such as the Big Dipper, Cassiopeia, and Orion. I was lucky enough to grow up in northern Alberta, Canada, where the aurora borealis is a regular feature in the sky on clear nights. My star fascination didn’t grow into a serious interest in astronomy, but to this day, any chance I get to stare into a starry sky, I take. Dark skies full of stars are one of my favorite things.
I was also fortunate to grow up with a father that was a hobbyist photographer. I didn’t start my journey into photography until later on in life, but I developed a definite interest at a young age because of him. I remember looking at, and reading through, the shelves of photography books and magazines that he had in his darkroom, and some of my favorite images were the star images. The first time I ever saw a star trail image was in the pages of one of those magazines, and the picture of full circles of light in the sky is something I’ve never forgotten.
When we saw the open skies above the elevator, we knew that it would be a great night to shoot some astrophotography.
When I started learning photography, I found several new friends to shoot with and learn from. One of them specializes in astrophotography, and he introduced me to the art of photographing the stars. We’ve been able to shoot dark skies together a few times, and I learned some of the basics about creating simple images from him, and I also did some research into creating star trail images. The key thing I learned is that these images are often created by shooting multiple consecutive frames and using specialized software to stack them together to create the final image.
Photograph by Lisa Cannon
This meant that when I decided to try one of my own that night at the grain elevator, I had an idea of what I needed to do. We settled into the evening shooting different views in and around the elevator, and as we got close to the end of the night, it dawned on me that there was no better opportunity to try a star trail image of my own. I had already gotten several images that I was happy with, but my partner wasn’t quite ready to pack up his gear; I knew I had time to capture the multiple frames that I needed for my final image, and I had just enough knowledge to get me started.
Photograph by Lisa Cannon
I hope that walking you through my first experience will not only inspire you to go out and try an image of your own but will give you the tools you need to be successful and have fun. In this guide, I will share with you what I knew and what I learned in creating the final image.
In this guide, we’ll cover the following:
- Choosing a location
- Composing your scene
- Gear, settings, and using an intervalometer
- Timing and number of images
- Post-processing
Recommended Reading: Want to expand your shooting skills and master photography? Grab our set of 65 beautifully designed and printable Action Cards that will give you over 200 photography assignments to help you take your photography to the next level. Check it out here.
Location
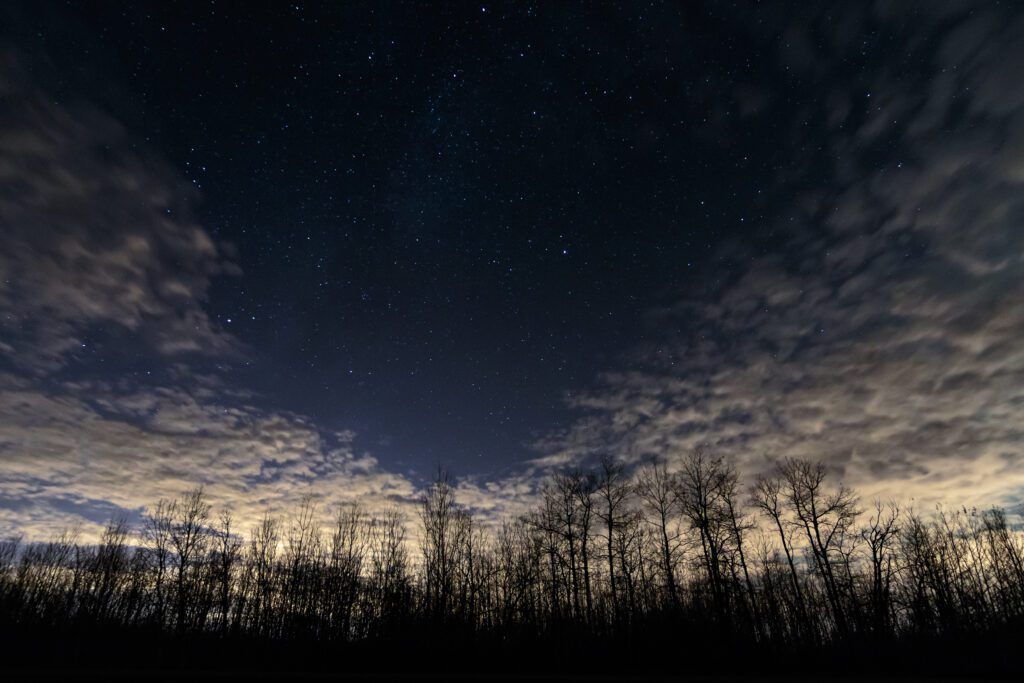
Key Lesson: There are a few things to keep in mind when choosing a location to shoot your star trail image. For the best results, the three most important things I’ve learned to watch for are the open sky, foreground, and light pollution.
Wide, open sky. Photograph by Max Pixel
A wide, open sky will give you an image with dozens and dozens of star trails – a personal favorite of mine. That’s not to say you can’t produce a star trail image with a narrower field of view, but just consider that it will result in fewer trails, and will require a more creative approach when composing your scene.

The narrower field of view. Photograph by Jaanus Jagomagi
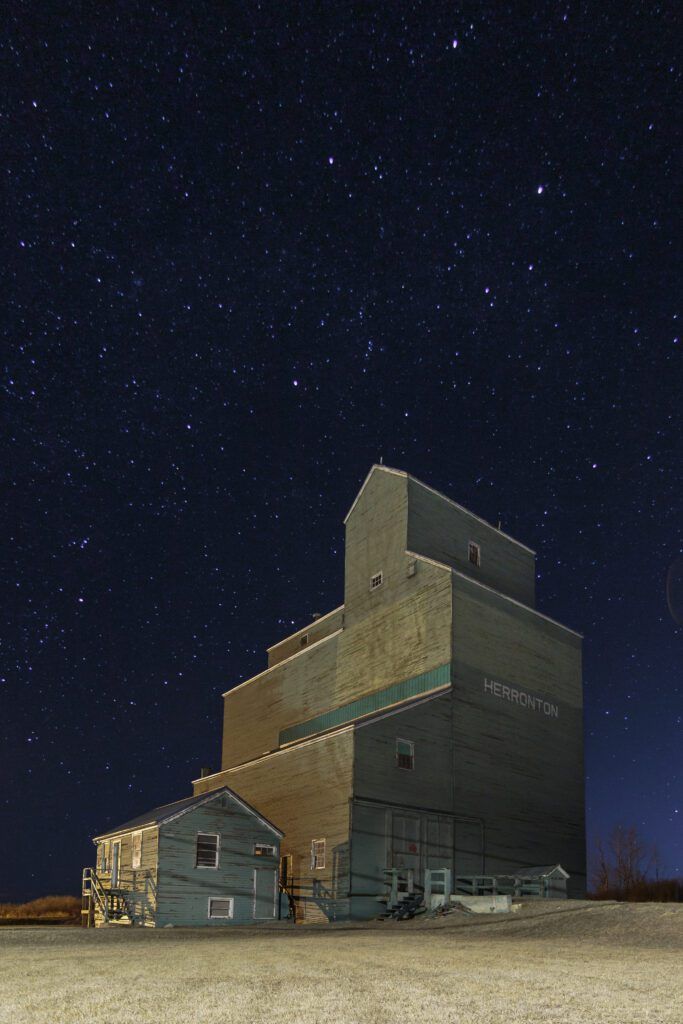
The choice of what to include as your foreground elements are important. You may even choose to include little to no foreground to give your star trails most of the attention. The important thing I’ve learned is that if I am including a foreground, I need to be sure to create a balance within my frame. I want the foreground to add to the image, not to distract from it. In this photo, I decided that the elevator was my main feature, so I placed it in the center and then attempted to balance the amount of open sky around and above it.
Finally, watch for the amount of light pollution at your shooting location. Light pollution not only creates bright spots in your images that can be distracting, but it can also wash out the stars. Ideally, we’d all shoot our starry sky images where there is next to no light pollution. There are online resources such as DarkSiteFinder.com that can help find locations in your area. You may not want to limit yourself to those areas or have one nearby. In that case, scouting locations ahead of time can help when you’re ready to go out shooting. Remember, you can always shoot away from any light pollution to remove, or at least minimize, the amount that ends up in your frames.
Composing Your Scene
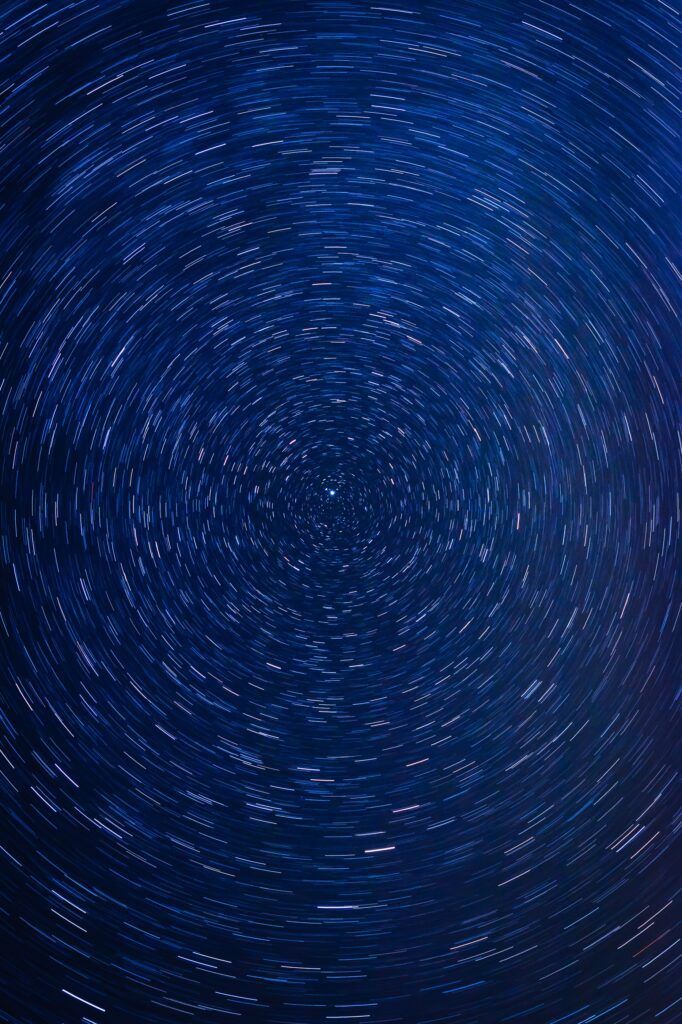
Key Lesson: Once you’ve chosen your location, it’s time to set up your composition. One thing to consider is whether or not you will be including the North Star, or Polaris, as it is the center point for star trails in the sky in the northern hemisphere.
Using the North Star. Photograph by Fred Moon
It is not necessary to have that center-type point, but it is often used as a focal point. You can use free star apps like Star Tracker or Sky View on your phone to help you locate it. Both are available for Apple and Android devices.
Without using the North Star. Photograph by PTNorbert
Now go ahead and set up your shot to include the foreground (if you’re using one), and to work around any light pollution in the area. Don’t forget to consider the balance between foreground and sky. If your location is very dark, you will benefit from shooting a few test frames at a high ISO to check your composition. Just don’t forget to adjust it again before you begin to shoot your sequence. I was lucky that the elevator I used in my image was lit by a couple of street lights so I had no issues composing my scene.
Gear, Settings, and Using an Intervalometer
Key Lesson: You don’t need a specialized DSLR or mirrorless camera to shoot star trails.
Recommended Reading: Want to expand your shooting skills and master photography? Grab our set of 65 beautifully designed and printable Action Cards that will give you over 200 photography assignments to help you take your photography to the next level. Check it out here.
I use my Canon 7D Mark II, which is a mid-level, crop sensor body. However, you do want to use a lens that is capable of wide, open apertures. I used my Tokina 11-16mm f2.8 (IF) DX lens. You will also need a sturdy tripod. I have a Manfrotto Element travel tripod that is small enough to carry around, but sturdy enough to hold up even in some moderate wind conditions.
Finally, you can use an intervalometer to shoot the actual sequence of images. An intervalometer is a timer-like device that will shoot a batch of images for a set exposure time, with a small pause between each frame. I have one built into my camera, as many camera models do, but you can also purchase an external one to plug into your camera if needed.
Because I’ve shot star images before, I know that the wider the aperture, the more light is allowed into your sensor. I set my aperture to f2.8, as that is the widest my lens will go. I’ll be honest here for a second, I thought I had shot my frames using 20 seconds for my exposure time as I was looking to create star trails and not avoid them, but in looking at the data from my RAW files, it turns out I used 10-second exposures. I have no idea why I did that, but luckily it worked. As far as the ISO setting is concerned, I set it fairly low at 400 because the grain elevator in my scene was very well lit and I didn’t want to overexpose it. ISO will vary depending on how dark your environment and sky are, as well as the length of your exposure.
Don’t forget to consider the balance between foreground and sky. If your location is very dark, you will benefit from shooting a few test frames at a high ISO to check your composition.
Focusing can be tricky in the dark, but there are two commonly used methods: find a bright object in the sky like a star and manually focus on that, or set your lens to infinity focus. Make sure to take a couple of test frames to check your focus and then dial in any small adjustments you may need.
The last thing to do is to set your intervalometer to control your camera and create the sequence. You will need to refer to the specific instructions for your camera or external intervalometer on how to set it up as each can be slightly different. It is possible to shoot the sequence without an intervalometer by simply taking exposure after exposure manually, but the intervalometer will make the interval between frames consistent. It also means you can set your sequence and leave your camera to work on its own.
Timing and Number of Images
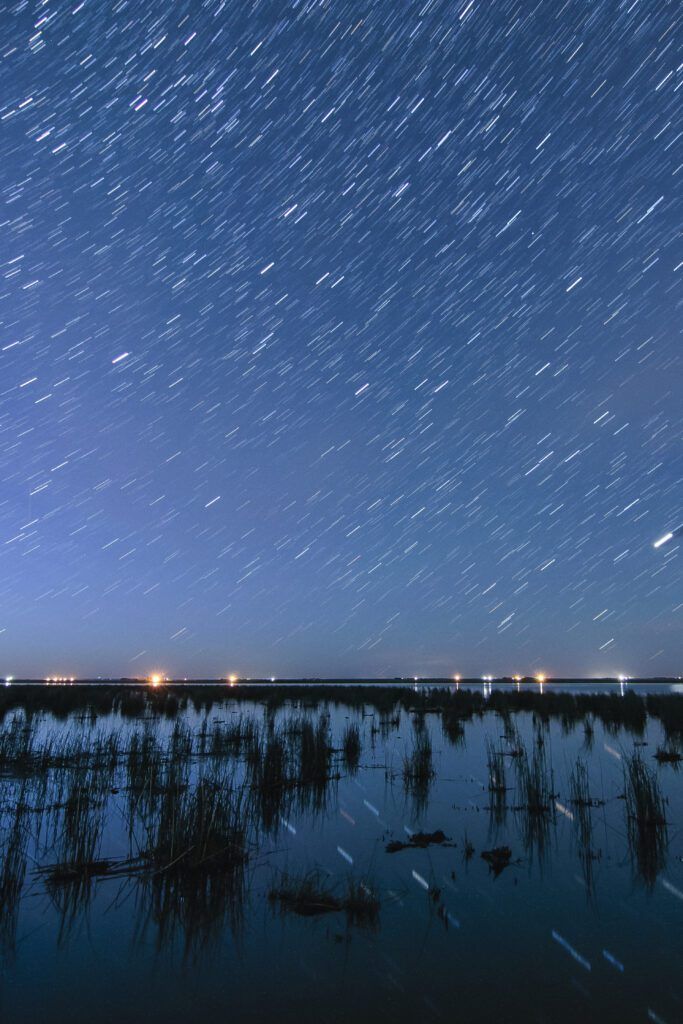
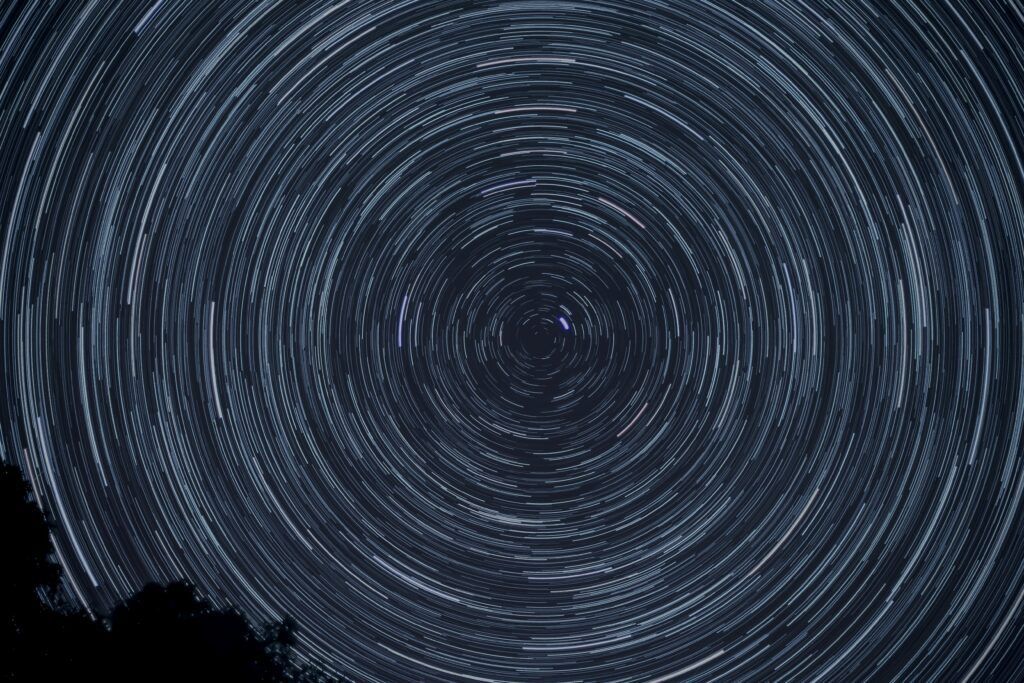
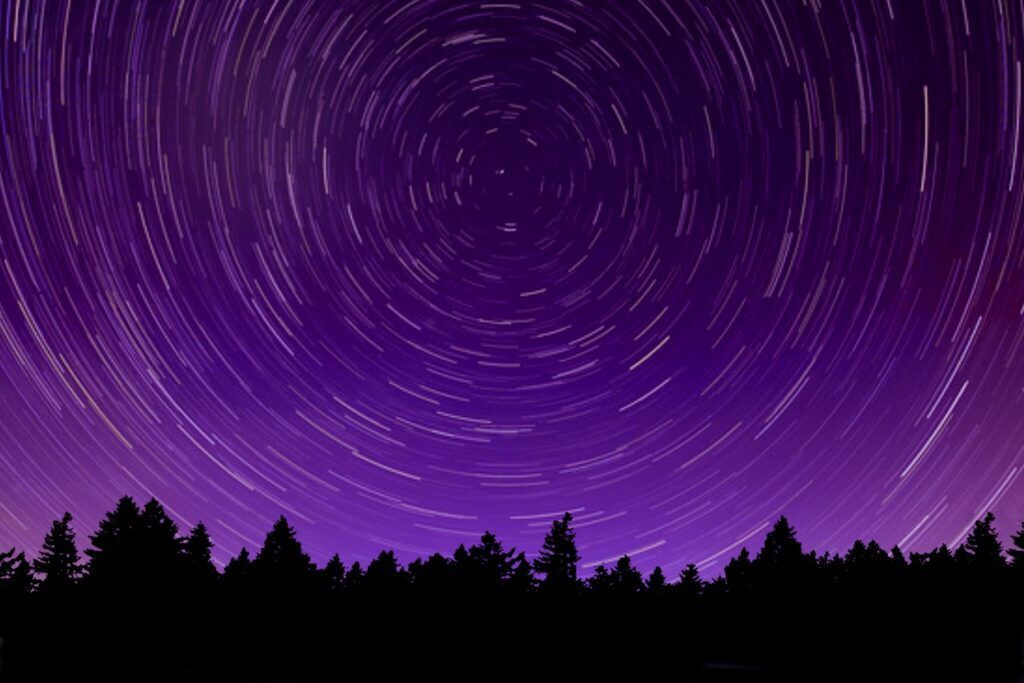
10-frame stack. Photograph by Lisa Cannon
Key Lesson: There is no magic formula; what you want your final image to look like will ultimately dictate how many frames you will need to shoot.
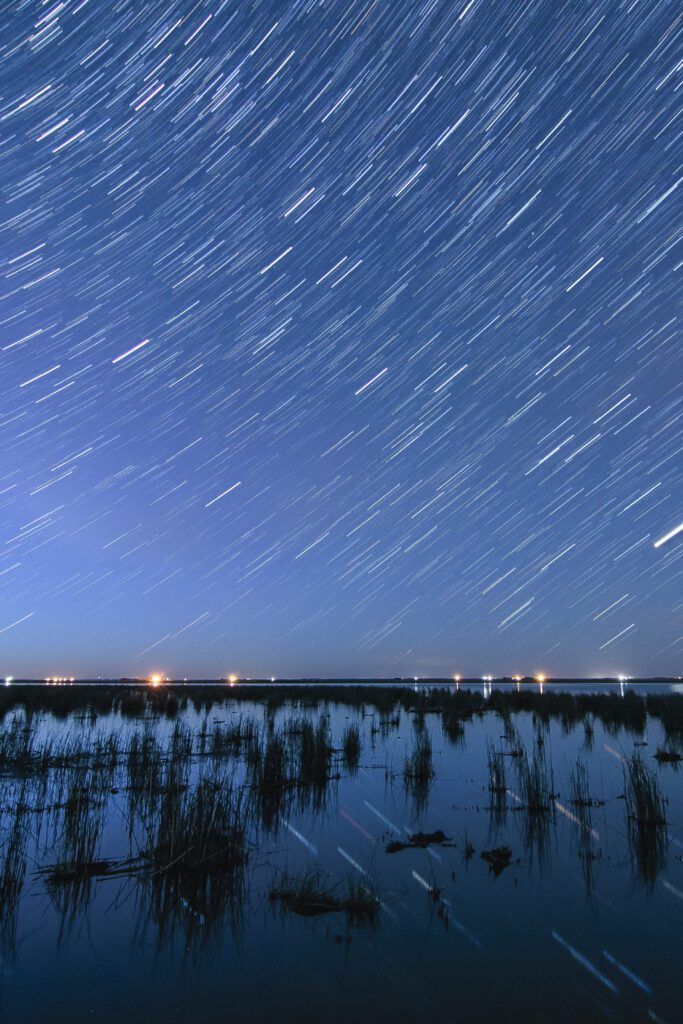
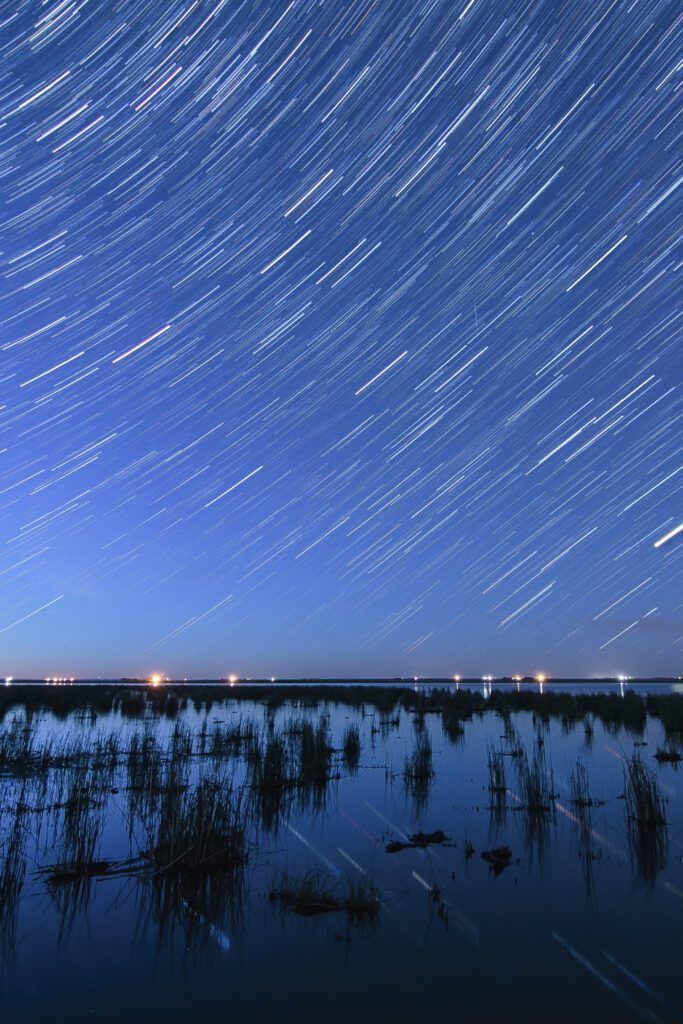
25-frame stack (left), 50-frame stack (right). Photograph by Lisa Cannon
For the image on the left, I set my intervalometer to take 50 10-second exposures. As I said, I did think I was planning to use a 20-second exposure, but I didn’t set my gear to that in the end. I chose to shoot 50 frames because I knew it would give me a fair amount of star trailing once the images were stacked, and it fits within the timeframe I had to shoot in. The more images you shoot, the longer the star trails in your final image will be simply because you are shooting a longer period of the earth’s rotation.
The more images you shoot, the longer the star trails in your final image will be simply because you are shooting a longer period of the earth’s rotation.
Since shooting the elevator star trail image, I have learned that I can simply set my camera to shoot 30-second exposures because trying to create star trails is my goal rather than avoiding them. This will also allow more light into the sensor, which means the ISO can be lowered to compensate. The lower the ISO, the less high the ISO noise becomes a factor in the final image, but you will end up with slightly more long exposure noise. You will learn for yourself what your noise tolerance is and what settings you are most comfortable using to get those results.
I have also since learned that shooting multiple dark frames and stacking them in StarStaX will reduce the noise in your final image. To do this, simply shoot multiple frames at the same settings you used for your star frames, but with your lens cap on. It is important to remember that the dark frames must be shot during the same outing as your star frames because the sensor temperature needs to be consistent. Once you load them into StarStaX, the program will average out the noise in the dark frames, and then use that average to identify and remove the noise in your final image.
Post-Processing
Key Lesson: After you’ve loaded your images from your camera into your computer, you will want to make any edits before you create your stack. I learned during the process that whatever you do to one frame, you must do to all of them.
Recommended Reading: Want to expand your shooting skills and master photography? Grab our set of 65 beautifully designed and printable Action Cards that will give you over 200 photography assignments to help you take your photography to the next level. Check it out here.
Using Lightroom, I was able to take advantage of the batching feature to make that simple. I also chose at this point to convert the frames to black and white because I felt the amount of contrast in the image was well suited for it. Once those edits were complete, I exported all of my frames so that I could load them into a star stacking program.
I uploaded the frames into StarStaX, which I downloaded for free (Sequator is another free downloadable option). StarStaX will take jpg, tiff, and png formats; I exported as jpg, as I didn’t realize until after that I had other options. The program is very simple to use, and there are many tutorials and how-tos available online to explain all of the options available. I left the options all set to the default, clicked the ‘Start Processing’ icon, and sat back to watch the image build. I get quite a little thrill watching as the program builds the image and the star trails take shape. Once it has finished, save your stacked image, and you’re done. If you want, you can import the stacked image back into Lightroom to add some final edits. As I had done all of my editings before I downloaded the frames, the only thing I did was to export it with my watermark. And that was it – my first-star trail image was complete.
My Final Thoughts

Photograph by Lisa Cannon
I couldn’t have asked for a better first experience with a star trail image. The knowledge that I had from previous astrophotography experiences helped a lot when it came to shooting for one of my own. Since creating this first image, I have created one more and find myself watching for opportunities to add to my collection. Hopefully, reading about my first time has helped to inspire you to give it a try, too.
Self-Check Quiz:
- What are three location considerations?
- What is the best type of lens for astrophotography?
- What accessory is highly recommended when shooting your sequence?
- What star can be used as a center point for your star trails?
- What two free software programs can you use to stack your images?
Assignment:
Practice makes perfect, so head out on location scouting missions, or simply pay attention while driving after dark. Take your camera along so you can practice getting your focusing techniques down. Once you start creating your star trail images, don’t forget to shoot varied numbers of sequences so that you can see the different results. You may find you prefer very long trails to short ones or vice versa. The beauty of photography is that there is no “right” or “wrong” image, but we have the freedom to create our visions and preferences. And finally, don’t forget to have fun!