
Let’s analyze one of photography’s long-time compositional dilemmas: whether to shoot vertically or horizontally.
To be honest, I think that most photographers are a bit lazy. Next time you are out with a camera, watch what other people do when photographing. Most take out their cameras, hold it horizontally, point and shoot without seemingly thinking too much about the composition. And to be fair, this automatic technique works…most of the time. But I’d like to suggest that this is not always the best way to shoot for the simple reason that the subject, whatever that might be, may not fit the frame it’s (subconsciously) being fitted into.
What You’ll Learn in this Article:
- The benefits of shooting in either the landscape or portrait orientation
- How to shoot a jigsaw panorama
- How to creatively break up the edges of the frame with software
- How to break the habit of shooting in only one orientation
- Compositional insights
Get Away From the Default
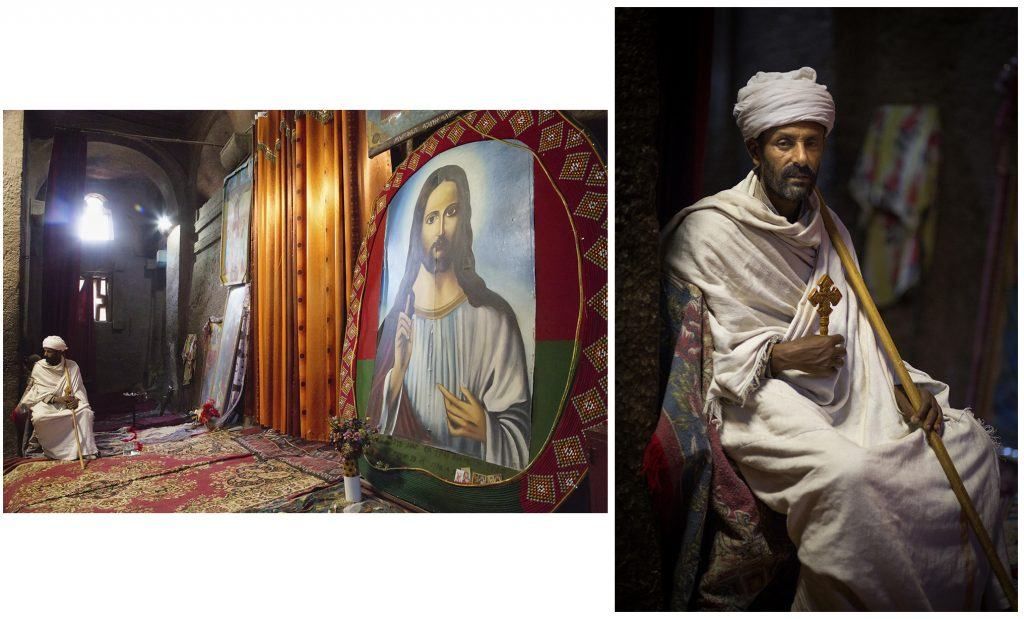
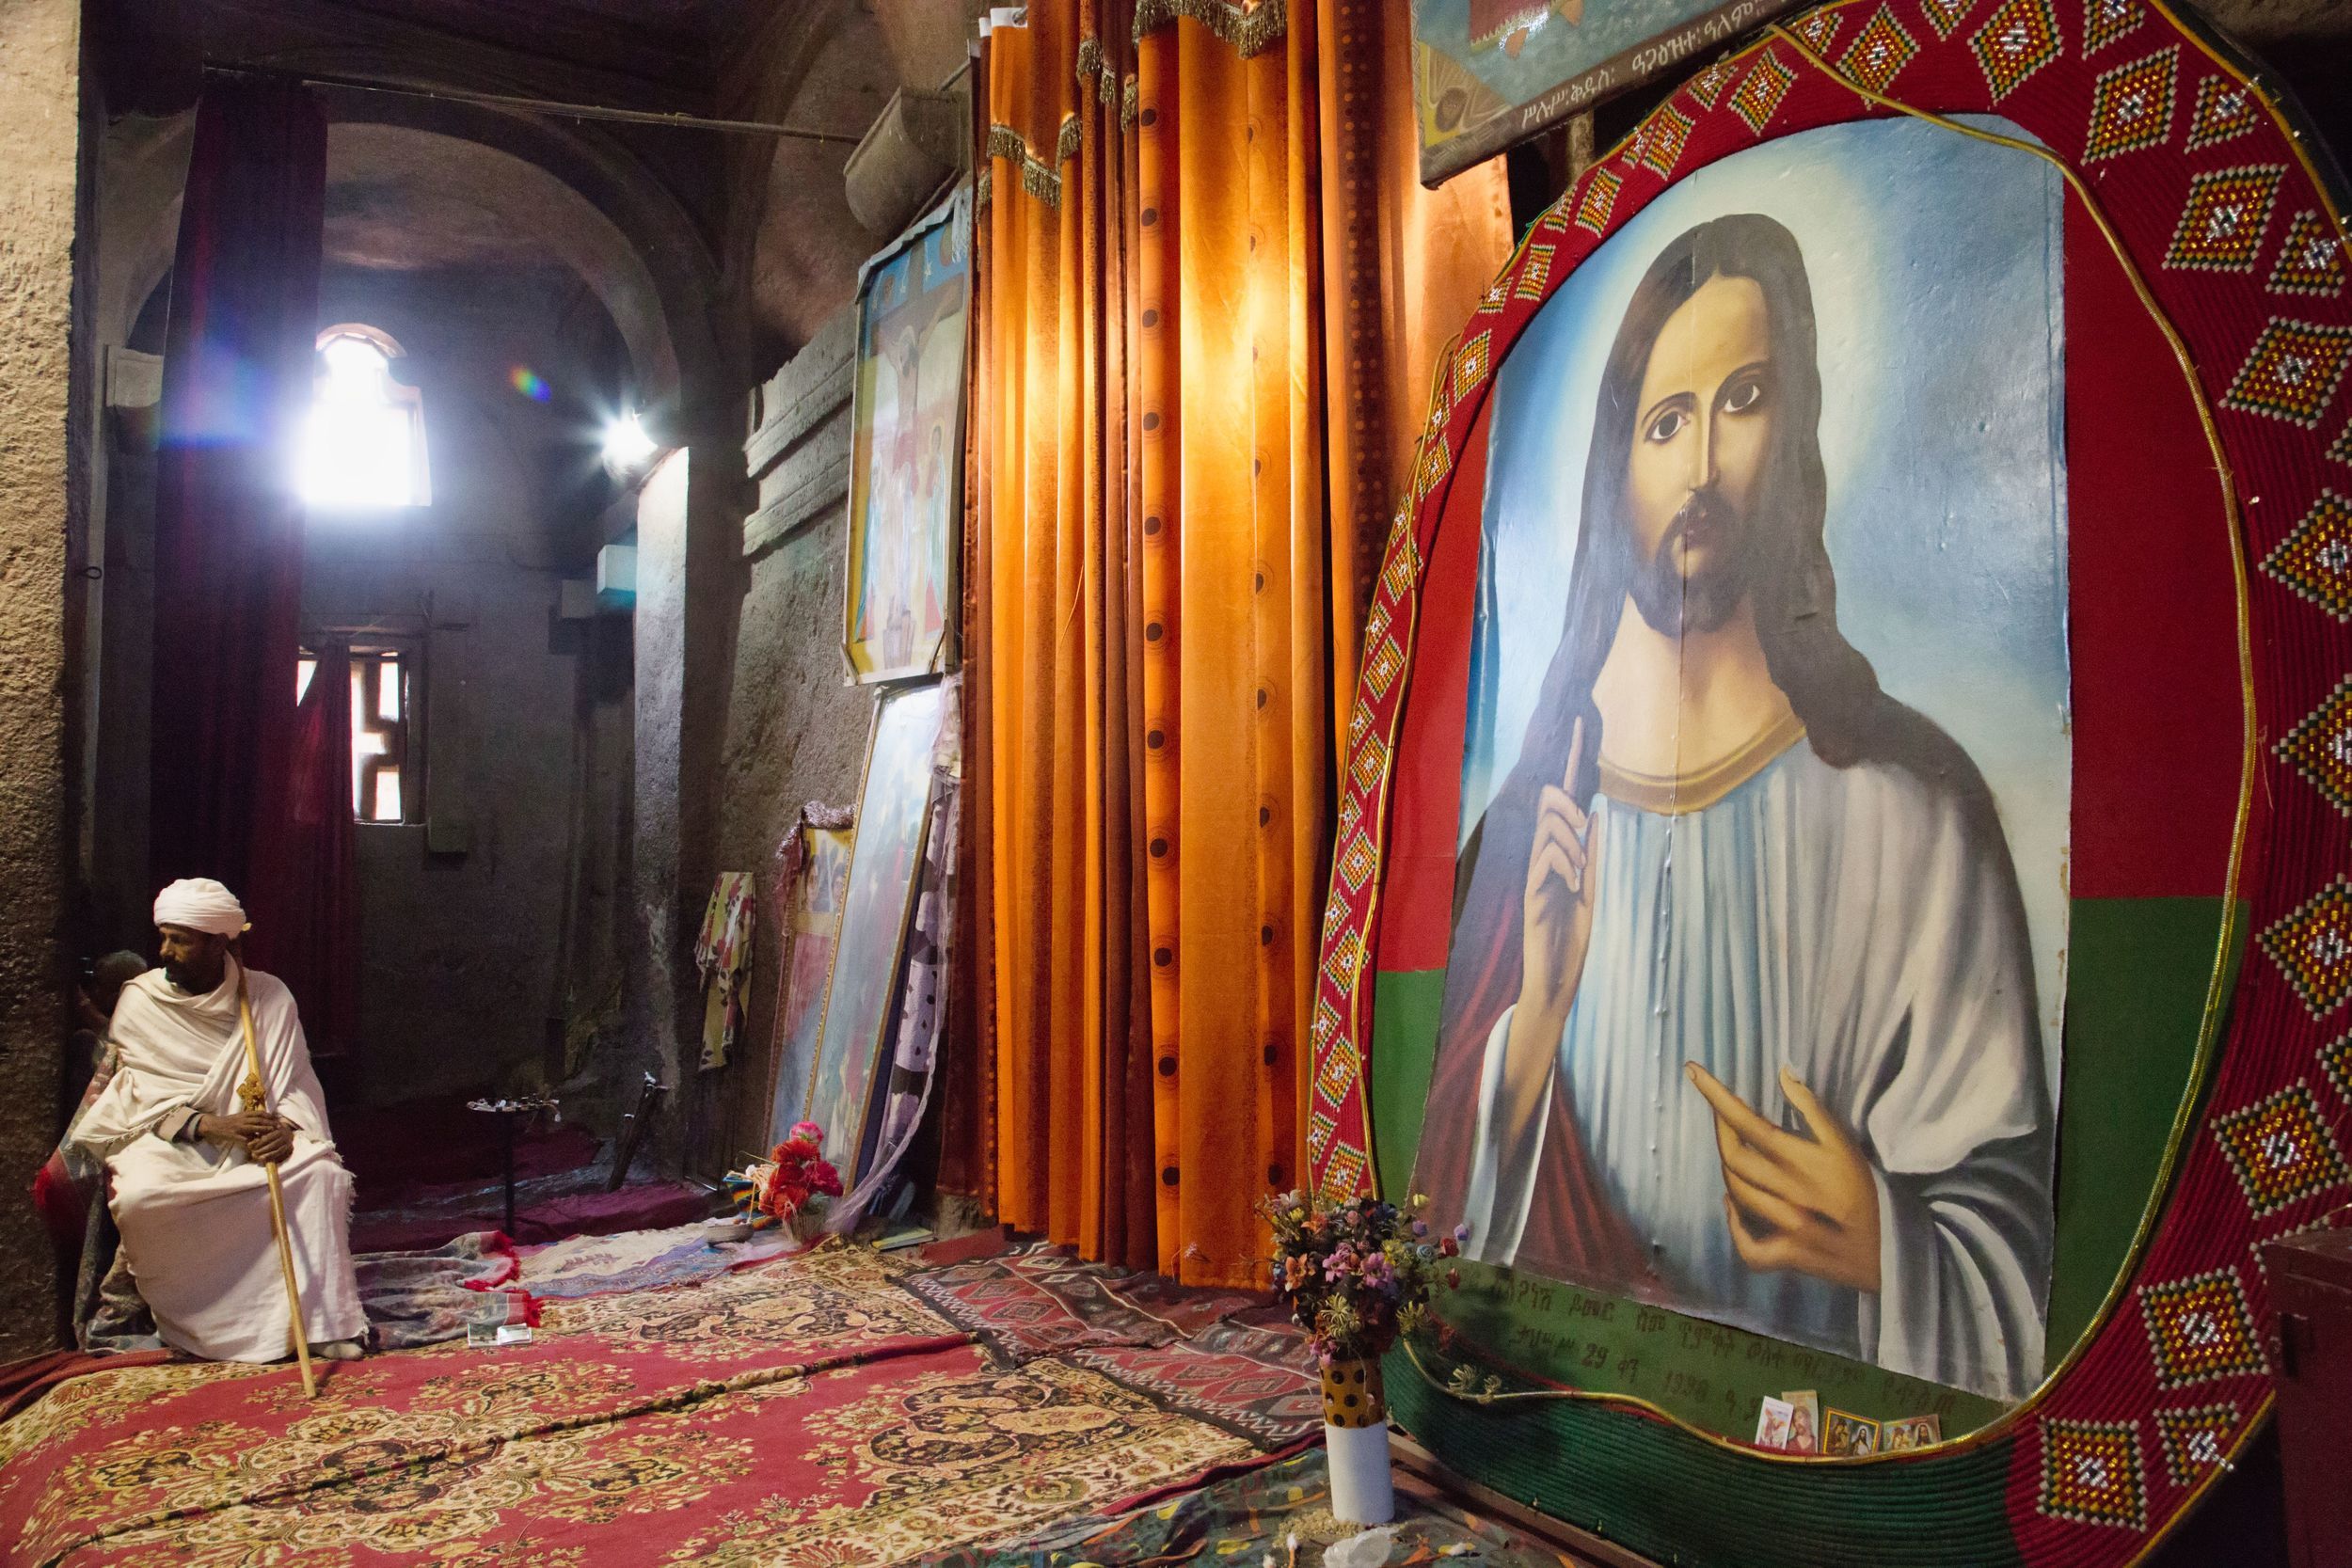
The compositional dilemma in the left-hand scene was how to set the scene in this dark Ethiopian underground church. A wide-angle setting in landscape orientation worked nicely to encompass both the striking painting of Christ in the right-hand part of the frame and the priest sitting off to the far lefthand side. To concentrate on the priest, I swapped my 24mm lens for an 85mm portrait lens and shot him vertically, using the very wide maximum aperture to defocus the (somewhat untidy) background. Photographs by Robin Nichols
When I started out in photography, the difference between shooting with the camera held horizontally (the default position for most of us) and holding the camera vertically was clearly labelled as different formats.
Shooting horizontally was always called shooting in the ‘landscape’ orientation, while shooting vertically was always called shooting in ‘portrait’ orientation. The names should be self-explanatory. A landscape, for the most part, is wider than it is high, while shooting a portrait mostly involves a subject that’s standing up and who is taller than they are wide.
Shooting horizontally is not always best since the subject may not fit the frame it's being fitted into.
I initially wrote that the reason why most of us choose to shoot by holding the camera horizontally was laziness, but actually it’s more about it being the natural way to hold a camera in your hands. That’s the way cameras have been designed for decades, so it makes sense that horizontal is the default position.
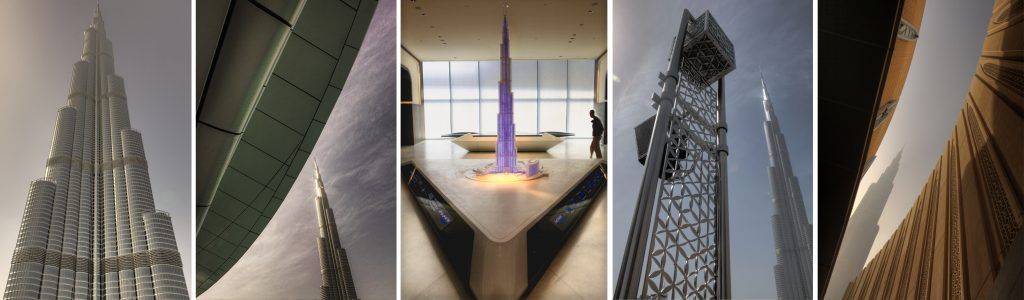
The Burj Khalifa tower in Dubai is synonymous with Middle Eastern wealth. If you are in Dubai, you can hardly miss it! I specifically set out to try and capture it in as many different aspects as possible. Ironically, my personal favorite is the version on the right in its original horizontal format. Photographs by Robin Nichols
The most common viewing devices we use (computer monitors and televisions) are designed to be viewed in the horizontal orientation. iPads and smartphones too, but of course these can be flipped and the image automatically rotates and resizes to fit.
It’s a small wonder, then, that most photographers shoot horizontally, even if the subject is portrait and not landscape.
Is this right or wrong? And do we really care?
Vertical or horizontal? This is the same shot flipped in Photoshop. I preferred the original orientation, on the left. If you don’t shoot one vertical and one landscape orientation, then you’ll never know which might be best. Photographs by Robin Nichols
Recommended Reading: If you’d like to improve your composition skills for better images, grab a copy of Photzy’s best-selling premium guide, Advanced Composition.
Compositionally Speaking
Composition is a technique that has a direct bearing on the image orientation. If you want to give an impression of a wide-open vista, the best way to achieve this is to frame the scene horizontally.
Composition is a technique that has a direct bearing on the image orientation.
I’d even go as far as to say that stretching this format to a width that’s far wider than a regular [viewfinder] frame using a stitched panorama can say even more about the size and breadth of a landscape than a single horizontal shot.
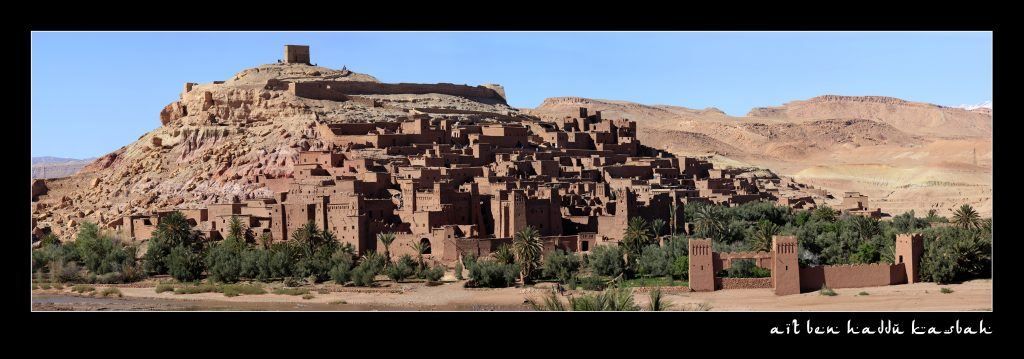
With big scenes, even shooting in landscape format might not be wide enough. Here’s one of Morocco’s most famous Kasbahs, Ait Ben Haddhu. It’s made up of five vertically shot frames stitched together using Photoshop’s Photomerge utility. Photograph by Robin Nichols
Conversely, a vertical composition can be used to emphasize height. This can be immensely effective when shooting tall subjects, animate or inanimate. Wider-angle lenses are particularly good, compositionally, for being able to pack in more detail than you’d get using a typical 18-55mm kit lens.
Why? A wide-angle lens – and I’m talking about anything from a 10mm super wide fish-eye to a 24mm prime lens – not only includes a lot of visual information, but also provides a far superior depth of field, a factor that can produce an impressive crisp, clear visual impact.
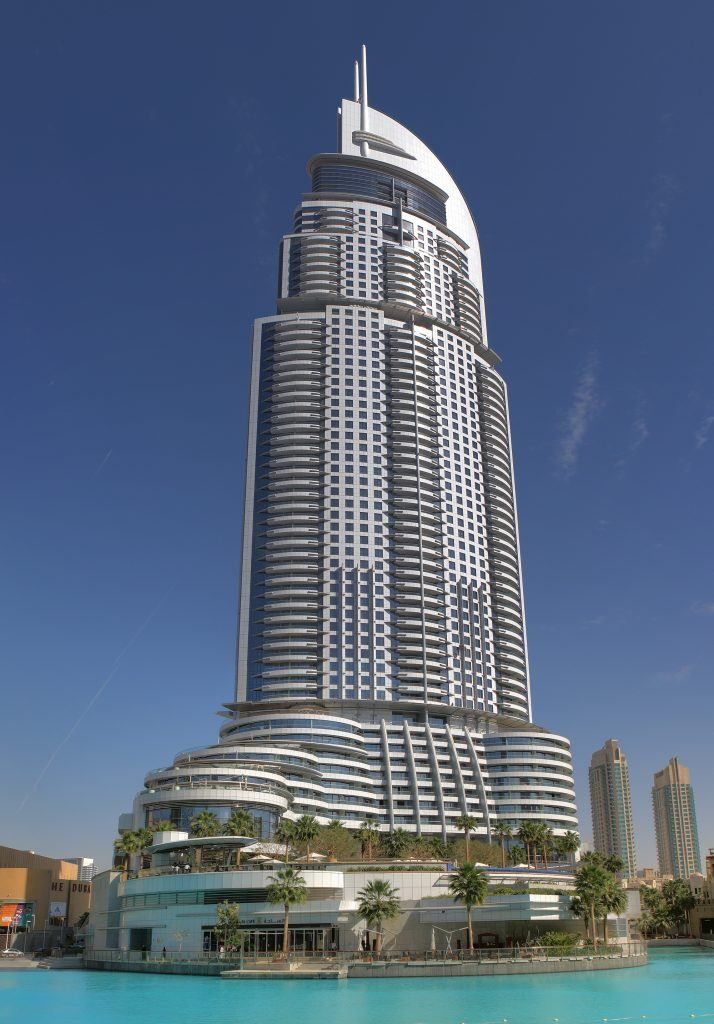
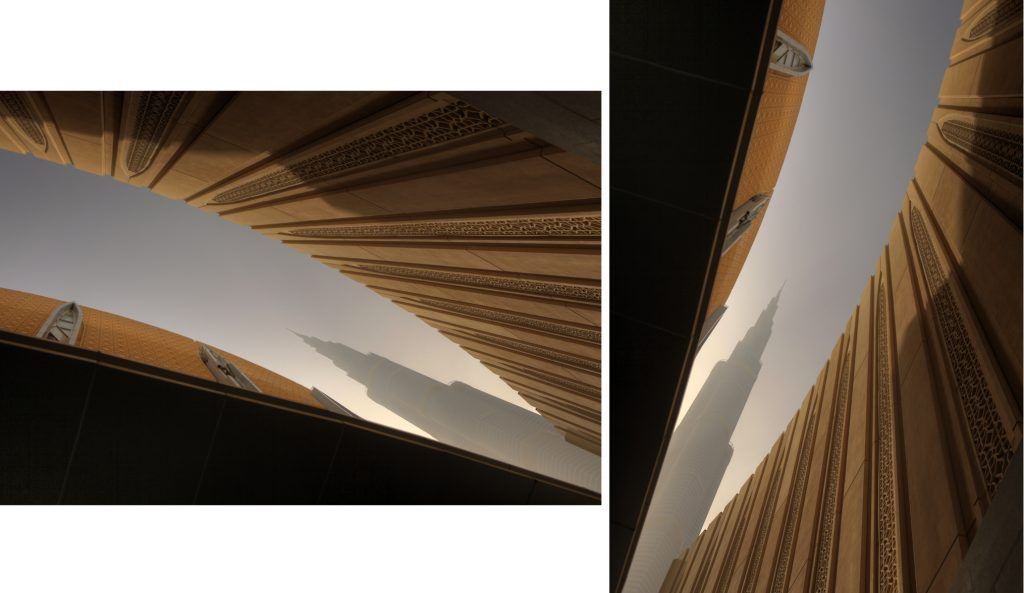
Never forget that panoramas can go two ways: horizontally or vertically. This is a Dubai tower assembled from multiple frames that have been stitched together using Photoshop Elements. Photograph by Robin Nichols
Stick Half-Way
Consider also the possibility of creating a square format. This has been popular with scrapbookers for many years, and now, of course, a square frame can be set to record using your digital camera or smartphone, making it upload-ready for Instagram. (Although not every camera can be set to record a square image, it’s easy enough to crop the file once it is downloaded to a photo editing application.)

While the square format is least used (unless you shoot using a medium format digital camera), it is a default format for wedding albums and scrapbookers. This is a double-page spread from a 12-inch square wedding book I designed for a friend. The format is very conducive for a range of design ‘looks’ that you cannot achieve when printing in the more traditional landscape orientation. Photographs by Robin Nichols
Recording, cropping, or creating a square format solves a lot of compositional problems. The shape of the format can therefore accommodate tall subjects as well as wide subjects with equal ease. It’s also a great format to accommodate subjects that lean at an angle.
Another consideration would be to use the orientation to emphasize shape, direction, and subject weight.
Subjects placed in the very center of any frame often produce less-than-interesting results. Everyone does this, right? So why not use the landscape or portrait format a bit more creatively by shifting the subject to the edge of the frame. Create a classic off-center shot.
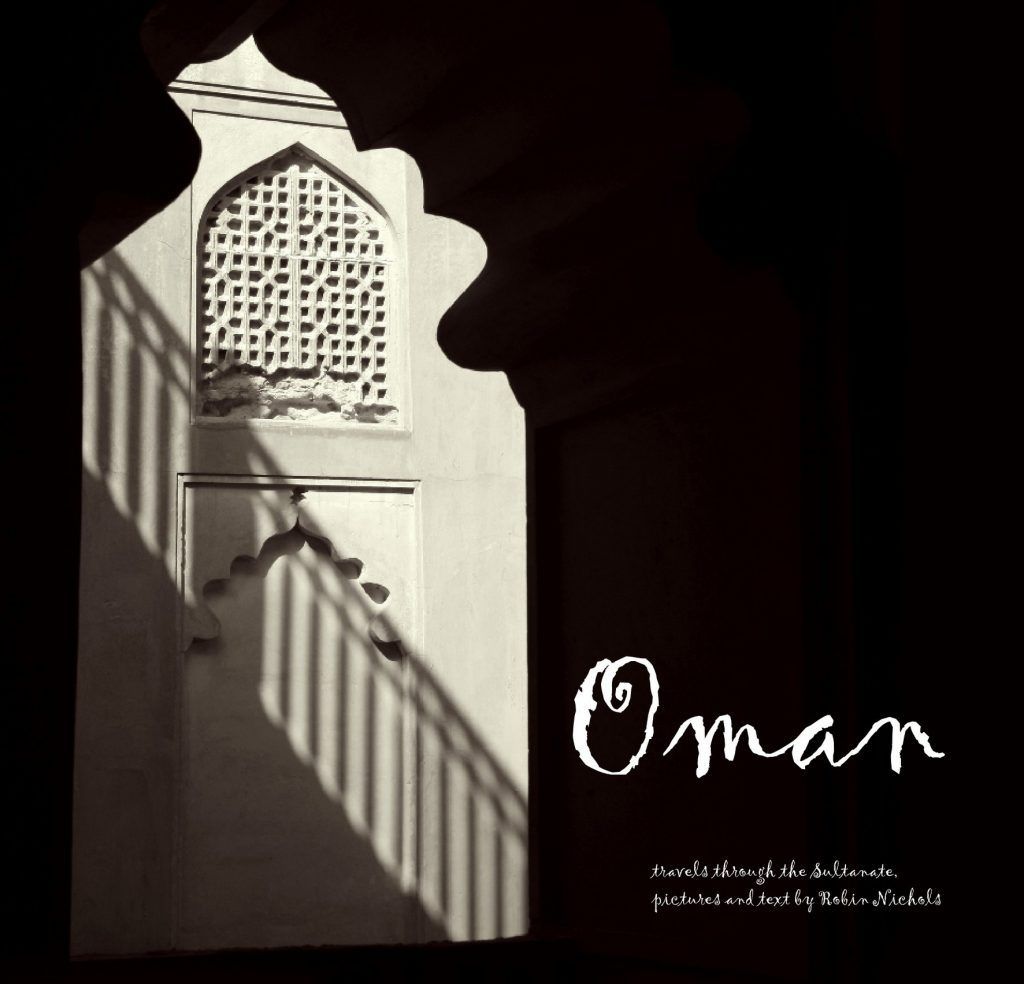
From a design point of view, the square format makes a lot of sense. This is the cover shot I made for a black and white photo book about a trip to Oman a few years back. The open square format lends itself perfectly to a range of options, including the creative use of text. Photograph by Robin Nichols
Breaking Those Rules
Like everything in art, having rules is one thing, but breaking them can open doors you never knew existed. As photographers we tend to live in a rectilinear world, so I particularly like presenting images that do not conform to this norm. One great way to do this is to let the software decide the final shape of the frame’s edges.
Like everything in art, having rules is one thing, but breaking them can open doors you never knew existed.
Do this by creating a jigsaw panorama, capturing a series of randomly shot scene sections that are then assembled in post-processing using software like Adobe Photoshop Elements.
How this is done:
- Shoot a test frame in the field to gauge the exposure. Use Aperture Priority mode. Then use exposure compensation, in conjunction with ISO, to adjust the shutter speed and exposure, if necessary.
- Make several exposures across the scene. The point of a jigsaw panorama is to not use a wide-angle lens setting but rather use one where the lens is zoomed in slightly. This produces less optical distortion but means you have to shoot more frames to cover the subject.
- Divide the scene into a series of frames, left to right (or right to left) and up and down, and start shooting. The order and the direction in which you shoot does not matter.
- Make sure that the entire scene is covered in your snaps. If you think you might have missed a bit, just go back and reshoot. It makes no difference if you overshoot the scene with too many frames – the software sorts it out.
- Open all the frames in Photoshop Elements and, using its Photomerge function (Guided Edit mode > Photomerge > Photomerge Panorama), create a panorama.
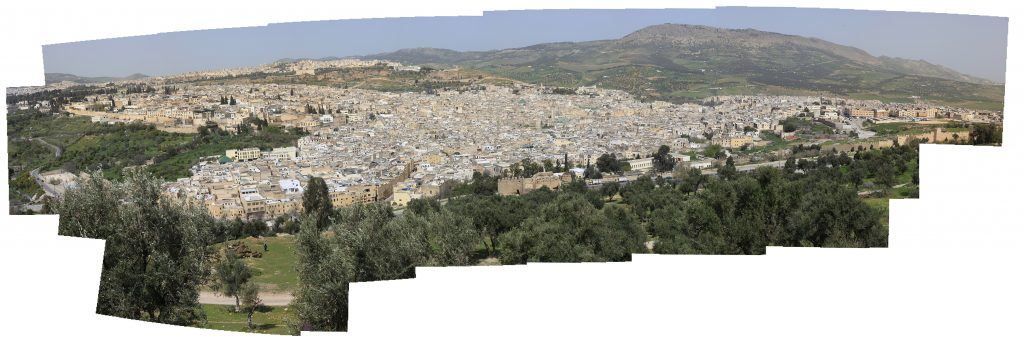
Breaking the rules can mean almost anything. Here, I recorded the scene from a distant hilltop and shot 38 frames and then let Photoshop try and stitch the image together. The result, as you can see here, was a flawlessly stitched horizontal panorama with a very uneven edge. I purposely left it like that to break the rectilinear mold that photography is so often restricted to. Photograph by Robin Nichols
Somehow, the software works out where everything goes and produces a stitched result. Because the jigsaw is made from a lot of individual frames, randomly shot in a freehand manner, you’ll find that the edge will not be rectangular. In fact, it might look completely irregular.
This can then be saved and used as a specific ‘look,’ or cropped to the usual rectangular format. Though quite random, often the irregular edge shape that this technique produces can look quite good – different, at least. My record is a jigsaw panorama shot using 38 image sections, which produced a stitched file that was over a gigabyte.
And don’t forget that panoramas don’t need to be only in the landscape orientation. There are plenty of subjects that deserve to be shot vertically rather than horizontally.
Recommended Reading: If you’d like to improve your composition skills for better images, grab a copy of Photzy’s best-selling premium guide, Advanced Composition.
Cover All Your Bases
One of the best mantras I have ever heard about composition is, “Once you have shot a landscape frame, flip the camera 90 degrees and shoot a vertical version.”
Cover your bases. Doing this means that you never get into a situation where you look at your images only to think you wished you’d have shot it in another orientation.
OK, you might shoot a lot of extra frames that you never use, but at least having the two gives you a choice, especially pertinent if you are not revisiting the same location.
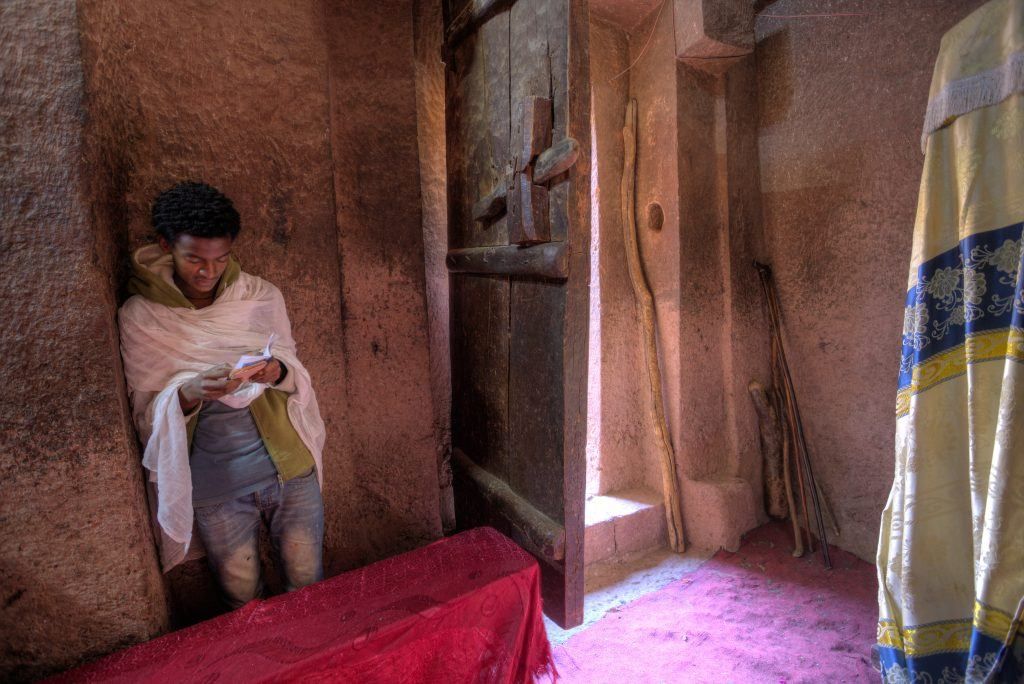
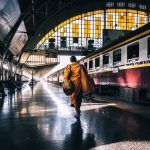
When it comes to adding a sense of dynamism to an image, off-center subjects often produce the best results. Why? An off-center subject is not only unusual (most of us just plonk the subject in the center of the frame), but it also creates a subconscious sense of tension or imbalance. And that’s a good thing. Actually, I was shooting the light passing through this centuries-old church door in Ethiopia when this man came in and leaned against the wall to the left, perfectly balancing the ‘weight’ of the heavy door to the right. This would only work if I’d framed it in the landscape orientation. Photograph by Robin Nichols
Besides, you might be pleasantly surprised at how good a subject might look if it’s represented in a different orientation. If you never try it, you’ll never know!
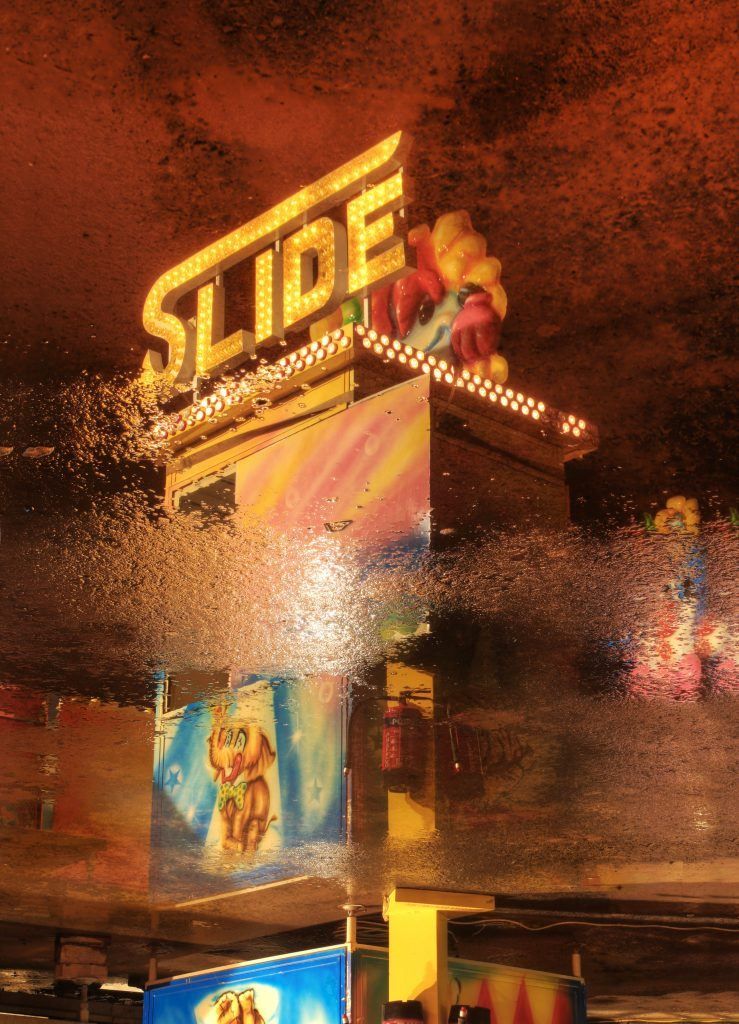
As a final comment on whether to frame landscape or portrait, here’s a typical response to a vertical scene: funfair reflections snapped in the portrait orientation. But it’s actually upside down (flipped in Photoshop) because it creates a bit more of a visual puzzle. Photograph by Robin Nichols