

- Optional Add-on: If you end up enjoying this article (...no pressure ha!) and you want to dive a little deeper into the topic, I've got an extra special upgrade for you at the end... So stay tuned! Thanks for reading!
I have a propensity for making things complicated.
My decision to learn to use my iPhone for street photography (that I love to shoot) is probably an example of that.
Why in the world would I not just stick with my old, reliable Olympus?
First of all, it is the challenge. I see beautiful, even extraordinary street photography created with mobile devices displayed on Instagram every day. I decided to give it a try. It did not really occur to me how much of a learning curve there would be to shift to this type of camera.
What you will learn from this guide:
- The challenges that must be overcome to use a cell phone camera for street photography
- How to train yourself to work with a “fixed” lens
- How to make the change from relying on a zoom lens to utilizing the camera position for composition
- The advantages and disadvantages of a cell phone camera
- Using “App” processing
- An introduction to the street photography technique called “Fishing”
Why shoot with a camera phone?
Part of the challenge is that I am used to having a zoom lens with a focal length of 24mm to 80mm on my Olympus.
I generally shoot in the 80mm focal length range because I am not the bravest street photographer out there.
If you read about street photography, then you know that the best of the street photographers often use fixed prime lenses.
The lenses on cell phones are fixed optical 30mm lenses (plus or minus a little), depending on the phone.
Here is the learning opportunity that I have carefully avoided until this moment…
I will learn to move me, instead of the lens, to get the picture that I want.
It seems to me that it will be a valuable skill even when using the trusty Olympus camera that I’m used to.
- Key Lesson: Using your cell phone camera for street photography will force you to develop the skill of recognizing good camera POV (point of view) for composition rather than relying on a zoom lens to compose
Another compelling reason to master a cell phone camera is that you always have it with you. This opens up a whole new world of opportunity – opportunity to take pictures of people going about their everyday lives, and those are the images that I particularly like to take.
Without an iPhone, I would never be able to create as many of these types of pictures; a normal camera simply attracts too much attention.
- Key Lesson: By always having your cell phone camera with you, you have a greater chance of capturing unique “spur of the moment” photographs that would be difficult to capture with a “regular” camera.
There is one last reason that I am determined to learn to use my cell phone camera for street photography.
Street photography is very exhilarating.
I would like every photographer to at least give street photography a try, just to experience the fun that we have taking street pictures.
The DSLR cameras used by photographers in other genres are often poorly suited for street photography. They are large and heavy, and they generally have to be held up to your face. A subject on the street will generally always notice a DSLR camera in your hands.
"I would like every photographer to at least give street photography a try, just to experience the fun that we have taking street pictures."
Almost everyone has a mobile device with a camera, and almost no one on the street will notice it.
If you are new to street photography, or would like to expand your camera options for street photography, I invite you join me in this learning experience to take street photography using a mobile camera device.
- Key Lesson: A cell phone camera does not have to be held up to the photographer’s eye, which gives an extra boost to your stealth mode when taking street photos.
- Note: If you’re interested in improving your post-processing workflow, check out Photzy’s Understanding Masking premium guide. It has a section for Lightroom and Photoshop, as well as Snapseed for mobile users too.
The difference is in the distance
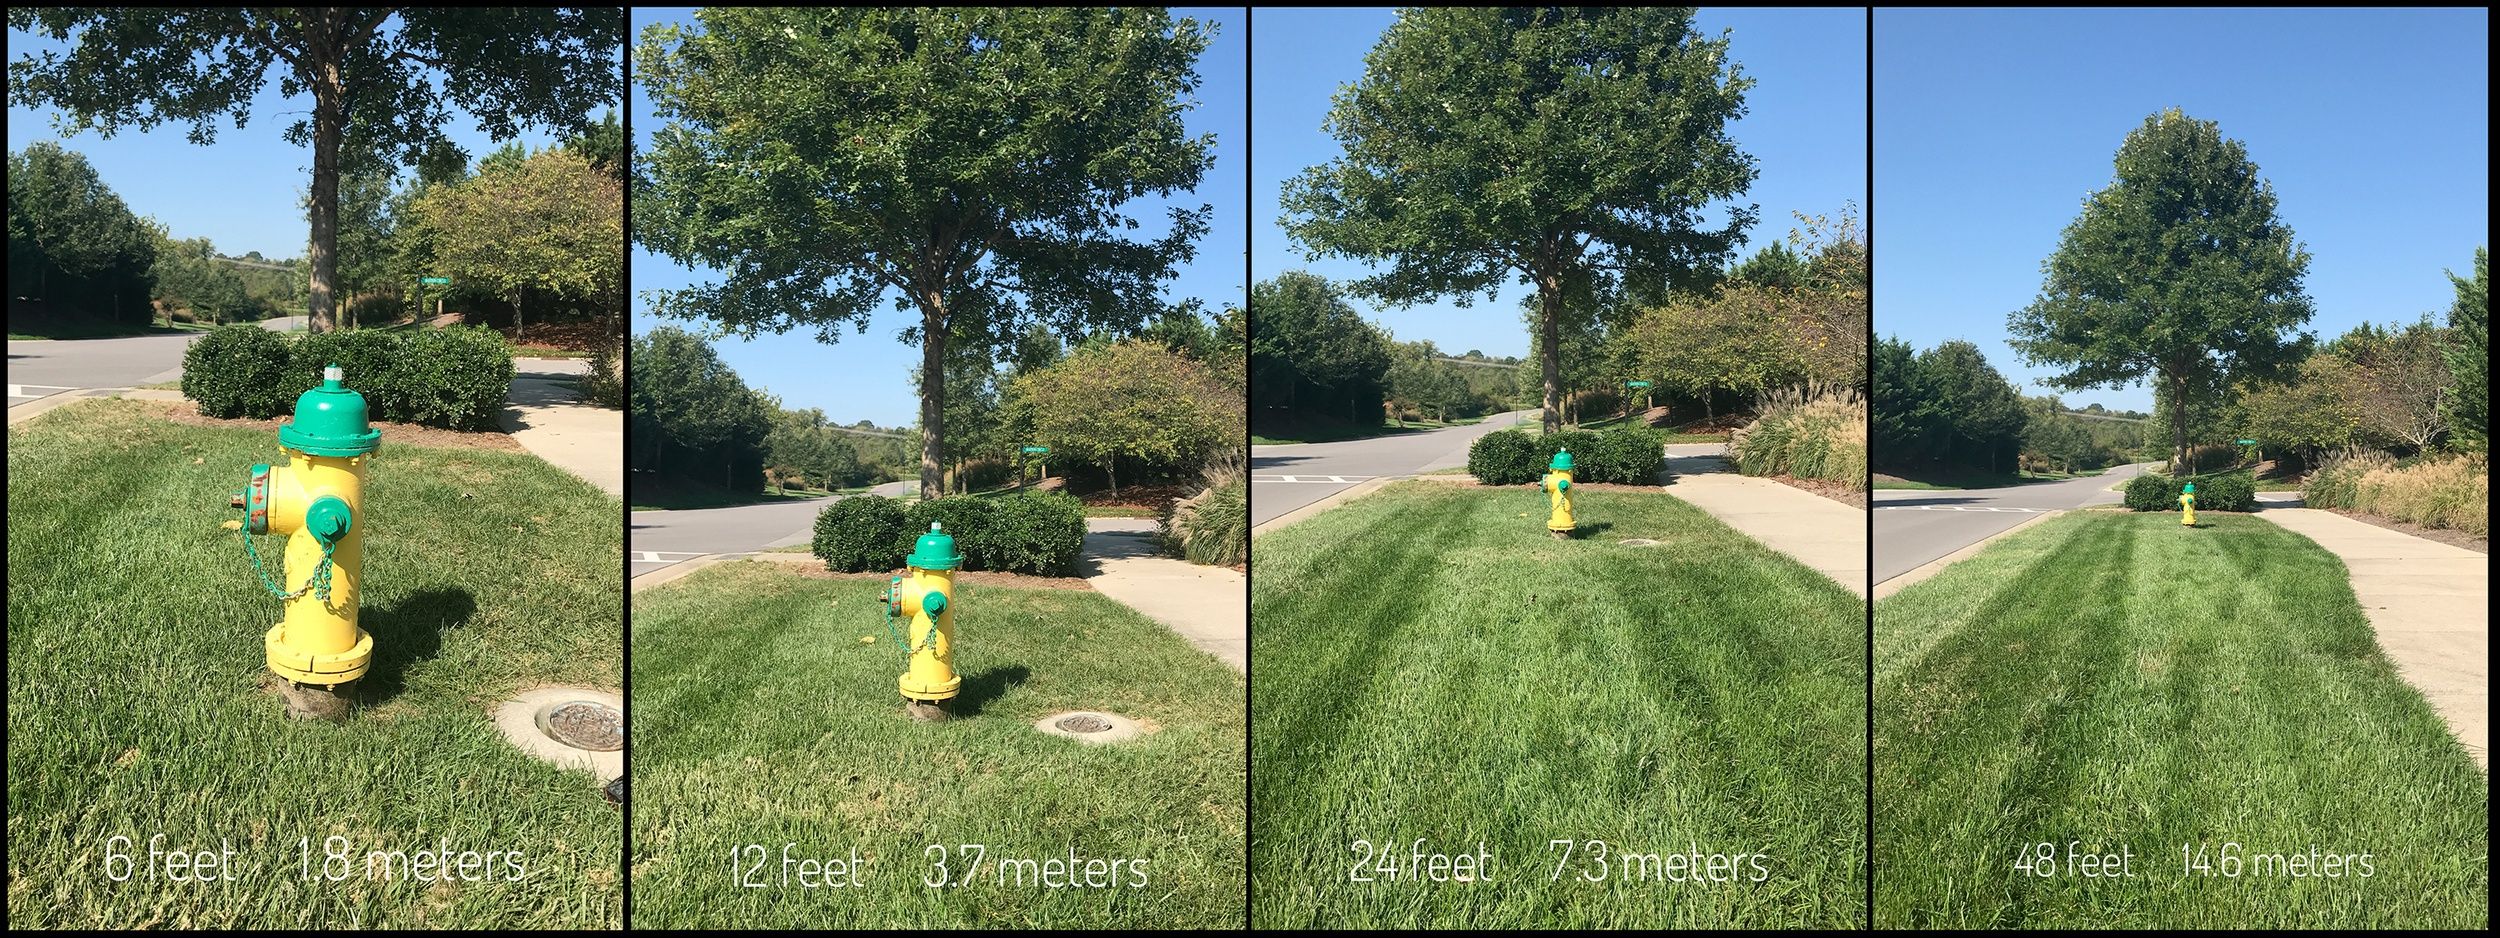
The first problem that I had to overcome was my poor understanding of how close I had to be to the subject when creating various types of street photos. This was particularly true with the “close-up” images taken by other mobile camera photographers that I have admired so much.
Aside from the issue of being limited to a 30mm camera lens, which feels like a fairly wide-angle lens, the opportunity to crop in post-processing is also limited by the resolution of the image file.
My 4/3rds Olympus, with its 16-megapixel file, does not set records for file size, but pictures from my iPhone 7 are only 12 megapixels.
- Key Lesson: With cell phone photography, you must be more alert to filling up the frame, as you don’t have as much resolution to work with when cropping.
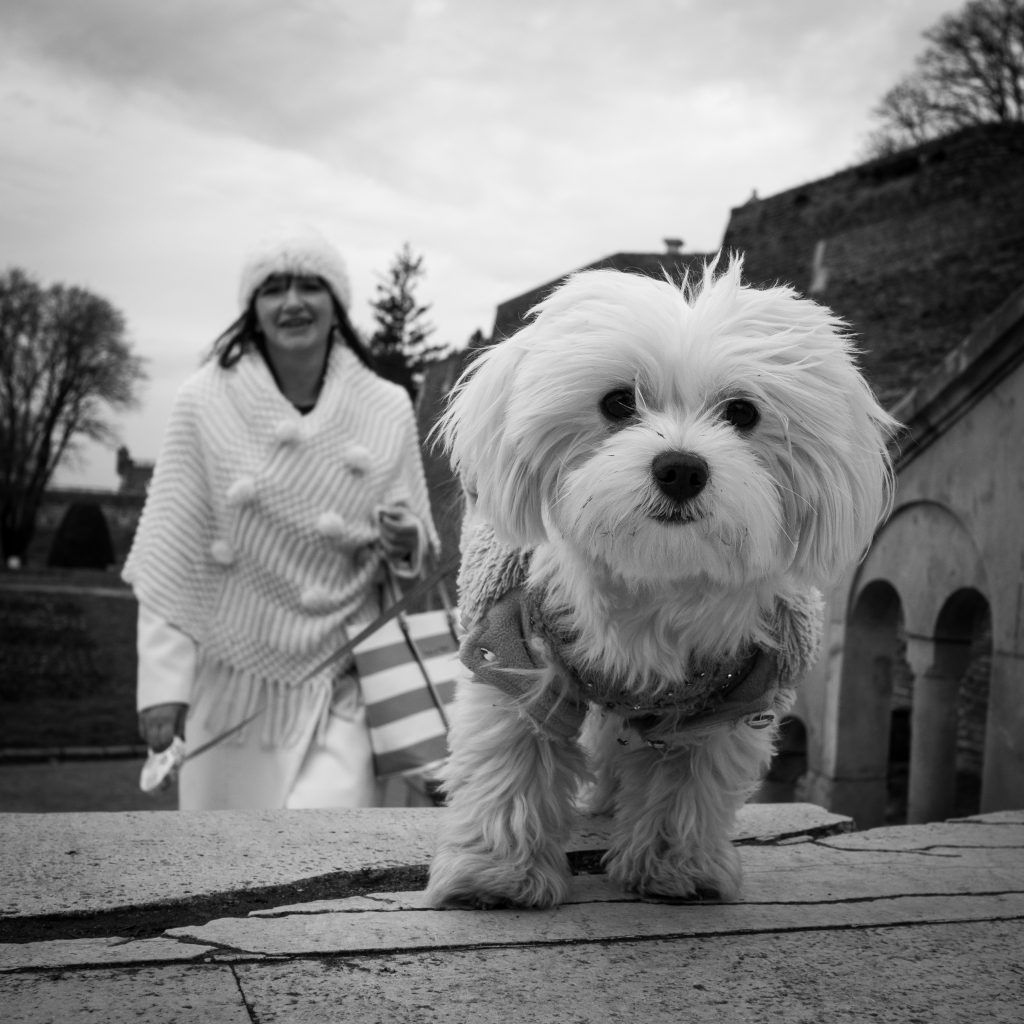
I already knew I was in trouble with subject size because I had asked John Farnsworth, whose gallery I suggest you peruse on Instagram, how he had taken his beautiful cell phone close-up images.
“Easy,” he replied. “I get a seat on a ledge, and when someone interesting comes along, I raise my phone and click.”
So I did that.
My first time out was not exactly the outcome I was expecting, but the picture above does have its charm.
To become more familiar with distance and subject size, I used a fire hydrant as a test subject. (It was very cooperative and stayed in one place.) I took pictures from approximately 6’ (1.8 meters) to 48’ (14.6 meters) away from the hydrant.
Practice shooting
Now it was time to start practicing, because in the end good photography is to a large degree a matter of practice.
The benefit of always having my iPhone with me became immediately apparent.
In fact, every shopping trip, every time I was out in my community, I could take pictures.
My trips to the store were a good place to start because I did not have to move in too much, and there was some geometry to the buildings, and the equipment, that could help strengthen my compositions.

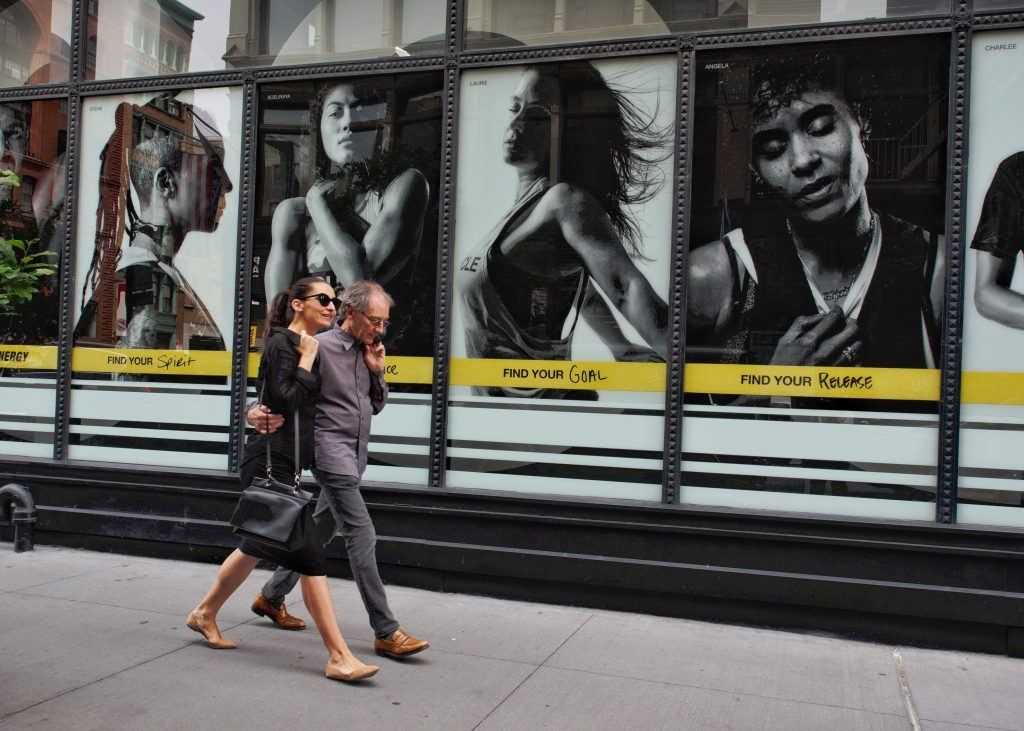
The first picture taken in my new endeavor was in a grocery store parking lot. I like catching the quirkiness of life. This umbrella fixed to the top of a hydraulic lift drew my attention (photo above). Then, I noticed for the first time that when a brick building is being painted, it could be painted one brick at a time. Who knew?

The next big opportunity came inside of a Walmart store. Here, I realized two things. I have to hold my iPhone a little higher than my Olympus because if I don’t, I cut off the subject’s head.
I also missed the Olympus camera flip screen because I learned that holding an iPhone in the angled position that is necessary to see the screen does not produce a sufficiently vertical picture. Unfortunately it is also a big tip off to a potential subject that you are taking a picture and not just texting someone.
Post-Processing cell phone images
During the Walmart photo excursion, I came to understand post-processing a cell phone image.
Often you will see filters used on such pictures.
I used a filter on mine. I processed it in Snapseed, which is a free and powerful post-processing app developed by Google. Several filter steps later, my final step was applying the Snapseed Drama 2 filter.
I am not sure that it will ever be award-winning post-processing, but it helps overcome the challenges of resolution and focus that are often an issue with these wide-angle, relatively low-resolution photos. I like it! It is something different.
In the end, theory is just theory, and it was time to get lots more practice. I would have to say that my practicing is still in the early stages.
The reality is that no matter which camera you use, you cannot practice street photography “too much.” The better you can anticipate a set of events, or recognize bits of irony in what you see, or find the best light in a given moment, the better your pictures will be.
The better you can anticipate a set of events, or recognize bits of irony in what you see, or find the best light in a given moment, the better your pictures will be.
Even with the iPhone mobile camera, I fell back to the comfort of known street photography strategies.
For example, it was comparatively easy to “fish.” Fishing means choosing a background that will be the cornerstone for the composition first. It can be chosen because of the lines, color, or text of signage
Then, it is a matter of patience – waiting for the right person, or people, to walk through the scene.
When I am fishing, I practice; that is, I take picture after picture as I wait.
As a practical matter, practicing on a cell phone does not include changing the exposure settings as I would with my Olympus, at least not until I started using the ProCamera shooting app, which is another free app for cell phone photography.
Shooting with the ProCamera app, instead of the built-in iPhone camera software, allows for incredible expanded choices including image file options such as shooting in the raw format and even shooting in the manual mode.
I am definitely not that fancy yet, but the app allows me to easily set the exposure selection point in a different place than the focus selection point.
I also use the exposure compensation option so I can vary the light coming into the camera.
- Key Lesson: There is numerous shooting apps for cell phones. Many of them are free or very inexpensive. Don’t be afraid to try them out.
Mainly though, I change how close I am to the background and how close the people are to me who are walking through the background. I generally find I get the best results with people closer to the background.
- Key Lesson: Develop a shooting style that includes focus, exposure, and positioning of the camera to the subject to the background.
- Recommended Reading: If you’re interested in improving your post-processing workflow, check out Photzy’s Understanding Masking premium guide. It has a section for Lightroom and Photoshop, as well as Snapseed for mobile users too.
Light and reflection
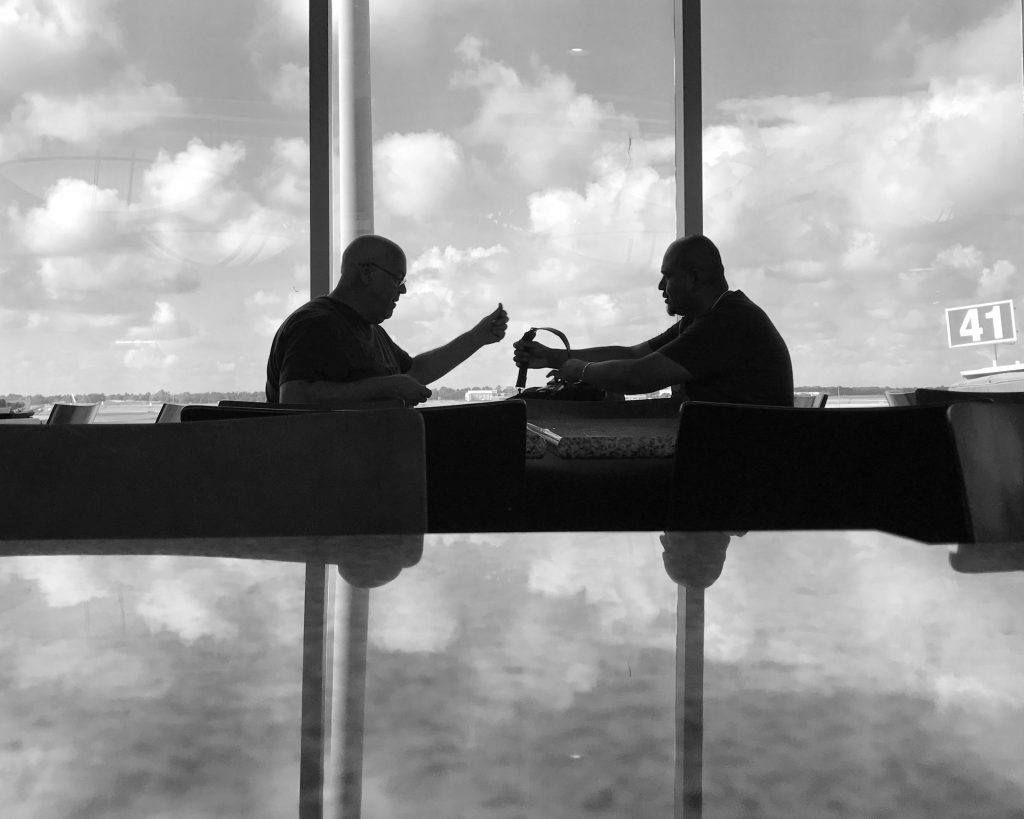
I have also found that the light that is good for my Olympus is, of course, equally good for my iPhone.
I like to shoot in airports. They typically have large windows that let in a lot of light. There are also often highly polished, reflective surfaces from floors or counters. This provides an opportunity to practice using my iPhone to take dandy silhouettes that come from backlighting.
Photographing reflections is a low-stress method of getting interesting street photography pictures. People do not typically recognize that they are being photographed through a reflection, or if they do, they do not seem to care.
Using reflections as a background adds interest.
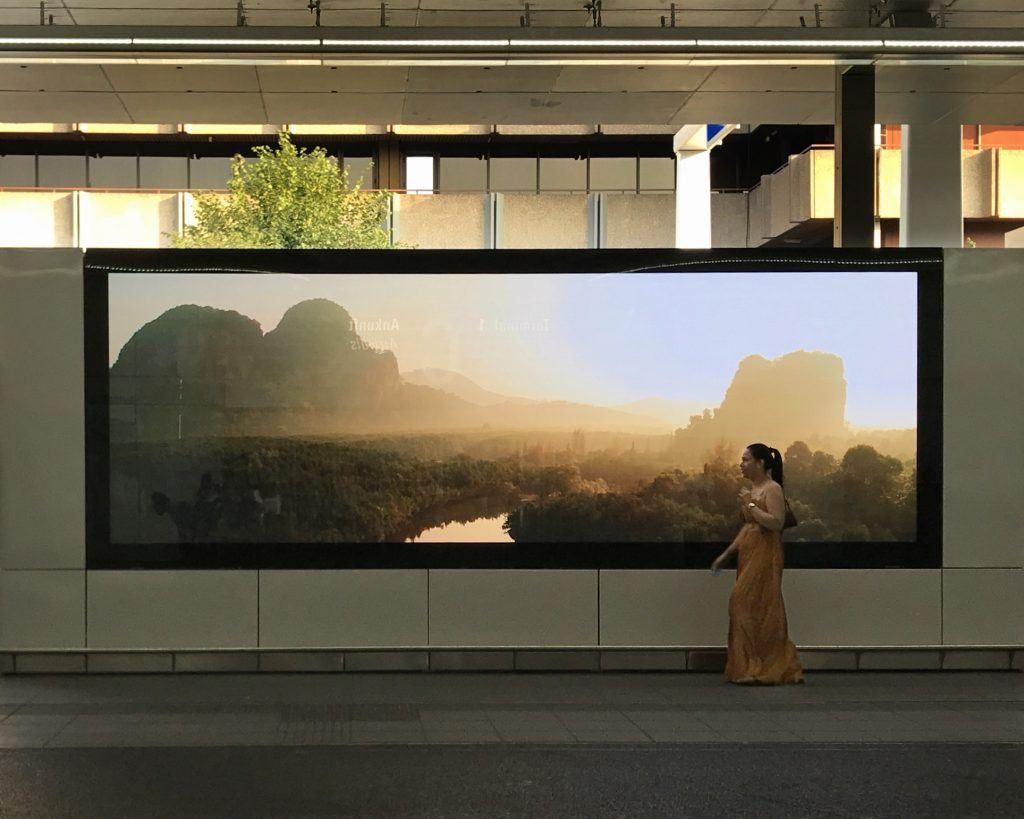
Getting up close
Finally, the prize of mobile photography is the possibility of a close-up. I do truly think that a cell phone is unmatched in being available to take close-up photos.
Most of us have our phones with us whenever we are out in public. Plus, it is as discreet as any camera could be.
A cell phone is unmatched in being available to take close-up photos.
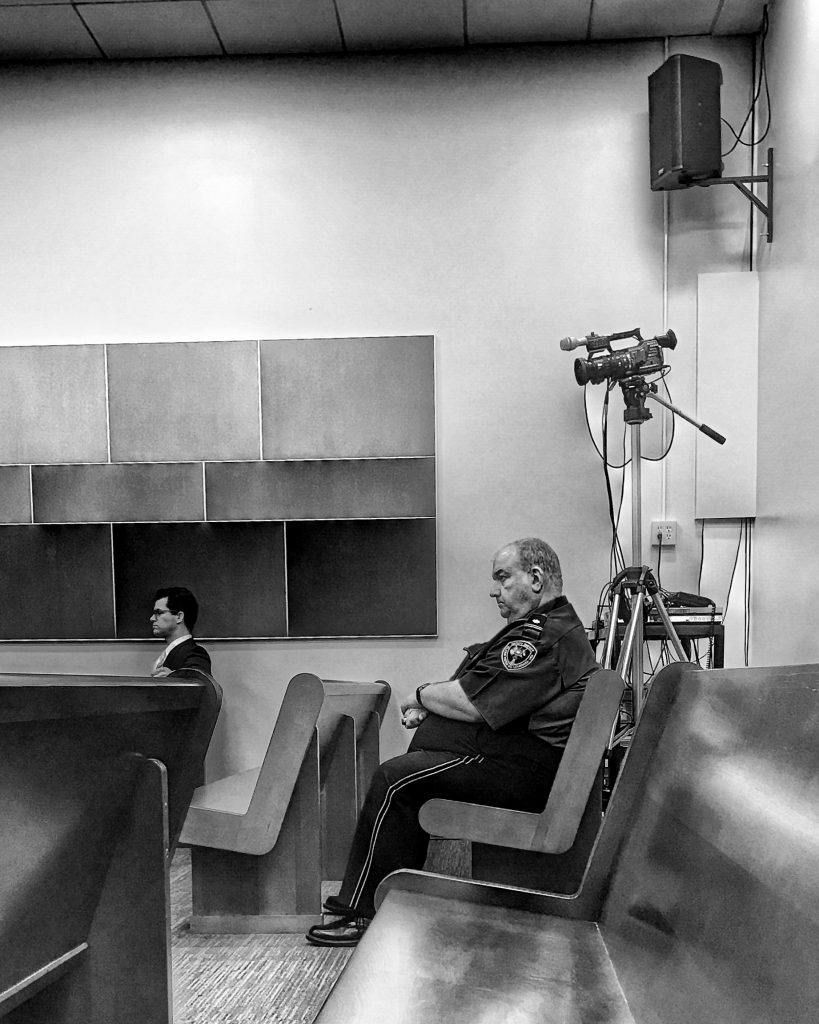
As I am new at using my iPhone for street photography, I find crowded settings are my best chance to get a close-up.
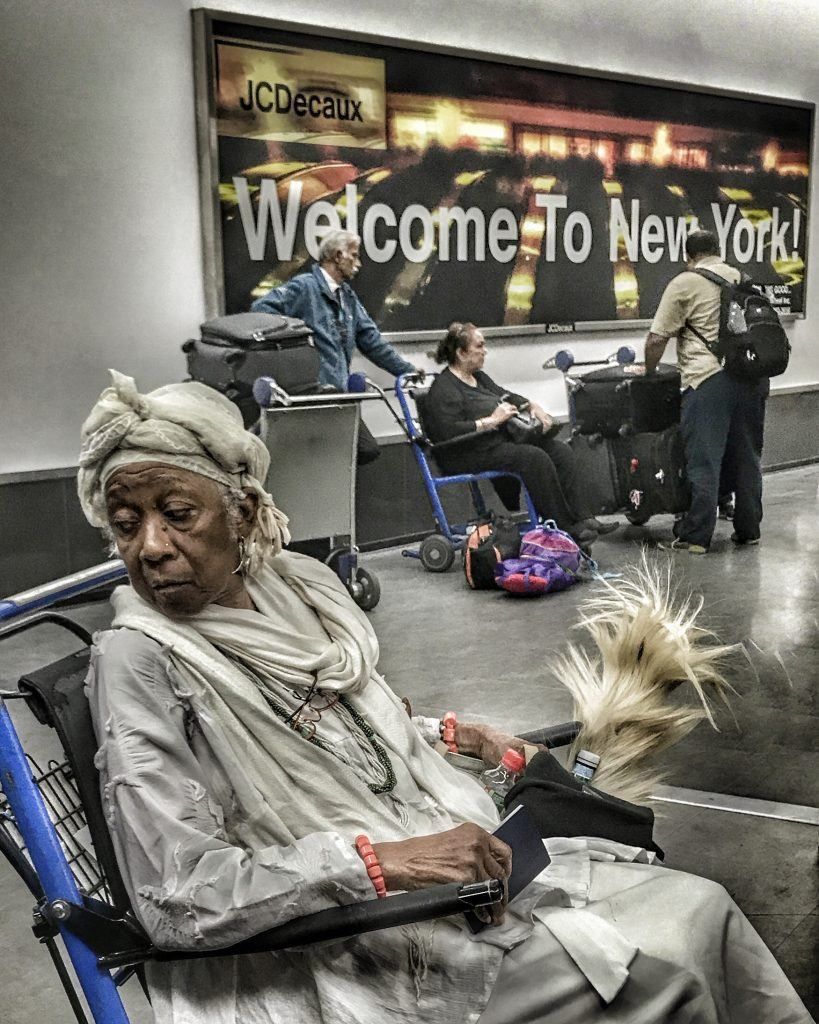
I attempted to get a picture of this elegant lady (above) from the moment we got off of the plane. Finally, she and I were wedged in a sea of people trying to get luggage. Yes, it would have been better if she had been looking toward me. The compensation is the splendid “Welcome to New York” sign in the background.
- Recommended Reading: If you’re interested in improving your post-processing workflow, check out Photzy’s Understanding Masking premium guide. It has a section for Lightroom and Photoshop, as well as Snapseed for mobile users too.
Final
Whether you are new to street photography or want to try a new camera to take street photographs, mobile device cameras offer a perfect opportunity to get in on the fun of this rapidly expanding photographic genre.
There are some challenges – chiefly the requirement to get up a bit closer to take a picture (than some people may be comfortable with).
Ultimately, you will use the same techniques that are known to produce good street pictures with larger DSLR and mirrorless cameras.
You will adjust to the particulars of your mobile camera just as you would with any camera. And, if you use the many opportunities a mobile camera offers, your practice will improve your ability to see the most interesting things on the street to photograph.
- Self-Check Quiz
- Why are street photos often post-processed with filters?
- When using a mobile device camera, what distances will likely prove the most useful for taking street photographs?
- What are some good street photography practices that can you use to make it easier to start taking street pictures with your mobile device? For example, what is fishing?
- Where is it easiest to take close-up pictures when using your mobile device?
**Editor’s Update: If you want more, you can Get 5 Extended Case-Studies on ‘Mobile Phone Photography’ With these extra case-studies (57 pages) you’ll dive much deeper into specific situational examples. Not only will you learn from these, you can ethically ‘steal’ from them, to form your own unique ideas. A perfect addition if you want to get straight to the key points faster. If you missed out on your set last time, they’re available again on sale for only $7 right now (80% off limited time deal) Plus it includes free shooting challenges, and self evaluation questions, designed to push you outside your photo comfort zone. Grab your case-studies for $7 here →
📸 Thank you very much for your support, hope you have an awesome week! Visit the Marketplace Deals for more in-depth photography training.