
A friend loaned me his macro lens many years ago, and it has changed the way I view the world and create images. It is one of my favorite forms of photography because I get to be creative with my images and explore miniscule worlds that have been right under my nose! I never tire of finding subjects to shoot and finding inspiration in the everyday. It is almost like learning to “see” in a whole new way.
Before I began shooting macro images, I was under the mistaken impression that you needed a lot of specialized equipment to get images like the ones I admired. One of the most important things I have learned from shooting thousands of macro photographs is that you can often use things that you already have in your own home, and this works for lighting as well.
Lighting is important – a key ingredient – to all photographs. It becomes even more important to photographers who shoot macro, as they are often using a very narrow aperture to obtain depth of field. Use of a higher f-stop means less light reaching your sensor, which means you need a good source of light to properly expose your shots.
Before I began shooting macro images, I was under the mistaken impression that you needed a lot of specialized equipment to get images like the ones I admired.
Another challenge with macro lighting is the length of your lens and the proximity to your subject. A big lens that is near to what you are shooting can create some big shadows, so placement of your lighting becomes very important.
However, you don’t have to buy a lot of expensive lights to capture amazing macro shots. By using less conventional lighting methods, you can create some unique and artistic shots. I am going to share some of my favorite methods for lighting my scenes and take you through some setups that I frequently use.
In this article, you will:
- gain a deeper understanding of the types of light available for shooting macro images;
- learn to utilize natural light sources for creating close-up images;
- explore lighting options that you already have in your own home;
- look at how the direction, quantity, and quality of your light can lead to better compositions and more interesting, artistic images; and
- explore some ways to “play” with light to get even more creative.
Continuous Light - Natural
My absolute first choice when lighting a macro image is daylight. Daylight can take many different forms, from bright sunlight, to the filtered light of an overcast day, to sunlight filtered by the atmosphere in the evening or morning. Some forms of natural light are certainly preferred over others, but, in general, it is the light I try to utilize the most.
Natural light from the sun, whether direct or filtered through cloud cover, is a continuous light source. However, the intensity of that light can vary, especially when weather conditions are changing. Frequent checks to ensure that you have your exposure correct can be necessary when utilizing daylight as your main source of illumination.

Nothing beats the warm light of the sun for lighting macro images. The sun was bright and almost overhead when I shot this, creating some dramatic spots of light and shade. Thankfully, the dragonfly perched in just the right spot to capture that light. Photo by Leanne Cleaveley
Another thing to watch for when using daylight is overexposed spots, especially on bright sunny days. You can use your camera’s “highlights” function to identify blown-out spots in your image and adjust your settings accordingly by stopping down or increasing your shutter speed.
If you can’t get outside to take advantage of natural light, then you can use a window to set up your macro shots. Windows are perfect, as your subjects are typically small and don’t need a lot of space to set up. I have a southfacing window with an extended ledge that I use for most of my indoor macros. The other advantage to an indoor setup is that you don’t have to contend with the elements, such as wind and rain.

The filtered light of the early evening sun helped to give this image a warm light that made the corn look even more buttery and plump. Photo by Leanne Cleaveley
The only tricky thing about shooting beside a window is subject placement in relation to your light. If you shoot your subject facing the window, you will have backlight that will create harsh shadows or even turn your subject into a silhouette. You may have to arrange your camera and subject parallel to your light source to get some great side light.
Key Lesson: When using a window to provide natural light to a scene, ensure
that the ledge is large enough for you to get a good angle on your subject, so that
it isn’t backlit (unless that is what you are trying to achieve to start with). Alternatively, you can use a reflector to bounce some light back into the shadowed areas to help with exposure.
Another way to contend with the angle of the light from a window setup is to use a reflector to bounce some of that great light back into the shadows. It is a little more work, but it allows you to take advantage of one of the best sources of light for macro shooting.
A drawback to using natural light for shooting is that it limits you to daylight hours. Also, as previously stated, overcast days can be challenging. You really are a slave to the weather, daylight hours, and good lighting conditions when natural light is your go-to, but it can be worth waiting for that just-right light!
Continuous Light - Artificial
I want to differentiate between two types of artificial light that you can use when shooting macro images. There is the flash (which I will talk about more later), which emits a brief burst of light of varying intensity. Then there is artificial light, also known as continuous light, because it is a steady source.
A few examples of continuous light sources that I use when shooting macro are a sunlamp, an LED table lamp, and LED headlamps.
Continuous light sources have some distinct advantages and disadvantages compared to a flash.
An advantage that I utilize to the fullest when shooting with continuous light is the ability to ‘see’ exactly what is exposed in my shot. When I shine my LED table lamp on my subject, I can instantly identify what is in the light and what is in shadow. I can make small adjustments to create contrast or backlight on an object and have a very good idea of how it will look in my final image.
Key Lesson: What you see is what you get when using continuous light sources. This is a distinct advantage for macro photographers as they can move the light around before shooting to get the image exactly as they want it to appear.
For these reasons, I highly recommend the use of continuous light. However, it does have some drawbacks, the most notable being that to achieve a strong source of steady light, you often need to be “plugged in.” I say “often” because there are more and more lighting options available that are small, portable, and utilize batteries.
Even plugged in, the amount of light emitted by these sources is far less than what can be achieved with a flash. One way to compensate for this is to use a tripod and shoot at a slower shutter speed, which often works well in macro if your subjects are still.
LED ring lights, which encircle your lens and illuminate your subject, are a newer addition to lighting options for macro photographers. These lights, unlike a flash, provide a constant light so that you can see what you will shoot. A drawback is that they are less powerful than their ring flash cousins. Again, you would need to compensate by adjusting your shutter speed, ISO, or aperture.
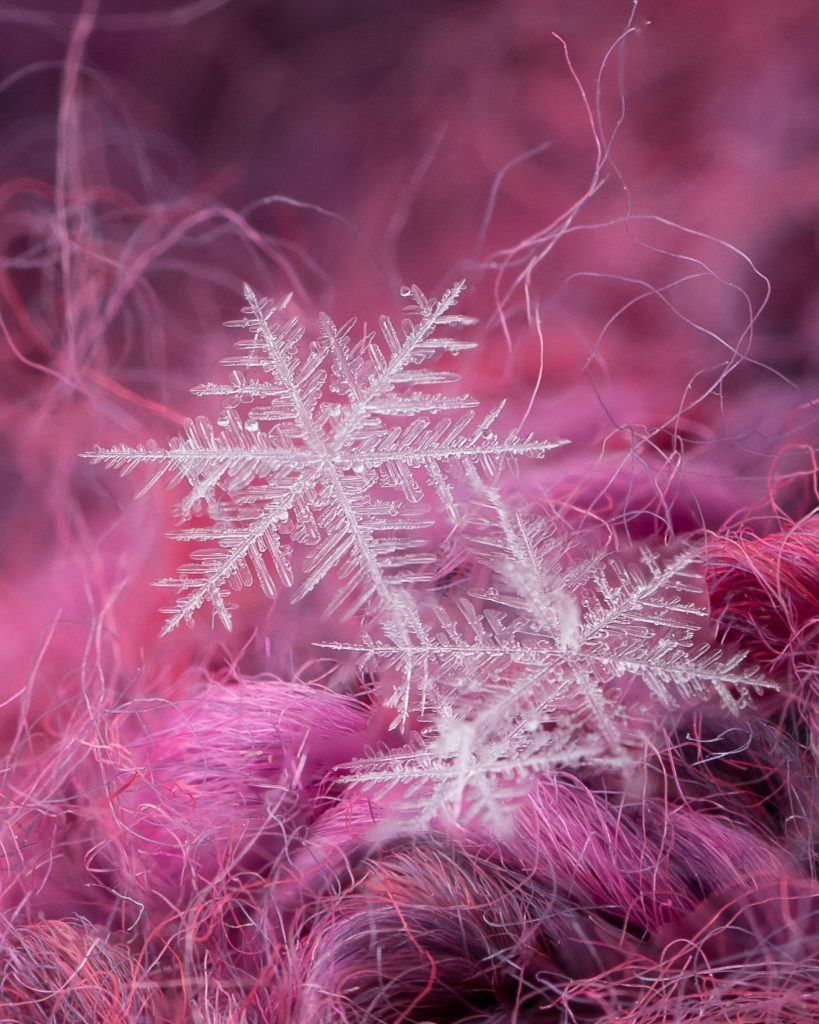
Snowflakes, with all that reflective and refractive ice, are incredibly finicky to photograph. Too much light and you lose the delicate details, not enough light and the snowflake is in shadow. I have used a small headlamp frequently to provide just the right illumination and get the light at just the right angle to accentuate my snowflake images. Photo by Leanne Cleaveley
Flash
A flash can be an excellent source of light for shooting macro images. It too has some distinct advantages and disadvantages that you need to be aware of.
Your flash offers something that most continuous light sources (natural or artificial) lack, and that is power. That brief burst of light can overpower other light sources. For that reason, a flash is a great tool for creating dramatic effects such as black backgrounds, high-key scenes, or even freezing movement like water drop splashes.
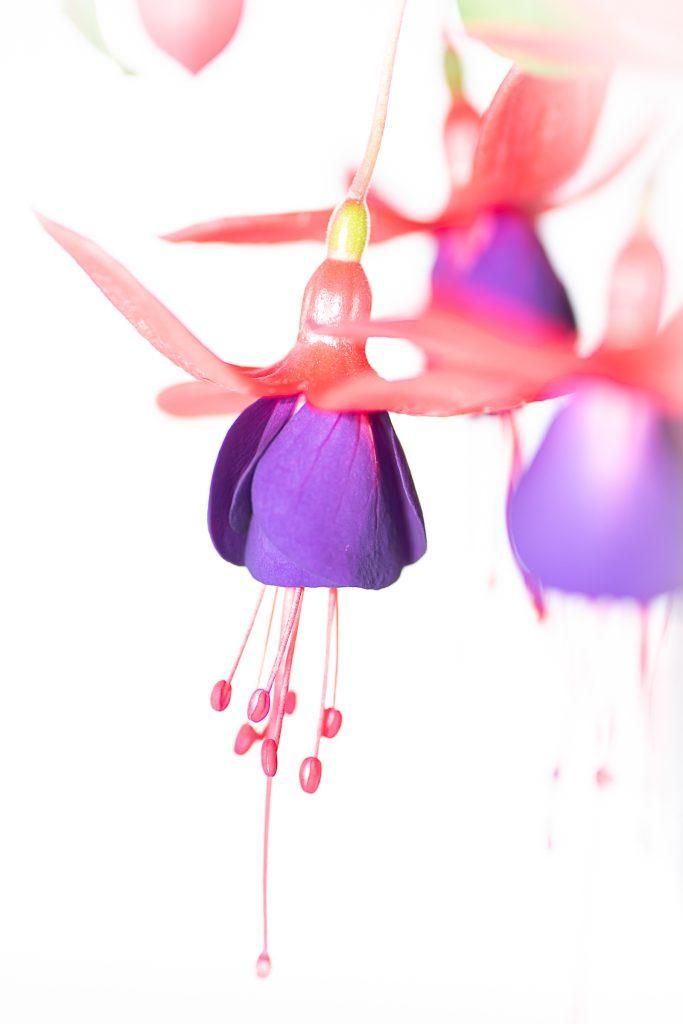
Photo by Leanne Cleaveley
Your on-camera flash is not always the best option for taking macro shots, as it has a hard time reaching your subject over the barrel of the lens. At the very least, you should try and get your light a little higher. You can do this by using a speedlight attached to the hotshoe on top of your camera or a bracket that raises it even higher and sometimes closer to your subject.
Key Lesson: Avoid using your on-camera flash for shooting macro images close to your subject as the lens will block your light, creating shadows.
A flash creates a strong source of light and has many options for manipulating that light to make it work for your images. Most flashes allow for changes in output (the amount of light), focus (how narrow or wide a beam), and quality (use of diffusers and other light modifiers).
If you have the ability to use your flash externally, it creates many more lighting options for you. By moving your flash around you can ensure that your lens isn’t blocking your light source. An external flash also allows you to be even more creative by positioning it in ways that create side- or backlight.
If you have the ability to use your flash externally, it creates many more lighting options for you.
Another option for getting light to your subject is using a ring flash. These lights wrap around your lens, providing light directly where your lens is aimed. They can allow you to get into small spaces with your macro lens without having to worry about creating a shadow with your lens.
Ring flashes come in a variety of types, from ones that connect directly into your hotshoe, to adapters that attach to a speedlight mounted on your camera and utilize your speedlight as a source. They also vary in power output and price.
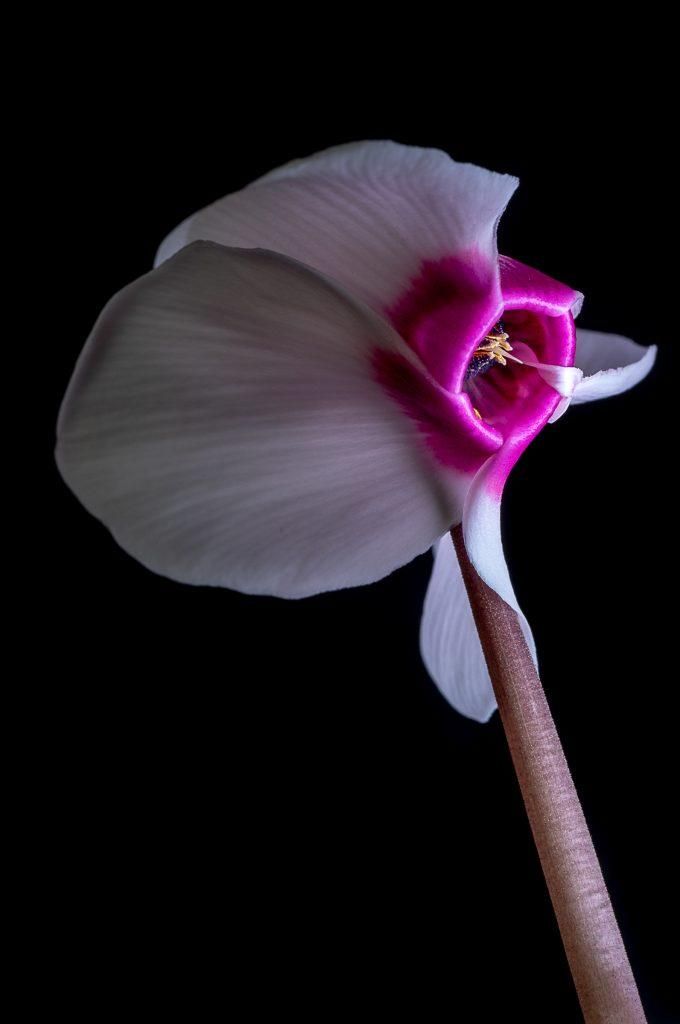
An image like this (and the previous photo) can certainly be achieved with natural light, but use of a flash makes these types of images much easier to create. Photo by Leanne Cleaveley
A drawback to ring lights and flashes is that your light comes from one direction only: head on. Some types allow for different light output on different parts of the ring, providing more versatility. However, you may want to think about your purpose for shooting. Ring flashes are great for documenting specimens or providing fill light with little shadow effect, but you may want to consider other light sources for more artistic shots.
You should consider what you will be shooting before purchasing any types of lighting tools. For still subjects, you may find that the tools you already own will work fine. Your lighting requirements increase dramatically if you are shooting subjects that move, as you need to be able to “freeze” the action.
Key Lesson: Take some time to consider what you will be shooting the most before buying lighting tools for macro. You may find that you have many of the tools you already need, or you may need to buy something specific for your genre.
The same power that can be of great benefit to your images can also be a drawback. This is important to keep in mind because of how close your light source is to your subject when shooting macro images. Position your flash carefully and use a diffuser to avoid overexposed spots in your photograph.
Most flash units come with a diffuser, or you can create your own with some inexpensive materials. Even a piece of tissue or other sheer material placed over your flash can act as a quick and easy diffuser.
Lighting Effects
There are so many lighting options available for macro photographers, but in the end it is what you do with that light that really counts. Whether artificial or natural, continuous light or a flash, where you place that light and how you use it is what really matters.
Here are a few of my favorite lighting effects for macro photography:
Backlight
Placing your subject between your camera and light source is a great way to show off a subject’s shape and texture. I love using this effect for plants, and in particular flowers, as it enhances their features in ways that ordinary light does not.
You can create backlit shots using your flash or natural light. Early morning or evening are good times to utilize the sun as your light source. You don’t have to get the light source directly behind the subject to create backlight; just out of frame works fine to get an interesting backlit scene.
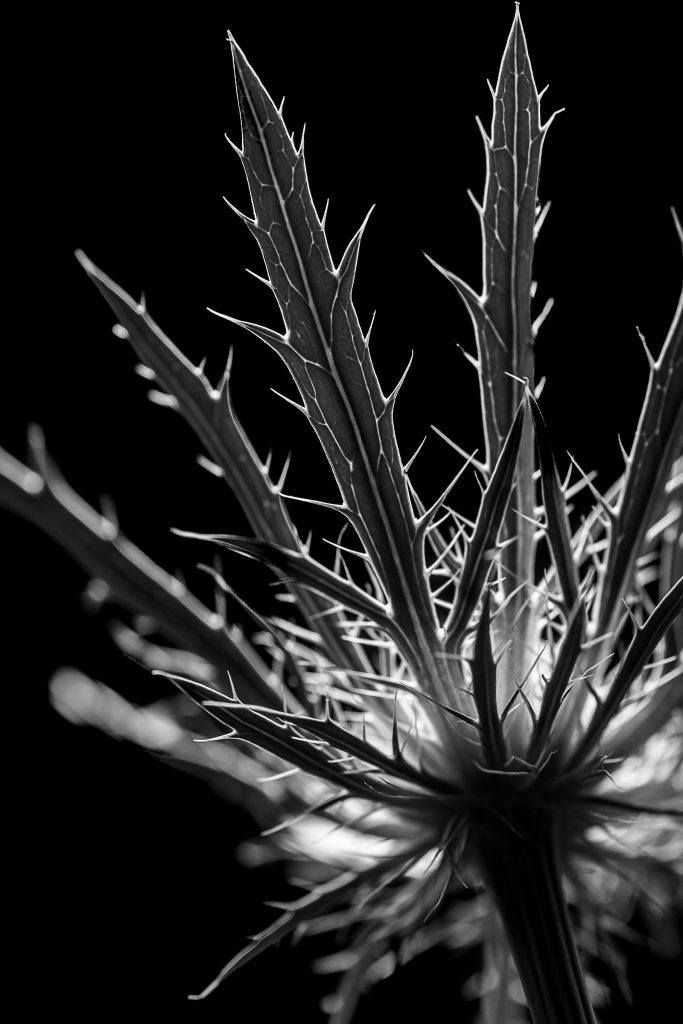
The use of flash to create backlight in this image really draws attention to the shape of the plant’s spiny leaves by highlighting the outer edges. The backlight also allows us to see the veins on the leaves more clearly. Photo by Leanne Cleaveley
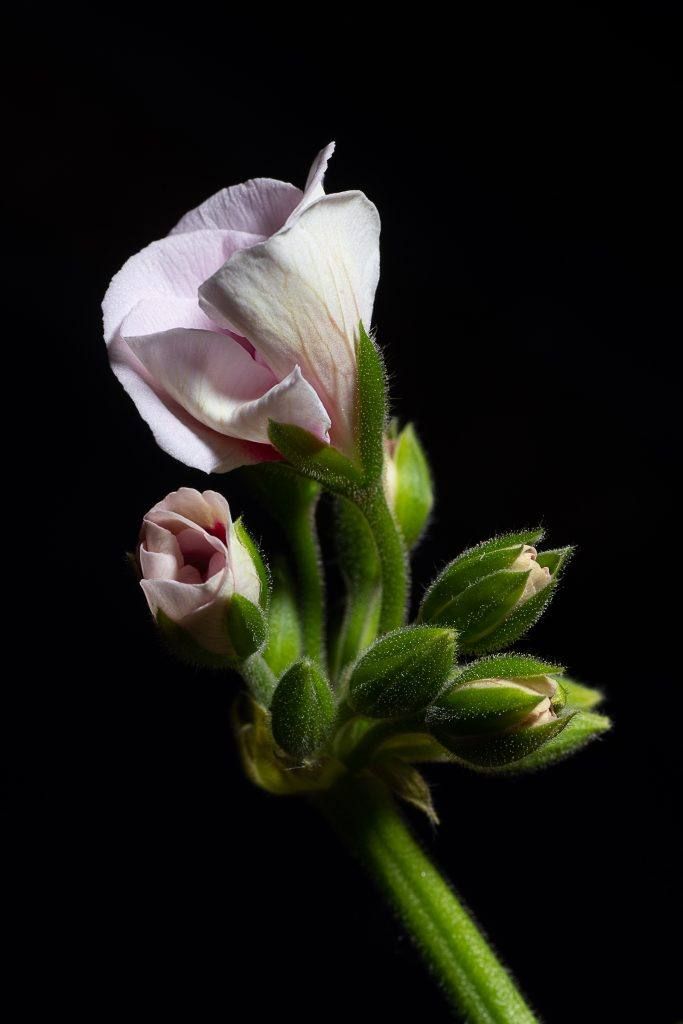
Dramatic Black Backgrounds
I am a bit of a sucker for black backgrounds, and they are easy to achieve when shooting macro images. The ingredients for a black background are a strong light source (flash is best), low ISO, and a high f-stop (smaller aperture).
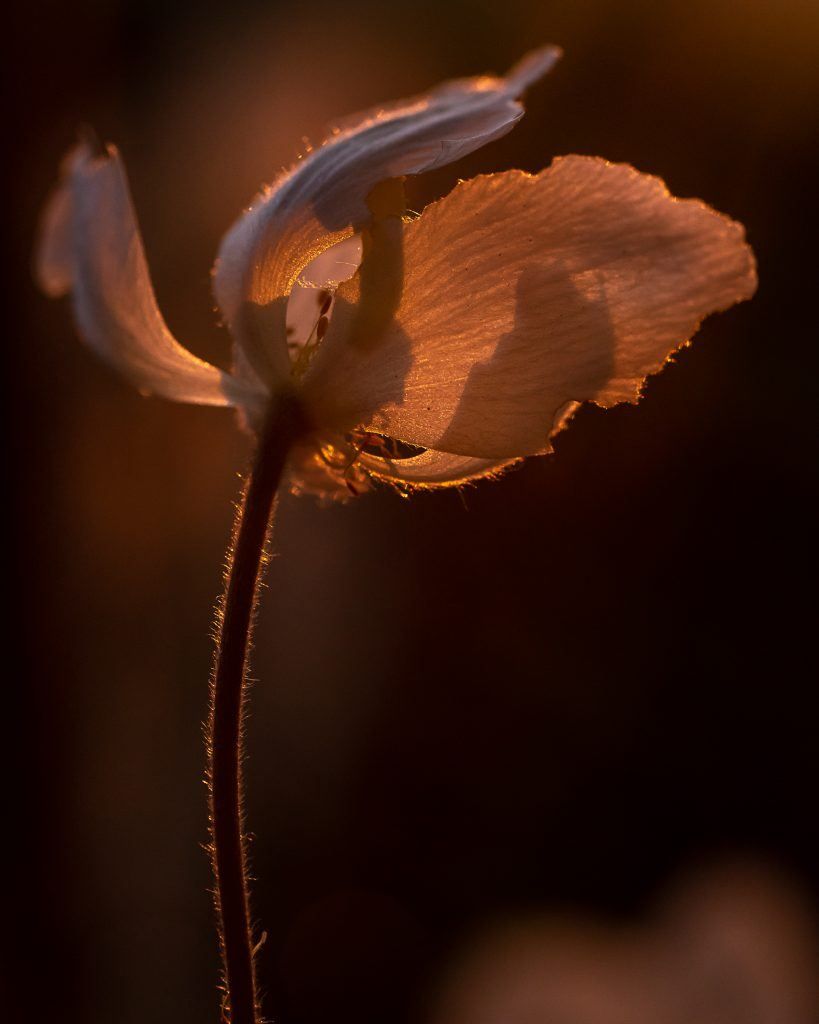
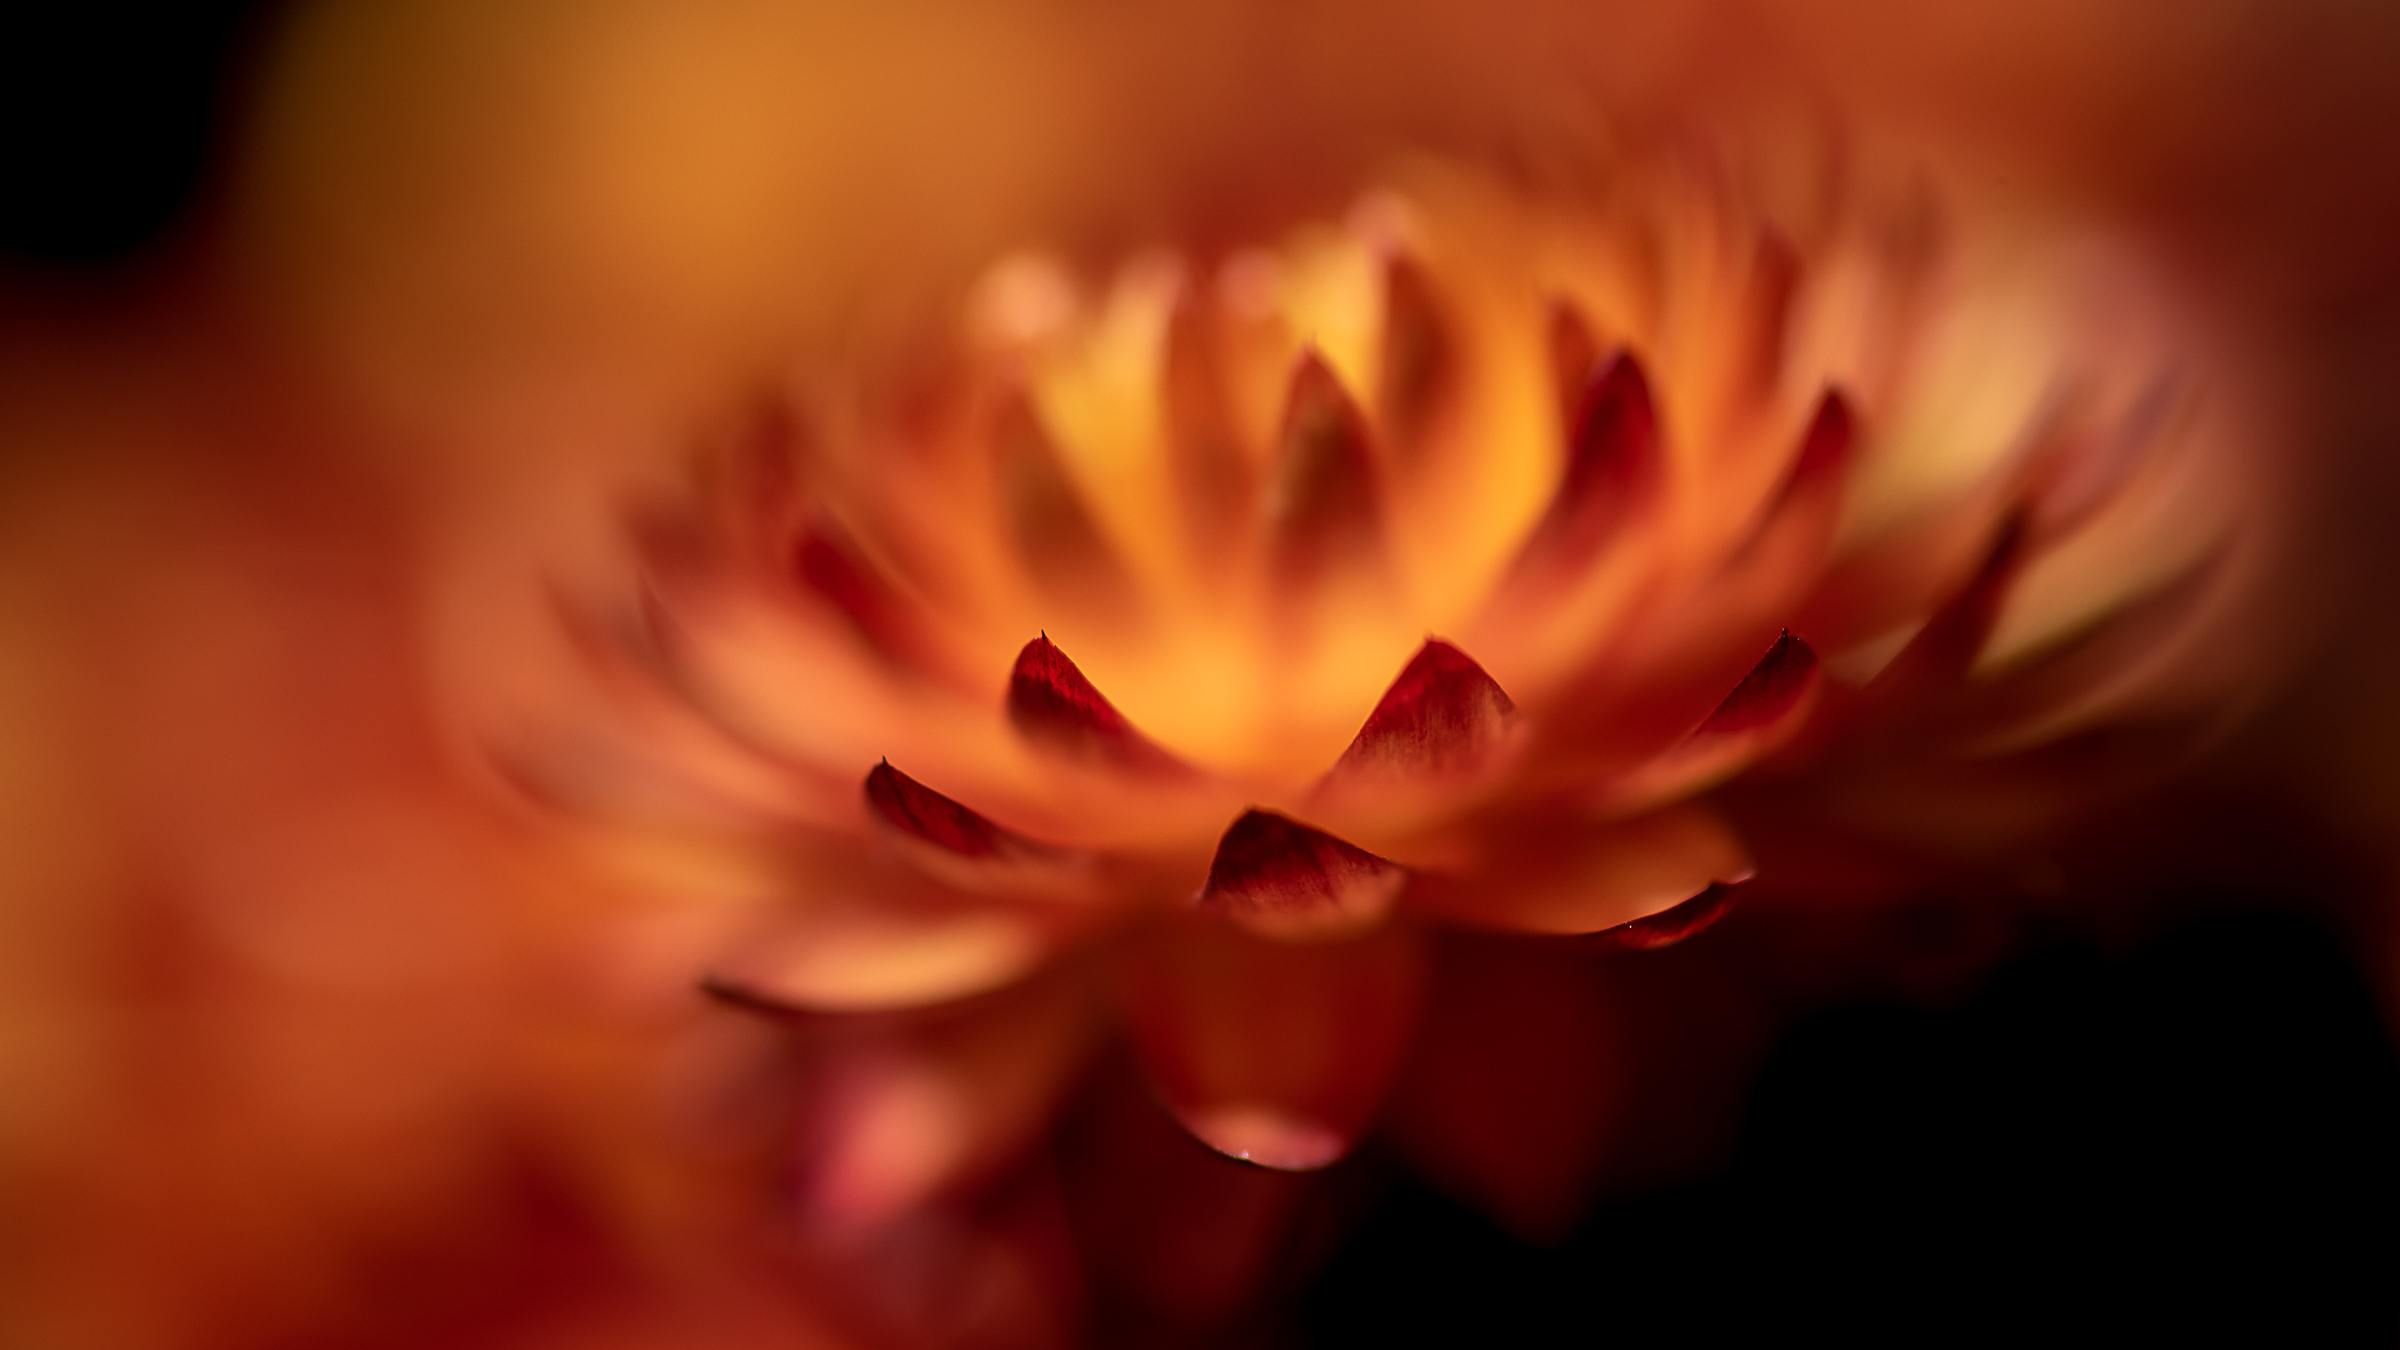
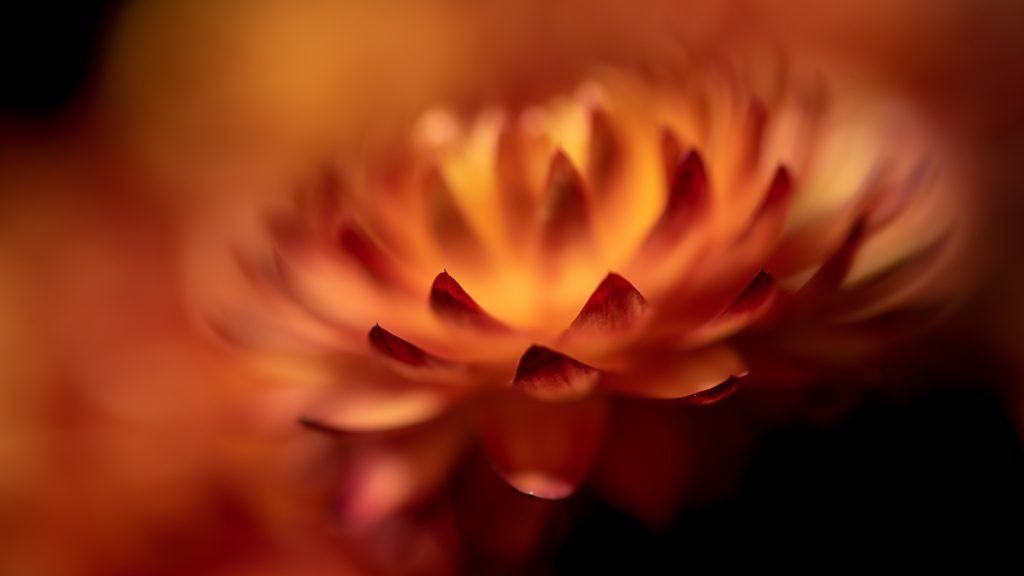
This shot was taken in the evening when the sun was close to the horizon. The lovely golden highlights created in this backlit image enhanced the aged flower’s beauty and brought out the texture of the stem and the ragged petals. Photo by Leanne Cleaveley
With the light focused on your subject (you may need to narrow the beam of light, either with the flash settings or by using something to block the light), you can achieve a nice dark background, even with ambient light in the room.
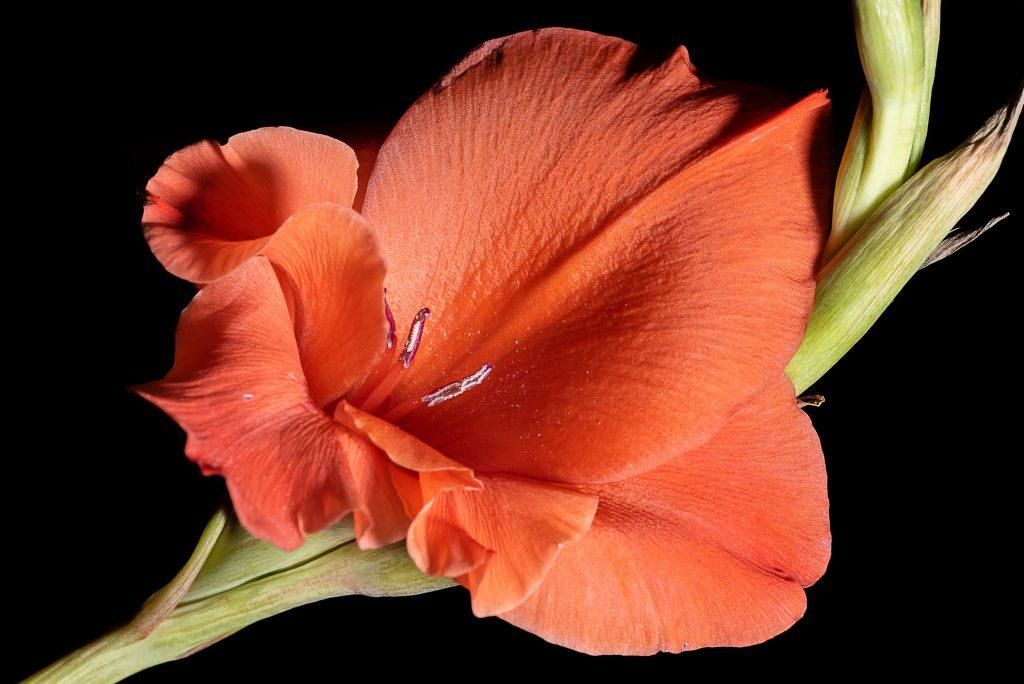
Shot at f22 and ISO 125, I was able to achieve a nice black background for this image of a gladiolus, with room lights on. The key was to not have any objects close enough in the background that might be exposed by the flash. The flash was powerful enough to make the ambient room light redundant. Photo by Leanne Cleaveley
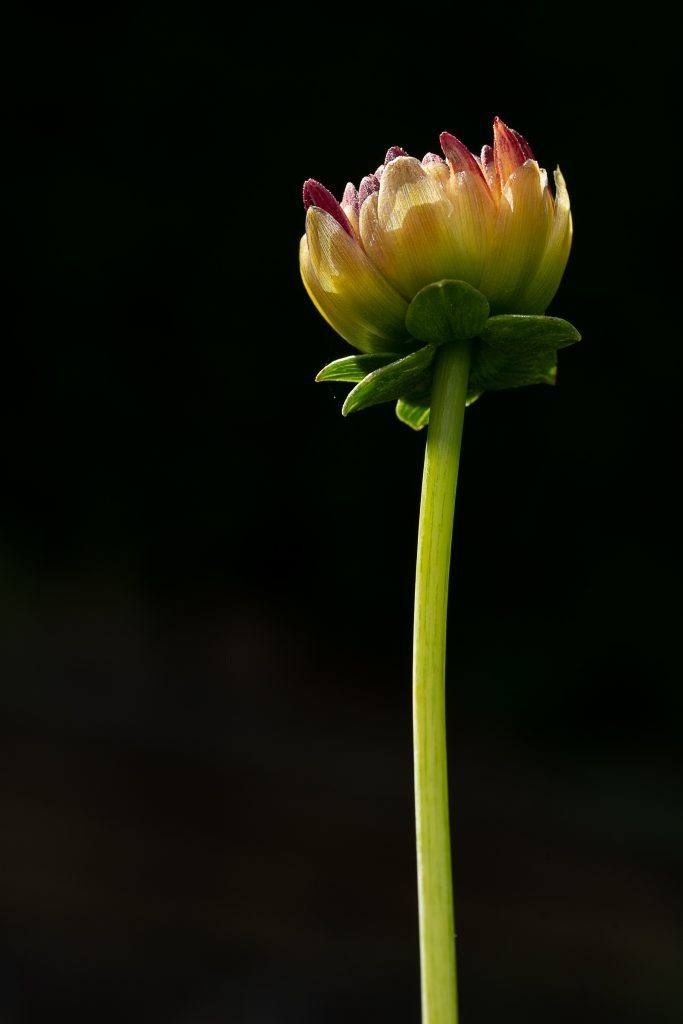
Black backgrounds can be created using natural light as well; you just have to look for the right conditions. Again, you need to set your ISO low and your f-stop high. You should look for a welllit subject with a dark background (preferably the background is in shade).
One of the advantages for macro photographers is that they need only make very small adjustments to change their background drastically. Have a distracting background? Move a few millimeters and you can easily lose those distractions. If you can’t find one that works, then bring your own, in the form of a cardboard backdrop covered in black paper.
There are so many wonderful effects that can be created when using light effectively for macro photography; backlighting and using black backgrounds are just a few of my favorites. Don’t be afraid to get out there and play. Look around and see what light sources you already have and how they can be used to create some fabulous macro images.
Recommended Reading: Want to create gorgeous, perfectly lit flower photographs? Grab a copy of Photzy’s premium guide: Photographing Fabulous Flowers.
Self Check Quiz:
- Name one type of lighting tool that creates continuous light and one type that provides a quick, powerful burst of light.
- What is one advantage that a flash has over other sources of light?
- To shoot macro images with an all-black background you need a strong light source, a low ISO, and a _________________ f-stop.
- What is the drawback to using your on-camera flash for shooting macro?
- What things should you consider when utilizing a window set up for macro shooting?
- True or False: When creating a backlit scene, the light source should be directly behind the subject.
- A _____________ is a good option for overpowering ambient room light.
- If you plan on shooting subjects that move, like insects, you should consider your light source carefully. Which light do you think would be the best for this type of photography?
Assignment:
Walk around your house and make a list of available light sources that you already own. Don’t worry if these lights are “unconventional” sources for photography. Over the next week try using a different light source each day while shooting macro images. I hope you will be pleasantly surprised to find some new and potentially unique lighting tools for your macro photography!