

I began my photographic journey exclusively shooting landscapes. I spent two years scrambling through bushes and chasing sunsets before I even considered taking a picture of a person. But like many photographers before me, I eventually felt the unmistakable urge to shoot portraits. This doesn’t mean I don’t shoot landscapes anymore – in fact, they are still my bread and butter – but when I was asked to write about improving your outdoor photography, I decided to focus entirely on portraiture.
There is something special about portraiture. Landscapes are inspiring and beautiful. Architectural shots are a testament to the ingenious creations of mankind. Macro images invite us to discover an entirely new world right under our noses. Portraits, however, stand alone in that they attempt to capture an elusive moment of humanity. This makes them both rewarding and difficult because while anyone can take a picture of a person, creating a stunning portrait is no easy task.
Many portraits are taken indoors. There are a variety of reasons to shoot indoors, including the ease of controlling the environment or the use of a studio. While I have no issue with studio portraits, and have seen many stunning images created in that setting, I personally have a strong preference for portraits taken outdoors. Perhaps this is due to my previous experience with landscape photography.
If you do choose to shoot outdoors, there are numerous, unique challenges that you will face, ranging from swiftly changing light to foul weather. It can be daunting to consider moving your work outside; however, in this tutorial I will give you eight simple steps that will get you started.
When you complete this guide, you should have a better understanding of the following:
- Understanding the light that you will be using in an outdoor portrait setting
- Using the Ephemeris tool
- Determining the best lighting options
- Using a reflector
- Choosing locations
- Making use of the changing seasons and props
1. Understand The Light
I have written before about the importance of understanding light. I can’t stress it enough, though, because it is all too easy to overlook. Often, as photographers, we will focus closely on our subject, or composition, and forget to consider the light. This is particularly common with portraiture, as we can easily be distracted by the crucial tasks of interacting with the subject, or posing.
Don’t forget that light is the basis of all photography. Before you begin to pose your subject, or fire off a test shot, take a moment and consider the light in your image. Are you going to use natural light only, or combine it with artificial light? Is the light hard, soft, or dappled? Will your highlights be blown if you expose for the face of your subject? Could a reflector help?
To answer these questions, you need to understand how light works and how it behaves in different environments.
Recommended Reading: It would be impossible for me to cover everything in a single tutorial, but you can learn everything you need in Photzy’s Understanding Light Book One premium guide by Kent DuFault.
In addition, I’ll be covering a few basic tips on controlling light for portraiture. Another place you can learn how to use light is by studying the work of traditional artists. Master painters spent their lives mastering the use of light, so head out to an art gallery and soak in some of their brilliance.
Of course, in addition to reading, you will need to take the time to experiment with various forms of light and how to use them. Practice makes perfect!
2. Use Natural Light To Your Advantage
Natural light can be difficult to work with. It shifts constantly, and this often makes it downright frustrating to use. It’s also one of the main reasons why we shoot outside. Natural light can be utterly spectacular, casting a warm glow over your subject or creating dramatic shadows. Unless you intend to shoot in the middle of the night (a very difficult proposition), you need to become accustomed to dealing with natural light.
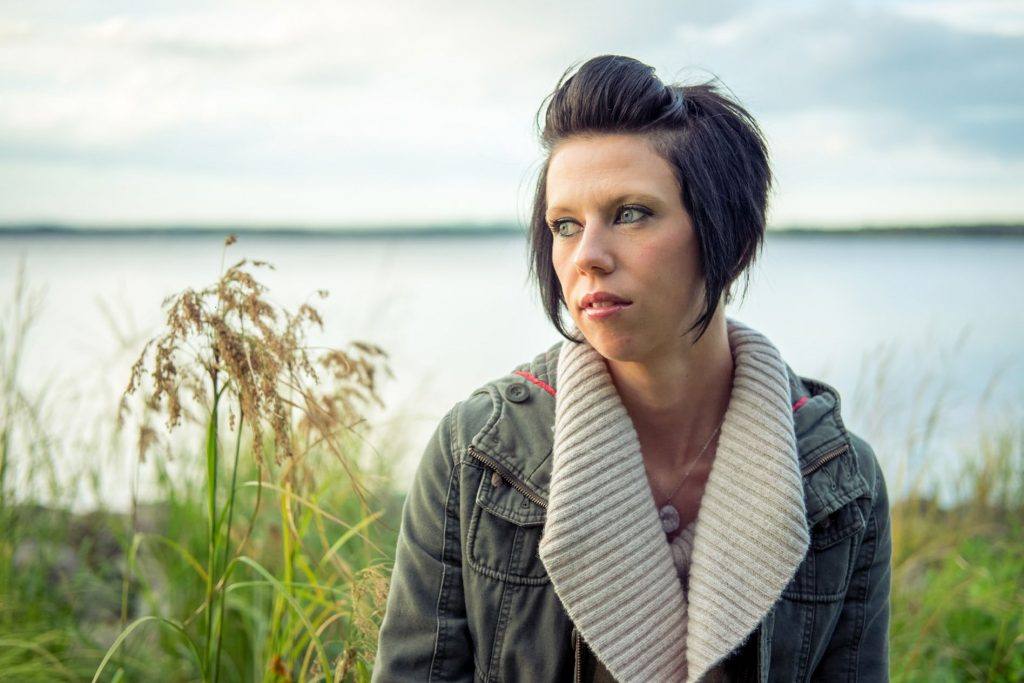
Photo by David Veldman
In the image above, I used only natural light, without any modifiers. One of the main challenges with light of any kind is choosing the direction of impact on your subject, and natural light is no exception. You will often find that unmodified natural light is too strong. Placing it behind your subject will create blown highlights if you properly expose the face. This high-key look can be beautiful, but only if you are very careful in its execution. Placing it in front of your subject will often make them squint; of course, this is undesirable. On the day of this shoot, however, I was blessed with a very large, helpful modifier – an overcast sky. The light was gently diffused, and I could place my subject facing the sun. This resulted in a well-exposed image without any unpleasant shadows on my subject’s face. To pull this off, I had to consider both the direction and the type of light that I was dealing with. Another way to deal with the sun is to shoot during the golden hour – an hour before sunset. The light will be much softer and warmer, which often results in a more pleasant portrait.
Recommended Video: If you’d like to learn how to use natural light in your photography, check out the Natural Light Video Course by award-winning travel photographer Mitchell Kanashkevich.
3. Use A Reflector
As I mentioned above, I had been lucky enough to have the use of gently diffused sunlight. However, this is not always the case – in fact, it may be the exception.
When you shoot outdoors, you will frequently find yourself dealing with an excess of contrast. One of my favorite ways to combat this is by using the humble yet effective reflector.
A reflector is exactly what it sounds like: any surface that reflects light from one direction to another.
Although you can buy reflectors, you can also make your own, using anything from a piece of wood with foil to a white sheet.
Using a reflector can help you deal with excessive contrast that’s usually present in outdoor scenes.
Recommended Gear: Personally, given their low cost, I most strongly recommend picking up a 5-in-1 reflector. Here’s an example that you can get at Amazon.
These reflectors come in different sizes and allow you to choose the shade of reflected light or intensity. I can confidently say that learning to use a reflector took my photography to another level.
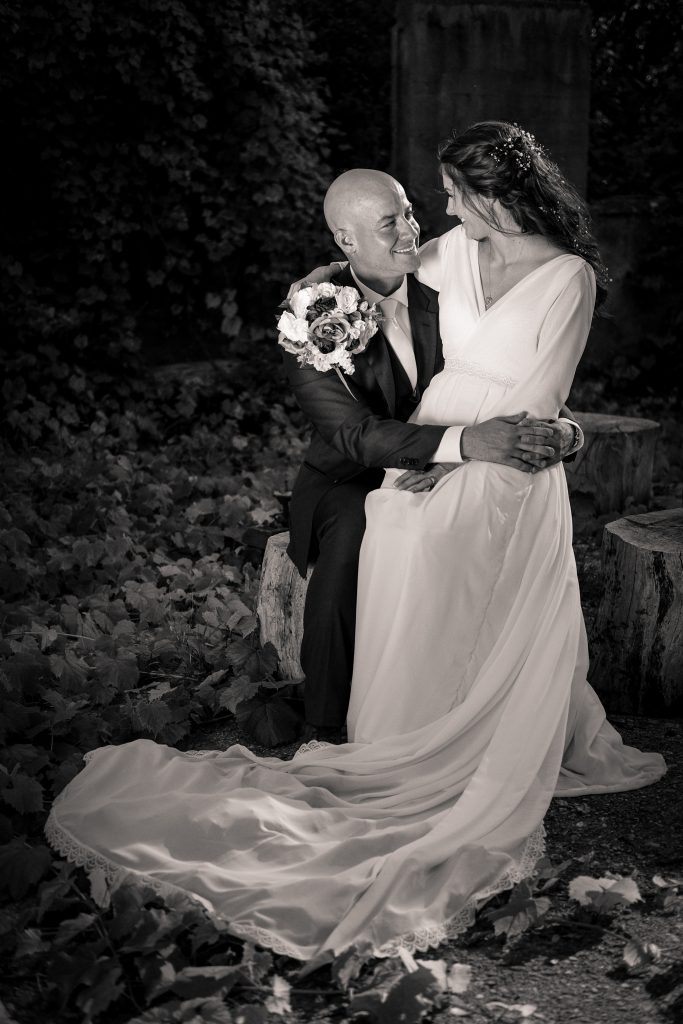
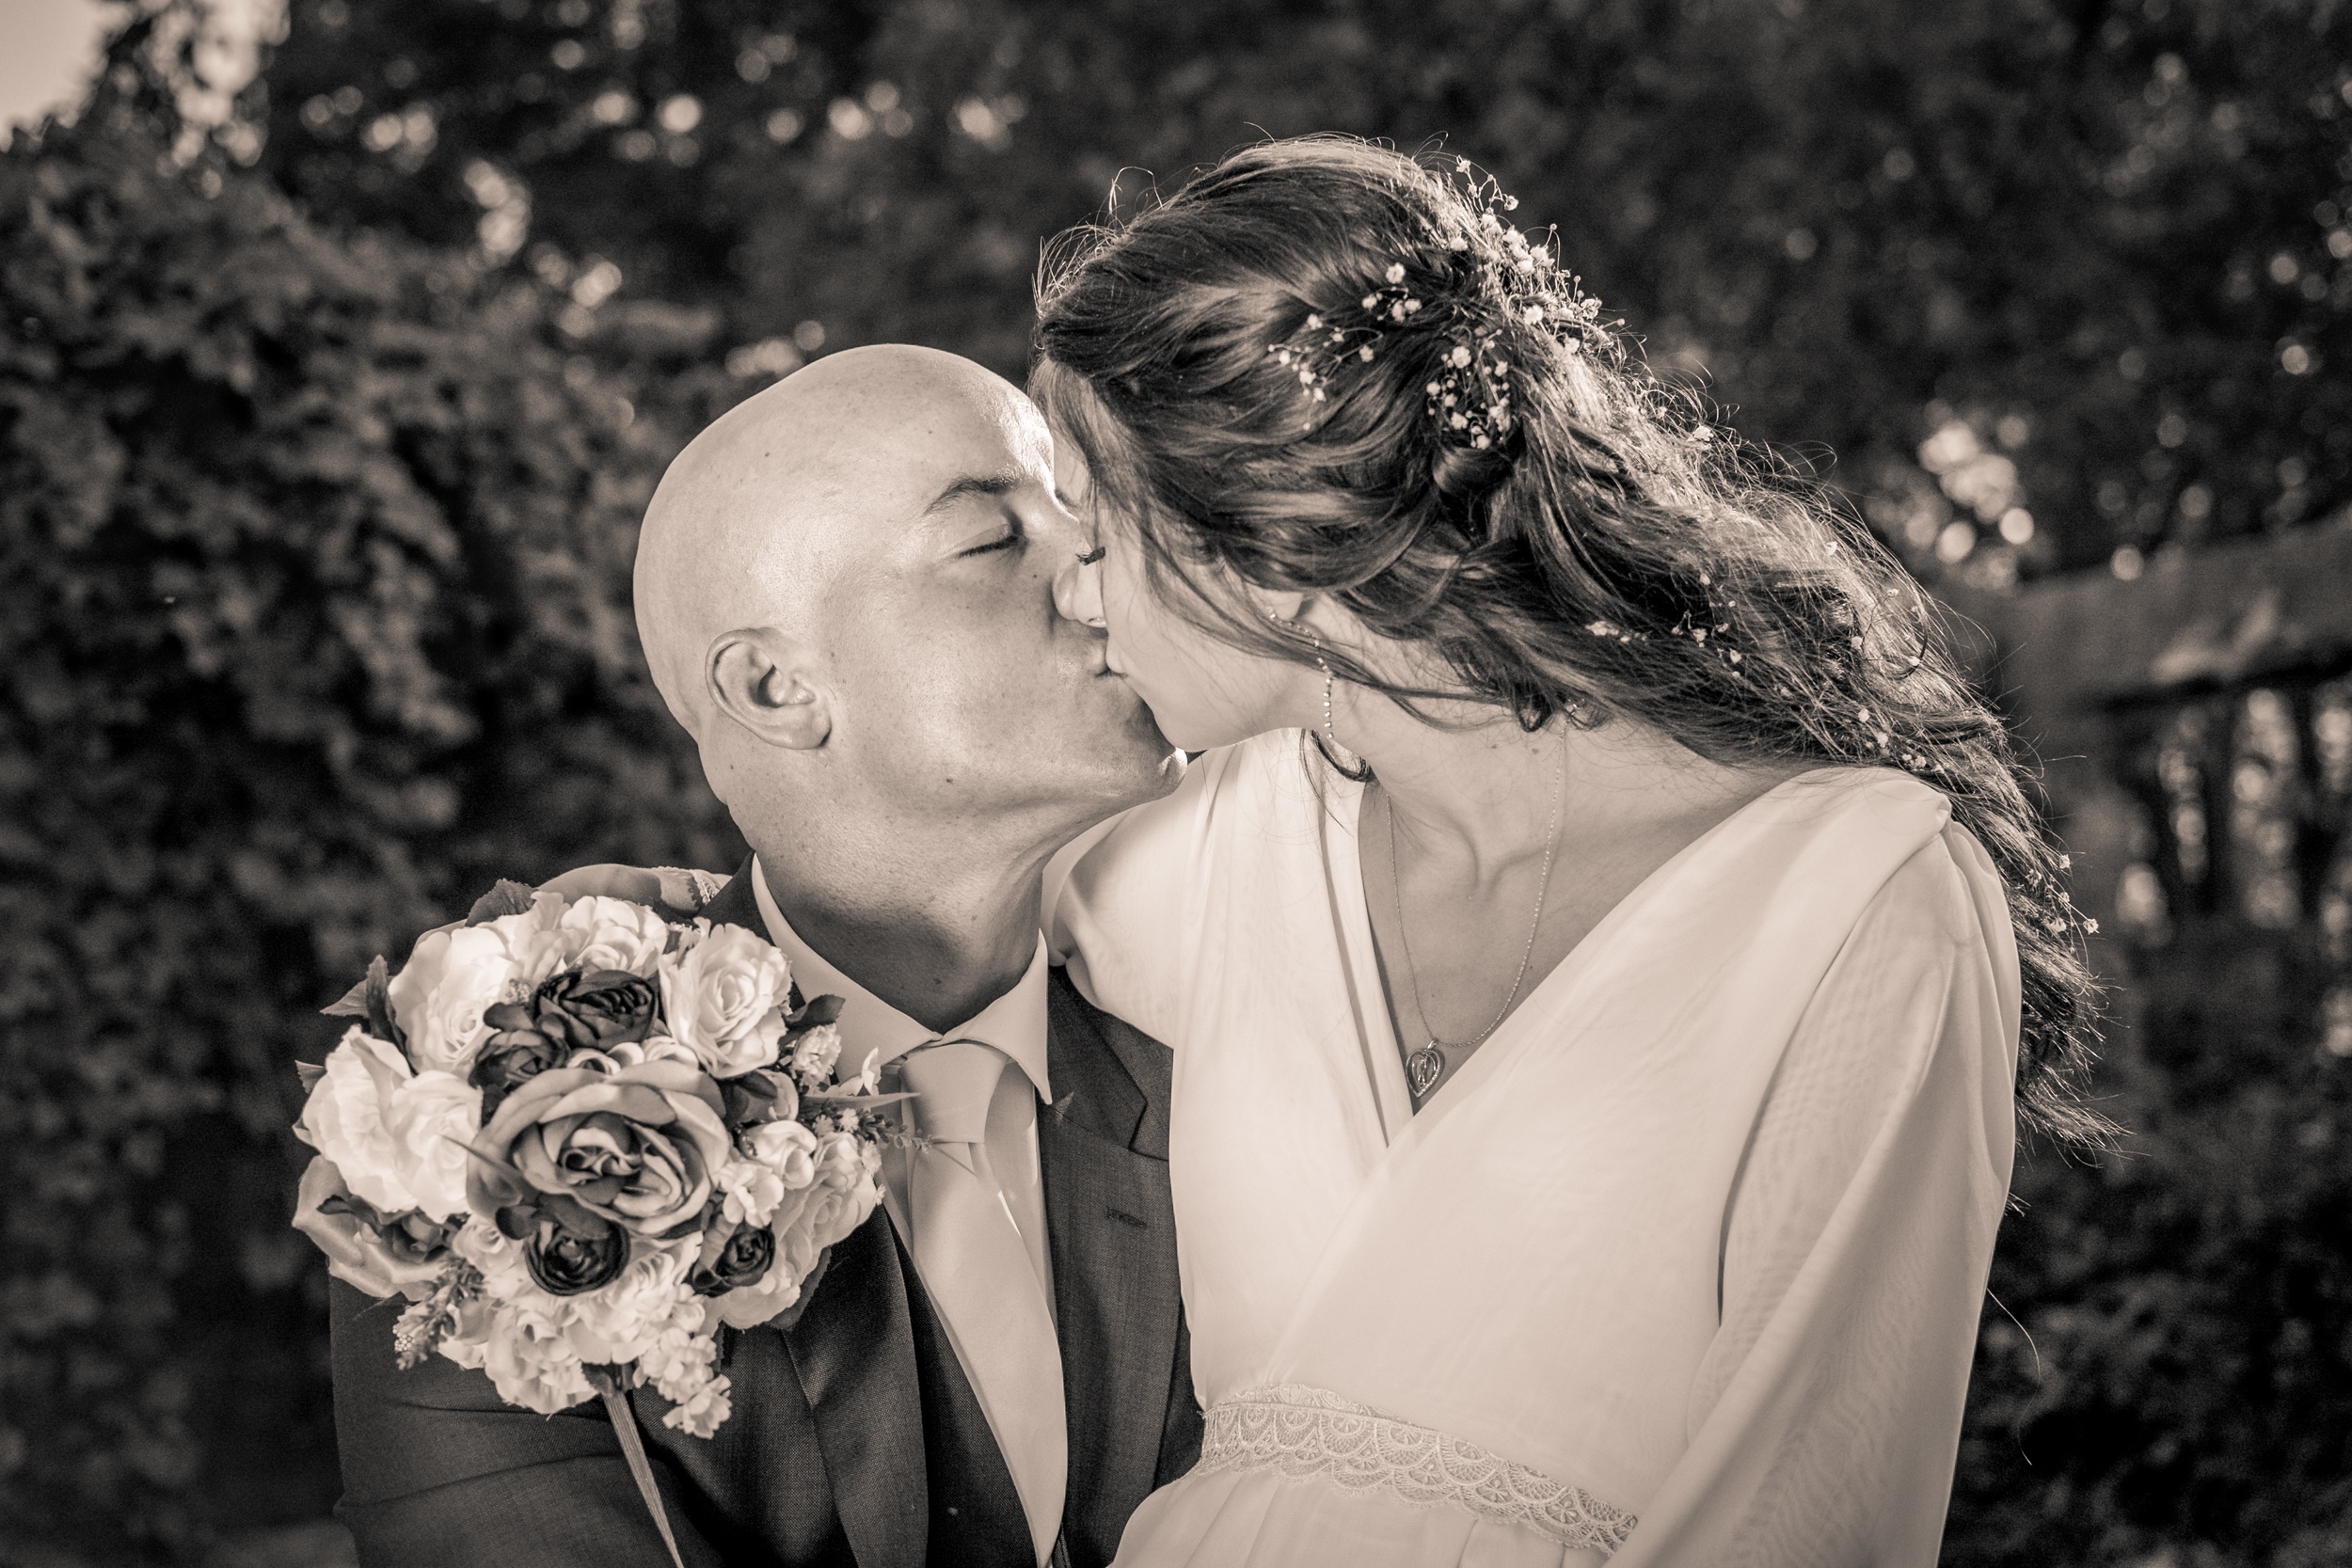
Photo by David Veldman
The portrait above was taken at a wedding. The bride and groom were very pleased with it, and I personally love it. The setup for this shot was delightfully simple. The sun was placed behind their back, and using a bridesmaid as an assistant, I angled the reflector to illuminate them and isolate them from the background. This dramatic lighting is beautiful, but was incredibly easy to create. Get a reflector and experiment with using it – you won’t regret it.
4. Use Artificial Light
Although natural light is fantastic, it won’t always be enough. Sometimes there won’t be enough of it (the intensity) or, as mentioned above, it will have too much contrast.
Fortunately, despite being outside, we are not limited to only using natural light. In many cases, you may find that you need to complement the natural light with something man-made, like an electronic flash.
Note the word complement. I used it deliberately to underscore the importance of balancing artificial and natural light. Nailing this balance will result in striking, but natural-looking images.
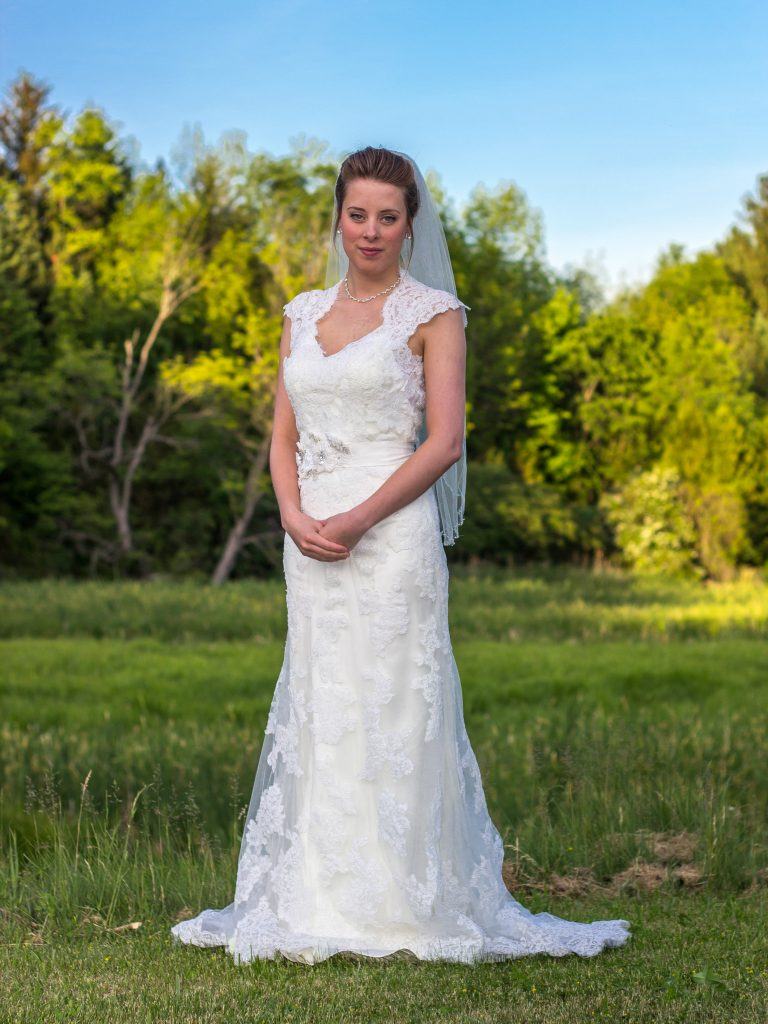
Photo by David Veldman
I took this shot of my wife (above) shortly after our wedding. (For once, she was asking ME to take a picture.) Ordinarily, the sky behind her would have over-exposed and become very white (with all the highlights blown). However, using a single Speedlight, I was able to add additional light to her while keeping my exposure in a range that would capture the highlights in the much brighter sky as well.
You will eventually need to learn how to use a flash if you want to reach your fullest potential.
This is a very simple example of a technique known as “fill-flash,” as I was simply using a flash mounted on my camera. Today, I would consider using an umbrella and off camera flash. Fill flash adds light to the foreground, so that the background doesn’t overexpose.
If you want to shoot portraits, you will eventually need to learn how to use a flash – both on and off the camera. Some photographers find flash too intimidating, and so call themselves ‘available light’ photographers. If you go that route, you will struggle to reach your fullest potential.
Recommended Reading: For tips and tricks on how to use your electronic flash, grab a copy of this Photzy’s premium guide – Electronic Flash Parts and Practices.

5. Location, Location
So, you’ve decided to shoot outside. Fantastic! The next question is, where outside? This simple question is extremely important, and one of the first things you should be asking yourself.
Even if you decide to use a very fast telephoto lens (large maximum aperture such as f/1.8) that obliterates the background into a smooth, out-of focus area, choosing your location is still important.
If you choose to shoot in a field, for example, you will have ample light, but at times, the sun can be overpowering. A forest can provide shade, but dappled shadows are often unattractive. No matter where you choose to shoot, there will be advantages and challenges, and it is your job to be ready for them.
I keep a short list of local areas that I can use to shoot portraits. This includes a waterfront area, a riverside park, and a picturesque forest. While you may not have access to these types of places, you need to scout your own area and consider where you would like to shoot when the time comes. (Nothing ruins a portrait quicker than a distracting or ugly background, even if you do use depth of field to blur it.)
6. Use The Ephemeris

Photo by David Veldman
This step coincides very nicely with the previous one. The photographer’s Ephemeris is an online and mobile phone tool that allows you to see where the sun will appear at any place, at any given time.
It is quite possible to choose an excellent location, but then find that while the place is right, the time is not. In fact, this has happened to me. I chose a beautiful riverside park, but when I met my clients at the location, it was too late in the day. As a result, the sun was setting behind a thick copse of trees, making the shoot far more difficult than necessary.
It is all too simple to avoid this mistake. Simply select your location on the Ephemeris map and note the location and height of the sun. As I mentioned above, the golden hour is very useful for portrait photographers, and the Ephemeris is your best tool for making the most of it.
You can visit the web version of the Ephemeris here for free.
7. Use Your Environment
Once you’re on location, try to remember that your background can do more than just provide a neutral backdrop. As I mentioned before, many portrait photographers love to blur out the background using fast aperture lenses. While there’s nothing wrong with this, it isn’t always the right choice.
In fact, using the environment around your subject can be a very effective method.
Suppose you decide to shoot your portrait in a forest. Instead of simply having the subject stand amongst the trees, you can have them leaning against a tree, hugging it, or sitting on it. Get creative, and use the props that you have available.
Sometimes natural elements or man-made objects can be used to manipulate light as well. A wall, particularly a light colored one, can be used in a pinch as a large reflector, and fill in unpleasant shadows. Be conscious of your surroundings, and don’t just shoot in your environment, but work with it.

8. Shoot All Seasons
Where I live, winter is a cold, bitter affair. The days become very short, and it can be very difficult to even want to venture outside. Despite this, I try my best to continue shooting year-round, and if you live in a location with distinct seasons, you should too.
While a tropical climate might provide a stable, predictable climate for photography, locations with four seasons provide the photographer more diverse shooting opportunities. In the summer, we can shoot the warm, sunny portraits, but in the fall and winter, we can create images that take advantage of our changing weather.
In the photo on the next page (page 16), the photographer created an unconventional portrait that is striking because of the winter elements. Taken in the fall, or during the summer, the picture would be entirely different.
Don’t stop shooting just because it gets cold outside, or the snow is blowing about. Of course, take precautions to protect your equipment, but shooting under rough conditions often creates stunning shots.
Recommended Reading: For improving your photography skills in inclement weather, grab a copy of Photzy’s premium guide – Bad Weather Photography.
Putting It All Together
As you can see, an outdoor portrait photographer has a lot of decisions to make: where to shoot, when to shoot, what light to use; we are confronted with numerous choices.
Don’t let this intimidate you. In fact, it’s part of what makes portraiture so much fun. Just remember that planning and consideration will almost always result in a better experience.
Research first, plan your shots, and most of all, have fun!
Here is an eight-point checklist to help organize your thoughts.
- Understand the light that you will be using (hard light or soft light? What direction? What intensity? Will you need additional artificial light?)
- Use the Ephemeris. It will help you choose the right day and time for the best lighting at your chosen location.
- Use natural light first. Add additional lighting as needed.
- Use a reflector. It’s simple, inexpensive, and accessible to all. Plus it works!
- Use an off-camera electronic flash. Face it, at some point you must master this technique. Why not start now?
- Choose your location carefully. Can you use it to add storytelling elements to your portrait?
- Utilize the environment – props… posing… altering the light
- Take advantage of the changing seasons – different season, different look!

Photo by Steven Leonti
Recommended Reading: Learn to create better portraits by grabbing a copy of Photzy’s best-selling premium guide – Art of Portrait Photography
Self Check Quiz:
- True or False: Outdoors, I’m using natural light, so I don’t need to worry about the lighting, and I should concentrate on my posing and expressions.
- When shooting portraits outdoors, is a light overcast sky a good or a bad thing?
- True or False: In order for a reflector to provide professional results, it must be purchased from a camera store.
- True or False: When mixing natural light and artificial light in a portrait situation, balancing those light sources isn’t really that important, like when shooting a product.
- If I use an electronic flash to light up my subject in the foreground so that the background doesn’t overexpose, this is called __ flash.
- What type of lens can obliterate the background through the use of aperture?
- What unattractive lighting (for portraiture) can occur in a forest?
- What does the Ephemeris do?
- What can the change of seasons provide for your outdoor portrait efforts?


