

Whenever I was on assignment, shooting for tourism organizations or travel magazines, I always envisioned the types of photographs I was going to create. My goal was simple: to capture compelling images that would serve as an appetizer to entice people to travel to that destination.
That goal served a specific purpose.
But for others who also love traveling and photography, this may not be a goal that you would define for your trips. And that’s because you may not find that need to promote a certain place or encourage others to visit a destination. For many, your photography goal while on vacation might be just wanting to create photographs that will serve as beautiful memories and awesome souvenirs for yourself and the people you’re traveling with. It may be just to show other people through social media where you are in the world and how much you’re enjoying your vacation. If you’re a more serious photographer, or thinking of getting into the business of travel photography, you may have multiple shooting goals – basically everything that I’ve mentioned so far.
It helps that we define our shooting goals because it allows us to prepare for better shooting opportunities regardless if we’re shooting for work, for fun, or for family.
One thing that I really liked about my job as a travel photographer was that the skills, techniques, strategies, and habits I’ve used on assignment helped me in creating better vacation photographs that my family and friends enjoy – some of which I would call trade secrets that can be a great benefit when applied to non-work-related shooting.
The tips I’m about to share with you today are some of the strategies and habits I’ve applied over the years, and I have used them on my own vacations so that I’d be able to get decent images that are usually difficult to get on a trip, especially when you’re in tourist spots.
It’s a very practical guide that even mobile photography shooters should find useful. In fact, the photos that I’ve used in this guide were all taken using the native camera app on my iPhone.
While I can recommend photography accessories or equipment to help you create better photographs, in this guide I focused more on shooting techniques so that more photographers can relate to it.
Are you ready? Let’s go!
Expectations and Limitations
Before we begin with the actual tips, let me share with you one lesson that I feel is very important in your quest to better photography when traveling: Your success is dependent on your ability to understand and work with and around your limitations.
I find this really true for any type of photography but more evident in genres where you have little control, like travel and street photography.
Photographers need certain levels of control to be able to create what they envision. The more control a photographer has, the easier this task would be. This is why understanding how to use Manual mode and the other semi-manual modes is one of the first things every photographer should learn. But the camera isn’t the only thing you need to be able to control.
Lighting is one of these things. This is why it’s always advised to choose the time of day whenever we’re shooting outdoors. Elements in your scene is another. You need to be able to arrange your elements to make it work compositionally. But controlling these two things outdoors is very difficult, especially when you’re on vacation. This is where limitations come in.
Your success in photography is dependent on your ability to understand and work with and around your limitations.
You can’t tell tourists to stop walking across your frame, and you can’t always wait for the right light because your tour bus is about to leave in 10 minutes.
You might arrive there when the sky is dull and distracting, or when there are just too many people competing with you for space, and not having any photo bomber in the background is an impossibility.
You need to set your expectations based on these limitations so that you won’t get frustrated when you’re there.
The other thing you need to consider is that when you’re traveling with family and friends, you’re dealing with other people’s wants that may also be different from yours. You may want to head out early for better lighting, but your spouse or grandkids are too sleepy to get out of bed.
What if you were expecting them to pose for an awesome shot but they’re not up for it? Sometimes you have to accept the fact that while you’re enthusiastic about photography, other people aren’t.
The more we come to accept these limitations, the more we begin to understand ways to get around it creatively.
Limitations help us to be creative.
The tips I am about to give were created based on shooting limitations when traveling.
1. Crowd Management
One of the top questions on my list of questions to ask whenever I’m traveling, especially if we’re going to a scenic place, is: how big will the crowds be?
The reality of famous scenic destinations is that you cannot avoid the crowd. The more famous the destination, the more people who will be there.
As much as you want a perfect shot of a landmark, you’ll be sure to compete with hundreds if not thousands of other people for a spot. When you do get the chance, you only have a few seconds to do it – or minutes if you’re lucky.
I know how difficult it is to compete with a crowd. That means you need to find ways to manage them in your shots.
The first thing you need to realize is that you are actually part of the crowd. If you feel that other people in the destination you’re in is a hindrance to your photography, then to someone else, you are a nuisance to theirs. You are a potential photo-bomber in someone else’s image.
So instead of worrying about the crowd, it helps to let go of your expectation of having a crowd-free scene in a potentially crowd-filled destination. The crowd is not your enemy.
When you can’t avoid the crowd you may want to incorporate them into your photographs, but you need to strategize how it can be part of your scene without them being distractions compositionally.
There are various compositional and technical solutions to be able to do this. The main idea, however, is to allow your subject(s) to stand out. If your subject(s) are people, they should look different from everyone else.
Timing the crowd to fall into the right place is also an important factor so that your subject becomes prominent and distractions are avoided. Yes, it’s important to pay attention to everything in your frame.
Take a look at this photograph.
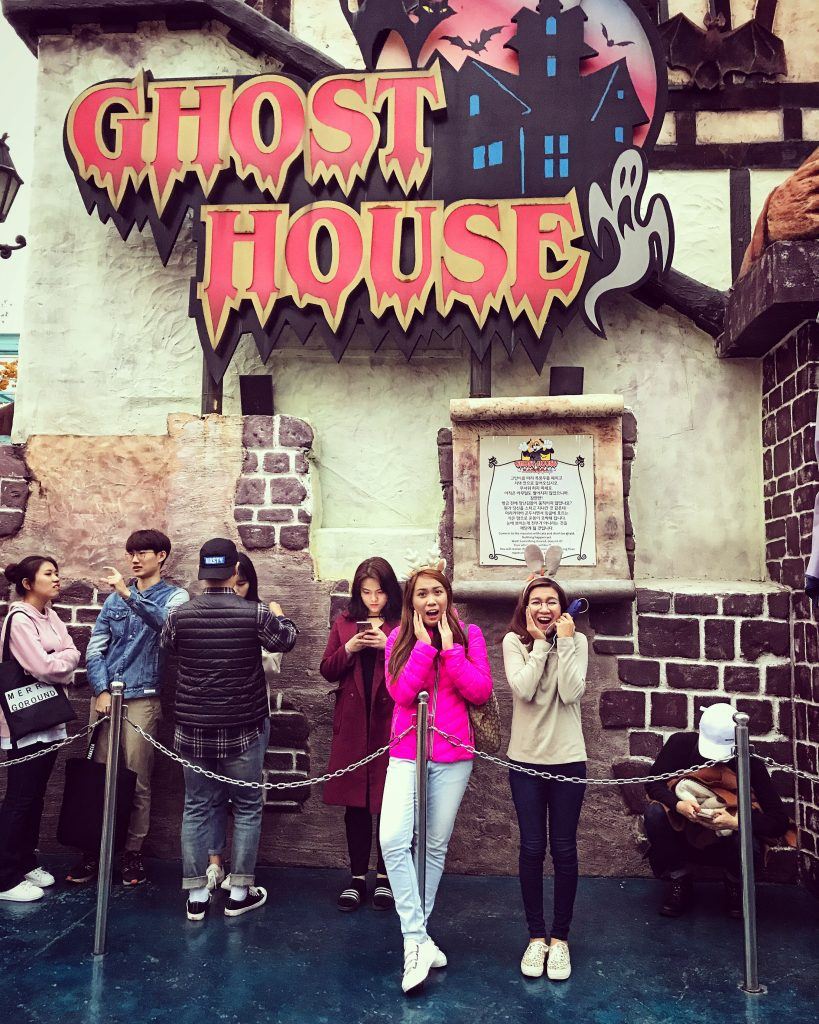
Photo by Karlo de Leon
My wife and a friend of ours was queuing at the Ghost House attraction at an amusement park in Seoul, South Korea. Both of them stepped forward and made exaggerated expressions.
Our friend’s bright pink parka also helped in highlighting them as the subject instead of just letting them blend with the others in the queue.
You need to find a way to increase the visual weight of your intended subject so that they will stand out. Study different composition techniques and you’ll discover other ways to separate your subject from the crowd inside your frame.
Recommended Reading: Want to improve your storytelling skills? Grab a copy of this bestselling premium guide, Powerful Imagery, by award-winning photographer Mitchell Kanashkevich.
2. Avoid Tour Groups
Beautiful photography involves great timing.
It’s being in the right place at the right time with the right concept, whether it’s done intentionally or by chance. In most cases, these are done by chance while preparing for it intentionally.
For example, when you’re visiting an iconic landmark, you would want to arrive before the tour groups do. As large tour groups do not arrive very early in the morning, you can choose to head out hours before they do.
When we visited Nami Island in South Korea, we wanted iconic photographs of tree-lined ginkgo and maple trees. We got there at 8:30am although I had hoped to get there by 7am. Unfortunately, forcing my wife and her friends to wake up earlier was a difficult feat. Getting there an hour and a half after opening time was the best we could do. That was one of my limitations during that trip.

Photo by Karlo de Leon
Still, it was a good choice since there weren’t a ton of people when we arrived. A couple hours later and we would have been competing with hundreds of other tourists to get a good background.
Of course, using this strategy has several considerations.
First, being early in one destination means you’ll also be late for another. We took our chances by choosing Nami Island as our prime destination of the day in our itinerary.
Second, using this strategy assumes that you won’t be part of a tour group and that you’re willing to arrive earlier or leave later after they do.
So you may be wondering, what can you do if you can’t avoid the crowd this way?
Beautiful photography involves great timing.
Understanding the psychology of the crowd is one of the secrets in working around this limitation.
You see, the crowd has a mentality, and if you understand this mentality you can use it to your advantage. One of these common things that the crowd does is they always follow the map.
Most vacationers in tour groups don’t really strategize where they should go first. They just usually go with the flow, wherever their guide takes them.
When they are told to go to A then B then C, they will do exactly that. If I’m avoiding the crowd, I will either do the opposite, or go to D or even Q. If you’re joining a tour group, it’s important that you choose a tour that allows you to explore on your own. If you’re brave enough to wander off by yourself for a bit, then that’s one way you can avoid the crowd.
Other solutions can be visiting during weekdays or less touristy days. This varies per destination so you need to do some research here. We visited Nami Island during autumn’s peak foliage so we made sure we went on a potentially less crowded day which helped in reducing the competition.
3. Hide Distractions Behind Your Subject
When there is something or someone in the background preventing you from achieving an awesome shot because it’s too distracting to look at, one strategy you can use is to hide it behind your subject or another foreground element.
You may do this by moving around a bit and/or bringing your subject closer so that it’s easier to hide the distracting element.

Photo by Karlo de Leon
This photo was taken in Jeonju, South Korea. The place has become quite famous because it’s a shooting location for a popular Korean drama that aired in 2017. The nice thing about this spot, though, is that everyone was disciplined enough to queue. We went there on a weekday so there weren’t a lot of people queuing for their turn to take photos of each other.
The spot where most people go to take photos is further back from where my subject is standing. Actually, it’s in between where she is standing and the traditional gate that you see behind.

If you take a closer look at the photograph, you can observe an extra element on the left side of the subject’s bonnet. It’s actually another person’s face and arm. There’s actually another person with her behind my subject. They’ve just finished their turn taking photos.
This is an example of hiding distractions.
This isn’t the best shot in the bunch, but I used this shot to show that someone was behind my subject to give you an idea. Of course, the best scenario is if the person was totally hidden.
This strategy works not just with people, but also objects like trash, an object with a distracting color, or an element that doesn’t quite fit the scene.
Recommended Reading: Want to improve your storytelling skills? Grab a copy of this bestselling premium guide, Powerful Imagery, by award-winning photographer Mitchell Kanashkevich.
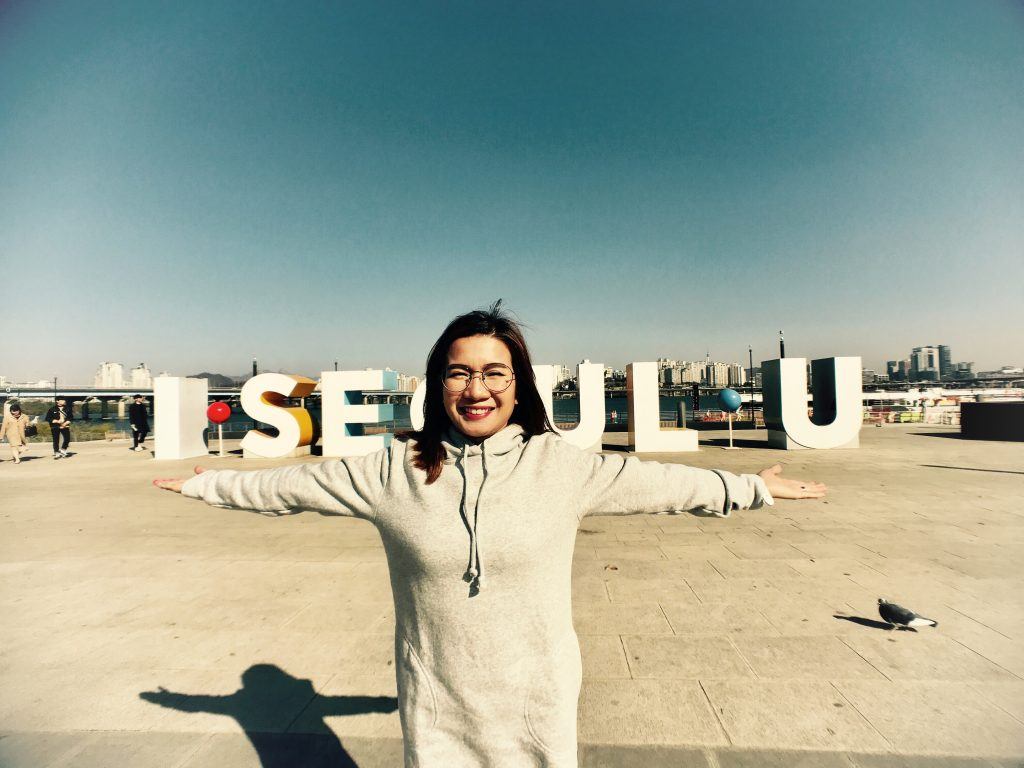
Photo by Karlo de Leon
4. Distance Makes a Difference
Hiding your subject won’t always work because you’re limited in terms of angle since you’re required to shoot lower to be able to hide distractions. It also won’t work when there’s too many things to hide.
For example, in this shot, we already managed to get there earlier than the tour groups to keep the crowds at a minimum, so it was quite easy to find a good spot during the first couple of hours that we were there.
This would have been a good example of how you can hide some of the crowd in the background behind your subject. If I would have taken a lower shot, my subject would have hidden the other people behind her. Of course, we wouldn’t have been able to hide the ones on the sides.
In this case, however, I chose not to use that technique.
I did try, but I like this perspective better.
The good thing is that it still turned out nicely. The other tourists were still part of the scenery but they’re not really much of a distraction anymore.

Photo by Karlo de Leon
Here, I used distance to lessen the visual weight of the other people. We intentionally chose a spot that is farther from everyone else. Most of them were actually crowding around that area in the back.
Why does this work? Because elements aren’t too noticeable when afar, so keeping distracting objects or crowds at a distance will help you get better shots.
People will normally crowd around the same spots, so instead of shooting where everyone is at, move farther from your background and you’ll create a good distance from the crowd.
This does two things: it makes the crowd insignificant in the shot since they’re small enough not to be noticed, or they are small enough to be edited out easily, if you’re into post-processing.
You may not always have the same iconic photograph you had in mind, but you’ll end up with a far better shot with little to no distractions.

Photo by Karlo de Leon
In this photograph, you’ll find a bit of a gathering at the gate entrance. As it’s a traditional structure, it’s really quite iconic so people tend to crowd around it to take photographs.
Instead of competing with them, we chose a spot where the people and gate becomes an accent in the background. I think this is a better shot than if we went closer to the crowd. This is one way to take advantage of distance.
Here’s another set of photos to illustrate:
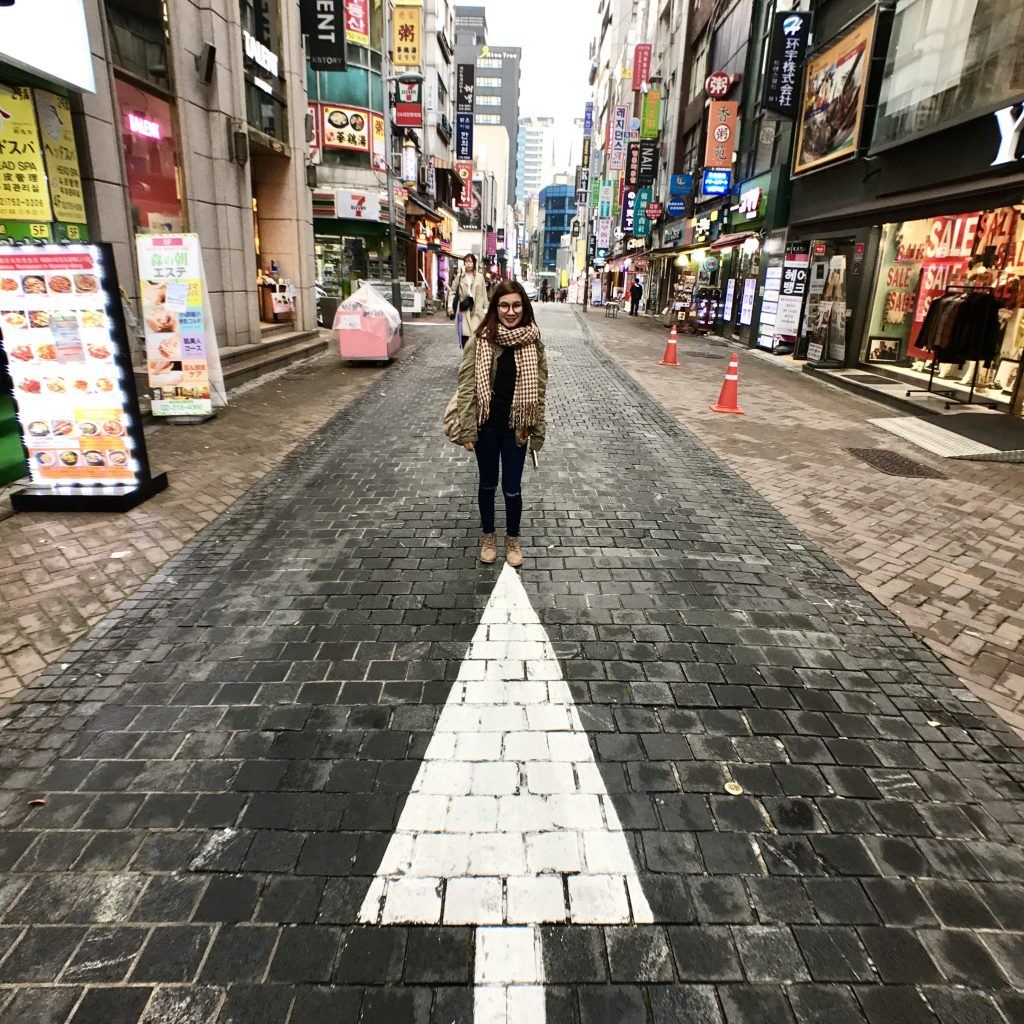
Photo by Karlo de Leon
Here, you’ll find a woman walking right behind my subject. Because she’s already walking too close to my subject, she’s now too obvious and has become a distraction.
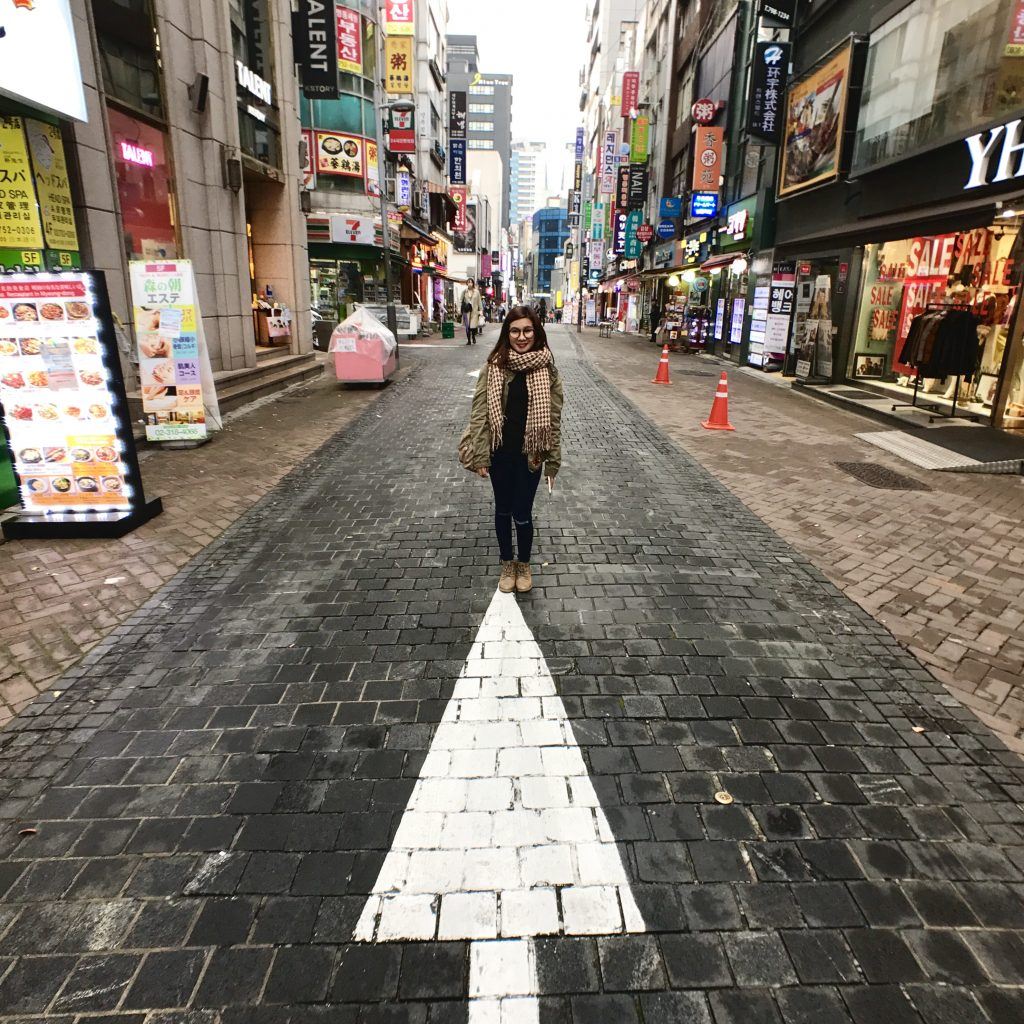
Photo by Karlo de Leon
A few seconds ago, however, she wasn’t too noticeable (right photo). If she was farther away, that would have been better.
5. Don't Spend So Much Time with Tricky Lighting
The reality for most people is that they don’t have the luxury of time to stay in one place when they travel. If you’re on a tour group, you probably have a set schedule and it’s not enough to give you an opportunity to choose the kind of light you have.
If you arrive at a place at high noon on a clear day, or better yet, in the afternoon around 2 or 3pm, you’ll find that light is not only intense, but also uneven. Sure, you may have heard that it’s not best to shoot when the sun is way up, but I’m pretty sure that won’t stop you from taking some souvenir photos.
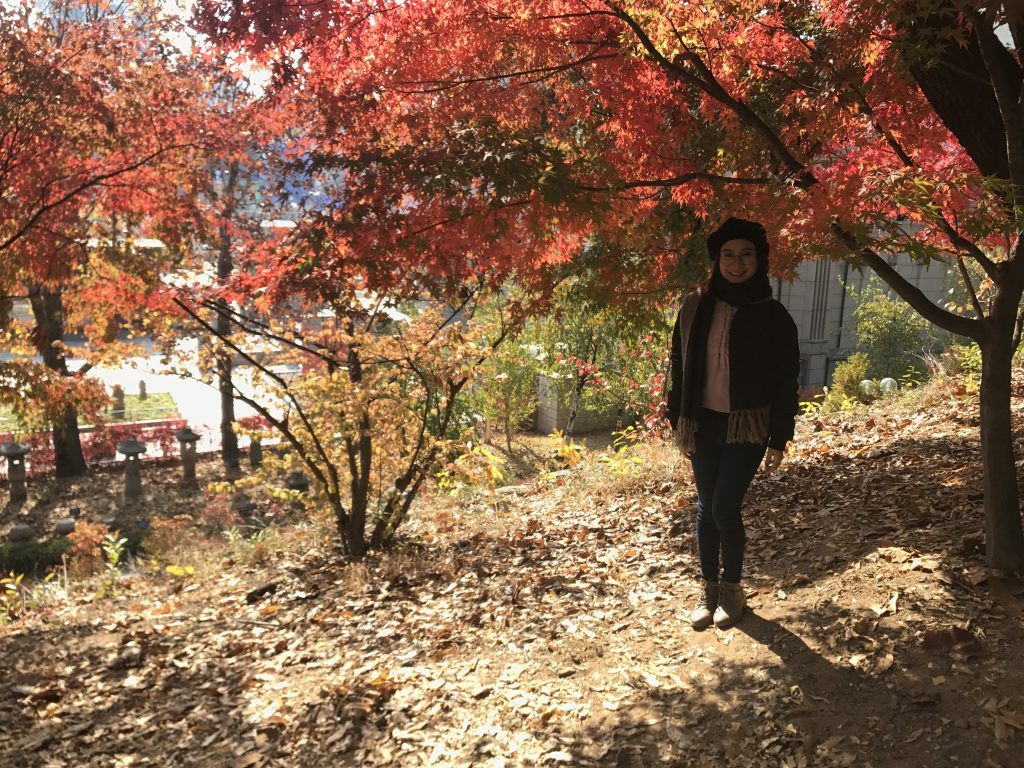
Photo by Karlo de Leon
Here’s an example of a shot my wife wanted me to take. It’s pretty bad, I know. But she wanted it so I took it to keep her happy. She later agreed that it was a bad idea.
Fill-in flash will probably work here, but I’m not a fan of flash. Flash is just too disruptive. It calls too much attention when used. Especially when you’re in a scene where I’m better off invisible, flash isn’t a good idea.
Also, when you’re using a phone camera or a DSLR’s built-in flash, where the flash is front-facing, it will also look very unnatural.
So what do I do when light is tricky and isn’t photograph friendly?
I avoid it.
But does that mean I avoid shooting opportunities? Yes! A whole lot. And I don’t mind.
Actually, that’s not entirely true; a lot of times we still want a photo of being in a landmark even if the lighting is bad.
Here’s what I’m talking about.

Photo by Karlo de Leon
This photograph is an example of really awful lighting. The sunlight is strong and the shadows cast by the other building just do not make the spot look pretty.
This is again one of those popular Korean drama shooting locations. The door is the actual landmark.
So why did we take this shot even if the lighting was bad? Well, just so my wife can post it on social media as part of her ‘Korean drama shooting locations’ album!
It’s a really bad photo because of tricky lighting, but we don’t have the time to stay here and wait for better lighting. We could have also been more creative around it, and I’m sure there are ways to do that; for instance, she could have stood on the other side of the door, but we didn’t have enough time since there was also a queue forming.
These are the opportunities where if you really want it, then just take it and fix it in post-processing if you can.
In my opinion, a shooting opportunity with bad lighting isn’t a shooting opportunity at all. I’m not a fan of editing beyond a couple minutes either (although you can use certain post-processing presets to make this shot look a bit better).
So when I encounter tricky lighting, if I can, I will avoid it.
In my opinion, a shooting opportunity with bad lighting isn’t a shooting opportunity at all.
Why is it alright for me to do that? Because there are a lot of other opportunities with better lighting when you’re traveling.
Dealing with tricky lighting means I have to think more, spend extra time, and put in more effort. Before you’re able to avoid or even work around tricky lighting, though, you need to be able to recognize it in a potential scene. The only way you really know what it looks like is if you experience it. If you’ve already done a bit of outdoor shooting, you’ll notice that at certain times you can’t seem to even out the lighting – parts of your scene are too bright and other parts are too dark and in spaces in your frame that you don’t want them to be. It happens regardless if the light is soft, but it gets worse when light is intense – that’s tricky lighting.
Here’s a photo comparison that I’d like to share with you:
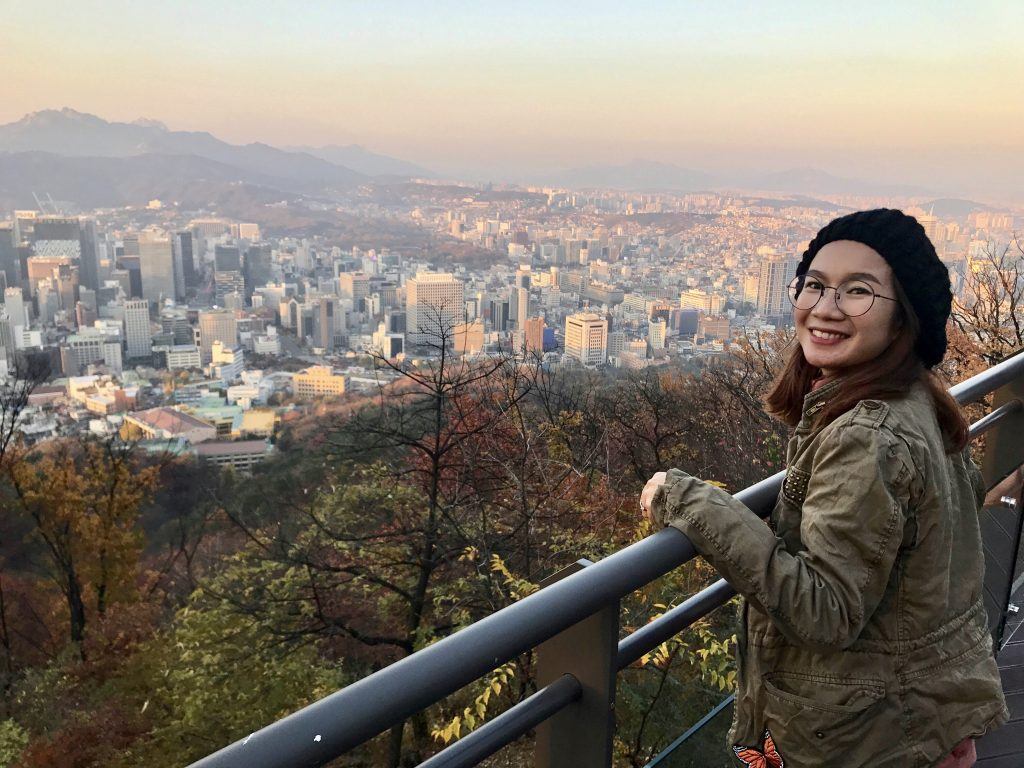
Photos by Karlo de Leon
Both images were taken at the Namsan Tower area in Seoul, South Korea. The view was absolutely beautiful so we definitely wanted some portraits with the city view as the background. I was looking for a way to light my subject so that it’s easier to even out the lighting on the background, but there wasn’t a good spot to do that. So we just let that go and went on our way to explore the other areas until we found a place where the lighting was even and well lit. We could have spent more time in that other spot where the lighting was tricky, but finding a better well-lit spot gave us more and better shots to choose from, and I didn’t even have to enhance anything in post-processing.
Find Interesting and Clean Backgrounds
This is possibly the easiest tip to follow: finding interesting and clean backgrounds. What I mean by interesting is that the background should either be culturally relevant, eye catching, or beautiful. And by clean I mean the lack of distractions and the presence of good, even lighting.
This tip works well in places that aren’t too touristy. Or if you’re in a touristy destination, look for spots that are not the main attraction. Remember, people tend to crowd around the famous areas, so they miss out on less-famous but photo-worthy spots.
When you’re with family and friends, most of them who would want their photos taken would simply like to stand in front of a nice background. Quite frankly, if those are the only photos you end up capturing, it’s already well worth it.
For me, my success in creating good vacation images is dependent on my ability in finding interesting and clean backgrounds.
Here are a few strategies that you could use.
Flat and Pretty Backgrounds
Pay attention to walls, doors, and buildings.These are examples of flat backgrounds.
Flat backgrounds are sceneries where most of the elements are within or almost within the same distance in relation to the camera.
This works because when you find one that’s interesting, all your subject has to do is to stand up in front of it, make sure there isn’t too many people around, and follow some composition rules – that’s it!
Because you’re taking depth out of the way, you’re removing the possibility of people walking behind your subject while you’re taking a shot. You need not worry about distractions in the background too much. Remember, the more control that you have, the better.


Photos by Karlo de Leon
These two photographs above were taken as we were making our way toward famous landmarks.
I like the bottom photo in particular because it’s not only culturally interesting but also quite modern compared to most of the other photos we took of flat and pretty backgrounds during our South Korea trip.
Single Vanishing Points
Single vanishing points are what we call one-point perspectives. It’s easy to find them when traveling.
Look around for interesting bridges, small roads, alleys, staircases, and tunnels.
You have less control when it comes to the background so you have to pay attention to what’s going on behind, but it’s quite effective because it uses the power of leading lines.
If you’re in a destination that is quite different to where you live, the chances of that background looking different is already a given. So all you need to do is have your subject stand right in the middle or near a vanishing point, which is the point where the lines intersect. Of course, again, you need to ensure you have beautiful lighting.

Photo by Karlo de Leon
This is a biking trail located beside the river close to Jeonju Hanok Village, a traditional village in Jeonju, South Korea. While everyone else was focusing on the traditional houses, we chanced upon this area on the far end of the village. Since no one was there, we had this nice vanishing point background and beautiful light all to ourselves.
Hide the Empty Sky
When you’re shooting outdoors while on a trip, whether you’re shooting posed vacations shots, candid shots, or beautiful sceneries, you will find a lot of shooting opportunities where the sky is part of the background.
But the sky isn’t always flattering. Cloudless white skies usually create an empty space that doesn’t work well with most images. You need to be able to deal with this problem.
Cloudless white skies usually create an empty space that doesn’t work well with most images. You need to be able to deal with this problem.
The most common solution to this is to adapt HDR techniques – blending together several images using different exposures to tone down the sky. Those who are into digital art would probably use a different approach, such as swapping skies with some other photo to make the image look better.
However, I’m not a fan of HDR nor am I a fan of composites in my vacation shots.
I’m not a purist so I do embrace editing as an important part of photography, but if it’s going to take me more than a couple of minutes to edit an image, then I ditch that editing solution. And maybe, since I’m used to shooting for publications who only require the raw images, I’m used to creating solutions in-camera rather than using postprocessing solutions to fix a shot.
If you’re like me and you don’t really want to spend too much time editing, here’s a couple things you can do:
Photo by Karlo de Leon
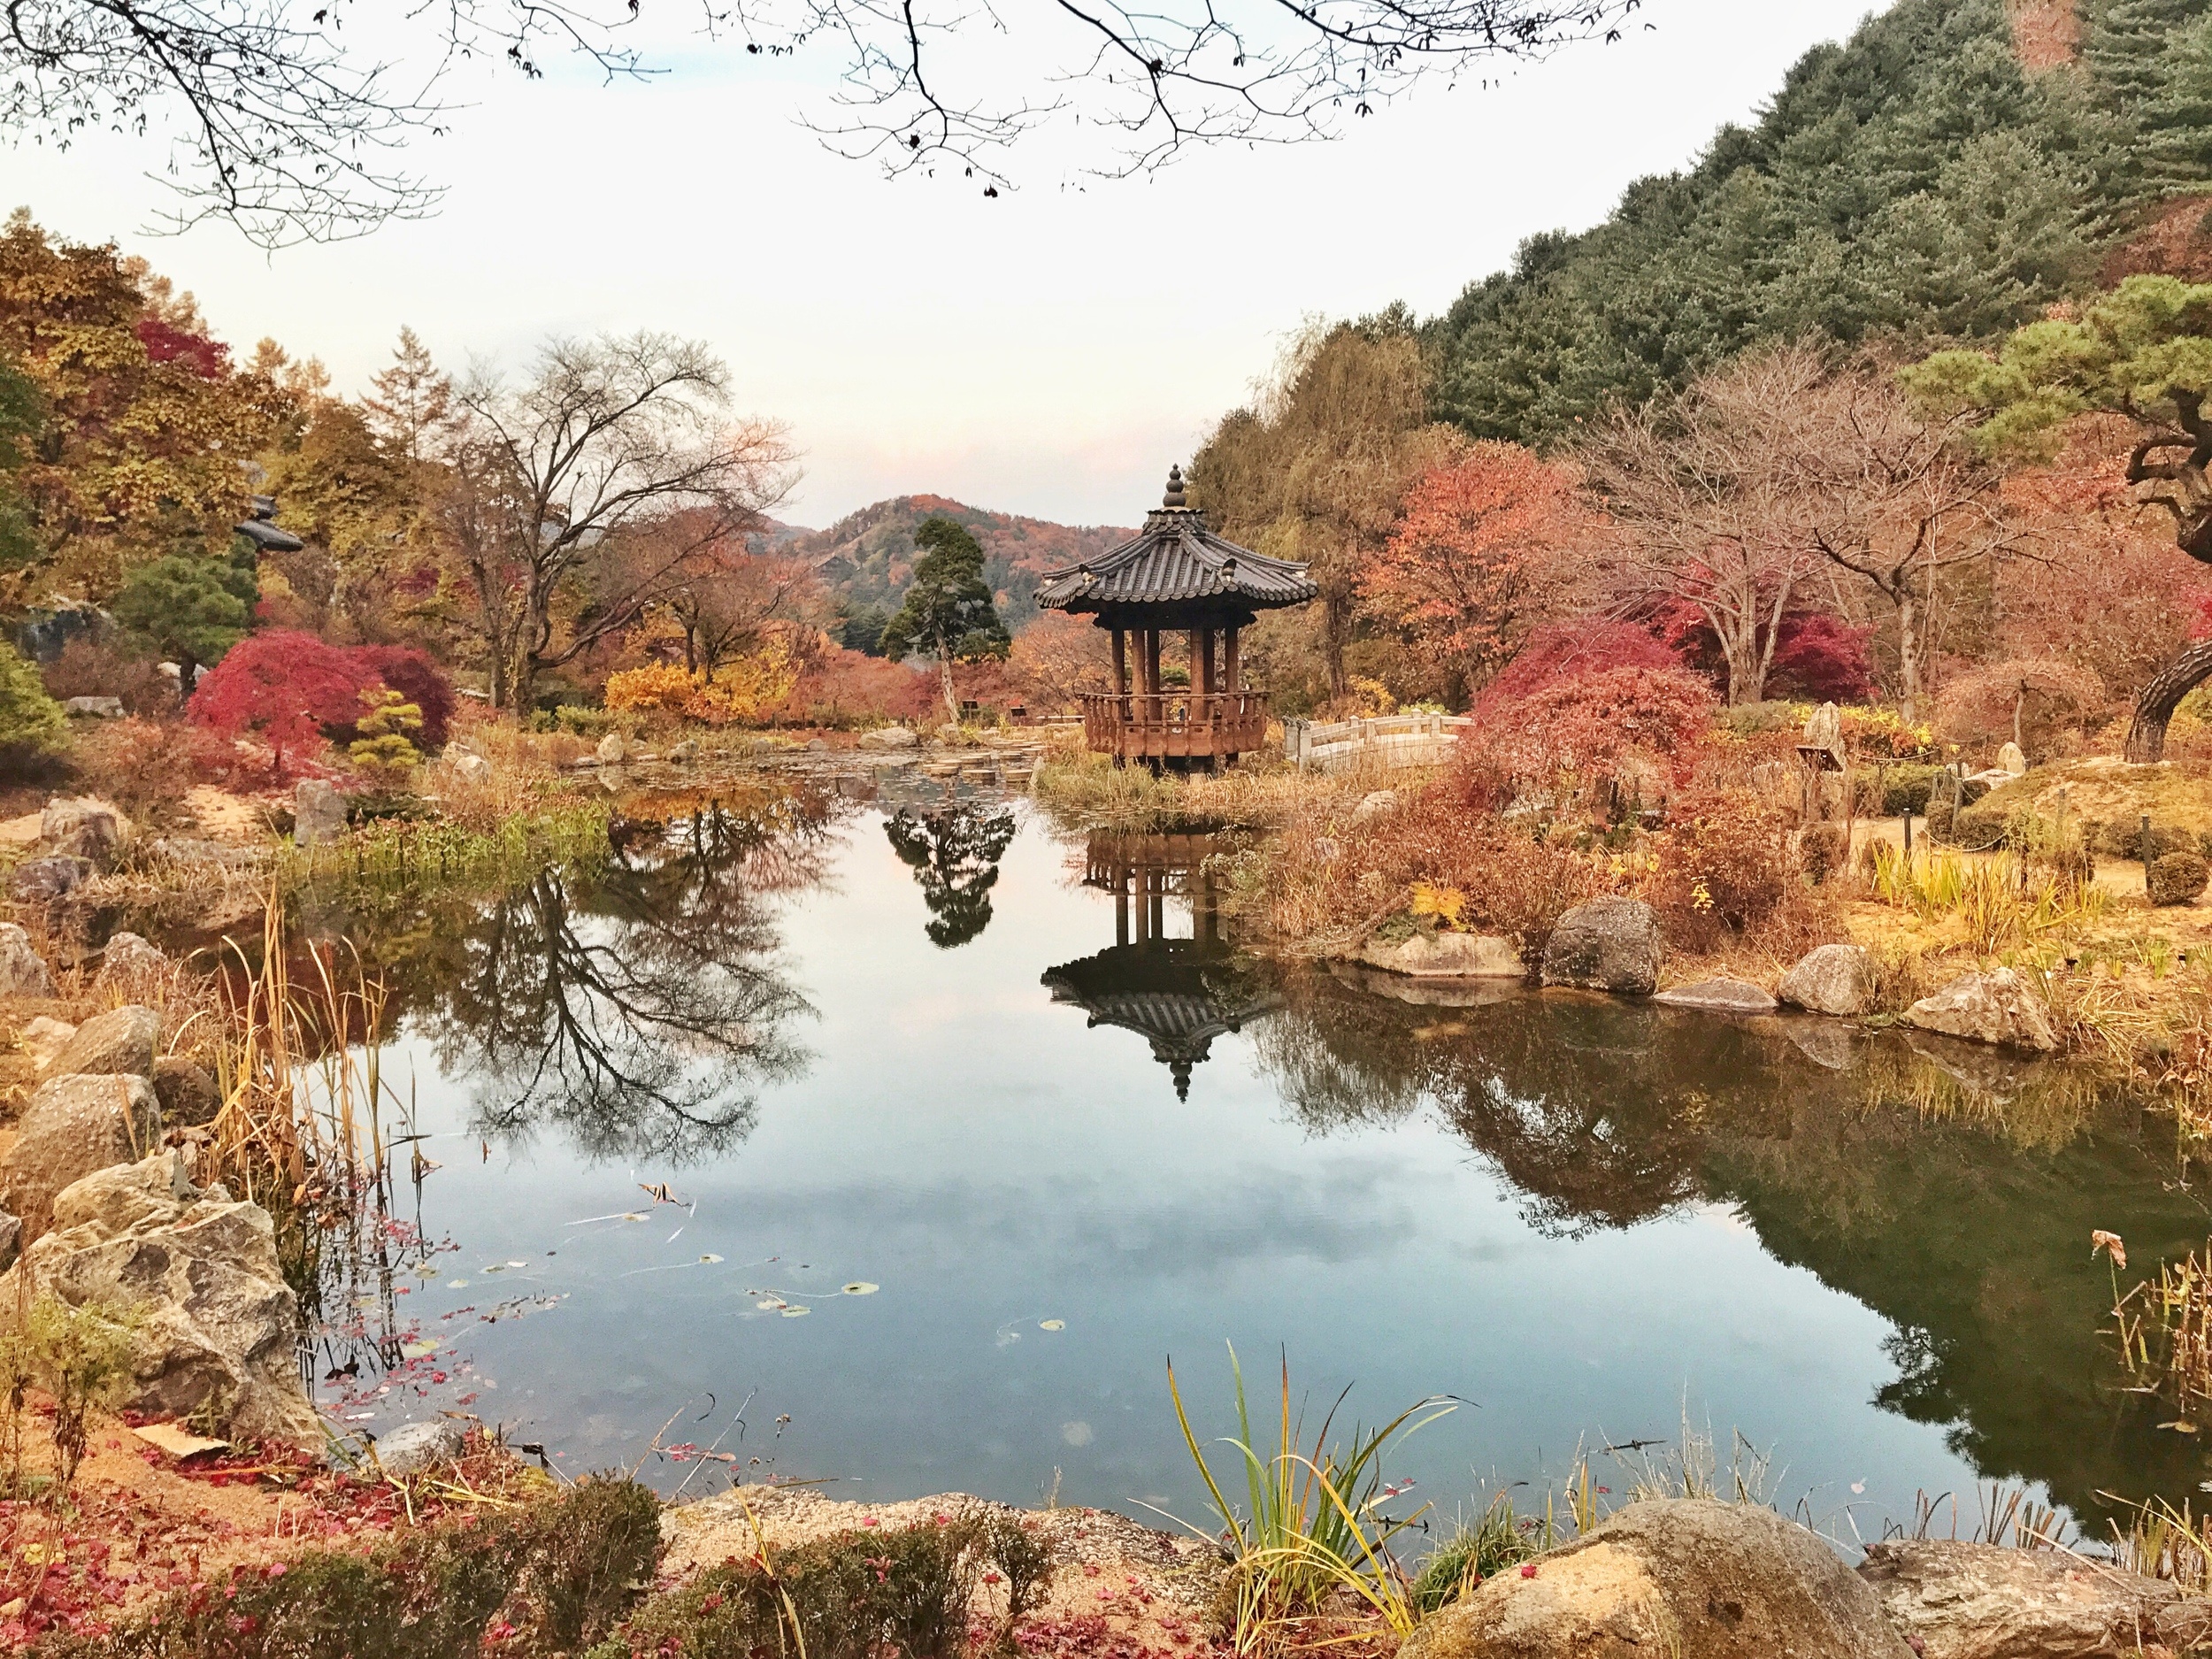
I took this image at sunset at the Garden of the Morning Calm in Gyeonggi-do, Korea. The sky was cloudless so the resulting photo created a big blotch of empty white space that’s quite useless in the image.
One solution was to change perspective and use the elements around us to hide or minimize the sky
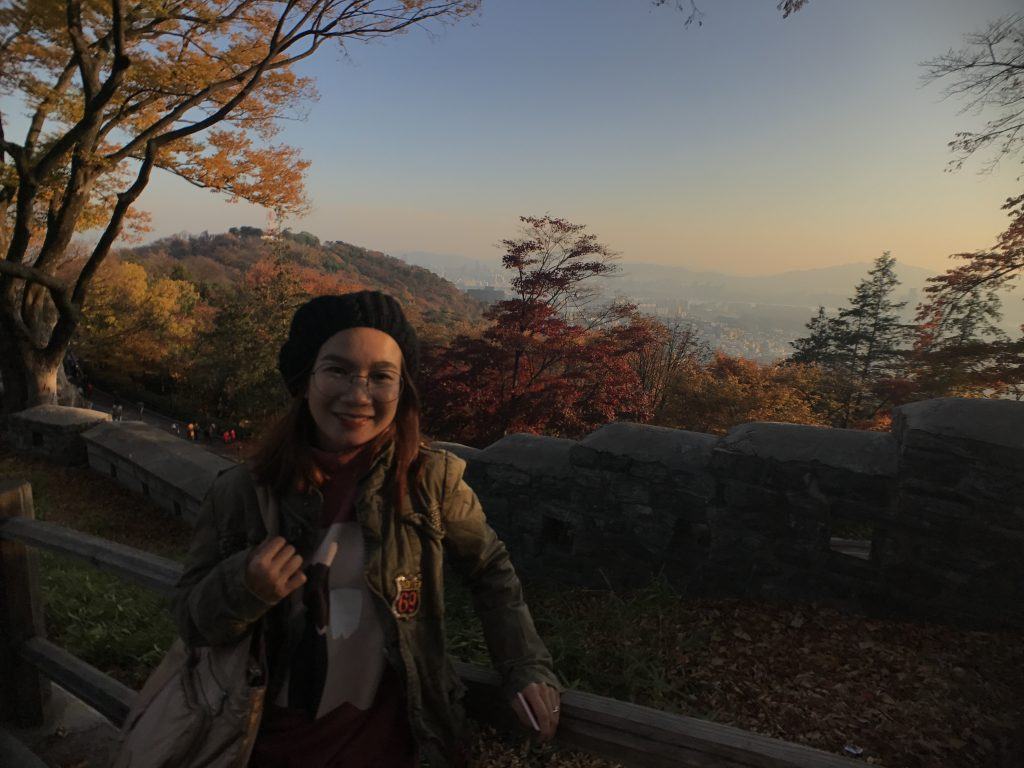
Photo by Karlo de Leon
Here, a tighter crop on the opposite side of the pond and a little help from the mountain and trees behind was used to keep the empty sky at a minimum. Moving to the other side also avoided backlighting.
Photo by Karlo de Leon
In this photograph, I used a different solution to minimize the effect of an empty white sky. By using the environment, a tree trunk, and some foliage, I was able to tone down the empty sky. Just imagine what that will look like without those elements.
Note: The sky may not actually look empty and may even have clouds when looking at it with your natural eye, but your camera’s sensor and LCD screen will render it differently because of what we call “dynamic range.” So when you have to increase your exposure so that your subject will be well exposed, that may overexpose the sky, giving you that empty white look

Photo by Kim de Leon
My favorite shot of this place, however, isn’t even mine. Here’s my wife’s shot of the same scene. She’s not a photographer, nor is she an enthusiast. She just loves taking photos when traveling.
I think she did a really great job of using nature to hide the sky. Again, imagine what that would look like if it was all sky. The sky here isn’t actually that bad since it has some color, but the branches made it look better.
Recommended Reading: Want to improve your storytelling skills? Grab a copy of this bestselling premium guide, Powerful Imagery, by award-winning photographer Mitchell Kanashkevich.
Final
Improving photography isn’t just about acquiring skills and knowledge. It’s also about being able to embrace certain attitudes and developing habits that you can use that you may not necessarily read in photography books, blogs, and guides.
Take time to develop these habits. Try out strategies. And develop your own trade secrets. I have already shared with you some of mine and I have used them not only when traveling but also in other genres of photography. Some may work for you. Others may not.
I really hope you enjoyed not only the lessons in this guide, but also the photographs that we took during our recent trip to South Korea.
These photos are very personal and I’d like to thank my wife for giving me permission to share them with you. They may not be the best images you’ll get when on vacation compared to many other photographs that you see in travel magazines, but for us, they definitely served their purpose and are something we’ll definitely collect over the years.
Note: If you’d like for us to create more practical content that focuses on trade secrets and working strategies, contact Photzy here and tell us what you think about this short guide.
I’d like to end this guide by giving you an exercise. I suggest you do this several times before your next vacation.
Shooting Exercise: For this shooting activity, I’d like for you to go on a vacation. To be more specific, I’d like for you to pretend you’re going on vacation to some other interesting city or country. In reality, you only need to visit the next town or even just a neighborhood nearby. If you’re located near a tourist destination, I recommend going there. To make it more realistic, bring your friends, your kids, or your grandkids with you so they can pose for you, as if you’re on a real vacation. Spend a whole day, half a day, or even just an hour. It’s really up to you. The actual exercise is simple: begin practicing the seven tips and strategies I have shared in this guide. At the end of your imaginary vacation, go over the photos you’ve created and recall which of the techniques were easy and which were hard to do. You may do this activity as often as you want until you go on an actual vacation. See how much you’ve improved by then.


