

Suppose you have dreamed about creating beautiful Milky Way pictures or any other form of astrophotography. In that case, you will find this guide very helpful when getting started.
We are going to discuss the 500 Rule. This rule is about keeping the stars sharp and focused in your pictures.
Here is what you will learn:
- What is the 500 Rule?
- How does it help with astrophotography?
- What happens if you don’t follow the 500 Rule?
- What is the 600 Rule?
- Why are DX cameras and lenses different?
- Why is it helpful to use a foreground object?
- Post-processing astrophotography photos
Due to the earth’s rotation, stars will record on your camera as streaks of light across the night sky. This is a direct result of the long exposures that are required to capture the dimly lit heavenly bodies above us.
Key Lesson: The only time this would not be correct is if you are using an astrophotography tripod head that moves in tandem with the earth’s rotation. There are many options available, and they are sometimes called ‘tripod trackers’ or ‘sky trackers.’ However, you don’t need to make this investment to get started in this exciting and rewarding genre of photography if you follow the 500 Rule.
Recommended Reading: If you’d like to learn more and improve your landscape photography, grab a copy of Photzy’s bestselling premium guide: The Complete Landscape Photography.
What Happens if You Don’t Follow the 500 Rule?
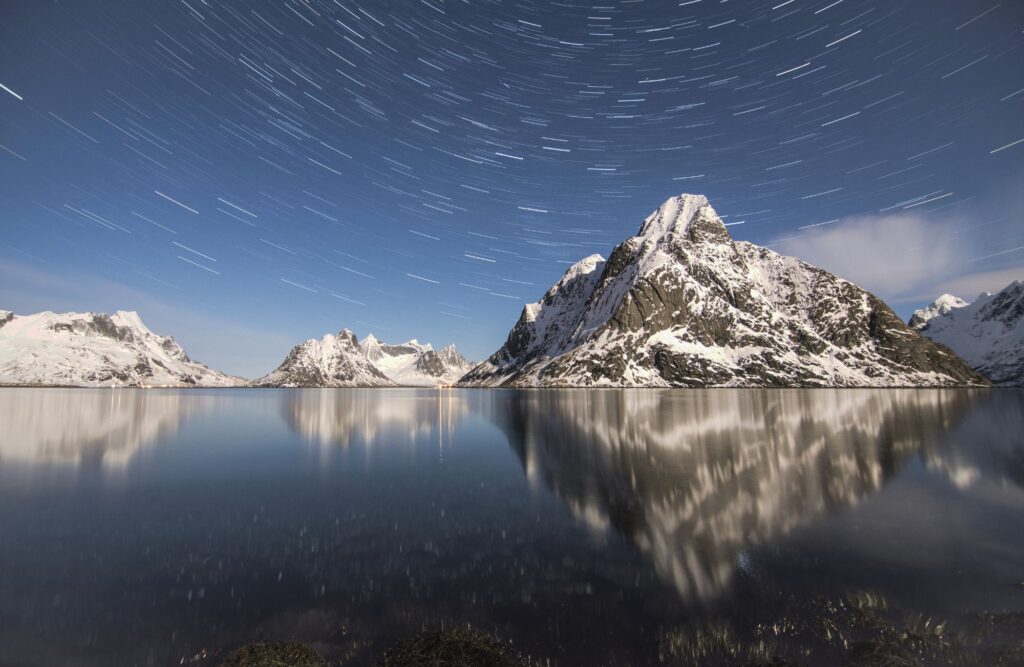
Your photos will display some level of star streaks across the sky. Those streaks aren’t necessarily bad, and you can use them for creative influence.
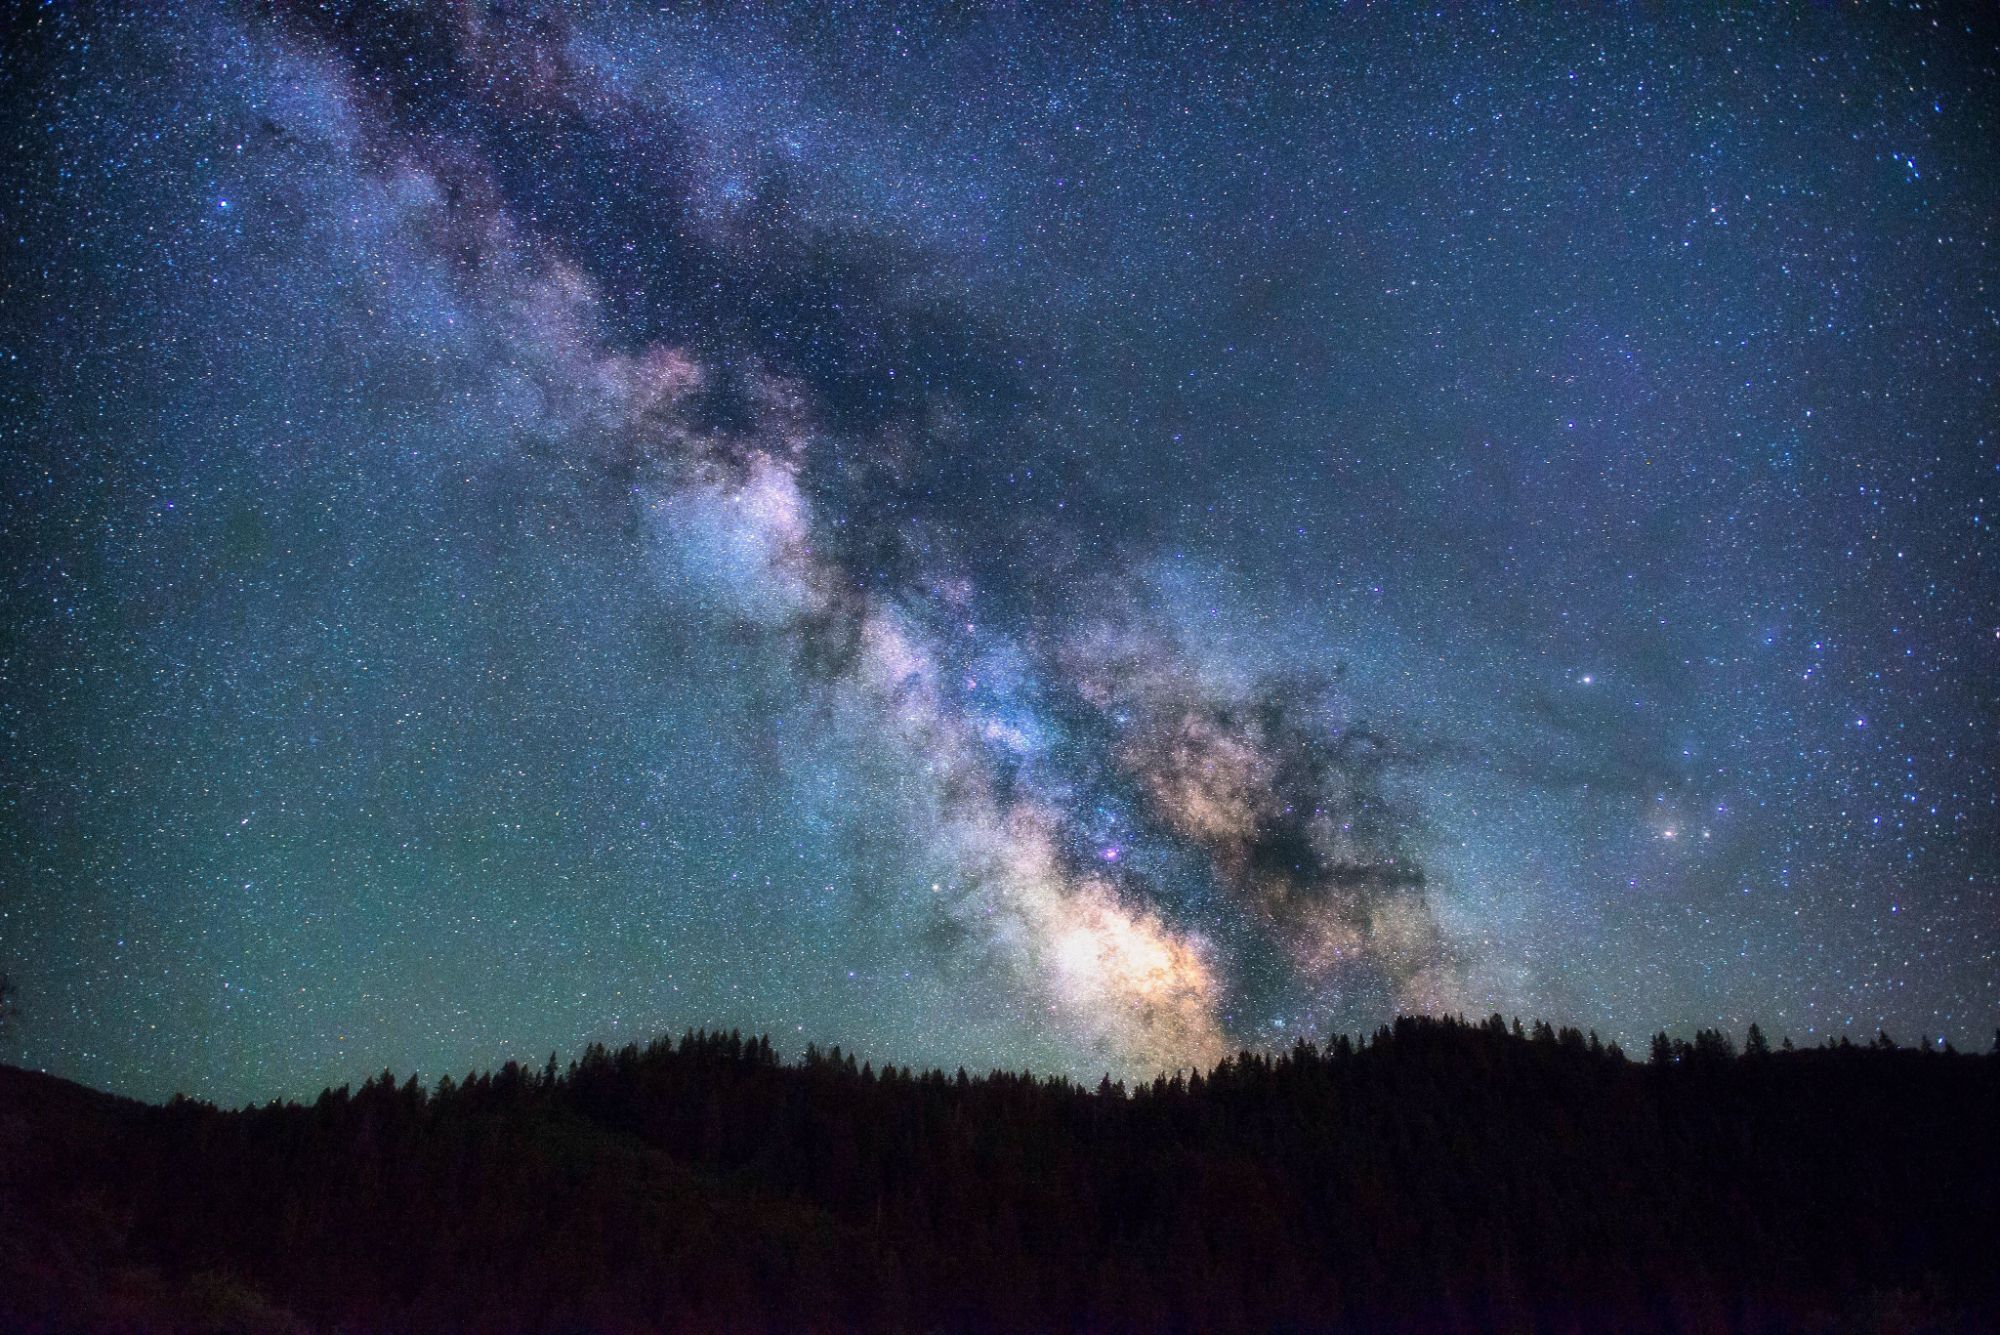
However, in some cases, such as photographing the Milky Way, you will want those stars sharp and clearly defined.
Without the 500 Rule, those streaks, depending upon your length of exposure, can be anything from slightly blurry pinpoints of light to full-blown semicircles across the sky.

You may have also heard of the 600 Rule. What?
The 500 Rule and the 600 Rule operate in the same manner. The difference is that the 600 Rule keeps the shutter open for a bit longer so that the stars’ light can be exposed longer.
Why would you choose one over the other?
With the 600 Rule, the longer exposures are adequate for Internet use or where the slight trails of the stars won’t be noticeable. The 500 Rule is preferable if you want tack-sharp stars or intend to print your pictures. In addition, even if your stars are a bit underexposed coming out of the camera, you can adjust them to perfection if you shoot in camera RAW.
I recommend the 500 Rule.

Write This Down
The 500 Rule states that to freeze the motion of the stars, you must determine your time value (the length of time that you’re going to leave the shutter open) by dividing the focal length of your lens by the number 500.
For example, a 50mm lens on a 35mm (or full-frame digital sensor) camera would be 500/50 = 10 seconds.
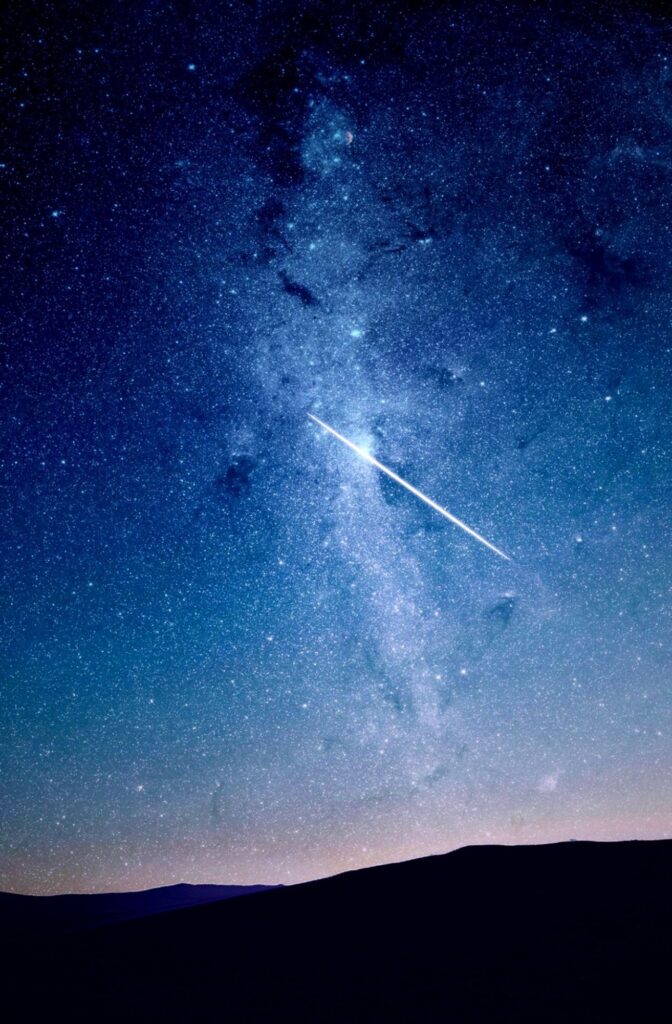
Key Lesson: If your picture displays sharp pinpoint stars but also exhibits one or more trails, then this is not a failing of the 500 Rule. What you have captured is likely the contrail of an airplane or some meteor activity.

You must include an additional calculation if you are working with a smaller sensor camera. This step takes into account the crop sensor factor.
Here is the 500 Rule formula, including the “crop factor” for a Nikon APS-C camera (as an example): 50mm lens x Nikon 1.5x crop factor = 75mm equivalent focal length. 500 divided by 75mm equals a 6-second maximum exposure length before star trails occur (always round down).
The 500 Rule states that to freeze the motion of the stars, you must determine your time value (the length of time that you’re going to leave the shutter open) by dividing the focal length of your lens by the number 500.
Key Lesson: If you are working with DX lenses designed to operate with your camera’s sensor size, then you can disregard this additional step.
Crop sensor factors for Sony and Nikon are 1.5X, and for Canon it is 1.6X. For other brands, you will have to do some research.

Important: Don’t forget that even if you’re following the 500 Rule, you could still get blurry stars if you’re not following good long-exposure best practices.
- The camera is on a sturdy tripod with a robust head.
- Use an external shutter release that can be locked down.
- With a DSLR camera, lock the mirror up, wait several seconds, and then release the shutter.
- Don’t set up on bridge decks, parking ramps, or anywhere where there may be slight, almost undetectable vibration.
- Secure additional weight to the tripod’s collar so that it hangs between the legs. I use a 10 lb sandbag.
- If there is any wind beyond a light breeze, try to set up in a protected area.
- Avoid foreground objects that may move and blur in a breeze.
Key Lesson:
- There are smartphone apps such as Star Tracker to help you find a star or constellation in the night sky.
- Start with an ISO setting of 1600 to 3200, depending on your camera model.
- Set your aperture to wide open.
- Choose a location with minimal or no light pollution.
- Use a wide-angle lens up to a standard lens (50mm on a full-frame camera) with a lens hood.
- Place an object in the foreground, such as a line of trees, a building, or other land formation with a definite shape (if you include the horizon).
- On a DSLR, lock up the mirror before releasing the shutter.
- Shoot in-camera RAW for maximum post-processing flexibility.
- Bring a flashlight.
- Set the camera to Manual Mode and the Shutter to either Bulb or the calculated exposure length.
- Focus using Live View or turn on the ‘in-focus’ indicator lamps inside the viewfinder.
- After shooting several frames with your calculated exposure, shoot two additional frames: one at 1-stop over and one at 1-stop under. Change the exposure by changing the ISO and not the f/stop or time value.
- Keep good notes for learning and repeatability.
Bonus Idea: Use the Foreground

If you include a foreground object, then bring an electronic flash and manually ‘pop’ the flash onto the foreground while exposing it to the stars.
- Be careful not to point the flash toward the camera.
- Keep your body in the shadows.
- Start by setting the flash to auto mode with an aperture setting that matches your camera lens. Adjust as necessary.
Post-processing
Don’t worry if your image files come out of the camera looking flat in color and tone and uninteresting in general.
This lackluster appearance is expected in astrophotography.
You must post-process your images while paying particular attention to electronic noise, contrast, clarity, and color saturation.

Recommended Reading: If you’d like to learn more and improve your landscape photography, grab a copy of Photzy’s bestselling premium guide: The Complete Landscape Photography.
- Why is the 500 Rule important for astrophotography?
- What is a tripod tracker?
- What happens in your photo if you don’t follow the 500 Rule?
- What is the 600 Rule?
- Why is the 500 Rule preferable over the 600 Rule?
- How is your lens used to determine the 500 Rule calculation?
- Why might you capture a light streaking across the sky even if you used the 500 Rule?
- When does a lens crop factor come into play?
- Name three steps toward good long-exposure practices.
- Why is it essential to keep good notes when shooting astrophotography?
- How does a foreground object help in astrophotography?


