5 Things That Will Breathe New Life Into Your Photography

New / Noteworthy
EDITOR’S NOTE: If you’re looking for an effective way to learn photography, take a peek at our popular project cheat sheets: The Action Cards. If you missed out on your set last time, they’re available again and on-sale right now.
Photography is almost like a drug, especially in the early stages.
When you capture the perfect picture, your body floods with endorphins, and you can’t help but feel a great sense of pride and accomplishment.
These feelings can occur no matter where you are- or what your subject matter happened to be.
However, humans tend to become bored over time- even with something as exciting as photography.
The purpose of my blog post today is to inspire you to reach out and breathe new life into your photographic efforts.

Schooner at Sunrise, Amelia Island, Florida – Photograph by Kent DuFault
I took the task of writing this blog post seriously.
I researched to make sure that this post will give you something new- to think about and aspire to- while also providing tons of fun.
No sky replacement. No selective color processing. No presets, actions, or one-click fixes. These challenges will make you think, explore, create, and grow as a photographer by using your camera.
Let’s get started!
1. Turn a singular subject into a themed portfolio
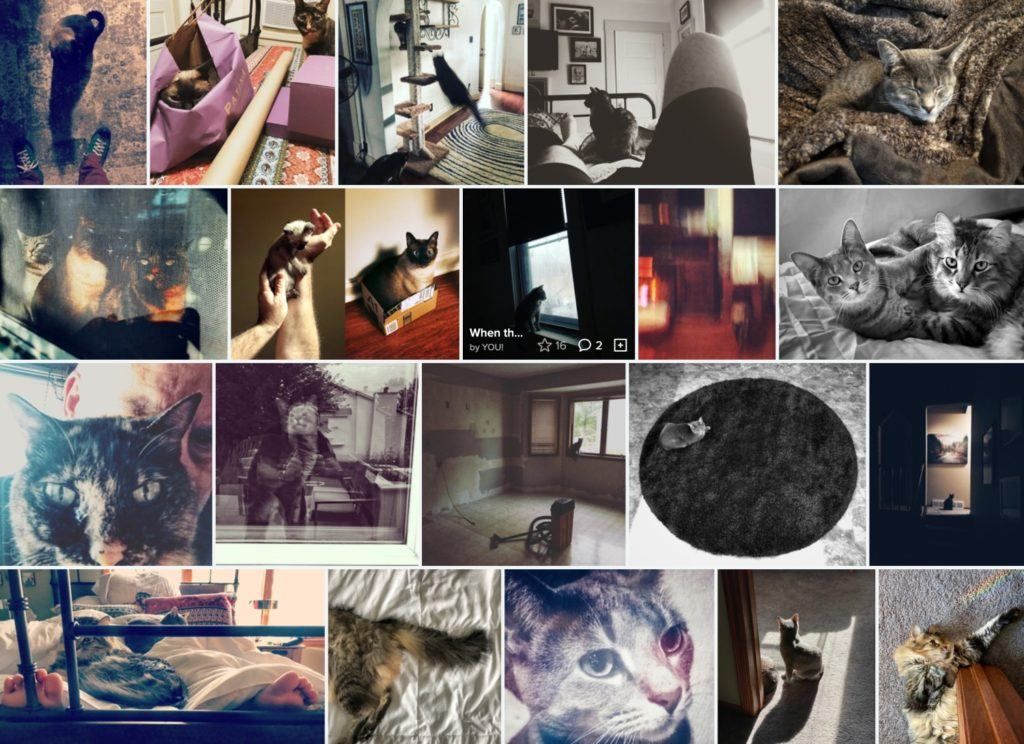
Cats – All Photographs by Kent DuFault
When I started in photography, my picture taking went as follows. I would carry my camera, and when I saw something of interest, I would take a picture of it. My attempts at photography were all over the place.
It was advice from one of my early mentors that changed things for me, and I will now pass it along to you. She said,
"Pick a subject or a topic that interests you and explore that subject thoroughly with your camera. Create a body of work, and with that effort, your photographer’s eye will grow as you are exercising the creative muscle."
One topic that I use with this advice is cats. I love cats, and I love taking pictures of cats.
However, after a while, all of my cat pictures started looking the same. So, I followed this advice, and I began to explore the topic of cats and not simply take photos of cats.
In the montage above, you will see cat portraits, cats in action, cat shadows, tiny cats, big cats, multiple cats, cat abstracts, graphic elements with cats, cat candids, etc. These are my results from following this first tip on breathing new life into your photography!

Cats 2 – All photographs by Kent DuFault
By fully exploring my subject, I have accomplished several things.
- I tried different angles and camera positions.
- I played with reflections.
- I used shutter speeds to blur or freeze action.
- I experimented with an altered white balance.
- I tried using frames and backlighting.
- I used graphic shapes and unusual compositions.
In the end, I better-understood cats, a cat’s life, and my photography has improved. I also have a better sense of satisfaction from my results.
-
Your Challenge: Pick a subject. It can be any subject. Commit to photographing that subject thoroughly for a while. Take pictures of your chosen subject every day. Would you like some suggestions on selecting a theme? How about a pet, a child, a tree, a building, a statue, a park landscape, or a particular street corner? The objective is to explore your subject. This ritual means no repetition. Each day you must do something different with your chosen topic!
👉 For more shooting challenges and assignments, see the bonus at the end of this post
2. No Cropping allowed. Compose inside the camera.
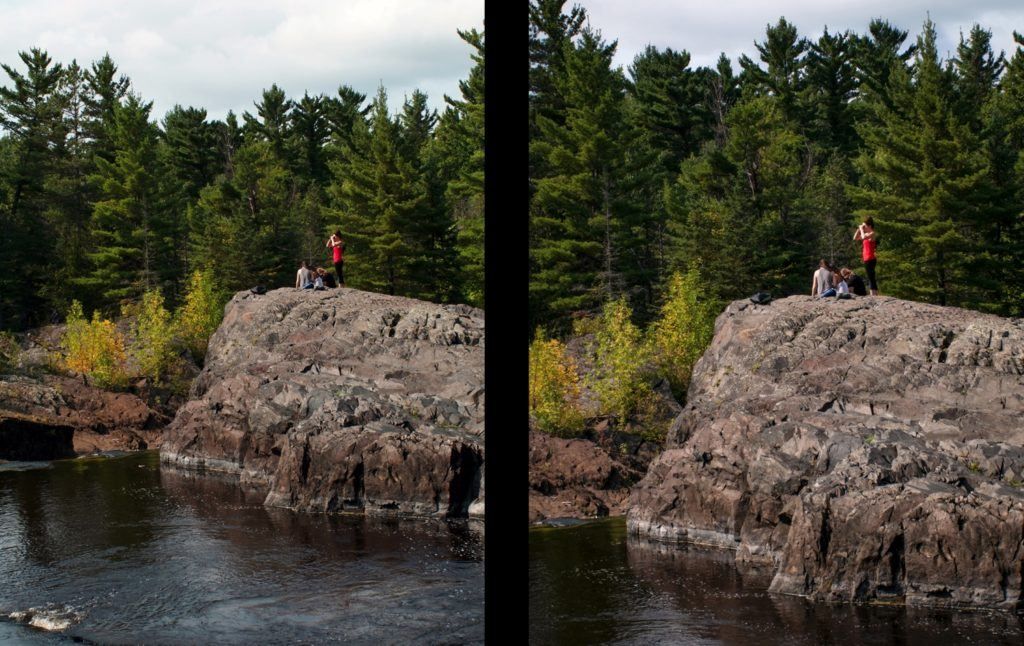
Girls in Nature – Photograph by Kent DuFault
On the left is how I shot the picture, and on the right is how I saw the photo in my mind.
No cropping allowed. The first time I heard this idea, it scared me.
No cropping? What if I can’t get the picture with the lens I have? What if I have no time? What if the subject is moving? What if! What if! What if!
Nobody said inspiration comes easily.
I have two words of advice. Practice this suggestion. But bear in mind that it’s not a rule. When you have the time and the ability, slow down and compose with no cropping allowed. Make it a game!
Command yourself, “No cropping allowed.” Force yourself to take the time to compose completely in-camera.
This tip may sound trivial. But I can assure you that most of us are not doing it- not to the extent we could be. I know I don’t.
When I followed this advice, my photography excelled. I think it was the result of merely giving a moment more time, energy, and thought.
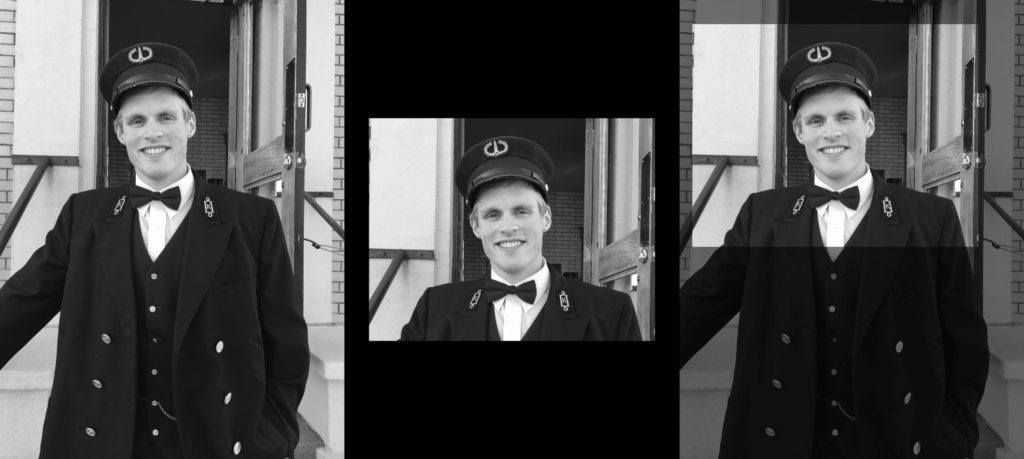
The Lighthouse Keeper, Split Rock Lighthouse, Gooseberry Falls, Minnesota – Photograph by Kent DuFault
I had all the time in the world to create this portrait of the handsome young Lighthouse Keeper. I had asked his permission. He said yes, and then I let my excitement of the moment take over and get the better of me.
The far-left picture is the one that I took. It isn’t bad; however, it doesn’t represent what I saw in my head. The center picture is what my creative mind envisioned.
Sure, I can crop to my envisioned image. But if you take a moment to examine the far right of the montage above, you can see how much of my image area I wasted in my haste.
Forcing yourself to crop in-camera might be a bit painful at first.
However, the resulting skills you will develop will not only breathe new life into your photography; you will also become a better photographer with higher self-satisfaction!
-
Your Challenge: This is a challenge that you may or may not want to dive into immediately. If you’re a bit trepidatious, I suggest giving it a try every other time you take pictures. However, throwing yourself full-on into this challenge will most definitely breathe new life into your photography while also making you a better photographer. Take your time. Compose in the camera. No post-production cropping allowed. Go!
👉 For more shooting challenges and assignments, see the bonus at the end of this post
3. Use zone focus for a day

The Smile at Johnny Rockets – Photograph by Kent DuFault
This photograph created an intimacy between the photographer and the subject by employing the zone focus technique. I was looking right at the Cook over my camera and smiling. It created a connection between us and provided a picture I wouldn’t have gotten otherwise.
I recently had a photographer ask me why Henri Cartier-Bresson’s photos always seem intimate while still being on the fly and sharp from foreground to background.
I told her, “Cartier-Bresson often used the ‘zone focus’ technique in his photography.”
Here is the setup for zone focus-
- You preset the lens’s focus manually to a set distance from the camera and leave it locked. (If it has an external lens barrel- tape it down- so it doesn’t move.)
- Zone focus works best with a wide-angle lens, a standard field of view lens (50mm for full-frame and approximately 30mm for APS-C sensor cameras, or a zoom lens that covers the shorter focal lengths (18mm-35mm).
- You choose an f/stop that gives you sufficient depth of field (down to f/5.6 or wider).
- You photograph while not looking through the viewfinder. But instead, you are looking at the subject over your camera.
I want to tell you that shooting pictures with zone focus is crazy fun.
It is quite freeing to remove your face from behind the camera and genuinely engage a subject directly. It doesn’t matter if it’s a human, an animal, a landscape, or even a flower.
(Pssst… this technique works perfectly with mobile phone cameras!)
There are two primary reasons why zone focus can breathe new life into your photography.
- It opens up your peripheral vision, allowing you to ‘see’ beyond the confines of the viewfinder.
- It encourages a stronger connection, a bond, between the photographer and the subject of the photograph.

Woman Selling Vegetables, Amalfi, Italy – Photograph by Kent DuFault
Follow these tips to begin creating ‘Zone Focus’ pictures.
- Use a lens that is 50mm in focal length or shorter (wide-angle). If using a zoom lens, select your widest focal length, and then tape the lens barrel so that it cannot shift.
- Select an f/stop of f/5.6 or wider.
- Set the shooting mode to aperture priority. You may want to experiment with what aperture works best for you.
- Set the ISO to ‘Auto ISO’ with a maximum setting of ISO 1000 (if your camera has this feature).
- Manually set the focus on the lens to 1.5 meters. If the lens has an external focusing barrel, tape it down so that it doesn’t become bumped off your setting.
- Set the metering mode to center-weighted.
- Set the white balance to Auto.
- Set the file format to camera raw or camera raw+jpeg.
- Set your focus points to a center grouping. I like to use a group of nine in a square shape.
- While shooting, hold the camera comfortably in front of you at your belly or chest level. Don’t look through the viewfinder. Point the camera in the direction of your subject by swiveling your upper body. Don’t check your frames until the end of your shooting day. Fire Away!
-
Your Challenge: Spend time photographing with the zone focus technique. Practice engaging the subject or merely taking in surrounding areas and not being limited by the viewfinder. A great way to practice this creative form of photography is to set everything up and then just take a walk. Photograph exciting scenes that come into view as you walk. Be sure to swivel around and look behind you. Cartier-Bresson created some of his most memorable photographs using zone focus, and so can you!
👉 For more shooting challenges and assignments, see the bonus at the end of this post
4. Every shot all day from a sitting position

By the Lake with Miesha – Photograph by Kent DuFault
To create the above photograph, I sat down on the grass. What did that action provide for my photo?
It gave the picture a unique point-of-view. That is what this challenge is all about!
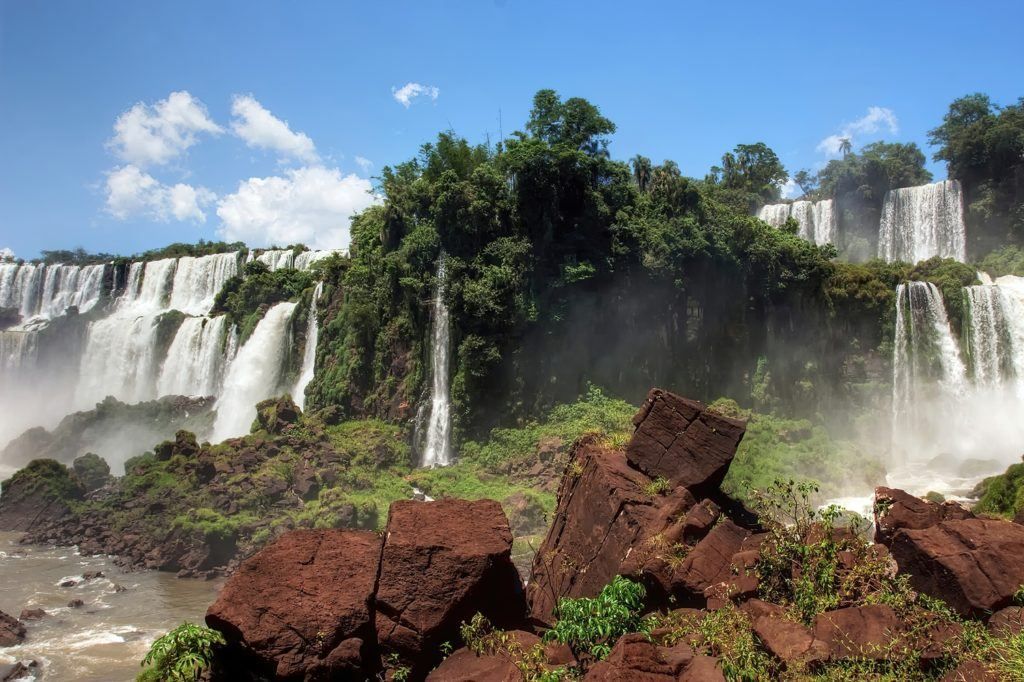
Iguazu Falls, Misiones, Argentina – Photograph by Kent DuFault
We’ve all been to that spot where we were dying to take pictures, only to arrive and find dozens, possibly hundreds, of other photographers standing around making the same picture.
That’s what happened to me at Iguazu Falls, and using a unique point-of-view (POV) is how I got my unique picture.
Go to Google and type in Iguazu Falls. Check the images tab. How many photos of Iguazu Falls do you see that look just like this one?
I can already tell you the answer is zero!
I stepped away from dozens of other photographers by moving down the trail a bit. I found a rock that I could sit on, and I then explored my subject from a unique point-of-view (POV) that no one else had considered.
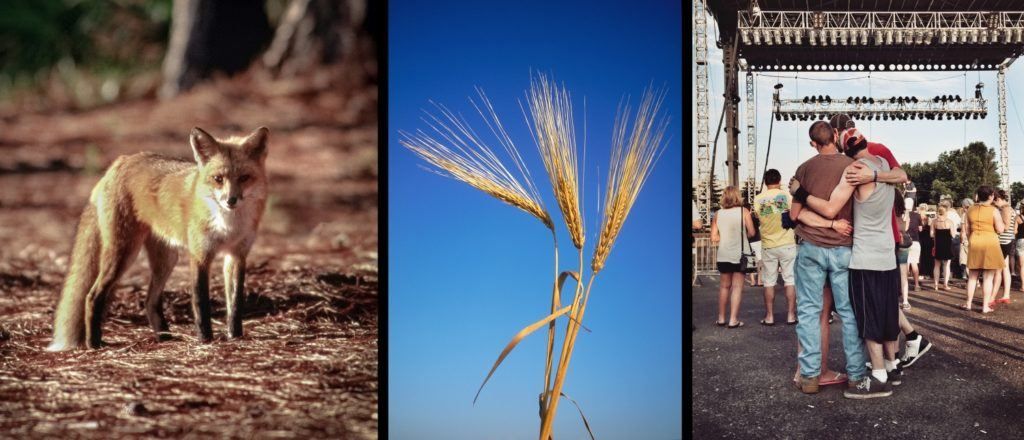
A Red Fox, A Stalk of Wheat, a Hug at a Smash Mouth concert – All Photographs by Kent DuFault
All three of these photos benefited from a unique point-of-view; I sat down.
-
Your Challenge: Begin breathing new life into your photography by exploring unique points of view. You may find this difficult if you’ve never tried this. I will give you a gentle nudge in a specific direction. When you’re out taking pictures, take every picture while sitting. You could sit on the ground, on a chair, a fallen log- whatever’s available- as long as you’re sitting. The next time you visit an often-photographed location, look around. I guarantee that you will see most of the photographers around you standing while taking their pictures. Use this unique POV challenge to garner photos that no one else gets!
👉 For more shooting challenges and assignments, see the bonus at the end of this post
5. Photography art with lens obstructions
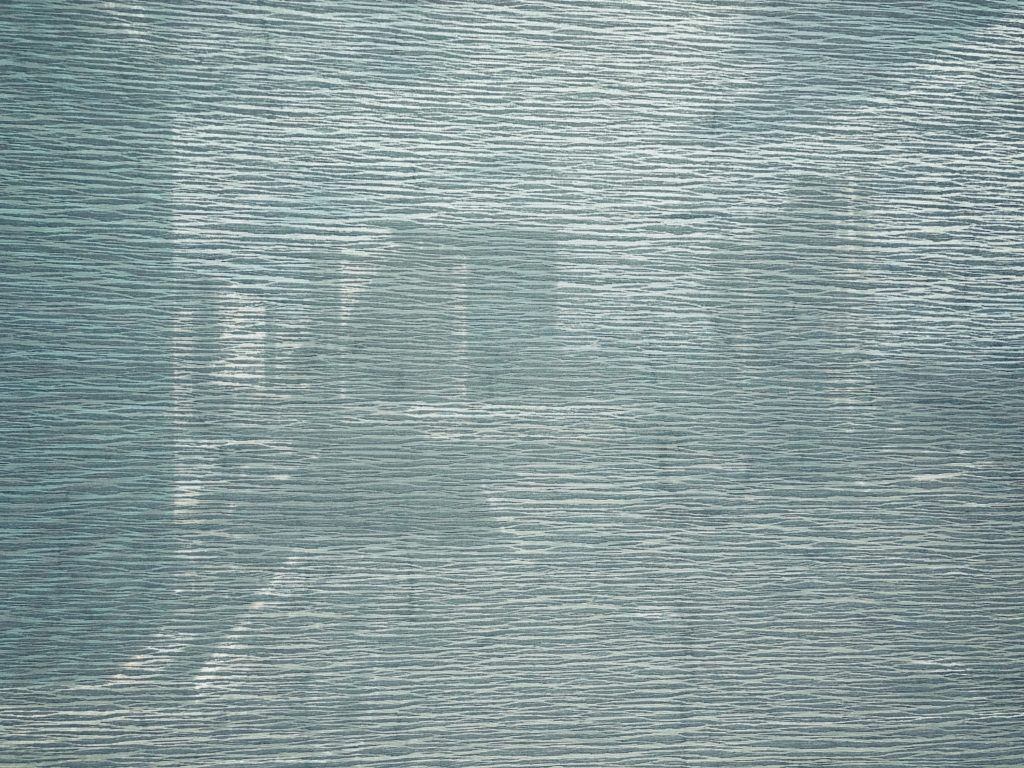
Las Vegas Strip as Seen Through a Window Shade – Photograph by Kent DuFault
This challenge to breathe new life into your photography may seem a bit counterproductive at first.
The secret to this tip is how it helps your visual perception grow and mature!
We all have what I call “The First Take Syndrome.” This phrase describes how we tend to take the first picture that catches our eye, and then we move on.
This challenge may seem counterproductive. We are going to purposefully not make use of the critically sharp lens that we all own.
We are going to reduce the clarity of our lens for creative effect.
I think the picture of the Las Vegas Strip is one of my best efforts in the lens obstruction technique. It ramps up the imagination!
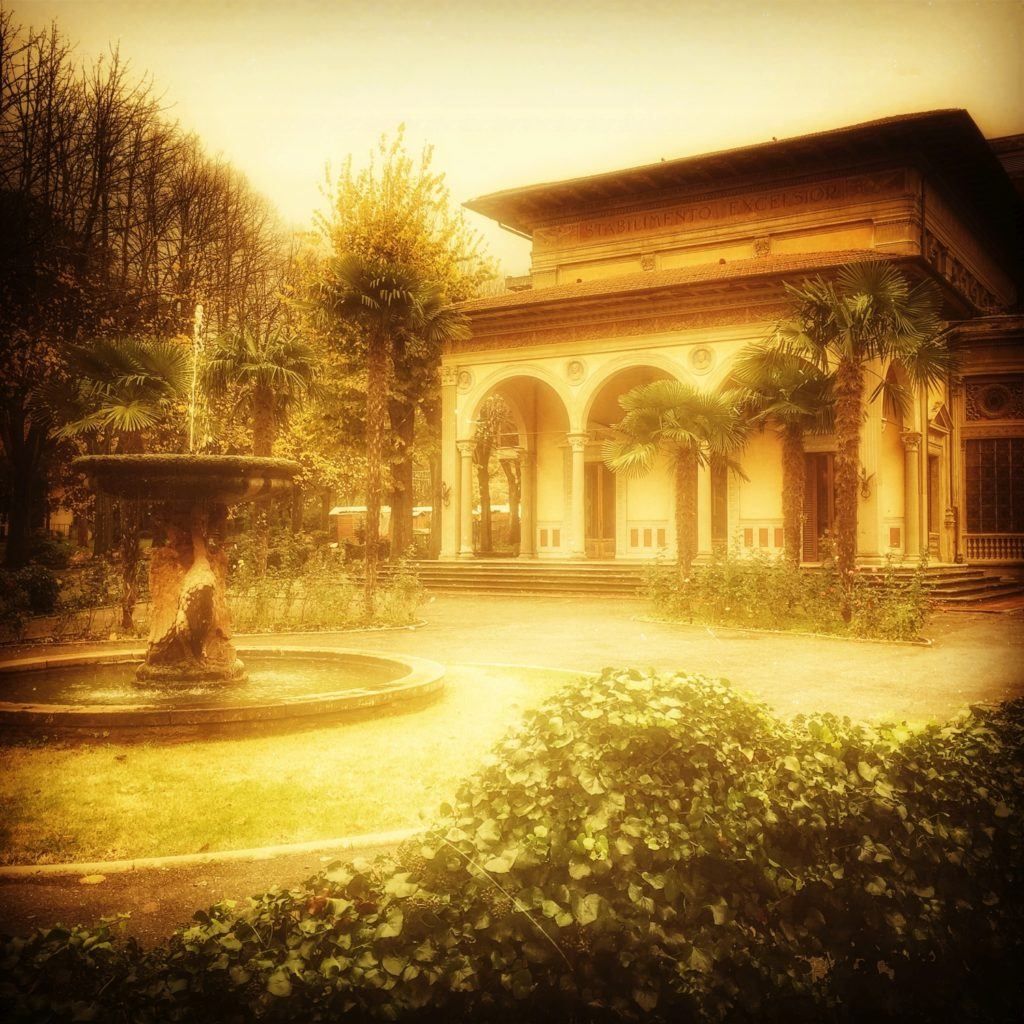
The Bathhouse at Montecatini Terme, Italy – Photograph by Kent DuFault
For this lens obstruction, I held a cheap pair of tourist sunglasses in front of the lens and added a vignette in post-production. It was a lousy photography day- overcast and light rain. Using lens obstruction gave me something interesting when the natural surroundings didn’t provide it. This technique can be a gamechanger when you’re on vacation.
The cool thing about this challenge is that you can create with any camera- even your mobile camera.
Some of my favorite lens obstruction materials are cellophane, glass broken or whole, colored acetate, ripped cloth, scratched plexiglass, plastic with patterns, etc. You get the picture. Any object that will partially obscure the clarity of the lens is a fair game.
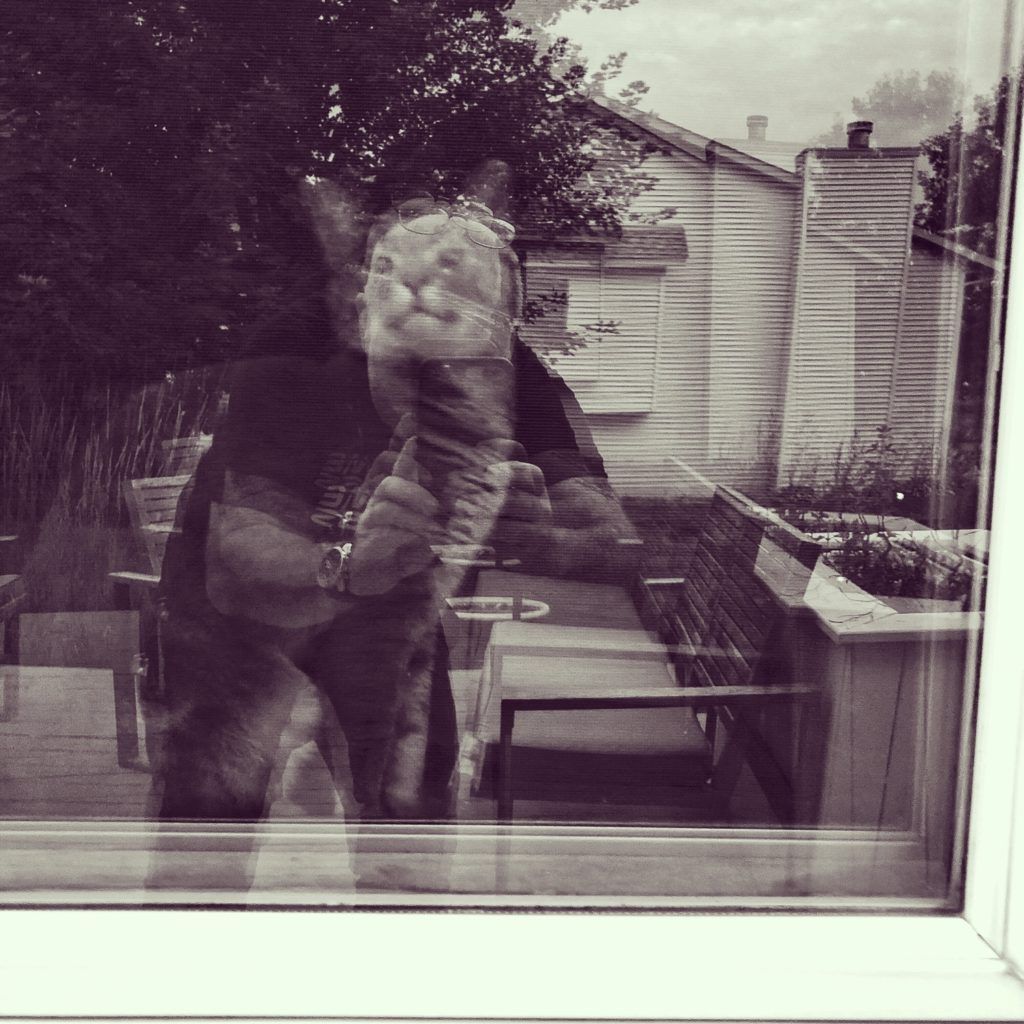
Selfie with Ramona – Photograph by Kent DuFault
This exercise in lens obstruction involved me, a window, a reflection, an iPhone camera, and a cat!

Frosty View of Lake Superior – Photograph by Kent DuFault
This effort in lens obstruction included a fogged window and a cyan acetate gel.
Lens obstruction is fun and easy. It’s a great way to add physical and emotional depth and mystery to your photos!
-
Your Challenge: Gather some items to obstruct your lens. Make sure your items are translucent and not opaque. You want some light to pass through it, and you generally want to see something through it. Try backlighting and sidelight as the lighting scheme will change your results significantly. Try to tell a story with your lens obstructions for an even broader audience appeal!
👉 For more shooting challenges and assignments, see the bonus at the end of this post
Let's Round This Up!
- Turn a singular subject into a themed portfolio – Fully explore a subject and create a body of work around that subject.
- No cropping allowed – Hone your composition skills by composing inside the camera.
- Use zone focus for a day – Develop a photographer’s eye with your face removed from behind the viewfinder.
- Every shot all day from a sitting position – A simple change in the camera POV can create a new and individualistic set of pictures.
- Photography art with lens obstructions – A playful and artistic adventure to get creative with your photos.
BONUS– I've got something special for you on the next page...
If you’d like to learn photography and expand your shooting skills by way of a unique, project-based learning tool, you should take a look at our Action Cards – printable project sheets that will give you over 200 photography assignments, covering everything you can imagine.
There are 34 cards on different composition techniques and 31 cards covering the various photography genres. That is, a total of 65 printable cards!
Thousands of photographers worldwide have benefited from these printable project sheets and have taken their photography to wholly new level.
If you missed out on your copy last time, it’s available again, and on sale right now.
Click below now, to read about it on the next page…

About Kent DuFault
Kent DuFault became a photographer in September of 1974. He took a “Basic Photography” class in high school and was hooked for life. His best-selling product, The Printable Action Cards have helped thousands of photographers worldwide learn photography through a unique, project-based learning system.

