

Finding Fish
Tip #1
There are countless places where you can find fish and other marine life. A good place to start is by visiting this page on Marinebio.org, where you will find over 100 aquariums and marine life locations across the world. Waza.org is another good resource for finding a zoo or aquarium. Keep in mind that most zoos have at least one impressive tank with fish or other marine life, and some, like the Turtle Back Zoo in West Orange, NJ, even have marine animals normally only seen at aquariums, including sea lions and sting rays.
Another way to see what other people are photographing, and to find interesting locations, is to visit Flickr.com and type in the town where you plan to visit with the word “aquarium” to narrow your search.
And always remember that safety for wildlife and/or marine life in aquariums and zoos comes first. If there are signs indicating that flash is not permitted, be sure to turn off the flash on your camera. Keep in mind that some cameras have an auto flash, so prepare in advance to avoid your flash going off accidentally. Also, don’t tap on glass with your hands to get the attention of the fish, and only feed the animals if it is permitted. Just being there with your camera will often be enough to attract curious fish or other creatures.
The Gear
Tip #2
Though this is a more advanced tip to get a wide range of photographs, especially when great photo opportunities come and go quickly, it’s a good idea to have two cameras. That could mean two ILMCs (interchangeable lens mirrorless cameras), two DSLRs, a DSLR and a compact fixed-lens mirrorless camera or even a DSLR and a high quality camera phone. There are two reasons for this. First, gear can break down. Another reason is that having two cameras allows you to capture images with two very different focal lengths without having to change lenses while the action is happening.
Imagine yourself in front of a 100-foot-wide by 20-foot-tall wall of glass with thousands of fish. By having two cameras, you could capture a few wide-angle photos in the 16-20mm range (in 35mm terms) and within a few seconds, switch to a telephoto lens (for example, a 70-300mm lens) and capture a close-up of a shark from very far away. Of course, you could also use a “super- zoom” lens with a range of about 24-300mm, but image quality is generally not going to be as good as lenses made specifically for wide angle or telephoto use. Super zooms are also generally going to be “slower,” meaning that the maximum aperture (f-stop number) will be higher, forcing you to use higher ISOs to get sharp images.
See my Balloon Festival article on Photzy.com for some tips and products related to managing multiple cameras.

Here I’m demonstrating how a retracted Kalt rubber lens hood gets compressed a bit while it protects the lens and window when positioning the camera at a 45-degree angle against a window.
The technique is exactly the same for fish tanks, aquariums, etc. Photo by Andrew Darlow
Tip #3
A retractable rubber lens hood can help you avoid catastrophe
Tip #4
A small microfiber cloth can also be 6. used to protect your lens instead of the rubber lens hood, but it is more cumbersome to keep out of the shot. And while I’m speaking about microfiber cloths, they are invaluable for keeping your lenses as well as aquarium glass clean. I would dedicate one cloth to cleaning aquarium glass (just keep it in a bag that you can label with a non- bleeding marker such as a Sharpie) because you have no idea what exactly is on the fingerprint-laden glass you will be cleaning to get better photos!
Tip #5
As with just about any photo outing or trip, bring more media cards and more batteries than you think you need. Also consider using either a mirrorless camera or a hood loupe so that you can review your images as you are shooting, even in bright sunlight. Most mirrorless cameras have EVFs (Electronic Viewfinders) that make reviewing your photos very easy.
Tip #6
This tip is primarily for controlled situations in private locations, but one way to really cut down reflections off of glass is to attach a black cloth or sheet of paper to the aquarium’s glass with a hole just large enough for your lens. For attaching the cloth or paper, painter’s tape can really save the day because it probably won’t leave any residue on the glass, especially if you don’t keep it on the aquarium for days. A jacket or piece of dark fabric placed over your head like a photographer’s focusing cloth can also do the trick, but it probably won’t be quite as effective. Working in a darkened room can achieve a similar effect. One thing you can do in public locations to achieve a similar effect is wear dark or black clothing to help reduce visible reflections from the aquarium’s glass.
Techniques For Reducing Reflections On Glass
Tip #7
By placing your camera lens at a 45-degree angle against or very close to the aquarium glass as shown in the photo with the rubber lens shade by a window, you will stabilize your camera, and at the same time, dramatically reduce reflections. Your autofocus should also still work fine when you use this technique, but if it’s not cooperating, switch to manual focus. You should also turn off your flash in these situations.
Please note that some autofocus lenses don’t focus internally, so the front element may rotate. Just keep this in mind if you have the lens against the glass. In this case, you should focus manually, or avoid touching the window so that you don’t damage the lens. If your camera has live view, you can often position your camera in spots that a viewfinder cannot reach, but that you can still see.
Tip #8
A monopod can do wonders in aquarium/fish tank photography situations. It is difficult to use a tripod because the technique requires direct or almost direct contact with glass, but a monopod can be positioned so that it offers more stability than hand holding while still allowing you to keep the front of the lens against or very close to the window. Just realize that you’ll need a ball head on top of your monopod if you want to turn your camera into a vertical shooting position. Otherwise, your monopod will be sticking out to the side, which can be very dangerous.


This photo (top) of a single fish from an aquarium shows how the 45-degree angle technique worked to remove reflections (in this case with a compact, fixed-lens camera). In the second photo, you can see me with the camera because I moved a few feet away from the glass. Camera: Canon PowerShot SD790; Lens/Focal Length: Built-in @ 6.2 mm; Aperture: f/2.8;
Shutter Speed: 1/60 sec; ISO: 3200. Photos by Andrew Darlow
Tip #9
Often, the aquarium glass through which you’re shooting will reflect a distinctive feature that will help the viewer better understand the location, or it will just give the photo an interesting look and feel. If you step back a few feet from the window, you can create some amazing images, and depending on how you frame them, you can also capture self-portraits of yourself hard at work, or even a few friends or family members.
"If you step back a few feet from the window, you can create some amazing images, and depending on how you frame them, you can also capture self-portraits of yourself"
Keeping Things Sharp Under Water
Tip #10
Keeping things sharp when photographing marine life is
probably the biggest challenge most photographers face. In general, shutter speeds from about 1/250 to 1/1000 should yield sharp images as long as you have a good lens, are holding your camera still, and/or have very good built-in image stabilization in the lens and/or camera body. However, achieving a 1/250 to 1/1000 shutter speed while staying at an ISO setting for your camera that won’t produce images with too much noise (digital grain) can be a challenge, especially if your lens cannot be set to f/2.8 or f/4. The lower the f-stop number, the more light that the lens will allow in.
Most full-frame DSLRs (they have sensors just about the same size of 35 mm film) do exceptionally well at ISO 800, 1600, and in many cases, even ISO 3200 or higher. I generally keep my Canon EOS 6D set at ISO 400 or 800 unless in a dark aquarium situation, and I’ve been very happy with the lack of visible noise in my images.
Most crop sensor cameras (those that are smaller than a traditional 35 mm frame, such as APS-C and APS-H–sized sensors) I’ve used in the last few years do just fine up to about ISO 800, but I generally set them to ISO 400 as an everyday setting, unless I’m photographing models with flash, photographing moving water, or doing tracking photography. Then I might set the ISO to 100 or 200. If there is some noise (but not too much), it often either adds a film-like quality, or I can often reduce it in Lightroom, Adobe Camera Raw, Photoshop, or a special application, like Topaz Lab’s excellent DeNoise application (www.topazlabs.com).

I was able to capture a very sharp image of this clownfish and its surroundings by holding the camera very still, using a wide aperture, fast shutter speed and a relatively high ISO for the camera. Camera: Canon EOS D60; Lens/Focal Length: Canon 16–35 mm @ 35 mm; Aperture: f/2.8; Shutter Speed: 1/500 sec; ISO: 800. Photo by Andrew Darlow
How To Use Auto ISO
Tip #11
There is a powerful feature available in many cameras called Auto ISO, and it’s ideal for indoor marine life photos in relatively dark settings. Let’s say you want to capture a shark moving swiftly through the water— you set your camera to Shutter Priority mode and set the shutter speed to 1/1000 second. If your aperture and standard ISO setting (let’s say, f/4 and ISO 400) can’t combine to give you enough light to get a good exposure, Auto ISO can come to the rescue and bump up your ISO to a range that you set in advance. This setting is particularly useful if you are moving from a dark
to bright location (common at aquariums) because it avoids the need to constantly change the ISO manually. It’s easy to forget that you’ve bumped up your ISO to 3200 when taking photos at an aquarium. If you do forget, you might then take outdoor portraits at ISO 3200, introducing more noise into your images than you want, and not realizing it until later.
Some cameras, like the Canon EOS 6D, also have the option
of choosing a minimum shutter speed in conjunction with Auto ISO. This is useful if you are hand holding the camera or if you want to avoid movement in the scene. For example, you might set the minimum shutter speed to 1/125 sec. If you are shooting in Aperture Priority mode, the ISO will be increased up to the limit you’ve set as soon as the camera meter calls for a 1/125 second exposure. Auto ISO even works in Manual mode on some cameras.
It’s important to note that I’m not advocating setting your camera’s ISO to the auto setting (if it has one), which means your camera could select a different ISO setting for every photo even if it does not hit the limits as you’ve set them as described above.
The best way to learn how to set up Auto ISO is to go through the process in a step-by-step fashion by first checking if your camera has the feature, and then by reading the manual or an article on the topic. I usually choose an Auto ISO range from 200- 1600 on a cropped sensor camera and about 400-3200 on a full- frame camera.
I usually choose an Auto ISO range from 200-1600 on a cropped sensor camera about 400-3200 on a full-frame camera.
Tip #12
Even though the goal for most people is to photograph marine life in sharp focus, capturing some movement in the scene can give your photos a beautiful, dreamlike look. This technique works extremely well when one subject is still and others are moving. Shutter Priority mode is the best option in these cases because you can “dial-in” the shutter speed and allow your camera to set the aperture (and ISO if you’ve set up Auto ISO as described in Tip #11). Experiment with 1/8, 1/4 sec and 1/2 second exposures.
What About Color Balance?
Tip #13
Color balance is one of the most challenging parts of taking photos of marine life in aquariums and zoos. The reason is because the light that is being used inside the tanks is usually much different from the light being used outside, and the lighting can be coming from multiple sources. Thus, your camera’s auto white balance may not produce color the same way that you remember the scene.
The best way to deal with this solution is to shoot in your camera’s Raw capture mode, which will allow you to adjust the color balance later in a program like Adobe Camera Raw or Adobe Lightroom with no loss of image quality. You can also take a few photos at different color temperatures to see which one looks best when you review it on your camera’s LCD or in the EVF (Electronic Viewfinder) if your camera has one.
If you can see through to the other side of the glass, you can take a photo of a gray card, such as the X-Rite Passport, and you can then use that to color balance the scene later. If you are in a private setting and are permitted to put something into the tank, you can also take a photo of a gray card inside the tank by placing it in a clear, watertight container made for diving, or by using a waterproof gray card or gray reference like the Datacolor SpyderCUBE.
If you’d like a starting point with regard to where to set your white balance in a wide range of situations, I would use either Auto White Balance or the “Cloudy” White Balance setting.
The location where I took this photo had a large glass aquarium with the ability to see above and below the water line. The lighting was natural light from the sun. I chose a “Cloudy” white balance and did not have to change it at all when post processing. Camera: Panasonic DMC-LX5; Lens/Focal Length: Built-in @ 5.1 mm; Aperture: f/5.6; Shutter Speed: 1/60 sec; ISO: 800. Photo by Andrew Darlow
Creativity Under The Sea
Tip #14

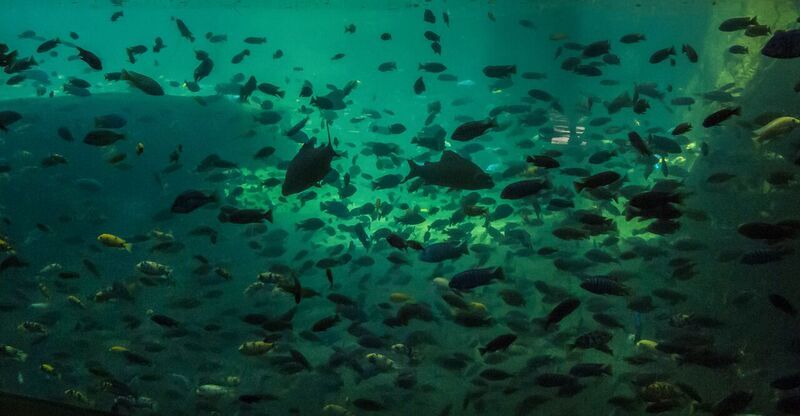
I was fortunate to capture this photo from under a huge tank just at the moment when a shark decided to enter the scene. Camera: Canon EOS D60; Lens/Focal Length: Canon 16-35 mm @ 16 mm; Aperture: f/2.8; Shutter Speed: 1/60 sec; ISO: 400. Photo by Andrew Darlow

I was very moved when I saw this boy “connecting” with the jellyfish in the tank in front of him. It’s these types of moments that remind me why I love photography so much. Camera: Canon EOS D60; Lens/Focal Length: Canon 16-35 mm @ 16 mm; Aperture: f/2.8; Shutter Speed: 1/10 sec; ISO: 400 . Photo by Andrew Darlow
Tip #15
Some aquariums and zoos that have large tanks allow you to view activity above and below the water line at the same time. Hippo areas are good examples of this. In these cases, take a series of photos that include both the underwater area as well as the above-water area (vertical orientation usually works best for this) at both wide-angle and medium focal lengths.
I hope this Quick Guide helps you to create better photos at aquariums, zoos or even a goldfish tank at your home!
I hope this post helps you to create better photos at aquariums, zoos or even a goldfish tank at your home!
If you have any comments or questions regarding this article, feel free to post them on Photzy’s Facebook page.
All the best!


