
By Kent DuFault
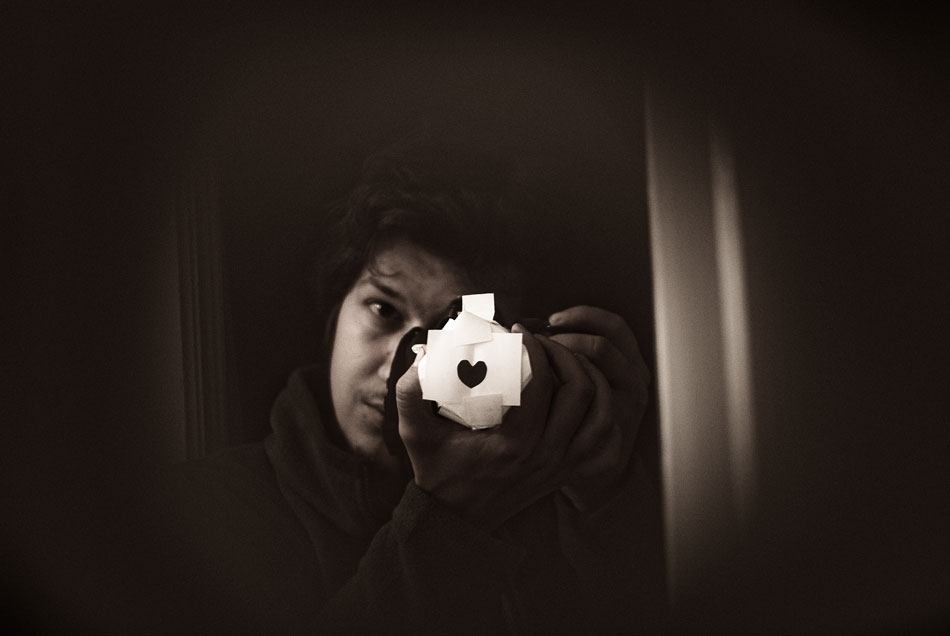
Figure 1 Photograph by Louri Goussev
Today, I’m going to show you how to make a custom valentine photo with hearts of light, using just a few simple items.
Your valentine will love it!
Here is what you will need:
- A DSLR camera with a lens in the 35mm to 100mm range. Use a lens with the widest aperture possible. For example, a 50mm f/1.8 would work perfectly.
- A lens cap or filter that fits the front of your lens.
- A string of lights. Christmas tree lights work great.
- Some paper, or art board, preferably black. (Bear in mind, different effects can be created using different types of paper, lights, and lighting.)
- An X-Acto knife, or another sharp bladed knife such as a razor blade knife.
- Some tape. Duct tape works like a charm.
What are we going to create for our end product?
Something that looks like this…
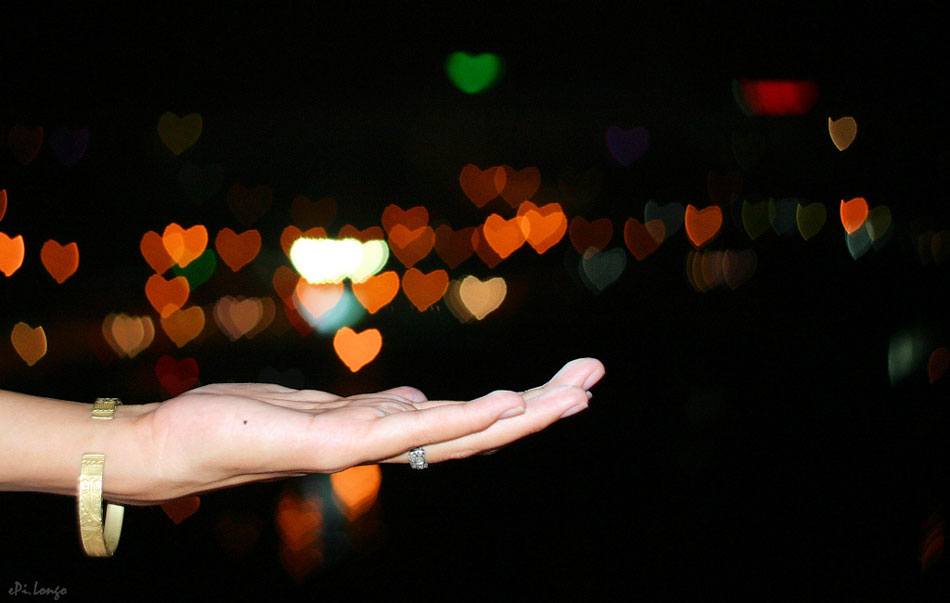
Figure 2 Photograph by ePI.Longo
Or, if you really want to get creative, how about something that looks like this?
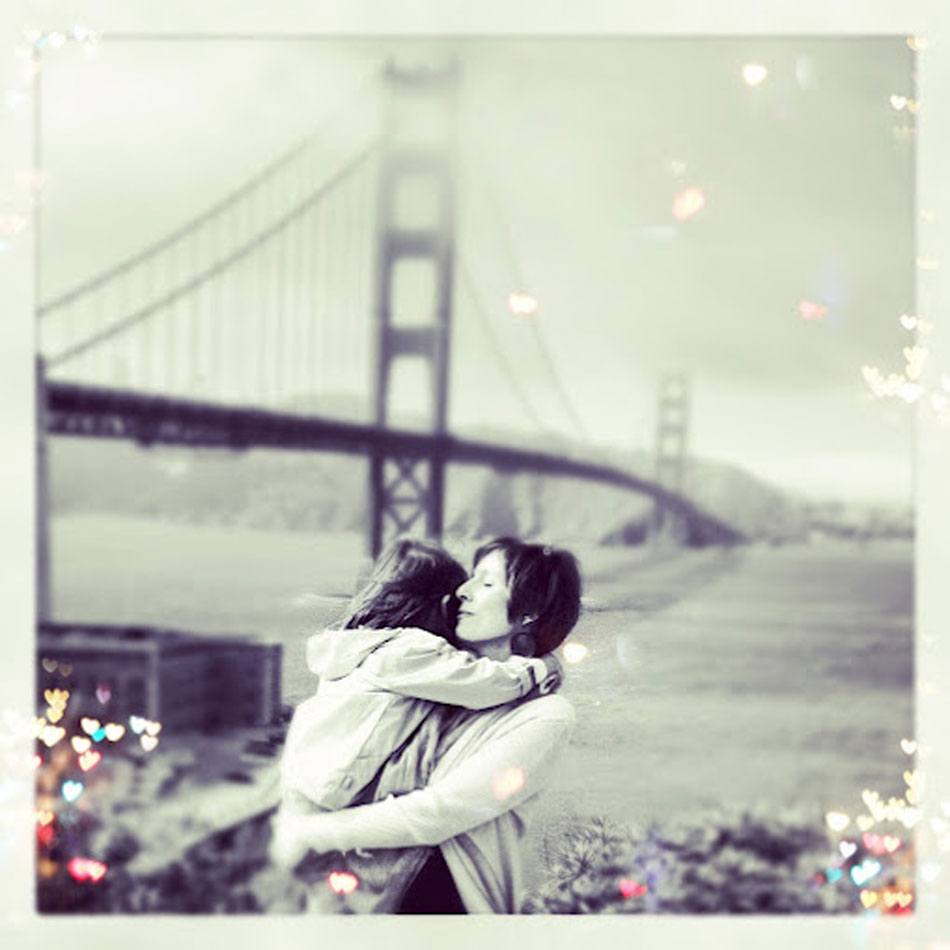
Figure 3 Photograph by Susana Fernandez
Or, you can take a simple approach like this:
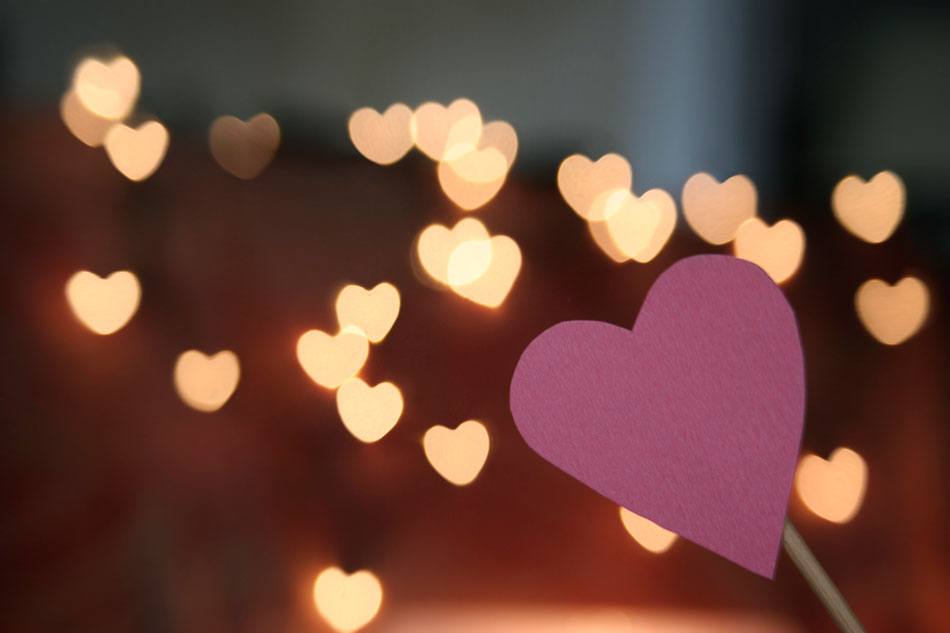 Figure 4 Photograph by Jessicahtam
Did you catch the gist? We are going to create heart shaped bokeh in a photograph!
There are three ways that you can approach this project.
- You can create your heart shaped bokeh highlights and then combine them with another image using software such as Photoshop. The second photo above is an example of the Photoshop layered and blended technique.
- You can create the entire image in-camera with one exposure. My third example above depicts what that looks like.
- You could be daring and attempt an in-camera double exposure which is depicted by my first example above.
Each technique has some benefits.
With technique number one, you can very quickly get your bokeh shots, with a lot of variety, and then take your time deciding which photo you wish to combine them with and how. The downside, of course, is that you must have the software to accomplish that. However, I think most of us do.
Cost Saving Tip: If you don’t have layering software like Photoshop or Affinity. Create your photos using your DSLR and then email them to yourself. Retrieve them using your smartphone and save them to the phone. Then you can use free APP software to create a layered image. I use an APP called “Photoblend” that works great. However, there are a number of free options in the APP world. Finally, if you wish to get the image back onto your computer, just email the finished image back to yourself and then retrieve it on your computer.
With technique number two it takes a little more planning, but once you have your picture it’s done.
Technique number three utilizes all the instructions as to how to create the heart shaped bokeh, but you must create the double exposure using your particular camera’s set-up.
Let’s talk about creating the heart shaped bokeh.

Lay your lens cap, or filter, onto your paper or art board. I think black art board works best. Draw a circle around the lens cap or filter. Then, using your knife, carefully cut the circle out.

Figure 5 Photograph by Louri Goussev
Fold your disk in half. Draw a half of a heart shape onto it and cut that piece out of the disk. This is just like we did when we were kids making valentines cards.
Now, at this point, your construction process can be as simple as taping the disk to the end of your lens. If you go that route just make sure you tape it securely all the way around so there are no light leaks behind your heart disk.
In Figure 5, you’ll notice that the photographer didn’t use a black art board, and he didn’t even cut it out into a disk. He simply cut out a heart shape on some printer paper and then taped it to the end of his lens. If you use thin white paper (as he did) and backlight it when you’re creating your heart bokeh, you’ll get a soft ethereal look similar to Figure 6.
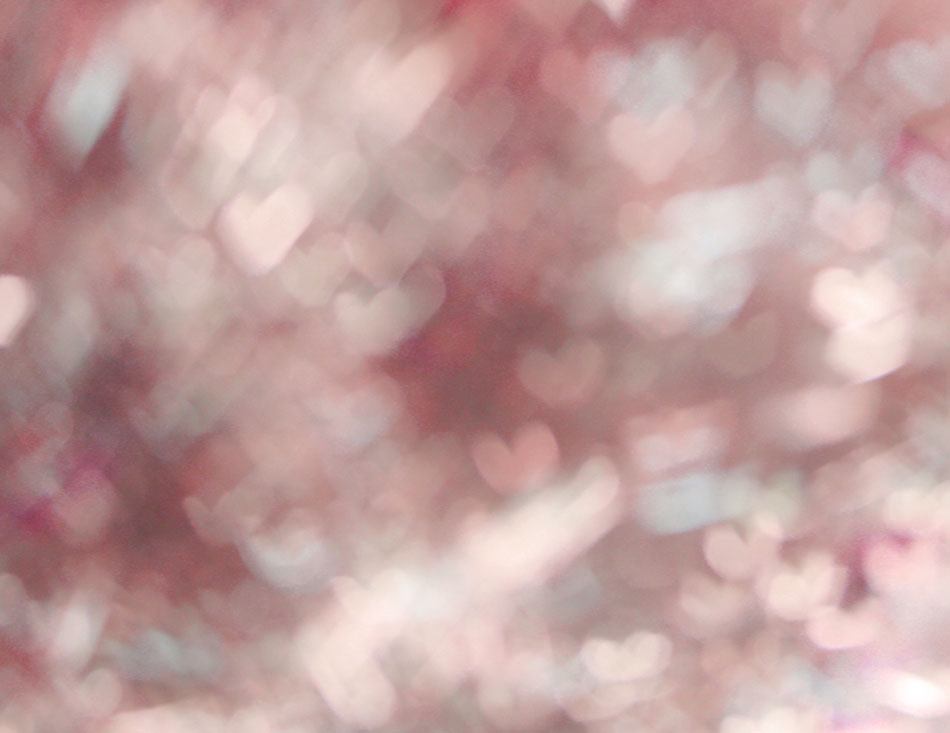 Figure 6 Photograph by Andrea Smith
With thin, backlit, white paper, your heart shaped bokeh won’t be as defined, yet it has a lovely soft effect.
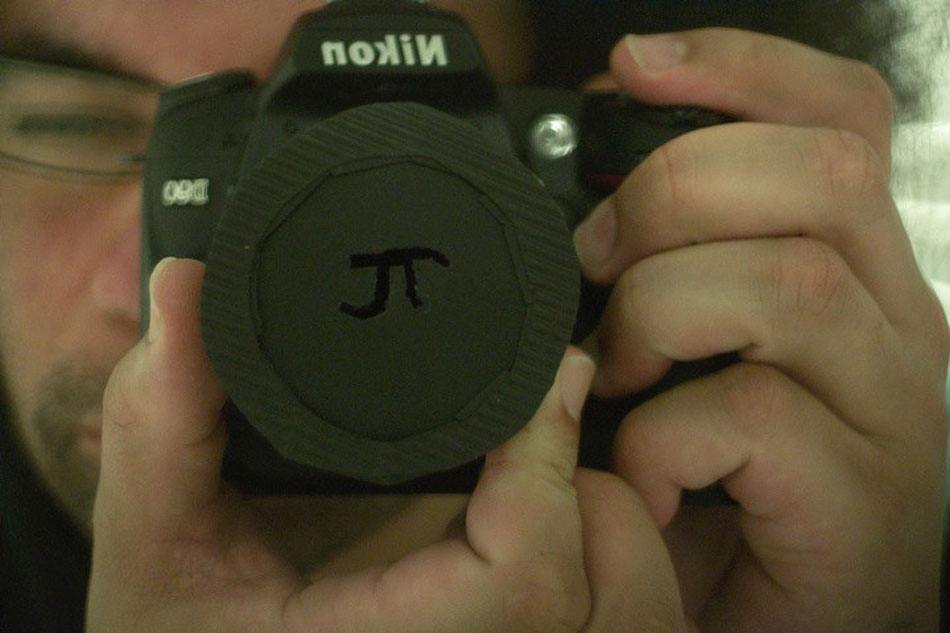 Figure 7 Photograph by beerandnoodles
If you want to make your bokeh filter a little sturdier so that you can reuse it, I suggest using the black art board. In addition to cutting out your disk, cut a strip, or strips, of the board at about one inch wide and long enough to wrap around your lens. Wrap the strip around the lens and tape the ends together so that you can slide the circled strip on and off the lens. Tape your previously-cut disk to one end of the tube (that you’ve just created with the strip). Again, make sure there are no light leaks. Now your bokeh filter can slide on and off the lens; there’s no need to tape it to the lens. Figure 7 is an example of this construction type.
Camera Settings
- Use Manual Mode
- Set your aperture to its widest opening (this is important)
- Set your shutter speed to 1/60th
- Set your ISO to 400
Everything to this point applies to techniques one, two, and three. Now it’s time to think differently depending on which technique you’re going to use.
Technique One
✓ Use a darkened room.
✓ String your lights out in a pattern and plug them in.
✓ Set the focus on the lens to the minimal focus setting.
✓ Depending on your lens focal length, start out about 5 to 10 feet away from the lights.
✓ Of course your heart-shaped bokeh filter needs to be on the front of the lens.
✓ Every light in your string of lights should be producing a heart shape.
✓ Moving your camera forward and backward (the distance to the lights) will change the size and definition of the hearts.
✓ Adding a gel to the front of the lens can change the color.
✓ Fill the frame with hearts or arrange the lights to leave space for your second image to occupy.
✓ Keep the background as dark as possible.
✓ If you need to adjust exposure, do it with the shutter speed or ISO. Be careful if you try and drop the shutter speed below 1/60th as you may get camera shake. Then again, that could create some interesting effects as well!
For technique two, everything that we’ve already done for technique one applies. The difference is now we’re going to put a subject in between our bokeh light source and the camera. This generally means three things.
- You’re going to need some working distance.
- You’re going to have to light your subject separately.
- In most cases, you won’t want your main light (on the subject) to bleed onto the background (where the bokeh lights are).
If you’re not a lighting guru, and you don’t have lots of equipment, I would suggest the following set up: do your shot at night; use the largest room that you have; and illuminate your subject with a simple table lamp that has a soft white bulb and the lampshade removed.
Technique Two
- Start with the steps for technique one (you may want to have more Christmas lights at your disposal than you would have needed for technique one).
- Place your subject about 10 feet from the bokeh lights.
- Place the camera 5 to 10 feet away from the subject (depending on the focal length of the lens).
- Focus on the subject. If you’re not getting enough of the heart shaped bokeh, begin to move the camera closer to the subject.
- When the bokeh looks good and your subject is in focus, and you’re happy with the lighting and the pose, take a test shot.
- Carefully check the background where the bokeh lights are strung up. You don’t want all the wires and everything behind those lights showing up. If annoying background elements are showing up, try these fixes.
- Decrease your exposure.
- Move the camera, subject, and lamp a little further away from the bokeh lights.
- Try shielding the light from the lamp by blocking any of the light from reaching the background. This could be done with a blanket or large piece of cardboard.
- Try hanging a dark cloth behind the bokeh lights.
Technique Three
For technique three, follow the guidelines for technique two except…
✓ Put the bokeh lights in one part of the room.
✓ Light your subject in a separate part of the room.
✓ Keep the background dark on both sets.
✓ Photograph the lights first, reset for your double exposure, and then shoot your subject second.
If you’re using technique one and you’re going to blend your images in Photoshop, do the following.
- Open your base image and your bokeh image in Photoshop.
- Highlight your bokeh image and do a select all.
- Copy that image.
- Paste it on top of the base image.
- Open the layers palette.
- Make sure your top layer (the bokeh layer) is highlighted.
- On the layers palette, look for the word “Normal” and open that drop down menu.
- Click through the various blending options until you get a blended layer that looks good.
- You can also adjust the opacity of the top layer for a different feel.
- Once you’re happy, flatten the image and save it as a .JPG.
Now, you can print your image and make your own greeting card. Or, slip it into a store-bought card, or send it to your loved one in an email, or turn it into a refrigerator magnet.
Let’s look at a few examples, and get your creative juices flowing.
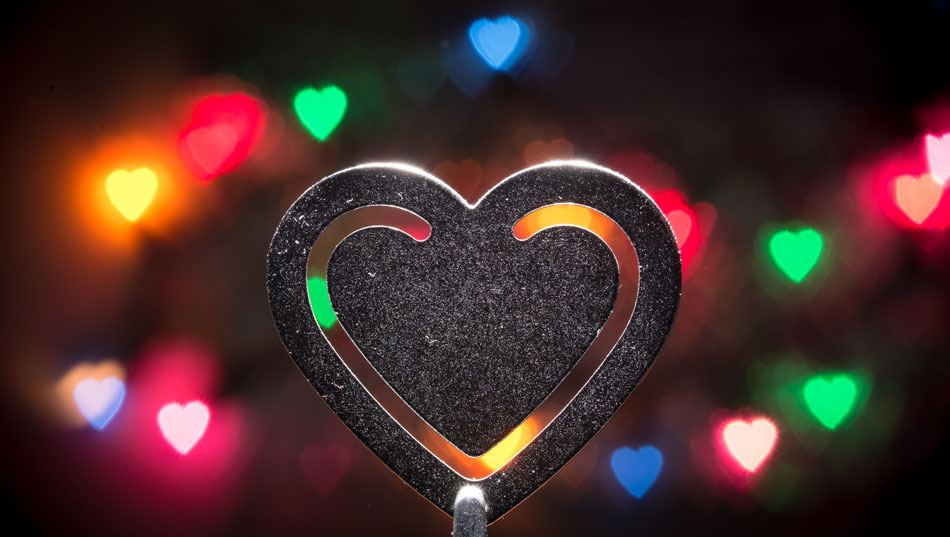 Figure 8 Photograph by Chris Hsia
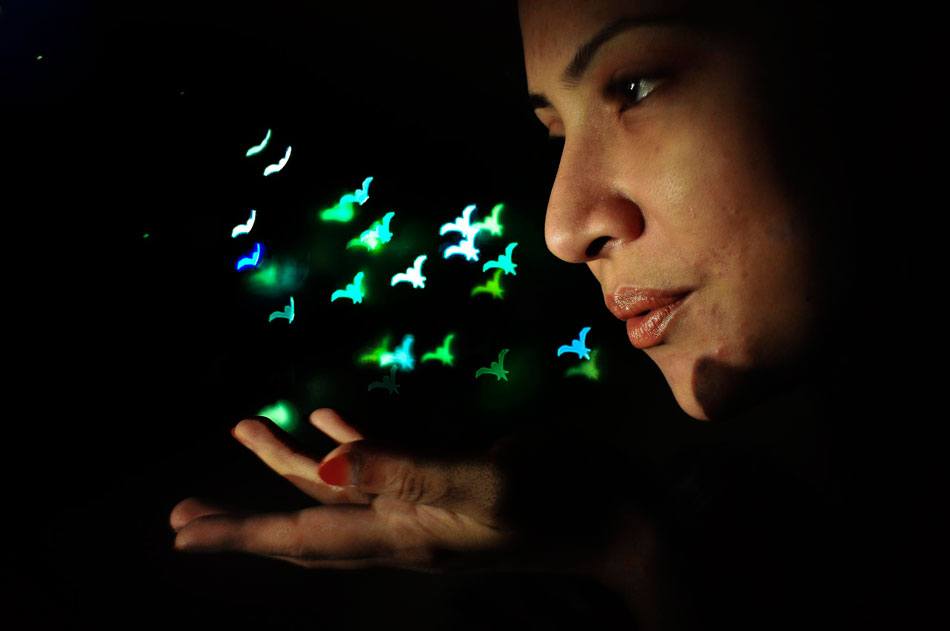 Figure 9 Photograph by infinity7664
 Figure 10 Photograph by Vestman
 Figure 11 Photograph by Andrea Smith
Happy Valentine’s Day!
