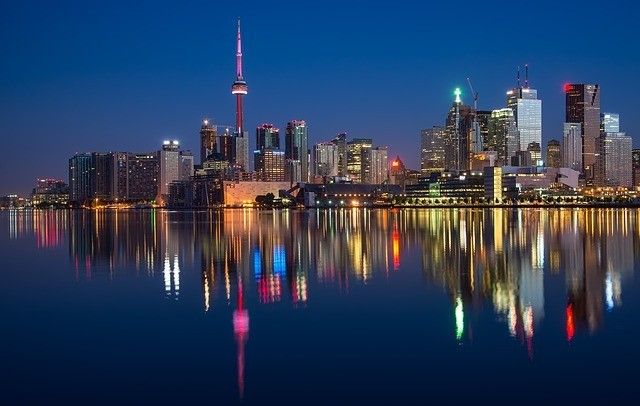
Fun Photography Project: Shooting Gorgeous Night Shots (with Camera Settings, Tips & Examples)

Kent DuFault
Kent DuFault

New / Noteworthy

NOTE: This is a photography project taken from the Action Cards set. For more, take a look here – Learn Photography Through Projects

Total Time: 2–5 Hour

Difficulty Level: Challenging

Skill Points:

  • Photographing at night using available light
  • Using moving light sources
  • Using long exposures
  • Mixing light sources

Night photography is more than just a long exposure...

The real expertise in night imaging is selecting an appropriate subject and determining the proper exposure. We will concentrate on 4 types of night photography: The cityscape, the motion blur, the artificial light boost, and the dusk mix shot.

Key Lesson: Night photography requires a few extra pieces of equipment. If there is any wind, you might want to attach a 5 to 10 lb. weight to the tripod to eliminate vibration. Always bring a flashlight. Always shoot in manual mode. Always use manual focusing.

Equipment

Camera Any camera with a “Bulb” setting
Lens Wide-angle to moderate telephoto (14mm-100mm)
Tripod & Remote Shutter Release Necessary, must be sturdy
Sandbag Recommended
Misc Flashlight, non-reflective black card, masking tape

Tips

These settings can vary widely. This is a starting point.

Shooting Mode Manual
Focus Mode Manual
Metering Mode Center-weighted
ISO As low as possible; Start with 400

Action Assignment

1. Study the sample photographs below:

Cityscape

Look for plenty of artificial lighting. Plan on shooting as soon as the Sun is set until 1.5 hours after sunset. You want some light, and color, left in the sky. Set the white balance to “Auto”. Tip: Always bring a black card. You can stop the exposure by holding it in front of the lens should something interrupt like the headlights of a car. Simply remove the card when the interruption is over and continue the exposure.
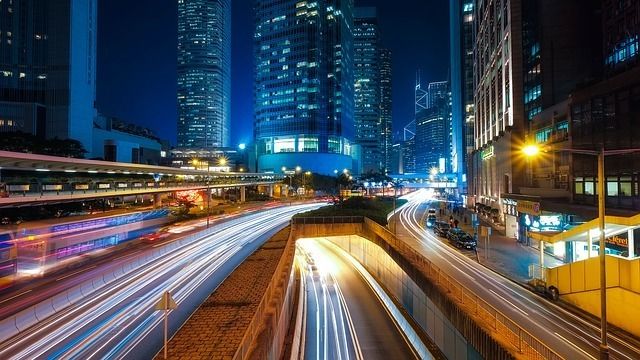
Motion Blur

Find a location that mixes traffic with city lights. Set your starting exposure time for 10 seconds and the ISO at 400. Set the aperture as necessary. Vary the shutter speed to adjust exposure first before changing the ISO. Do not go above ISO 1600. Expose for the highlights. Tip: Experiment with shutter speeds between 1/2 second to 15 seconds. Use a wide-angle lens.

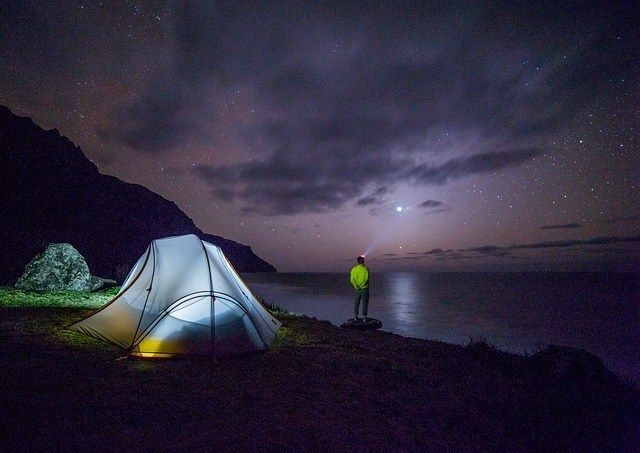
Artificial Light Boost

This shot should be taken from 1 hour after sunset until you’re done. Expose for the night shot, and then use artificial lights to highlight subjects within your composition. Use ISO 800 to begin, and your widest aperture. Tip: Try different artificial light sources. Try different white balance settings.
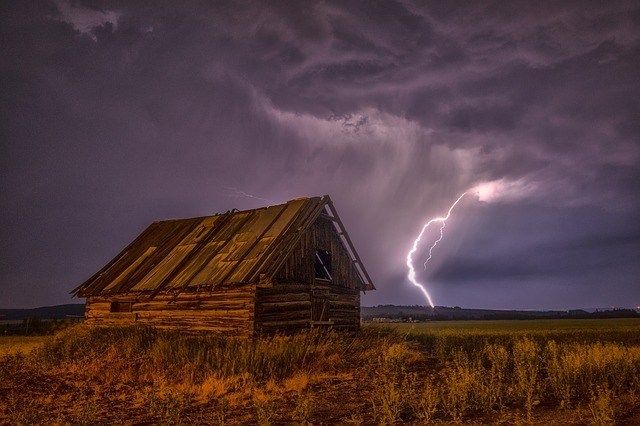
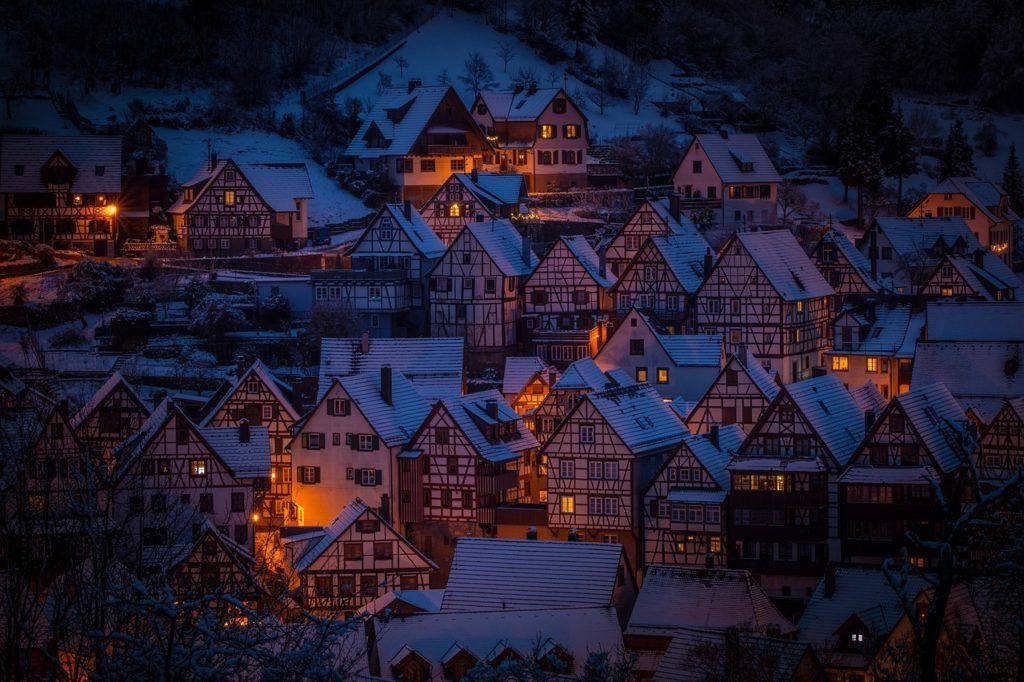
Dusk Mix Shot

A dusk/night mix shot requires you to shoot an image right at sunset, and then tape your black card over the lens. At some point after sunset, fire your second shot by removing the card to expose for the night shot. Set your ISO to 400 and the aperture to the widest setting. Experiment with exposure time. Tip: Practice covering and uncovering the lens without affecting the camera exposure. Once the card covers the lens- exposure stops. Tape it in place. In the reverse, remove the tape, let the camera settle, and remove the card from in front of the lens.

2. For all four shots, practice manual focusing in the dark.

How Did You Do?

  • Are your shots sharp?
  • Focused?
  • Free of camera shake?
  • Does the cityscape have some color in the sky?
  • Did you capture an accurate exposure in your motion blur?

BONUS: I've got something special for you on the next page...

The above content is taken from our hugely popular Action Cards – printable project sheets that will give you over 200 photography assignments, covering everything you can imagine. You can see the Complete Photography Action Card collection below:

If you enjoyed the above assignment and would like to know more about this project-based photography learning tool, do take a look at the Action Cards here.

Click below now, to read about it on the next page…

About Kent DuFault

About Kent DuFault

Kent DuFault became a photographer in September of 1974. He took a “Basic Photography” class in high school and was hooked for life. His best-selling product, The Printable Action Cards have helped thousands of photographers worldwide learn photography through a unique, project-based learning system.

Who is Photzy™ ?

Great question! Photzy.com is an online photography school with a focus on simple, practical tips and tutorials, for beginners.

Since 2012, we’ve grown to a small team of photography enthusiasts from all over the world, teaching over 200,000 students from 180 countries. No matter where your current skill level is, we’d like to help you explore your unique creative side, through photography!

“At Photzy, we believe EVERYONE is creative, and that photography is the best way to explore and share your creative side with the world.”